
 100% Security Verified | No Subscription Required | No Malware


 ChatGPT
 Perplexity
 Gemini
 Claude
 Grok
Grok
As we all know, content consumption is increasing as all social platforms have included dedicated video sections. However, creating visual content of high quality with all the enhancements could be challenging for novice users. Thankfully, many high-end and professional-grade video editing tools, like Adobe and Filmora are available in the market that streamline the editing process.
These video editing software not only provide basic editing but also offer an extensive suite of features to enhance the overall look of the video. In this article, we will discuss how you can use Adobe Premiere Pro and its alternative for professional-level video editing.
In this article
Part 1. Using a Professional Video Editor for Precise Editing
When making a film or creating content, you might face issues managing multiple clips or audio tracks, for which video editing software like Premiere Pro provides coherent options. This tool offers a unique interface which helps editors creating stunning visuals. It also provides support to various formats for ensuring maximum flexibility when working with video projects.
Getting Started With Adobe Premiere Pro
You need to install Adobe Premiere Pro on your device to get the most out of the editing experience. In the following section, we will be discussing the entire procedure of getting started with this editing tool.
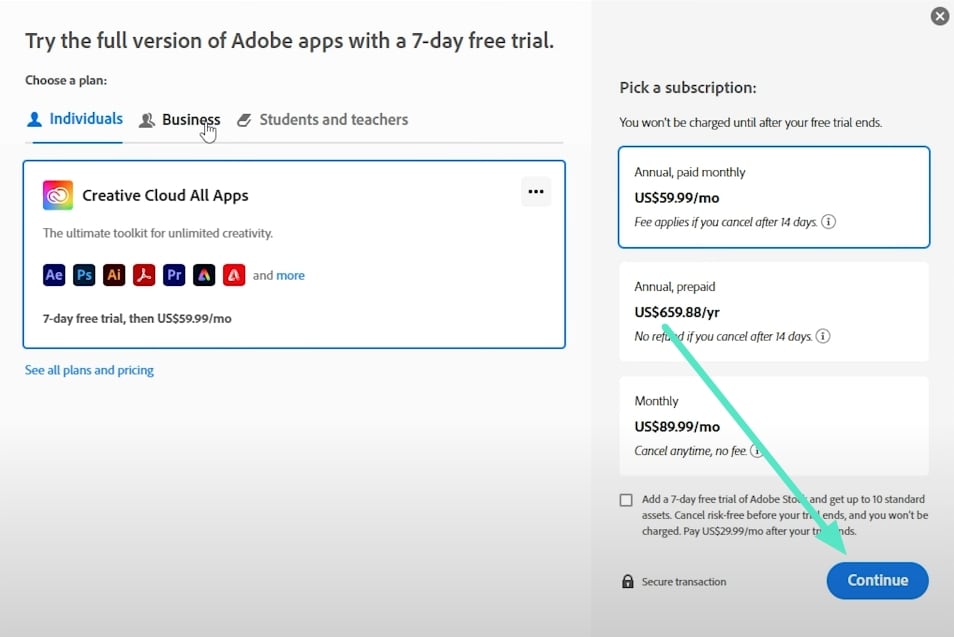
Step 1. To begin, head to the tool’s official website and access the Premier Pro package by clicking “Continue.” Next, specify your details and create your Adobe password by hitting the “Create My Password” button.
Step 2. Moving forward, click on the designated download button after configuring the authentication setup. Once downloaded, launch the software on your device and sign in to your account.

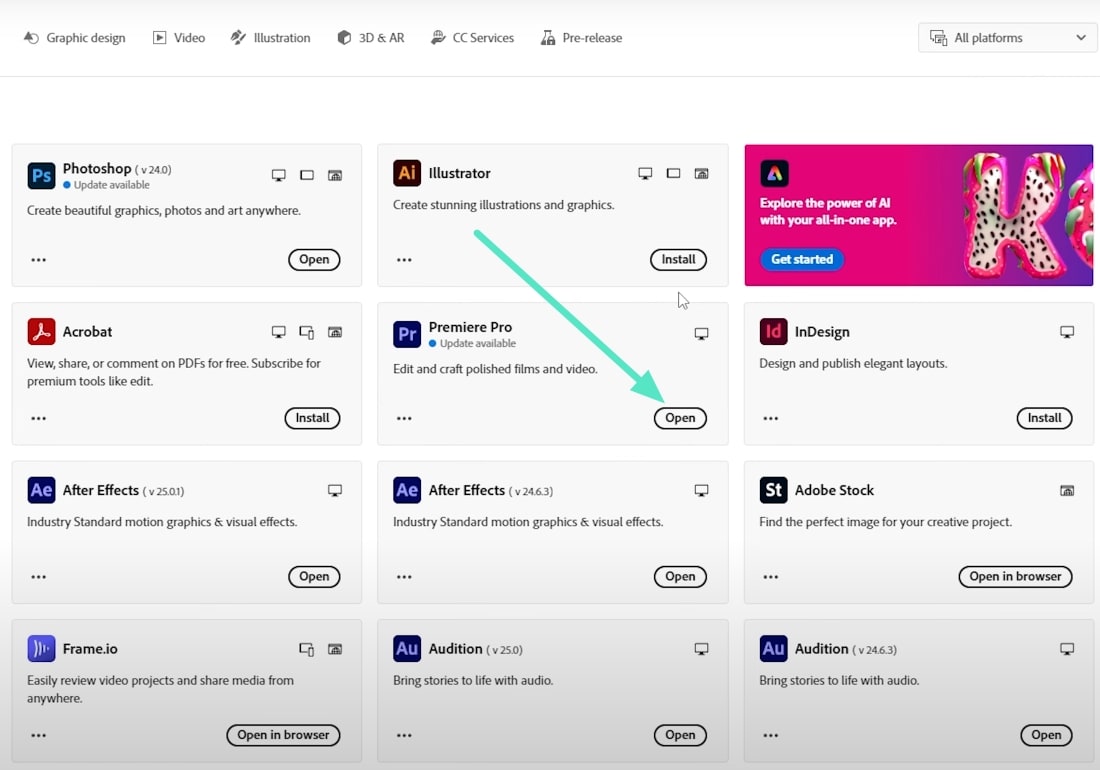
Step 3. Now, locate the Premiere Pro option and click the “Open” button to launch the tool successfully on your computer.
Core Features of Adobe Premiere Pro
- Provides a flexible multi-layered editing timeline that allows precise trimming and organizing of multiple clips.
- With multi-camera editing, synchronize and modify footage recorded from multiple cameras.
- This editing tool offers a wide variety of transitions and video effects to enhance the visuals.
- Besides video modification, Premiere Pro editing software download also offers audio editing functions to make the video sound clear.
How to Perform Editing on Adobe Premiere Pro
Editing videos requires some professional skills, as the interface is quite intimidating for new users or beginners. To get an insight into the interface and know how to use this tool for editing, consider the guide below:
Step 1. After launching Premiere Pro, create a new project with the “File” option on the menu bar. Continue to the project window on the bottom-left and import your raw videos.
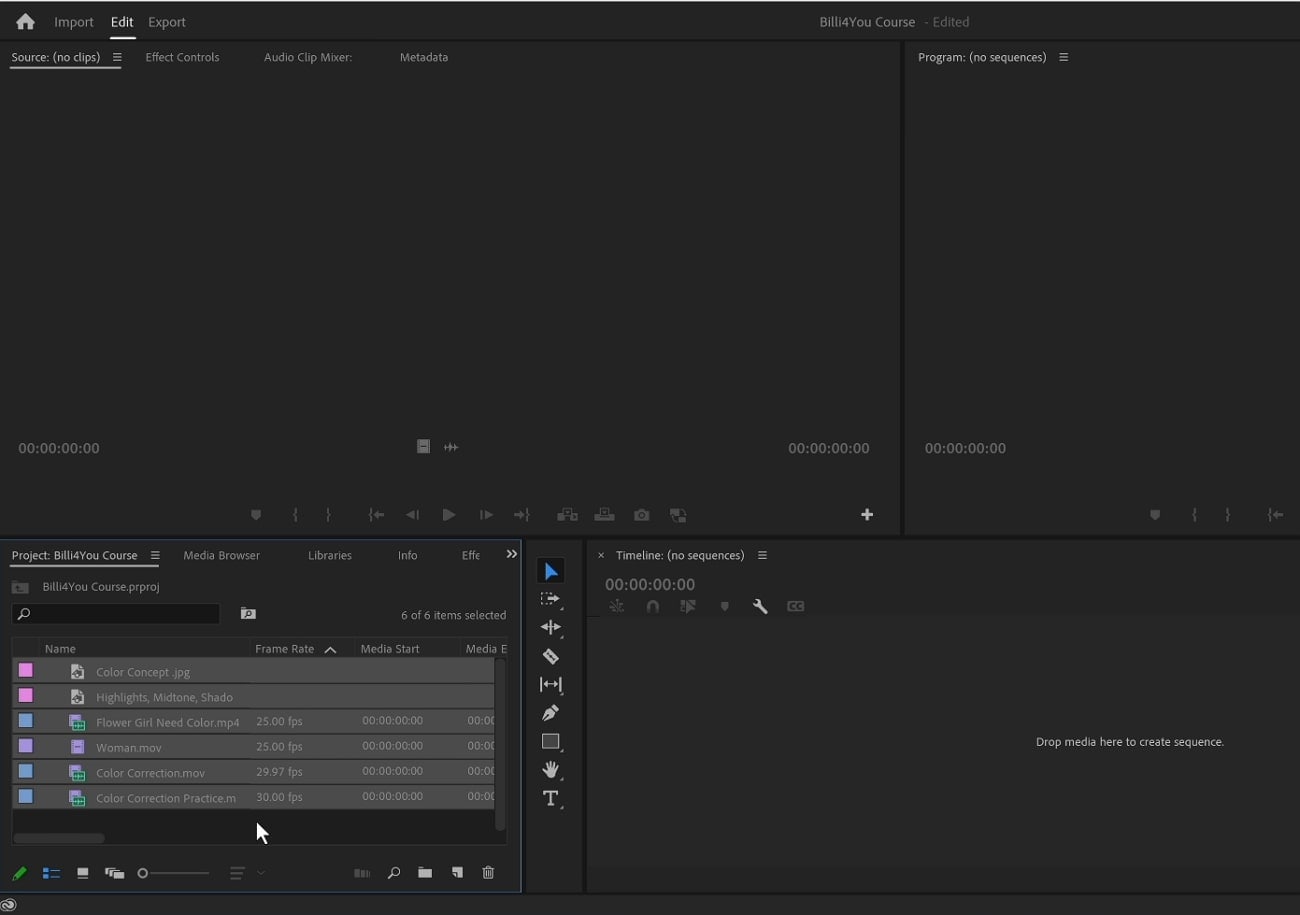
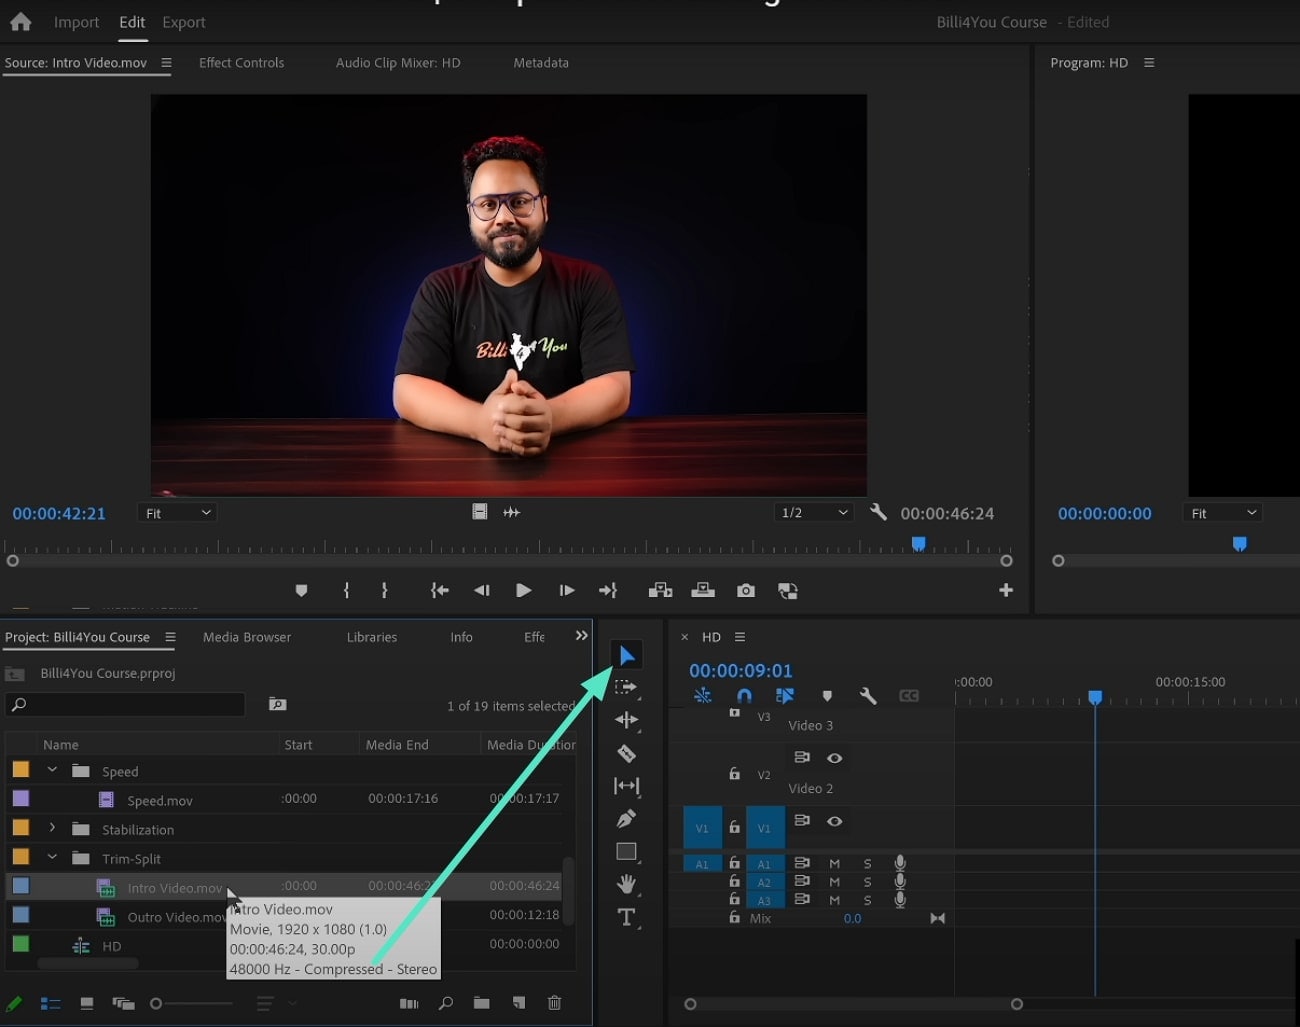
Step 2. Once the media is imported, locate the vertical toolbar adjacent to the video timeline to access your desired tool, like the “Selection Tool,” to make desired selections within the video previewed within the Media window.
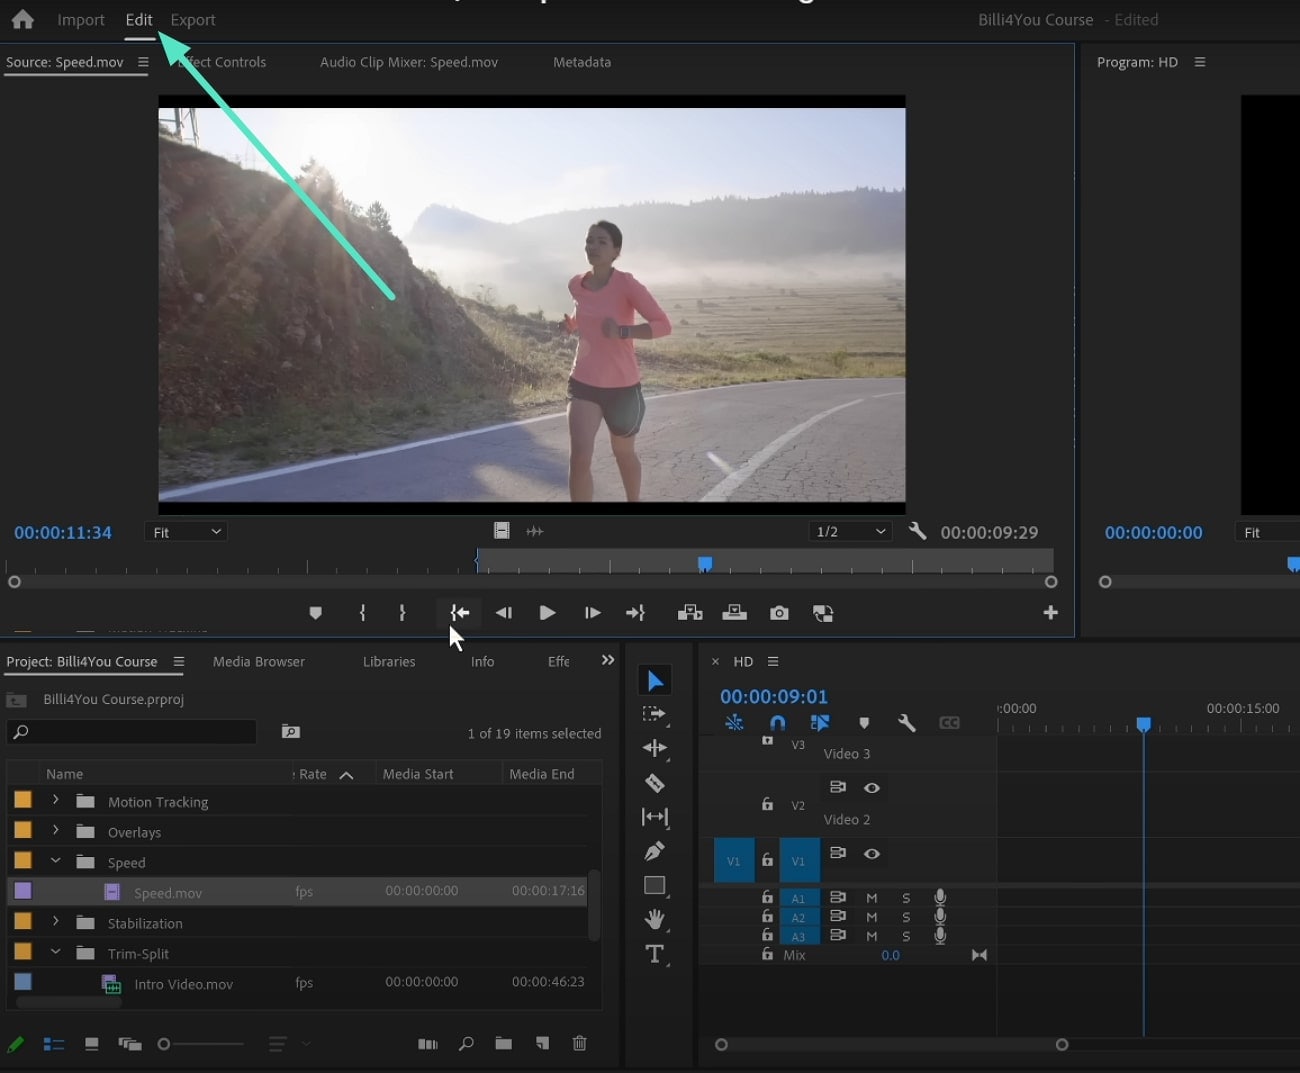
Step 3. Remove the unwanted part of a clip, head to the “Edit” window, drag the video track to the part, and press the “Delete” key on the keyboard.
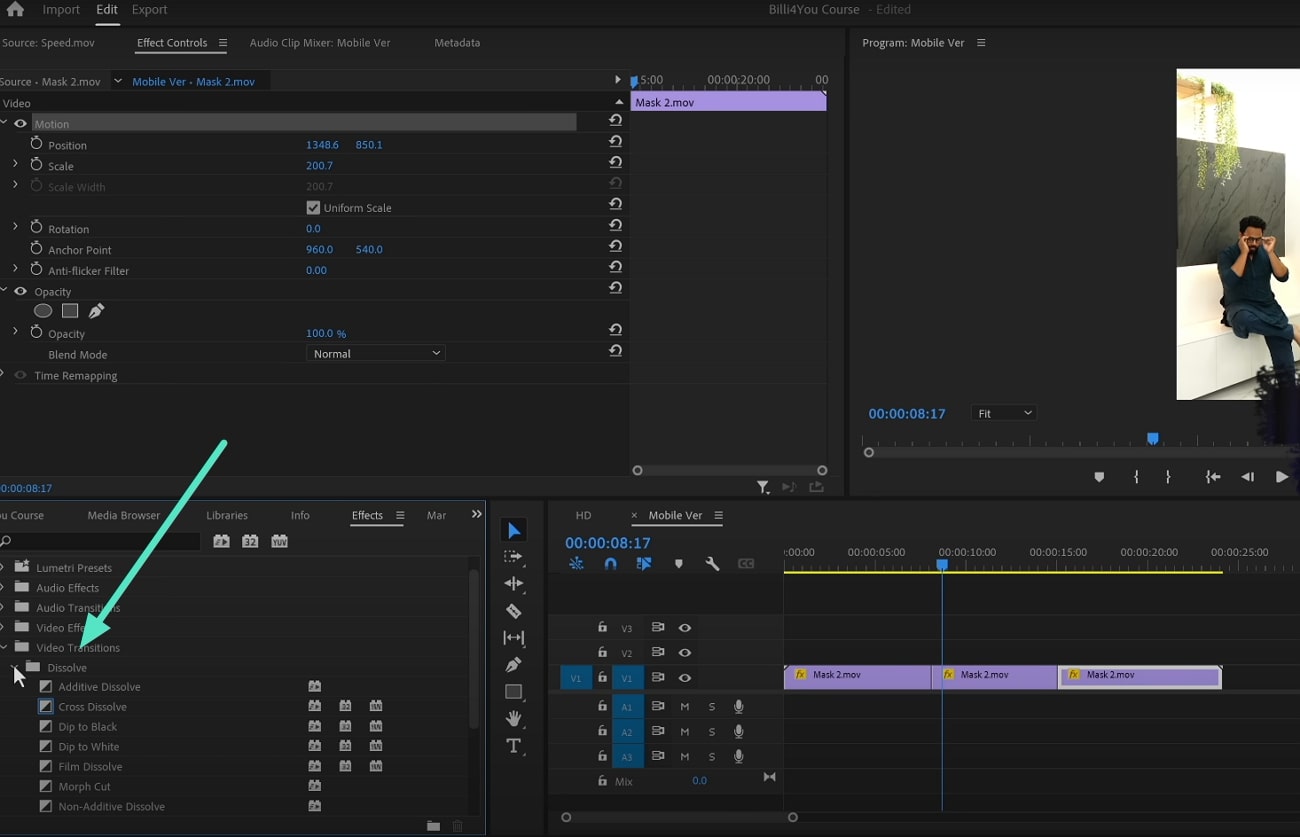
Step 4. To add transitions between multiple videos, take the playhead to the joining point of the videos and access the “Video Transitions” from the project panel. Double-click on it to apply the transition in the video section.
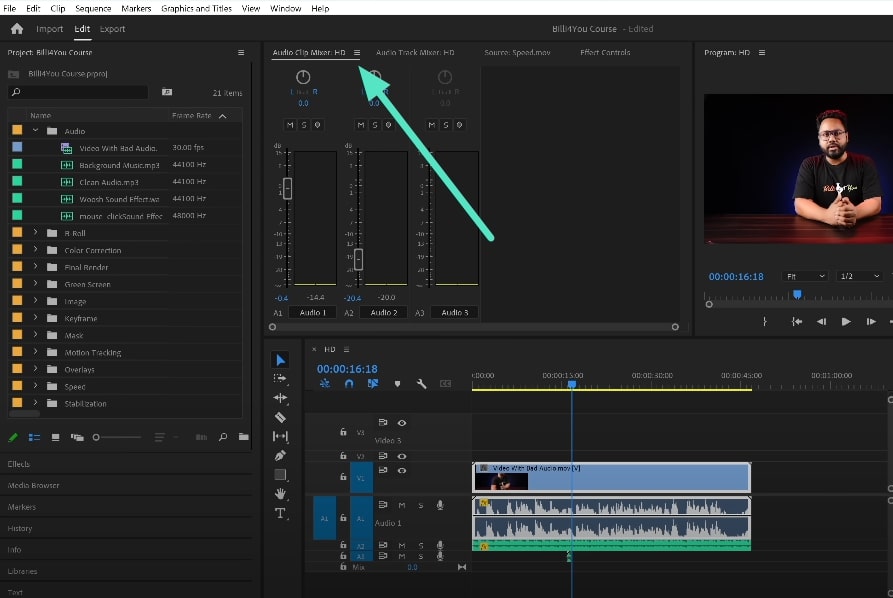
Step 5. After the visuals are modified, make changes to the audio by importing music and double-clicking on the audio track to enable “Audio Clip Maker.” Adjust the sound attributes according to your preferences in the provided space in Premiere Pro.
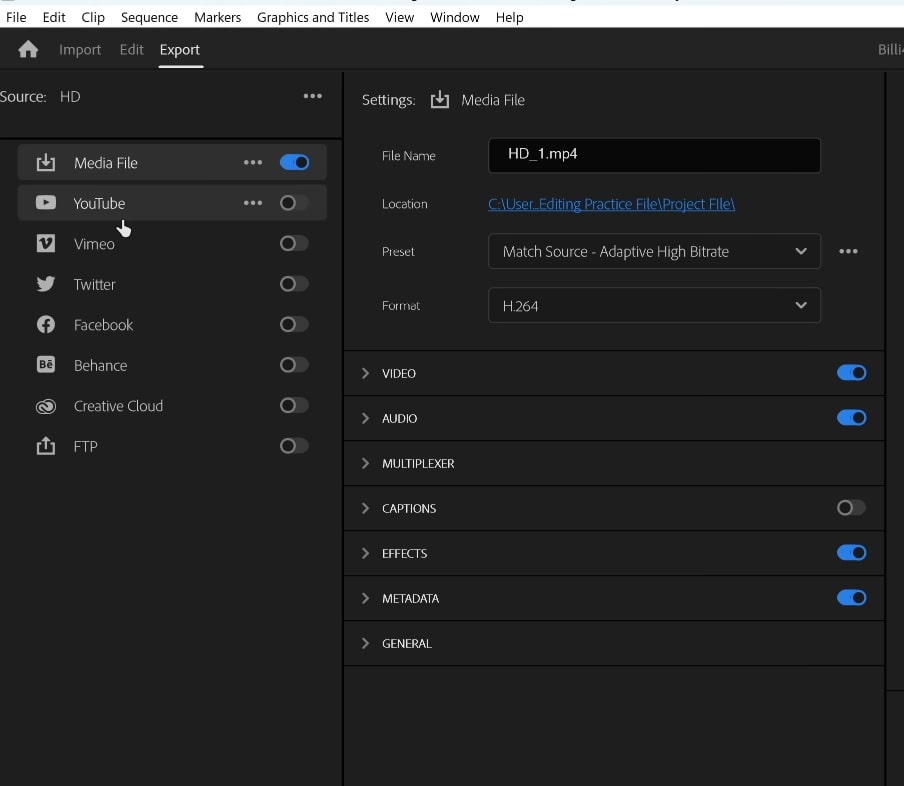
Step 6. Once you are done with all the editing, head to the “File” menu and select the “Export” option. In the “Export” window, configure settings like Image name, location, and format. Finally, hit the “Export” button to save the modified video with Adobe Premiere Pro.
Part 2. Make Changes to Your Video With Filmora
If you are looking for a solution for video editing that offers a clean and simplified interface, Wondershare Filmora could be the right choice. This AI-powered multimedia editor offers an extensive suite of functionalities for its users to create visual masterpieces. The interface of this platform is pretty simple, allowing novice users to play with their creative skills conveniently.
Wondershare Filmora for Desktop
This advanced tool offers various basic and AI-powered video enhancement features to modify the visual content according to their preferences. Users get the ability to import a video or start from scratch by recording video within the platform. Using Filmora for Premiere Pro video editing helps generate visuals in high-quality which are shareable on multiple platforms.
Key Editing Functions Offered By Filmora Desktop
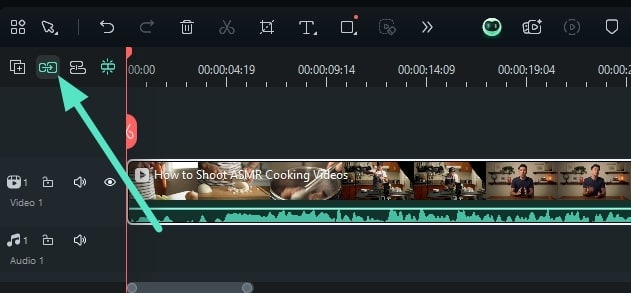
- Magnetic Timeline: This efficient video editing tool offers a magnetic timeline that automatically adjusts multiple clips when others are moved. It prevents unwanted gaps and delays between the videos and ensures a proper flow of work by keeping the clips organized.
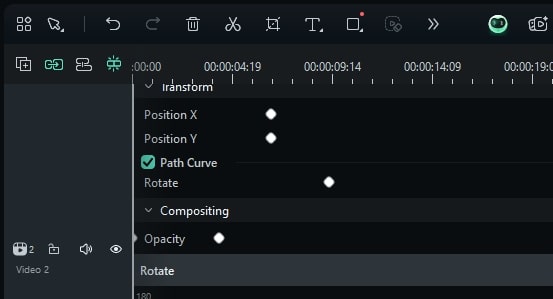
- Video Keyframing: Users get the ability to add precise motion effects by adjusting the position and opacity of the objects across different points in the video. It helps in enabling a smoother transition and animation while generating professional-grade motion effects.
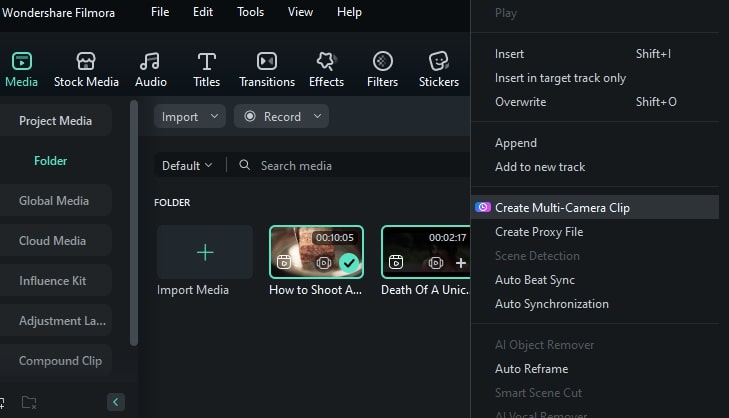
- Multi-Camera Editing: This feature provides the ability to sync and switch between multiple camera angles in a single project. The multi-camera editing is ideal for videos like interviews to process editing from different perspectives.
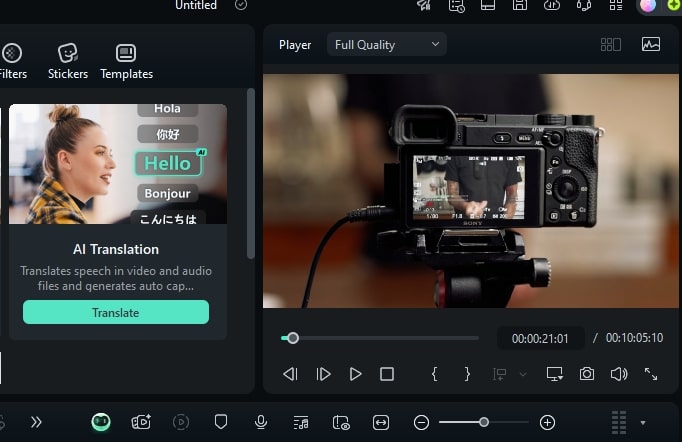
- AI Video Translation: This AI-powered tool can automatically generate subtitles and translate video content into multiple languages. Once the translation is generated, you can repurpose it for multiple projects, as the output can be saved as a separate file.
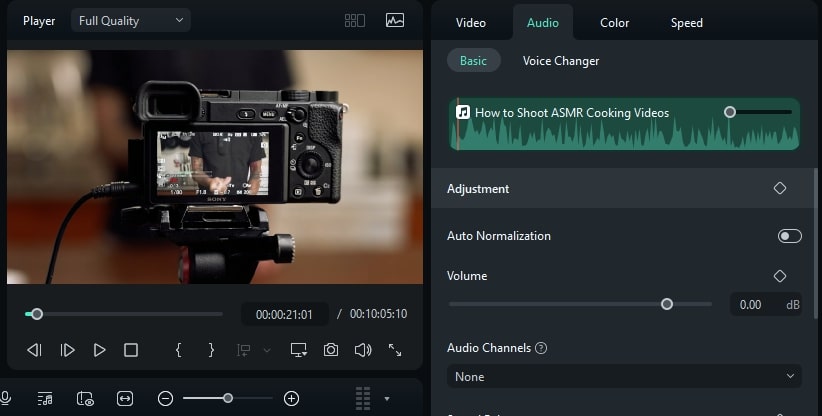
- AI Audio Adjustment: Unlike Adobe, Filmora offers various audio adjustment features that are powered by AI. From background noise remover to audio ducking, you can enhance the sound in your video with only a few clicks.
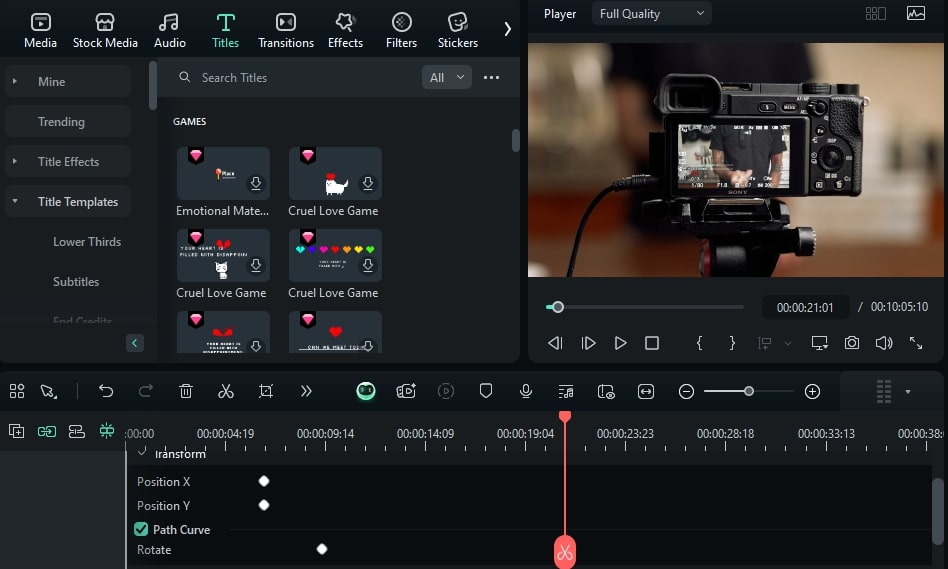
- Text Animation: Users can apply dynamic text effects with pre-made animations or customize their own. This feature adds motion to titles and captions to make videos more engaging and interactive for the audience.
 secure download

Operating Interfaces Offered by Filmora
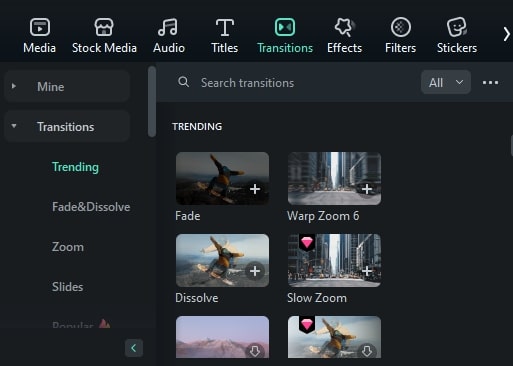
- Transitions: The transitions interface offers the drag and drop functionality to apply various fade and zoom effects. Users can preview transitions in real-time and adjust their duration for precise control. If there is a single clip, you can split it in two and apply the transition between them.
- Effects: This video editing platform includes a vast library of visual effects, which are accessible through a dedicated library section. Users can easily apply the effects by dragging or using the + icon. Moreover, the tool also provides the ability to adjust and modify the applied effects according to your preferences.

- Music: The built-in music library provides royalty-free music that can be added to videos effortlessly with a simple drag-and-drop function. Different mood and theme categories are offered to help you choose the relevant option according to the video. Moreover, you can ask the AI to generate background music by specifying different attributes such as mood, genre, and theme.
- Video Templates: Using this Adobe Premiere Pro alternative, users get pre-designed video templates with applied effects, clips, and transitions to simplify. You can drag the relevant template organized category-wise to the timeline and embed your video accordingly.

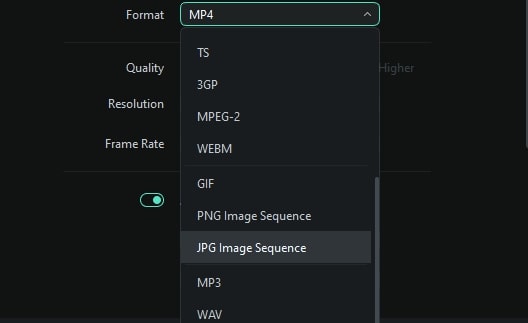
- Export Formats: The export window of this tool offers multiple formats, including MP4, MOV, and even GIF. Users can also optimize different settings for social output formats for different social media platform requirements.
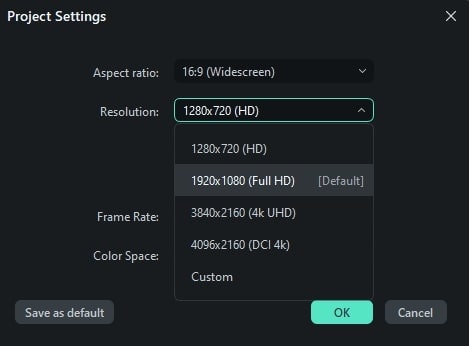
- Aspect Ratio Adjustments: This small window allows you to switch between different frames, such as widescreen, vertical, and cinematic formats. This function ensures that video frames are optimized for different screens on different platforms. Users can choose their desired aspect ratio by simply expanding the drop-down menu.
secure download
Video Editing on The Filmora App [Android/iOS]
If you are looking for a convenient and quick method to edit videos from your smartphone, you can use the Filmora App. The functions offered by this application allow you to precisely trim, edit, and modify the visuals and audio of your content. Besides basic features, the application also offers advanced AI-based editing for enhanced video generation.
Amazing Editing Features of the Filmora App
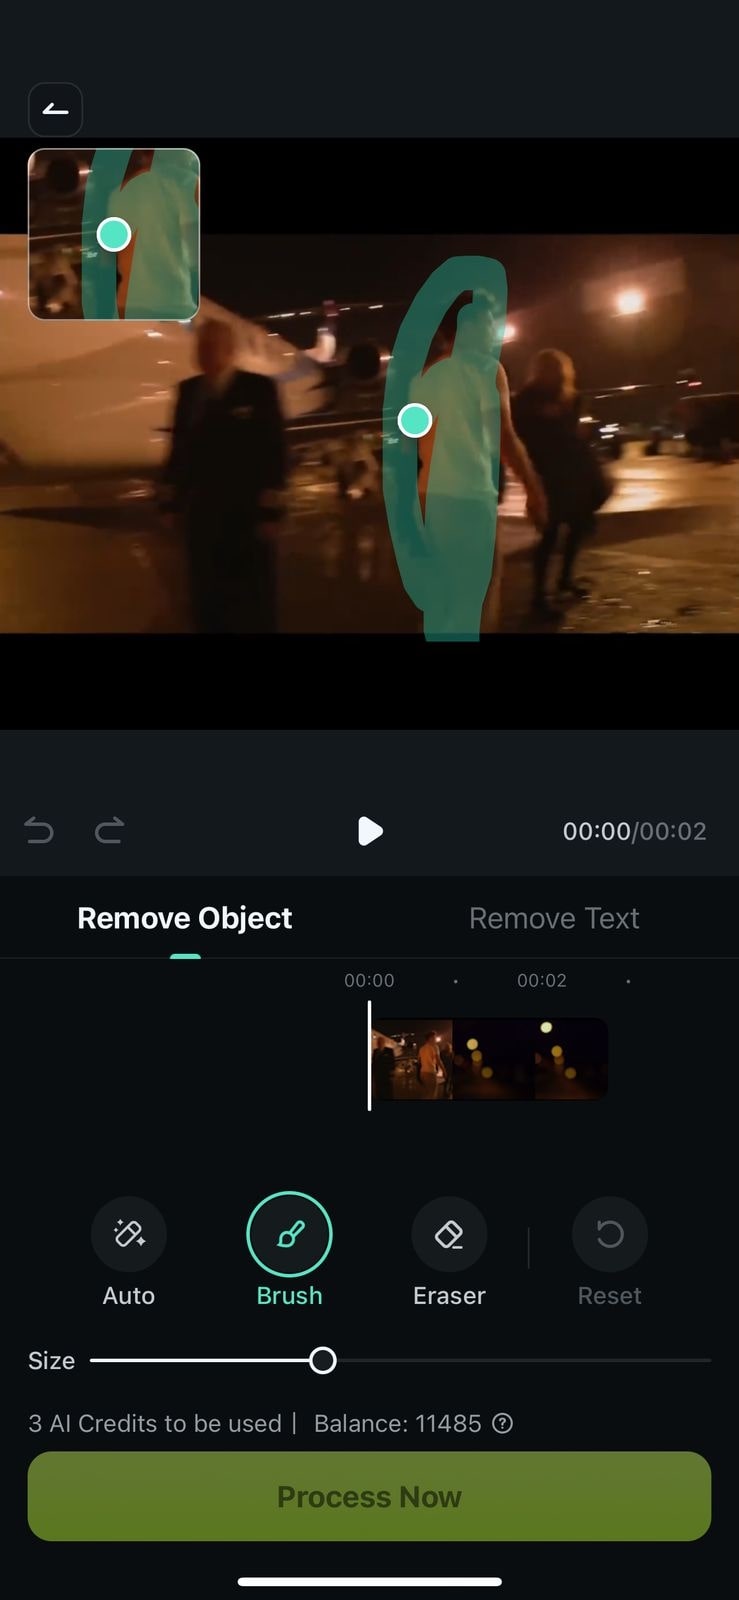
- AI Remover: The AI-powered object remover offered by this application allows users to erase unwanted elements from videos with a simple tap. You can make the desired selection by brushing your finger over it and simply letting the tool detect the unwanted objects and remove them.
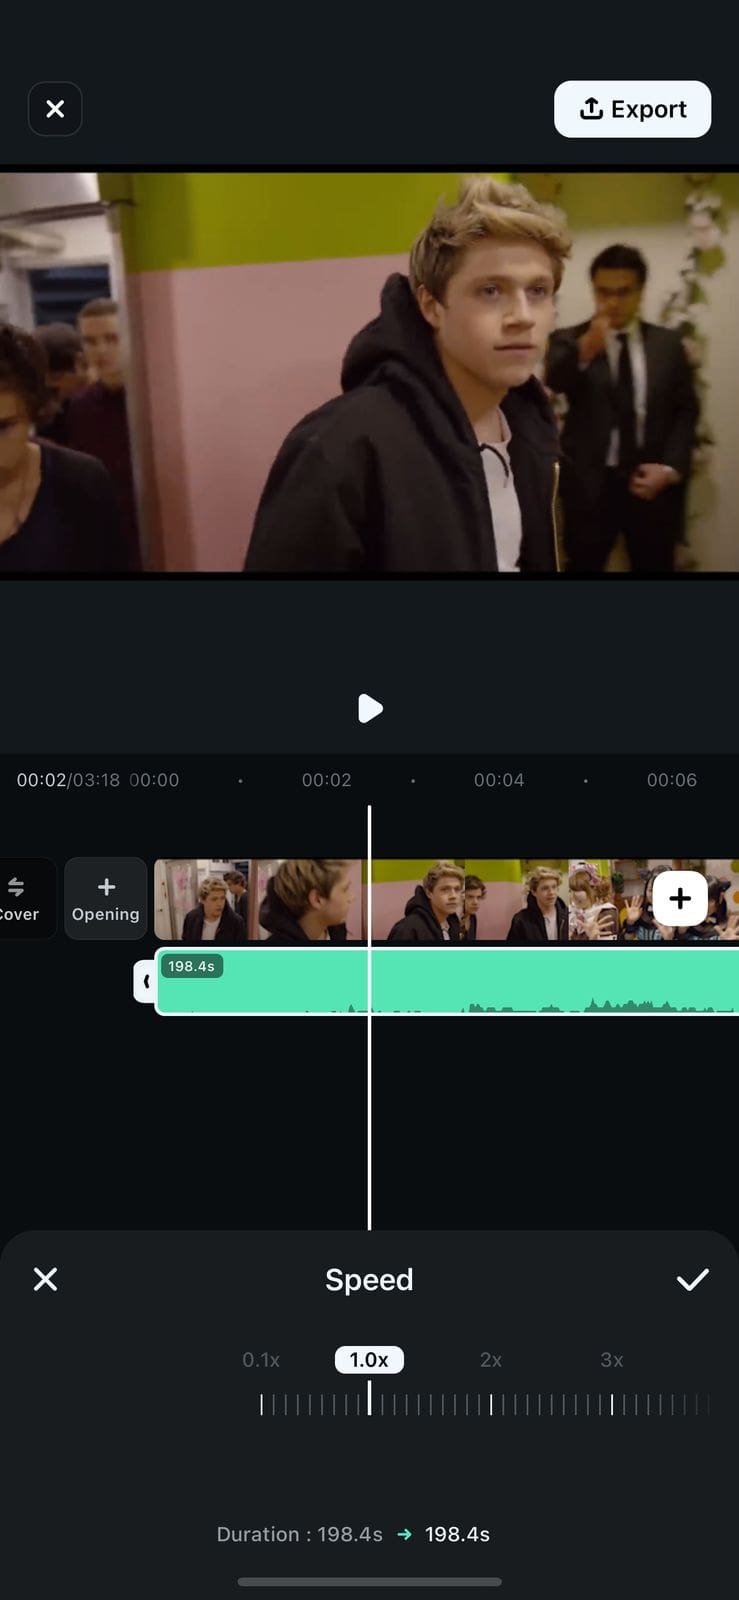
- Auto Speed Adjustment: This feature enables automatic speed changes to match the rhythm of the video or background music. Users can create slow-motion or fast-forward effects effortlessly by adjusting the speed of their videos.
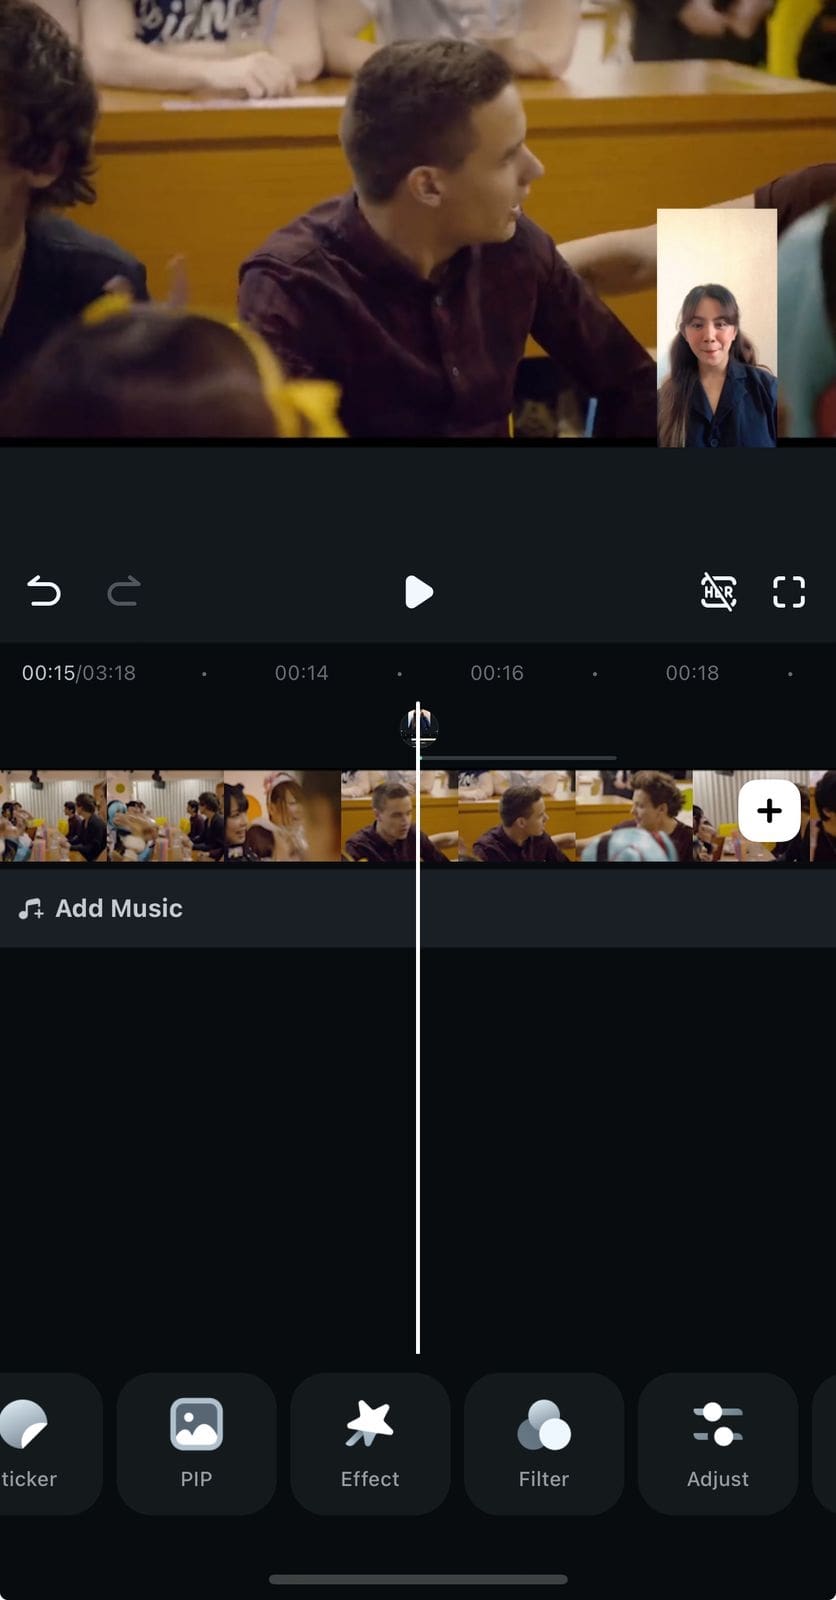
- Picture-in-Picture Function: PIP allows users to create overlays of multiple clips, especially for reaction videos or tutorials. Besides videos, users can also incorporate images and resize them efficiently.
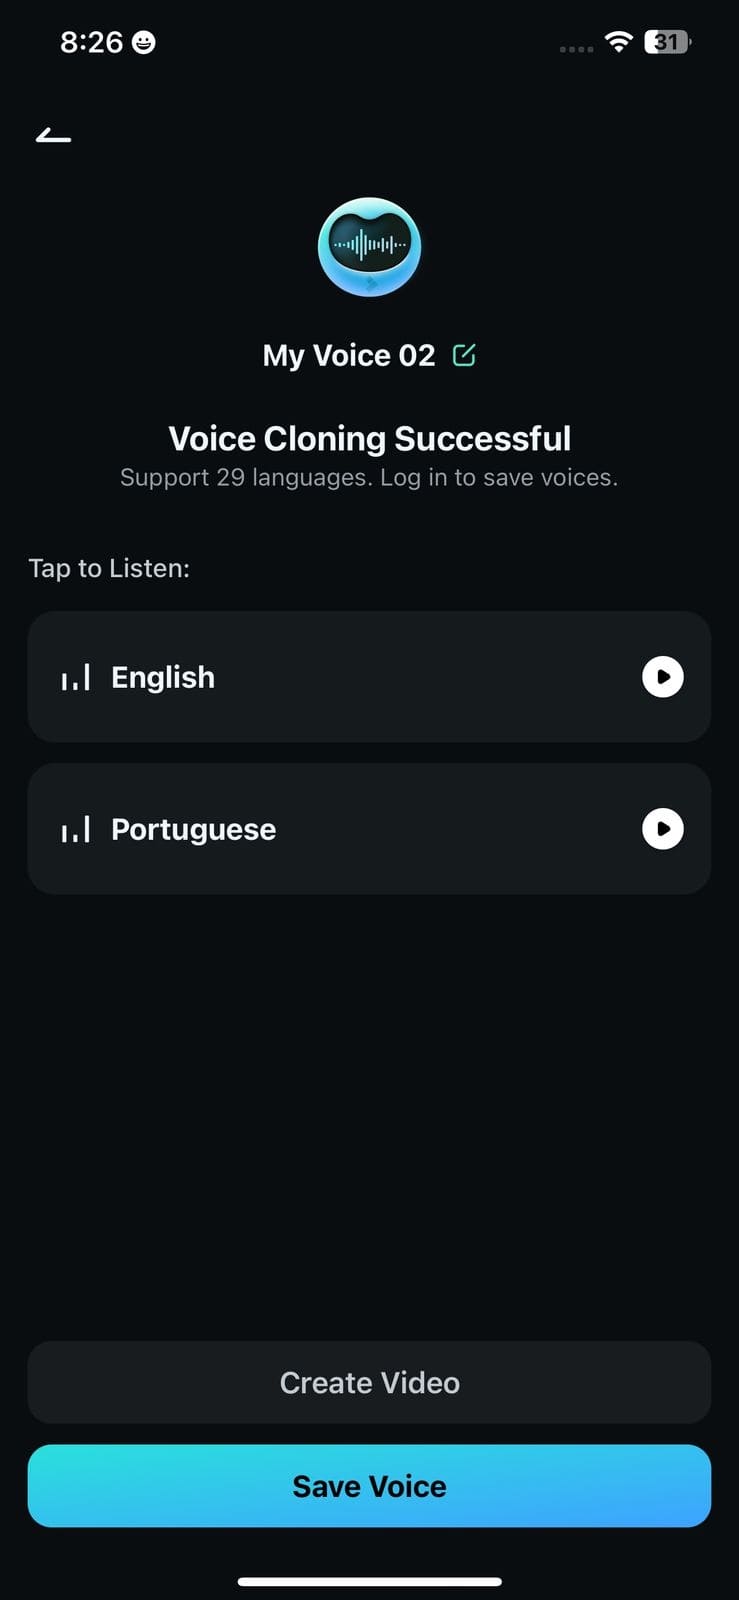
- Clone Your Voice: This Adobe Premiere Pro alternative app offers the ability to clone your voice by inputting voice recording. With multiple language support, you can create a replica of your voice in 29 foreign languages.
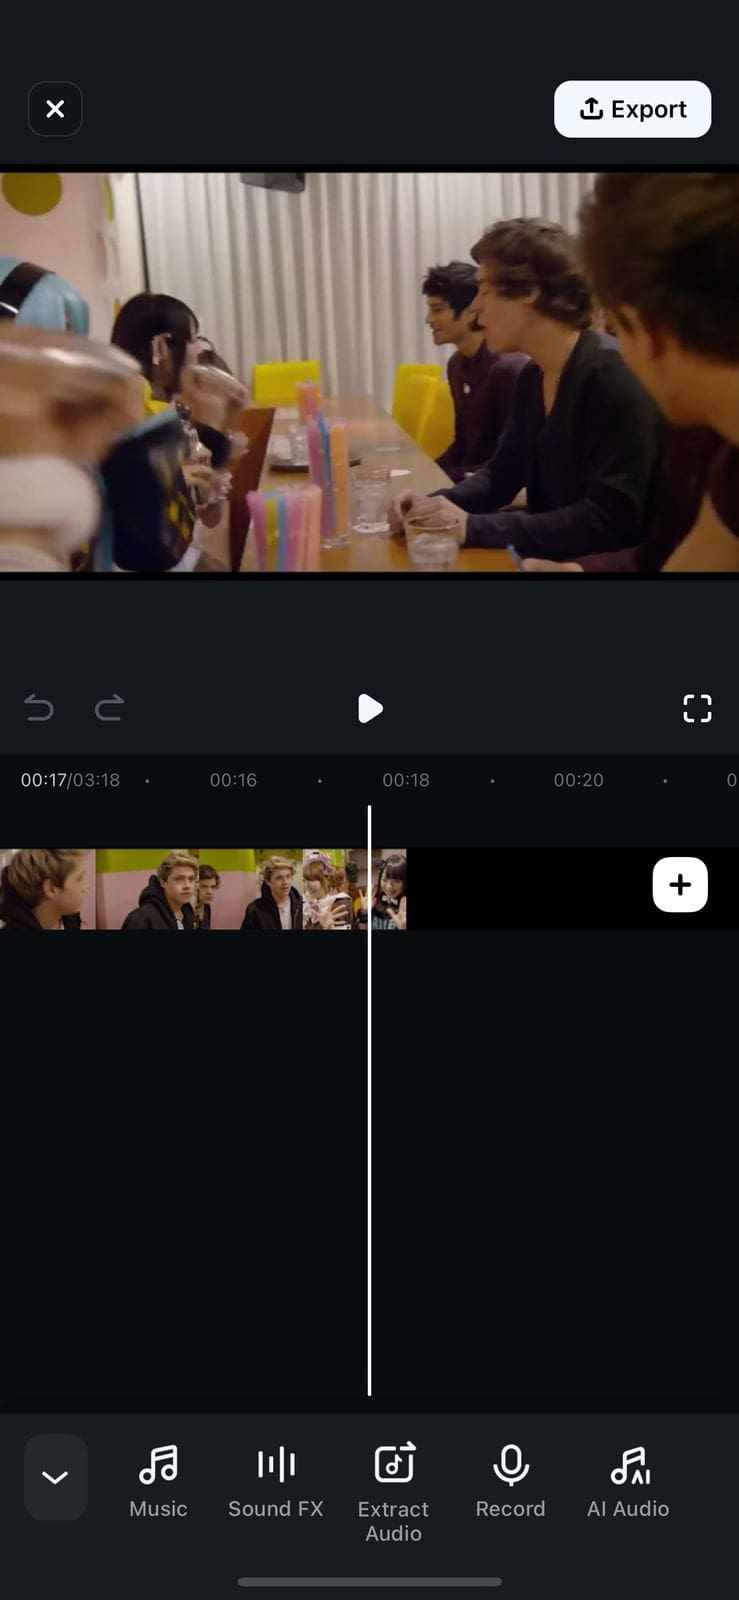
- Audio Recording: The Filmora App includes a built-in voice recording feature for narration and sound effects. Users can directly record within the application and adjust the volume as per their requirements. After the voice is recorded, you can apply different effects over it to give it a unique flair.
secure download
Operating Interfaces Filmora App Features
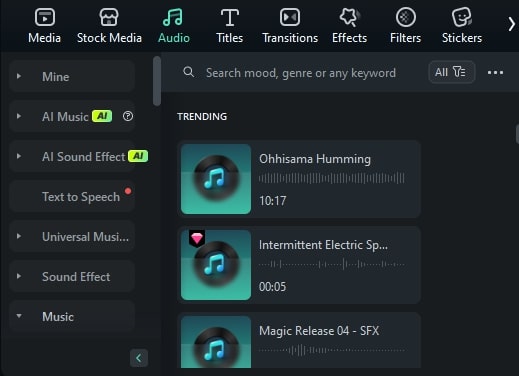
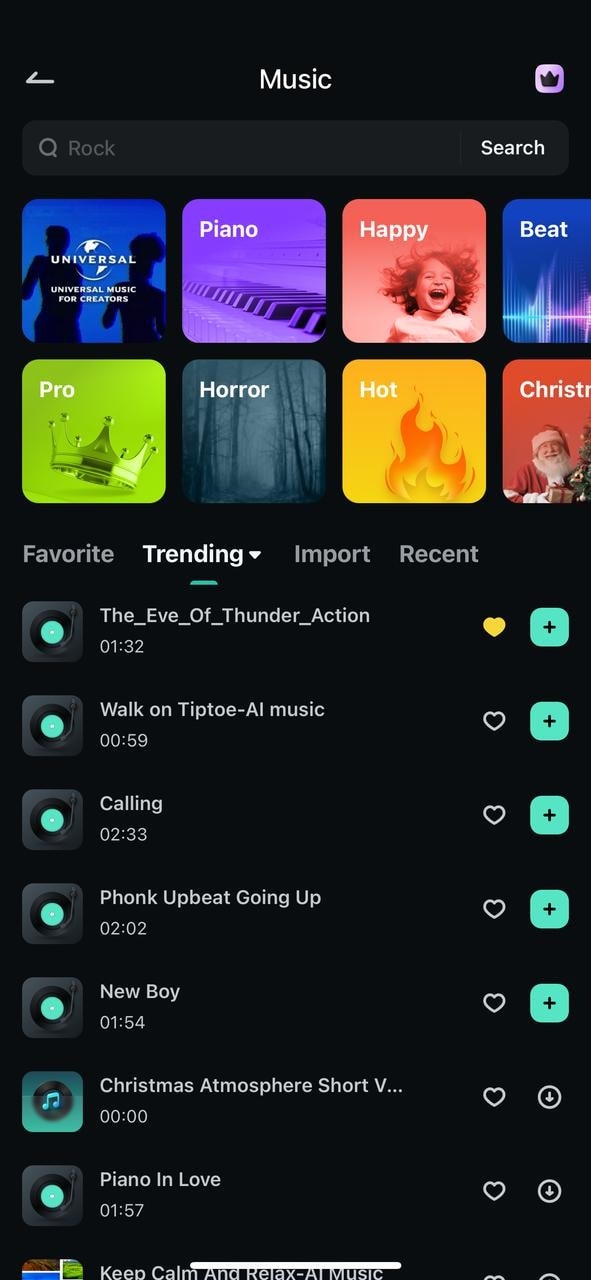
- Music Library: This music library offered by the Filmora App provides different categories, making it easier for users to select the music relevant to the theme and mood of their video.
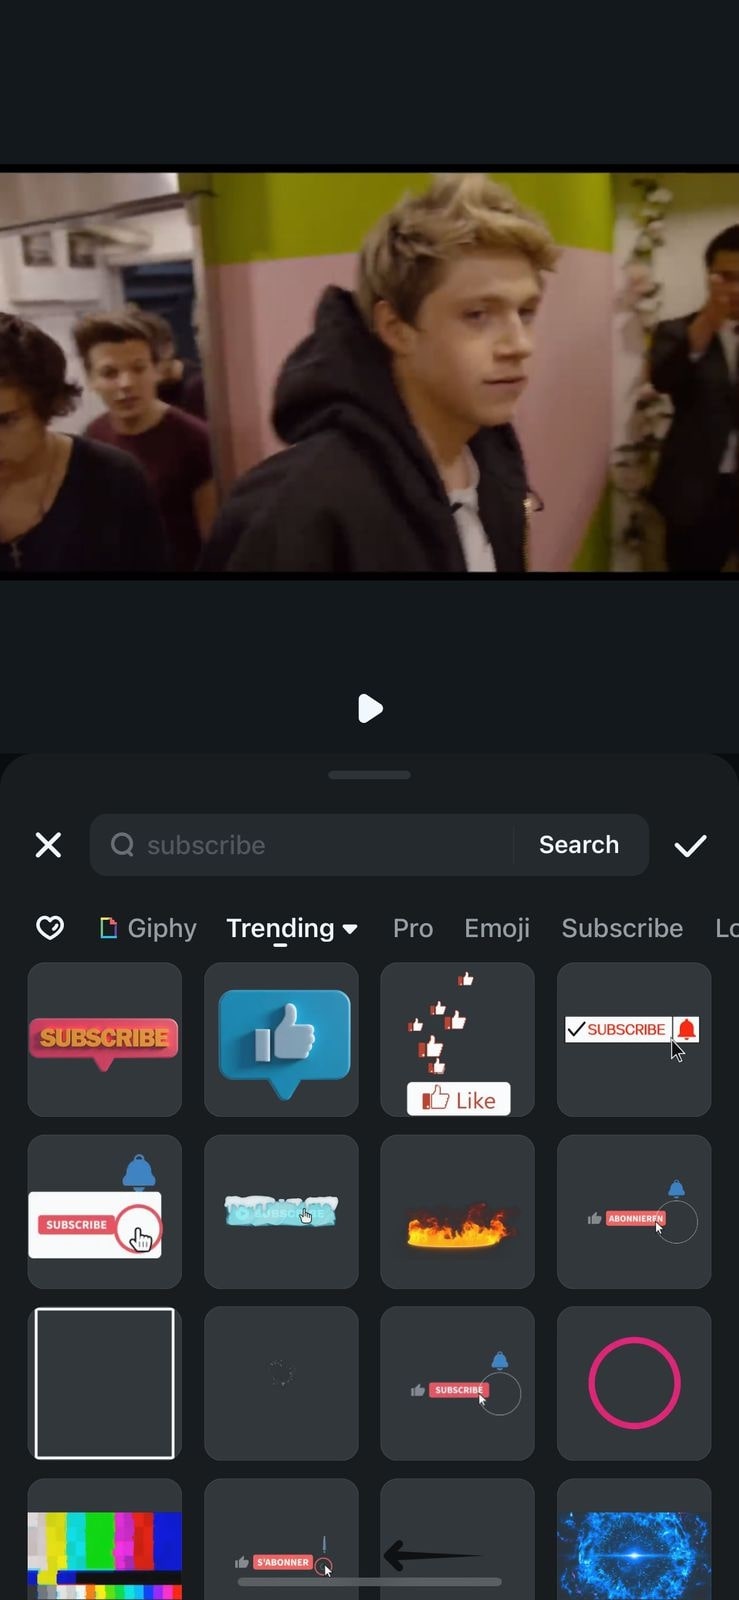
- Stickers: The sticker library offered by this app allows you to apply different elements to make the media enhanced. Users can simply tap on the desired sticker and apply it by pressing the Tick icon.
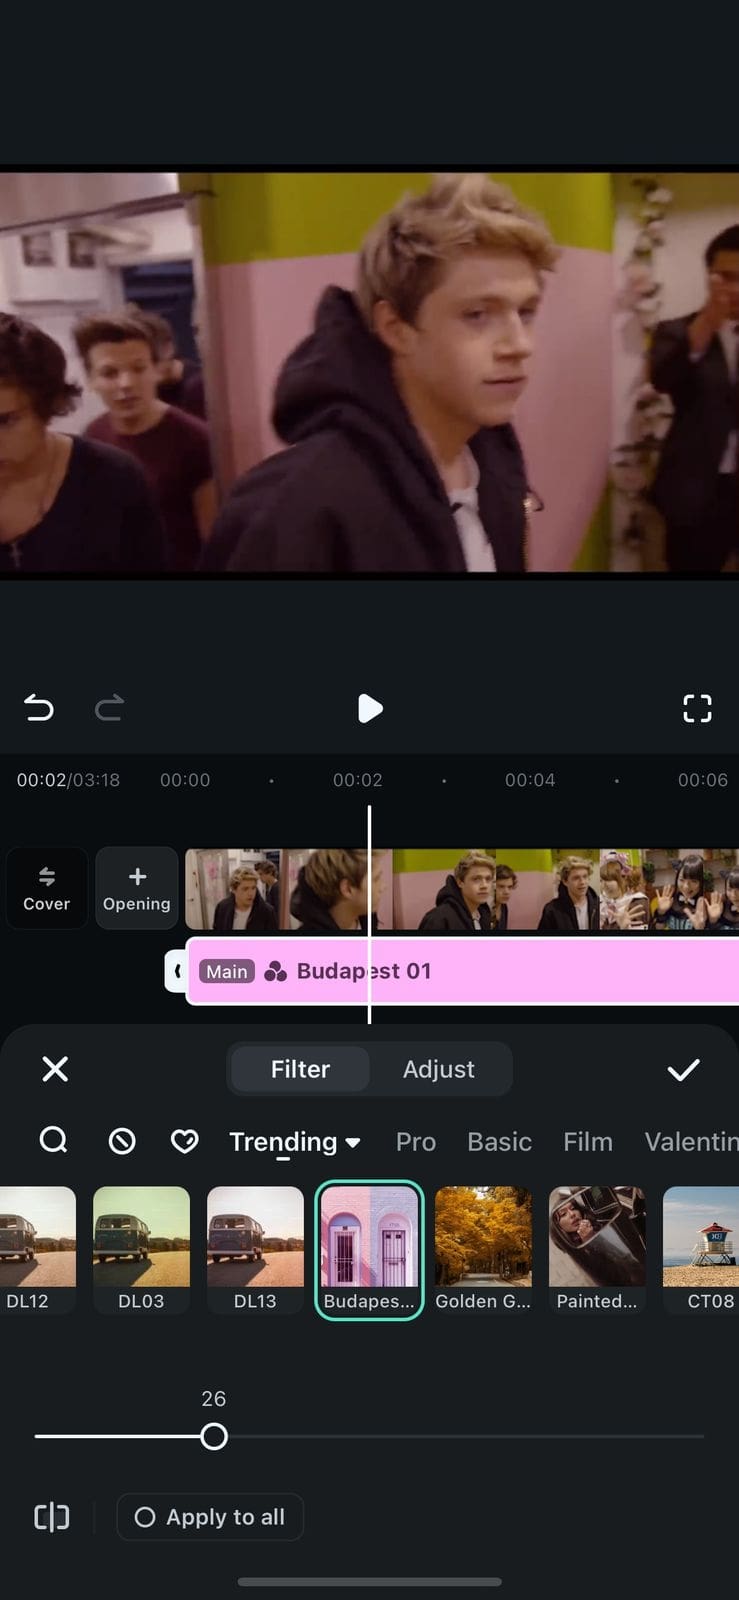
- Filters: Sorted category-wise, the filter library is easy to access, and users can simply drag the slider to adjust the opacity of the applied filter. Users can save a specific filter to their favorites list by tapping on the small heart.
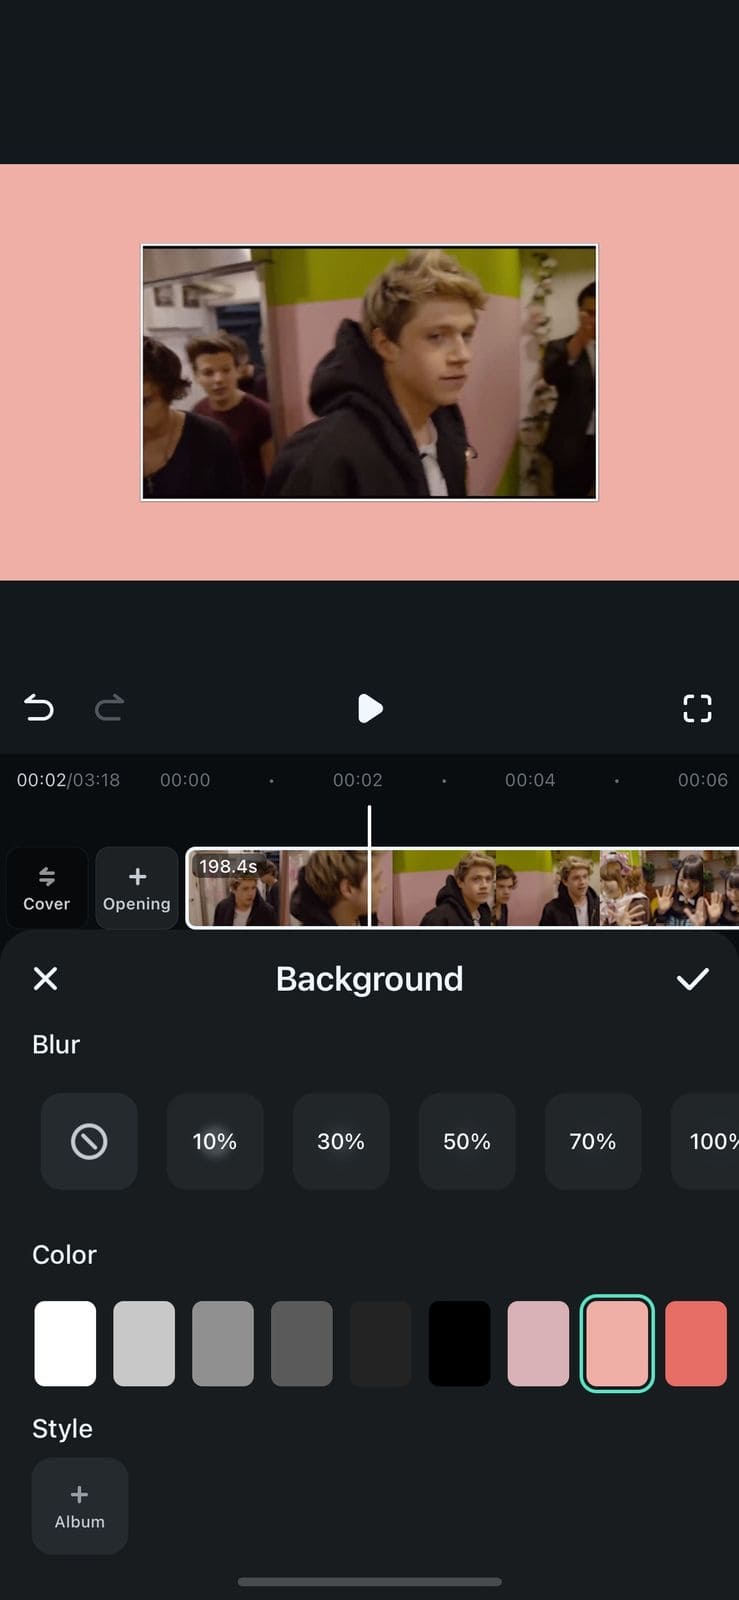
- Video Background: Add solid colors as background for your video by swiping through the shades offered by the application. You can pinch the video within the preview window to adjust the frame for prominent background applications.
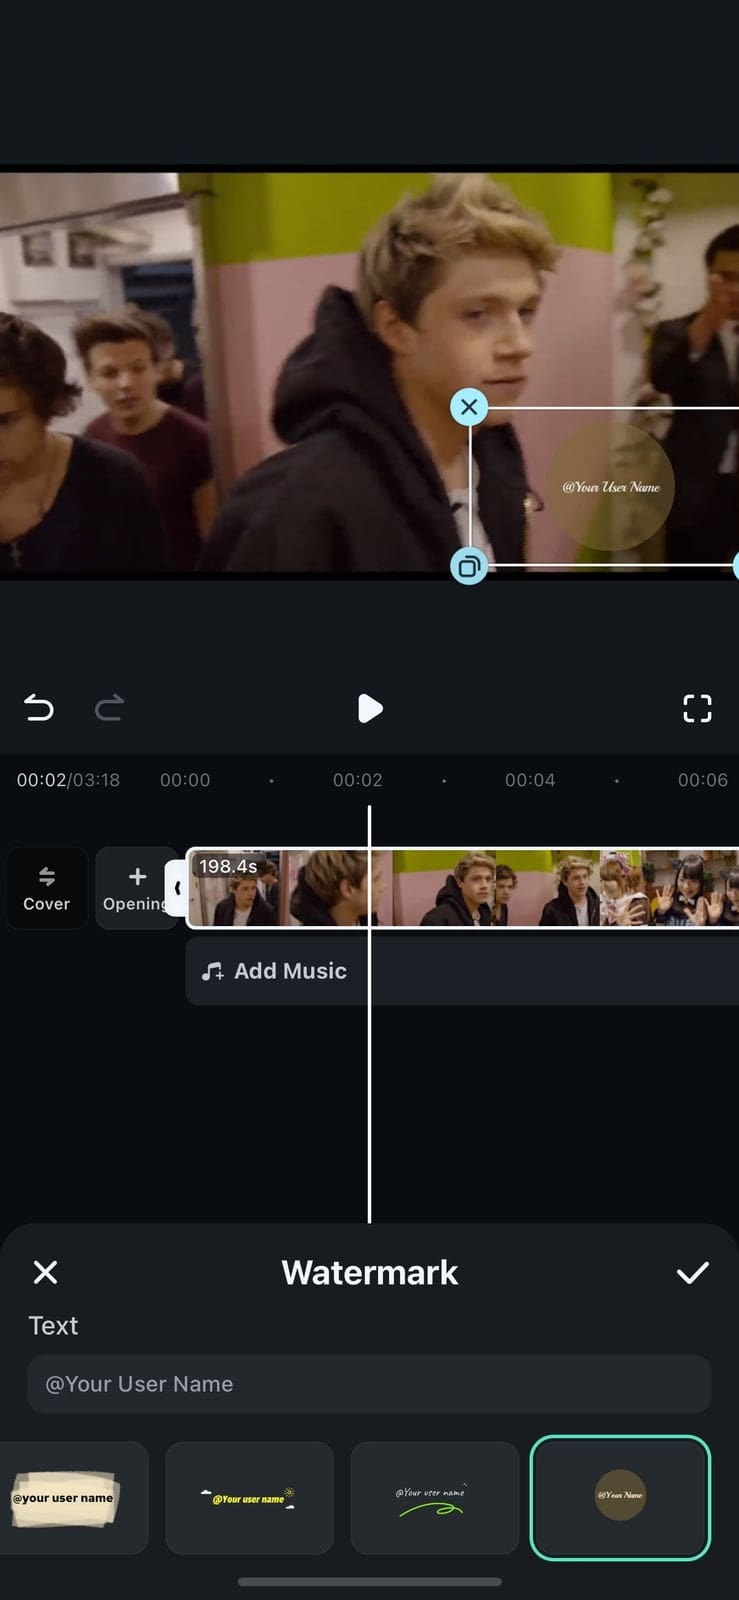
- Watermark Addition: The watermark tool enables users to add custom text and images to the videos. With drag-and-drop positioning and opacity adjustments, users can control visibility and position.
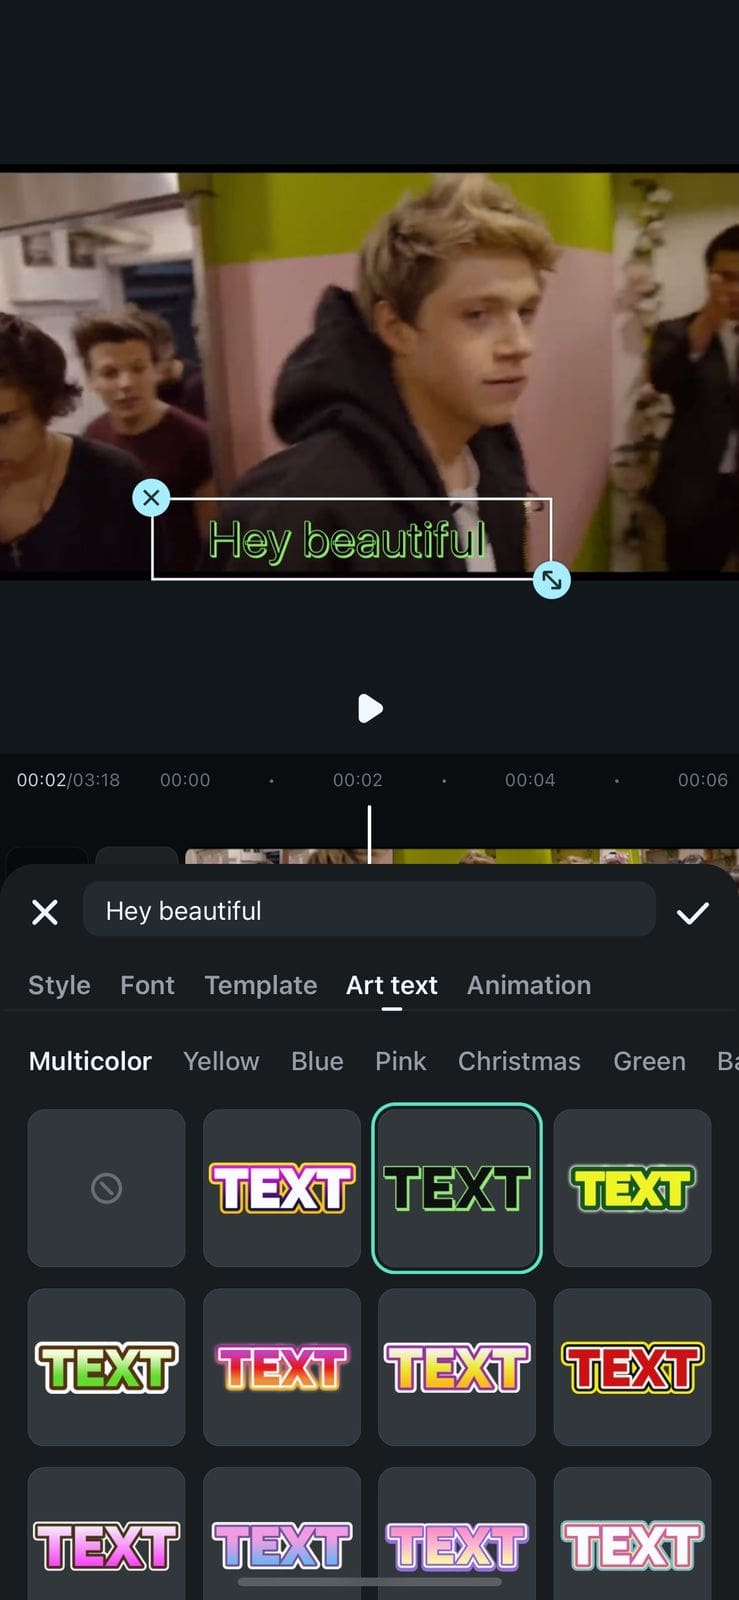
- Text Templates: Categories such as Trending, Pro, and Basic are offered by the application to apply relevant styling to the text added with minimal effort. Users can browse through the library by swiping and applying the text template with a single tap on a tick.
secure download
Conclusion
To conclude, this article discussed a detailed overview of the functionalities of Wondershare Filmora and Adobe Premiere Pro. The article also explained how Filmora is a better option as it offers more extensive features along with a simple interface. The platform offers various predesigned templates and AI-powered features to enhance multimedia without any prior editing skills or navigating through complicated interfaces.
