Video compression is an important process mainly useful for exporting videos at a smaller size than the original. Compressing videos allows users to comfortably transfer them from one device or platform to another, which is important in video editing.
Compressing videos can negatively affect their quality, leading to blurry media that isn’t appealing or professional. In fact, finding video compression software that's compatible with MacOS devices, specifically, can be daunting because the system doesn’t usually support tools that retain video quality.
The good news is that if you’re in this situation and searching for a great video compressor software for Mac, this article has the solution you need. Here, you will learn how to compress videos on Mac PCs using the best tool on the market—Wondershare Filmora. Let’s begin!
In this article
Part 1. The Best Video Compression Software for Mac
For any tool to be the best video compression software for Mac, it must offer extensive features supported by MacOS. Filmora ticks all the boxes when it comes to video editing and compression, from high video quality to quick and easy size reduction.
Beyond its basic functionality, Filmora offers multiple methods to compress files on the platform with ease. The following are some more reasons why Filmora is the best video compressor for Mac:
- Filmora reduces the video file size, making it up to 90% smaller
- It allows you to compress videos by trimming the video, changing frame rate, adjusting resolution, and much more.
- With Filmora, you can retain the quality of your video even after compressing it.
- Significant File Size Reduction
- Versatile Compression Options
- Quality Preservation
- User-Friendly Interface
- Works on Mac, Windows, iOS, and Android.

Part 2. Easy Methods to Compress Video Files Easily on Mac in Filmora
Before we discuss the various methods of compressing videos on Mac in Filmora, there are a few things you should know. To access the MacOS video compressor, first download the tool from the official website and launch it. Then, create a new project, import your video into the editing suite, and adjust its properties as you see fit.
Once that’s all set, you can apply any of the following methods to compress video files easily:
Method 1. Adjust Resolution
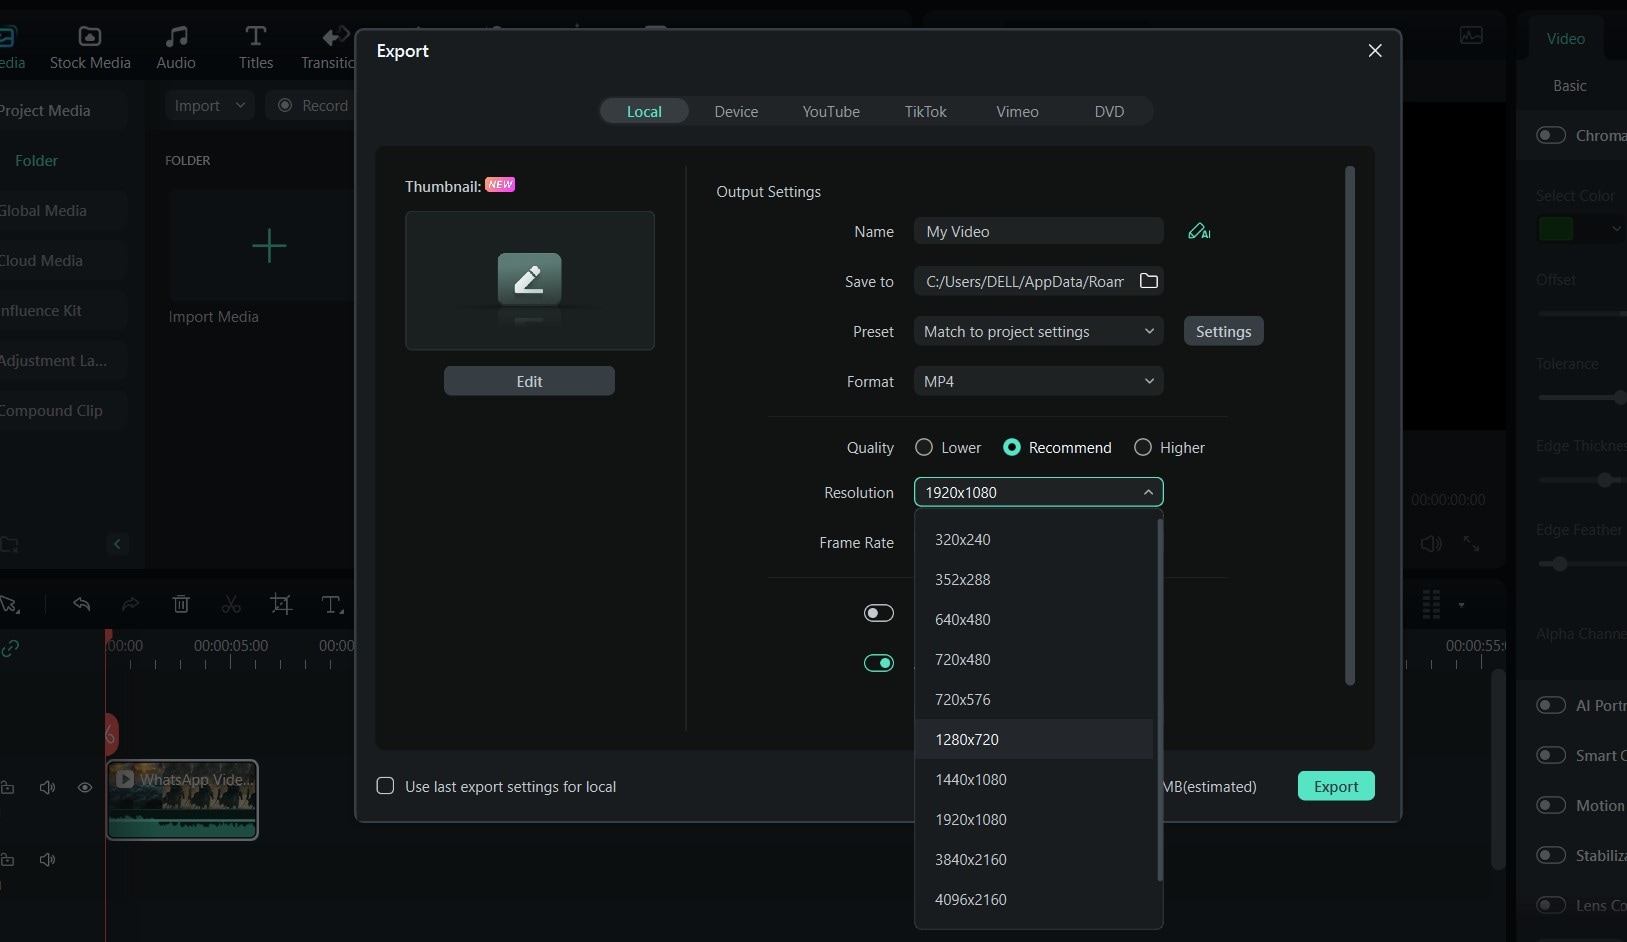
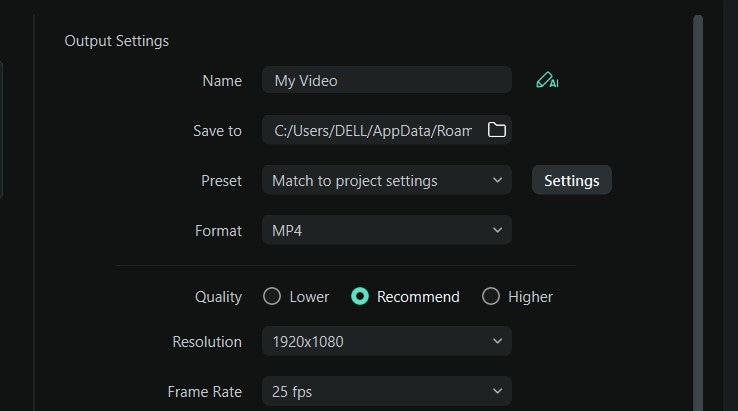
For users who aren’t keen on maintaining the highest video quality, one of the most effective ways to compress your video files in Filmora is by reducing the resolution (For example, you can reduce it from 1080p to 720p). The following are the steps to do it:
- Step 1: Click on Export at the top of your screen

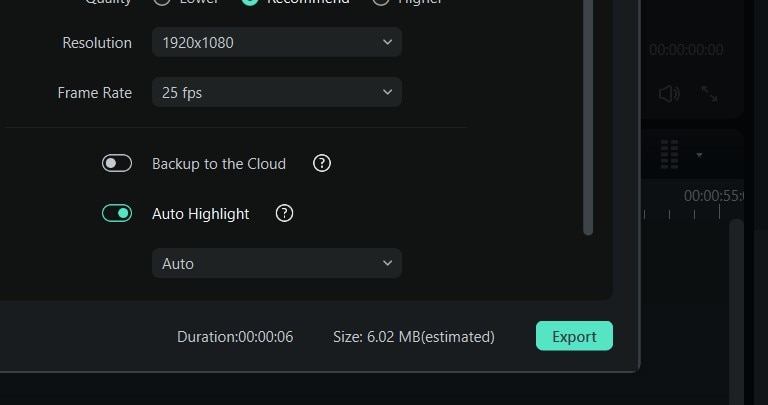
- Step 2: Reduce the video resolution by clicking the Resolution option. Then, select a slightly lower resolution size. Remember, the lower the resolution, the lower the file size.
- Step 3: Click Export to save the video.
Method 2. Change Frame Rate
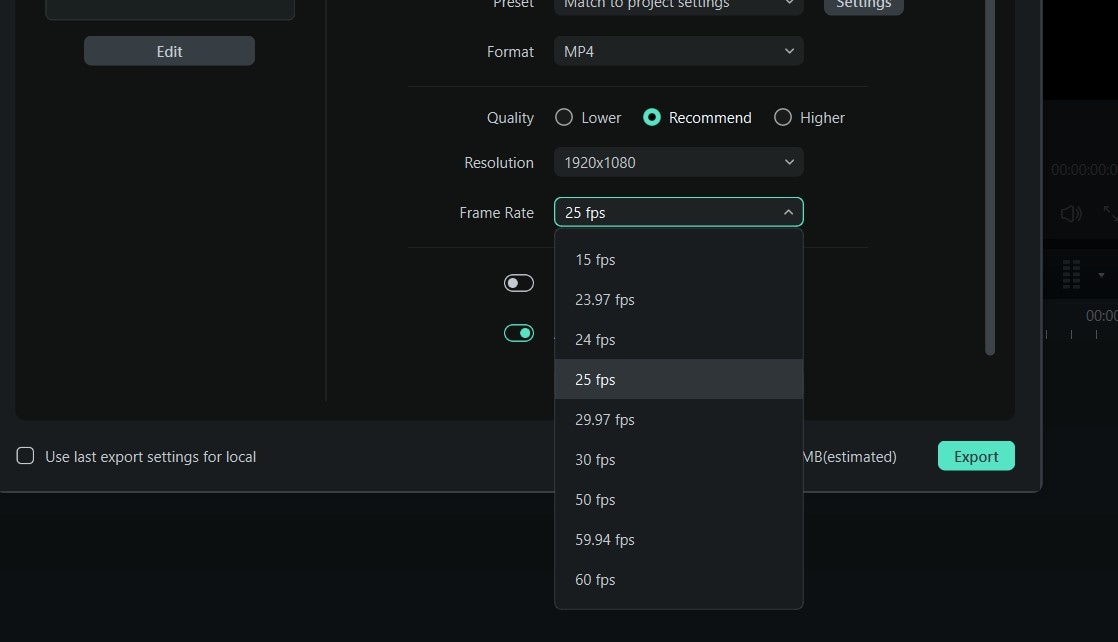
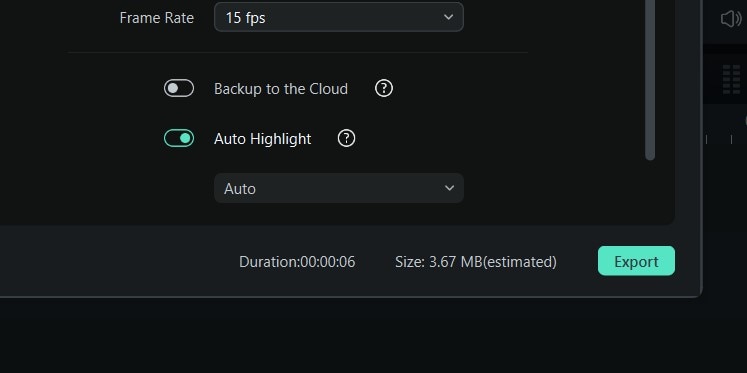
Another method to compress your video in Filmora for Mac is by adjusting the frame rate of the video. However, before using this method, you must note that this process may affect how smooth the movements in the video would be. With that said, here are steps to compress a video in Mac in Filmora by changing the frame rate:
- Step 1: After clicking Export, adjust the video’s frame rate by tapping the field next to the Frame Rate property.
- Step 2: Click on Export to save the video to your device.
Method 3. Trim the Video
Trimming your video’s length involves cutting out the unnecessary sections of the video to reduce its duration. In doing so, this process also reduces the size of the video. The following are the steps to trimming videos with Filmora as the MacOS video compressor:
- Step 1: After importing your video into the editing suite, drag and drop it on the timeline.

- Step 2: Hold one edge of the video thumbnail in the timeline and move it towards the left to shorten the video to your taste.
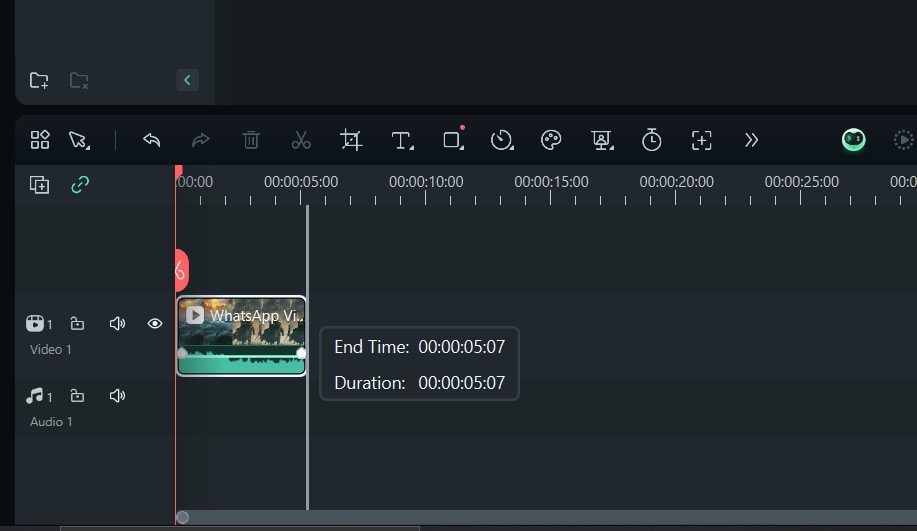
- Step 3: Preview and export your video.
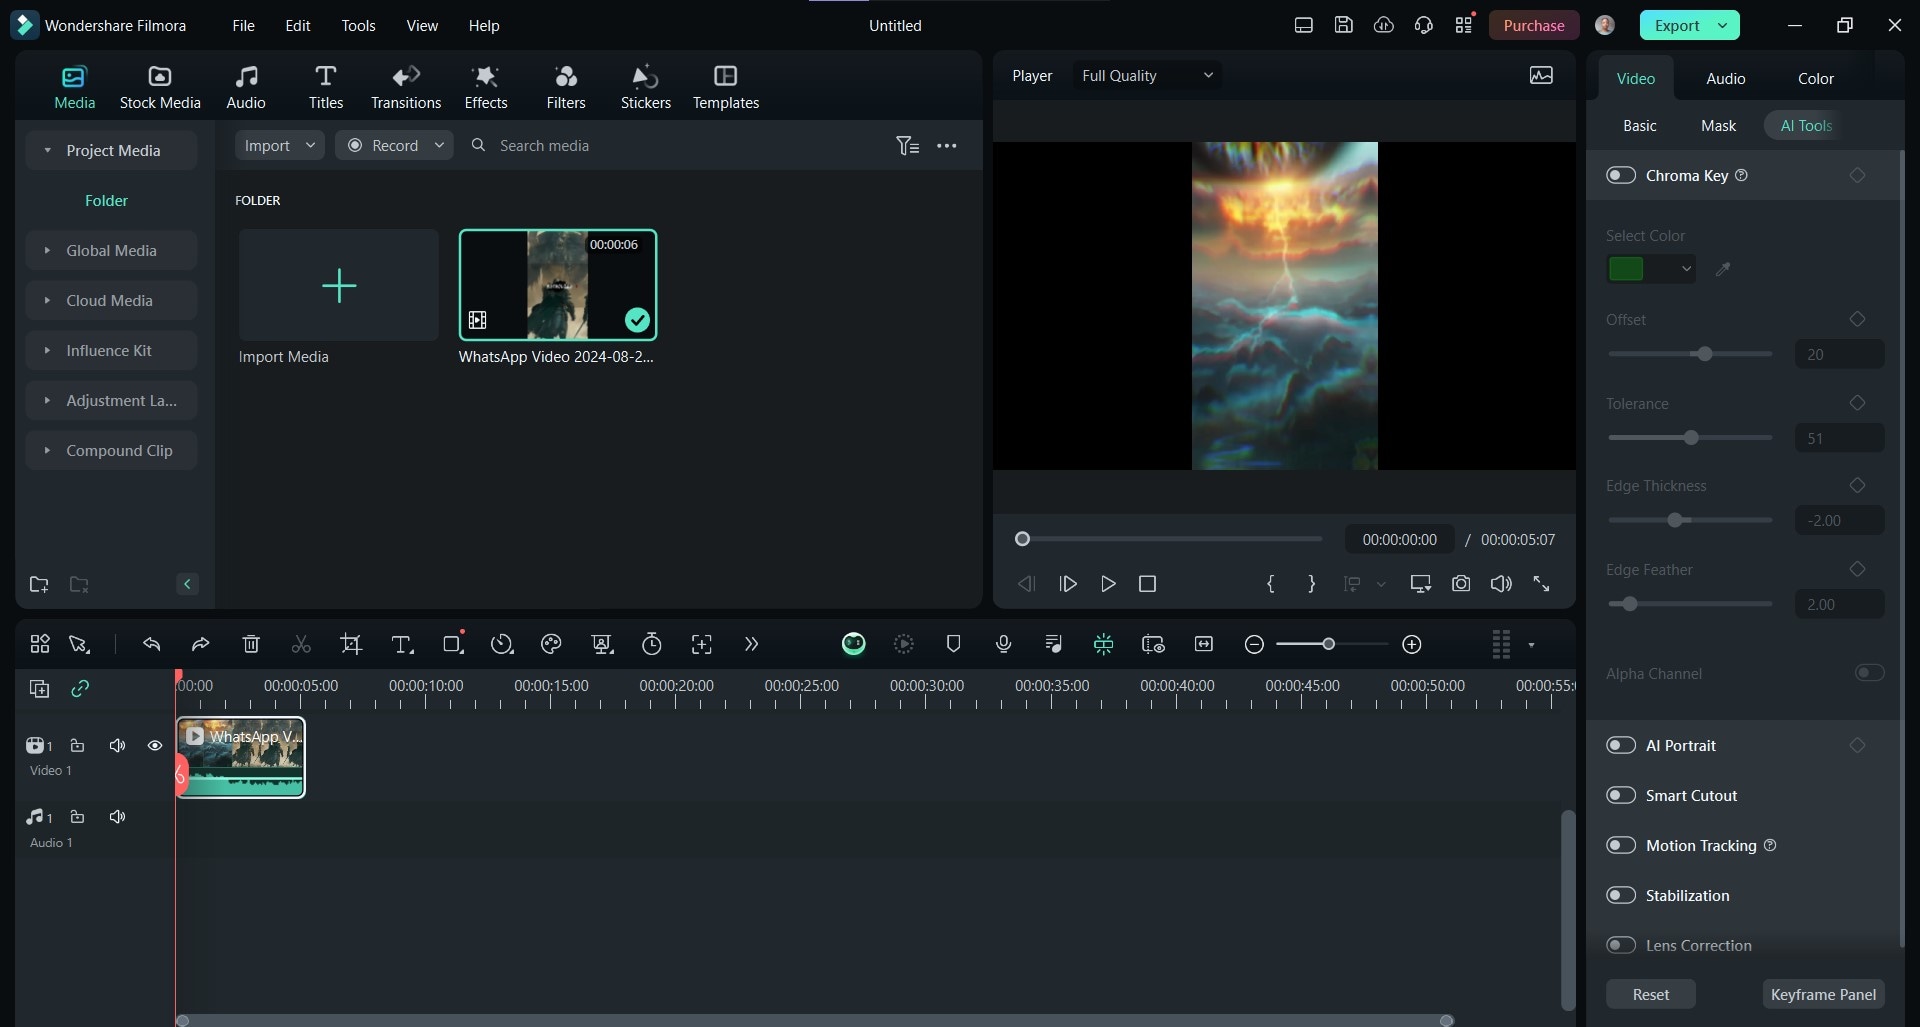
Method 4. Crop the Video
This method involves removing unwanted portions of the video to decrease its dimensions. This helps reduce the sizing of the finished video when exporting it. Here are the steps for using Filmora as a video compressor software for Mac to reduce video size through this method:
- Step 1: After importing your video to the platform and adding it to the timeline, click the Crop icon at the top of the timeline.
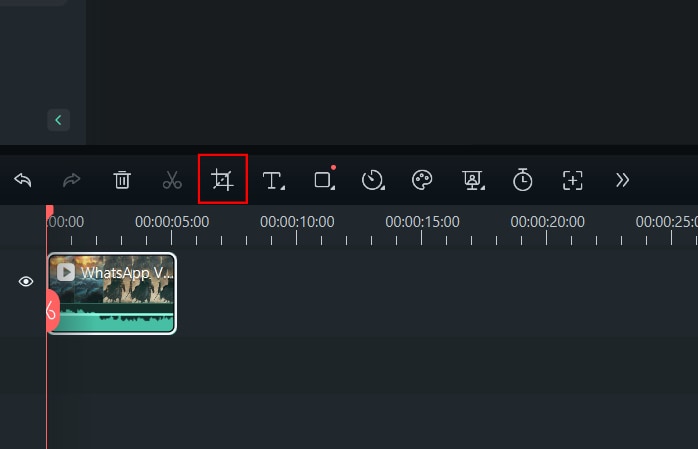
- Step 2: Crop the video to your preferred size, removing unwanted portions of the display. Then, click Apply.

- Step 3: Preview the video and save it to your device by clicking Export.
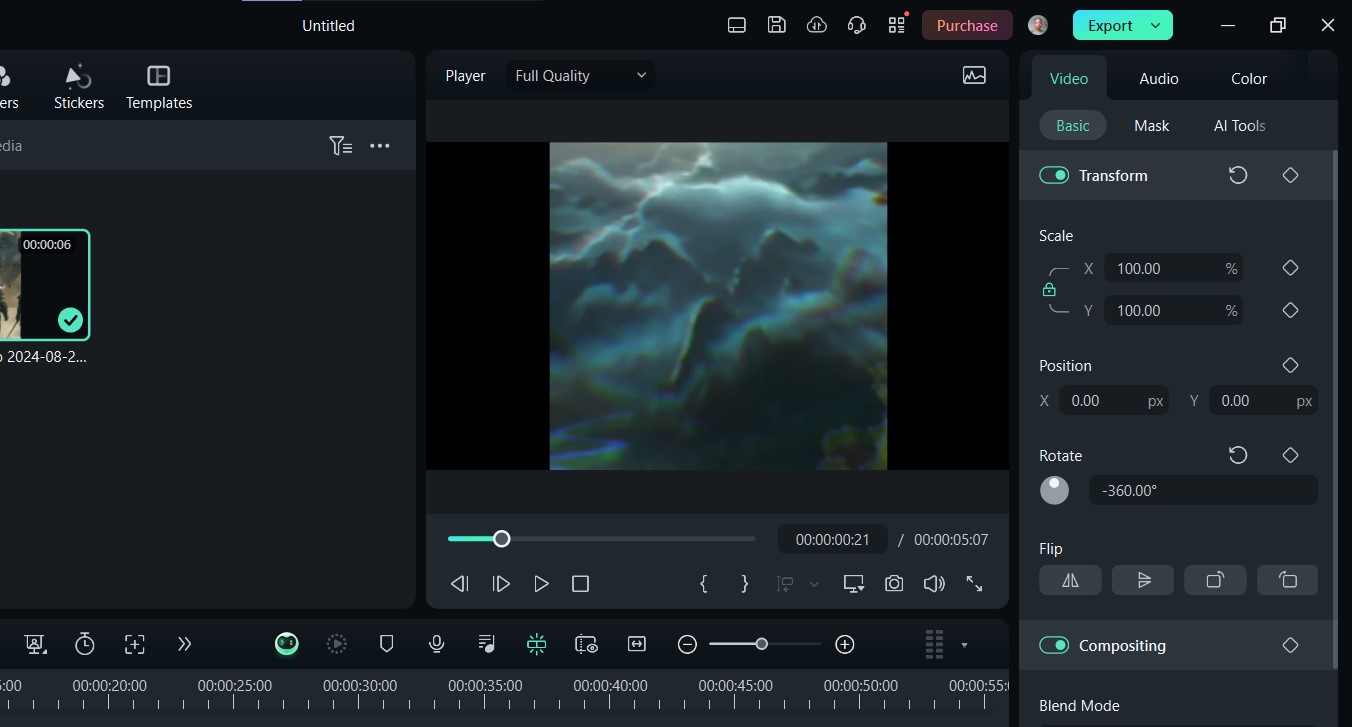
Method 5. Adjust the Bit Rate
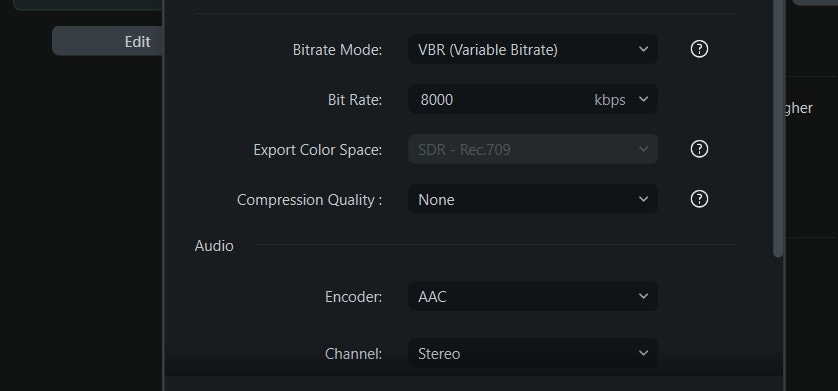
The bit rate essentially determines the size and quality of a video file. The higher the bit rate, the higher the quality, and vice versa. So, while it may impact the video’s quality, you can reduce the size by reducing the bit rate. Here’s how:
- Step 1: Go to the Export panel and click Settings.
- Step 2: In the Bit Rate field, adjust the bit rate by typing in the new rate you want. You can also change the bit rate mode.
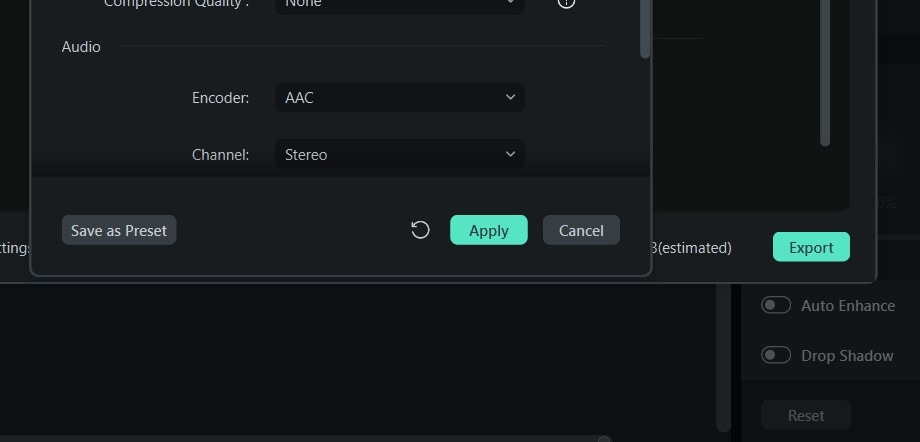
- Step 3: Click Apply and then Export.
Part 3. Effective Tips for Reduced File Size
Before applying even the best video compression software for Mac, various factors need to be set up to ensure your video comes out looking clean and smooth, even though it’s been reduced in size. In this section, you will discover some tips for effectively reducing video sizing in Mac:
- Reduce Noise: Before using compressor software for Macto reduce your video’s size, it’s always a good idea to reduce the noise in the video’s background. You can do this by recording the video in a quiet environment or by using a video editor that offers noise-removal features like Filmora.
- Optimize Audio: When compressing your videos, it is also vital to adjust your audio to reduce the sizing of the final video. You can do this by adding a smaller-sized audio track that aligns with the video’s theme or by editing the existing audio.
- Consider Lower-Resolution Formats: When exporting your video, instead of using the highest resolution, consider using lower formats like 720p or even 480p. You can preview the video to ensure the quality isn't too low before using it.
- Utilize Cloud Storage with Compression Features: Storing your videos on the cloud comes with an added compression functionality if the size is too big. So, when exporting your video, you can opt for cloud storage with these compression features to avoid downloading large video files directly to your device.
- Avoid Over-Compressing: Over-compressing a video can affect its smoothness, clarity, and even quality. This makes the video less attractive and difficult for your audience to understand. As such, you must avoid over-compressing your videos.
- Consider Using a Lossy Audio Codec: Although lossy audio codecs compress files by reducing some data, using them allows you to reduce your video’s size further, so it’s easier to export or share.
Conclusion
Compressing your videos undoubtedly has benefits, and when done correctly, you don’t have to compromise their quality or smoothness. Filmora offers various seamless methods to do this, from video cropping to resolution adjustment.
While it isn’t a completely free video compression software for Mac, you have access to free credits with which you can explore the platform’s video compression capabilities. Once these credits are exhausted, you’ll have to purchase a plan to access all of Filmora’s capabilities. Start your journey today by downloading Filmora from the official website.


 100% Security Verified | No Subscription Required | No Malware

