Have you ever downloaded a video and found an annoying logo in the corner? Watermarks on videos, while intended to protect content, can be distracting for viewers. They can also make the video look unprofessional.
There are different types of watermarks. But the good news is_ there are several methods to remove them from videos. We'll show you a simple trick: blurring. It's like putting on a blur mask to hide the watermark.
Wondershare Filmora, a user-friendly video editing software, offers several easiest ways to blur the watermark on videos.
This article will show you how to blur watermarks on videos. We'll cover different methods, including Filmora's AI Object Remover, blurring options, and cropping tool.
In this article
Part 1. Understand Different Types of Watermarks
Watermarks come in various forms, each having a specific purpose. Understanding the type of watermark you're dealing with is essential for choosing the most effective technique to blur watermark video. Here are the most common types you might encounter in videos:
● Simple Text or Logo:
These are the easiest watermarks to deal with. They're usually just text, like a website address, brand name, or copyright symbol. Often, they stay in one place throughout the video and aren't too big or flashy. Because of this, blurring them out is a good way to make them less noticeable.
● Dynamic Watermarks
Unlike their static counterparts, these watermarks can be tricky. They often change position or appearance throughout the video. They make blurring a bit more challenging. These might be used for tracking purposes and require more advanced removal methods.
● Patterned Watermarks
Sometimes, watermarks appear as repeating patterns or textures embedded within the video itself. It can be quite complex to blur these watermarks on the video. They require a different approach than simple text or logos.
Part 2. Blurring Techniques for Different Scenarios
Get to know the different blurring techniques Filmora offers. Remember, the best approach depends on the watermark type and your desired outcome.

● Gaussian Blur
This is the most common and effective technique to blur watermarks on the video. It softens the edges of the pixels around the watermark, making it blurrier. This decreases its visibility without disturbing the overall video quality.
● Motion Blur
This technique is ideal for dynamic watermarks or videos with movement in the background. It creates a directional blur effect. It mimics the natural blur that occurs when objects move quickly. This can cleverly disguise the watermark within the overall motion of the video.
● Selective Blur
Selective blur is a more targeted approach for watermarks that are particularly tricky or in detailed areas. It allows you to target the watermark while keeping other parts sharp.
Part 3. How to Blur Watermark on the Video Using Wondershare Filmora: 4 Methods
Wondershare Filmora is a complete video editing software having a wide range of editing features. You can blur the watermark on the video quickly using the following simple techniques:

Method 1: AI Object Remover for Watermark Removal (Quick and Easy)
The AI Object Remover is a new feature in the latest version(V 13.6 and above) of the Wondershare Filmora. It uses artificial intelligence to detect and remove watermarks. It's a fantastic option for quick and accurate watermark removal. Now you don’t need to struggle with the manual removal of watermarks. Instead, you can use this video watermark remover with no blur for quick removal. Fortunately, the quality of your video will not be affected.

How to Blur Watermark on Videos Using Filmora AI Object Remover
- Step 1. Download and install Wondershare Filmora.

- Step 2. Click “Create New Project” to proceed. Then, click the> Import and select the video containing the watermark you want to remove.

- Step 3. Drag the imported video and place it on the editing timeline at the bottom. Play the video to identify the watermark location.
- Step 4. Go to the "Effects" panel, and click the "AI Object Remover" effect. Color the watermark with the brush.
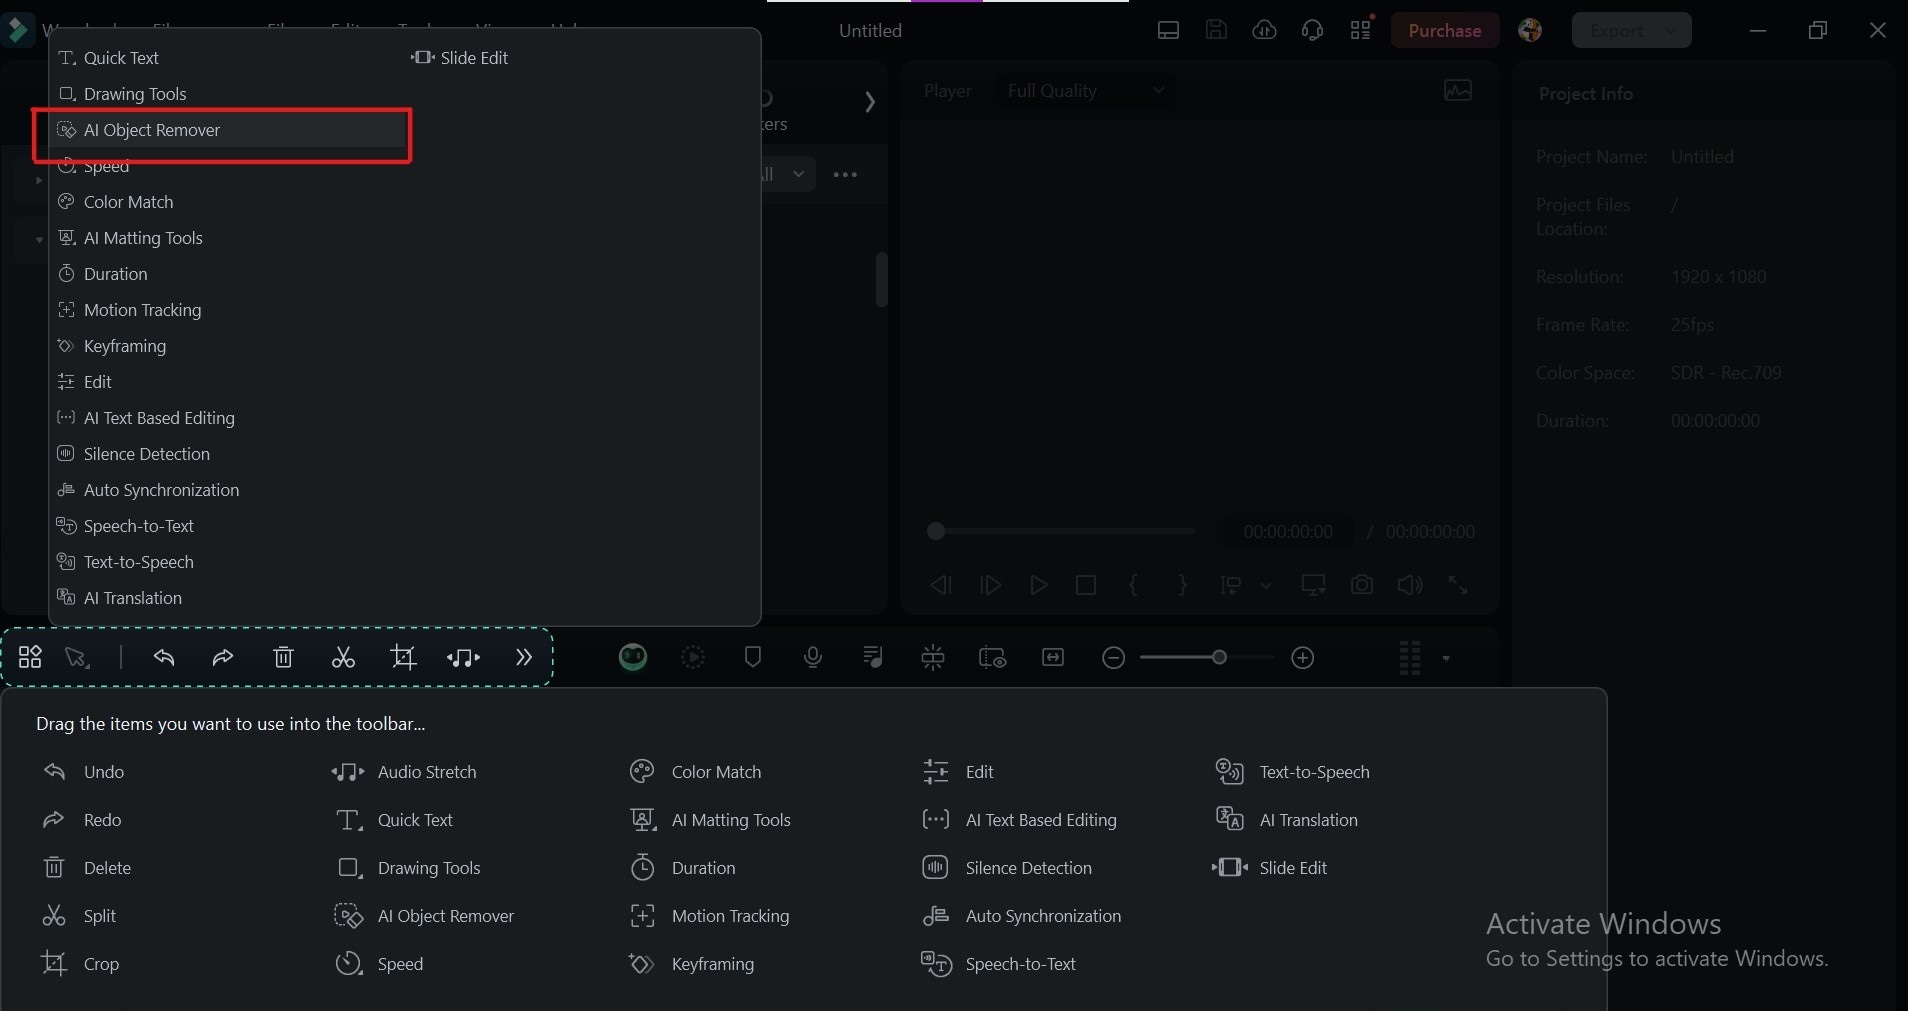
- Step 5. Simply Click> Remove. Play your video to see how it looks now.

- Step 6. Once satisfied, click the "Export" in the top right corner to save your watermark-free video.

Method 2: Gaussian Blur for Simple Watermarks
Gaussian blur is a simple yet effective feature within Filmora. It’s suitable for logos or text. Here's how to blur the watermark on the video using this technique:

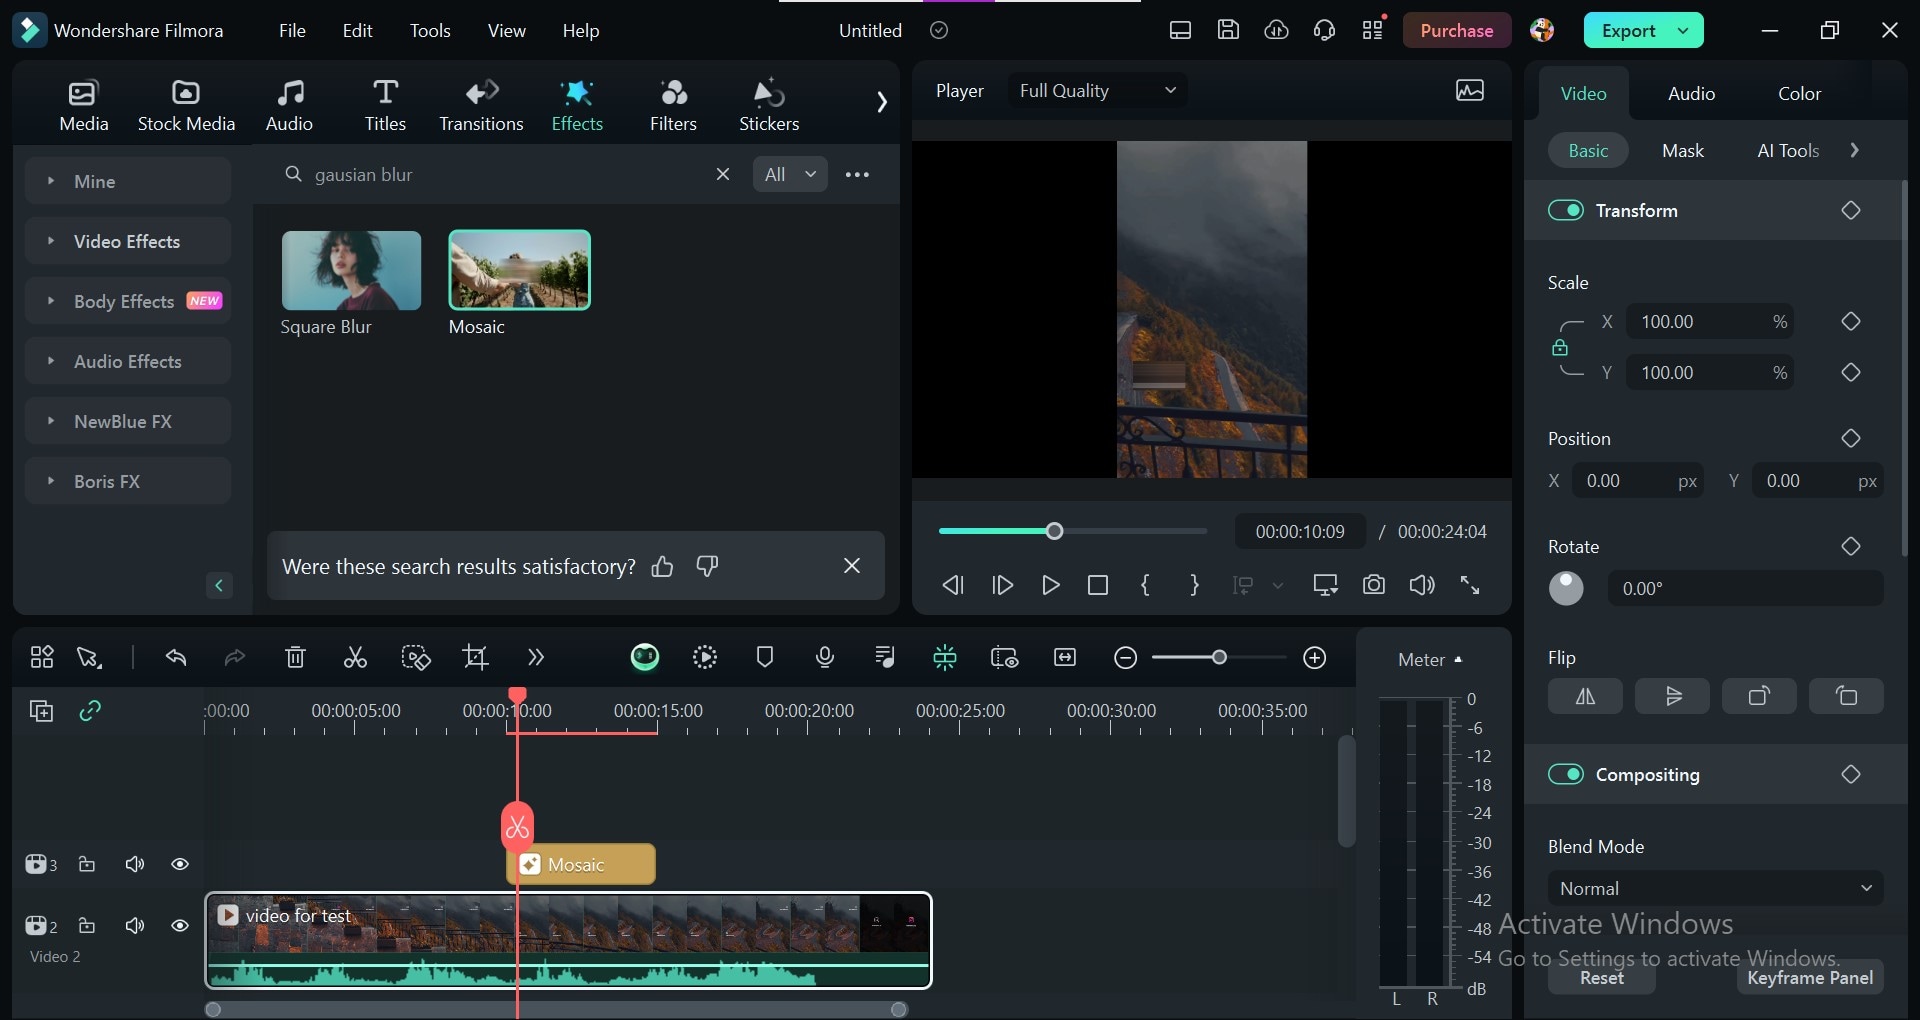
- Step 1. Head over to the "Effects" on the top menu. Search "Gaussian Blur" in the search bar. Drag and drop the effect onto the video track above the clip with the watermark.
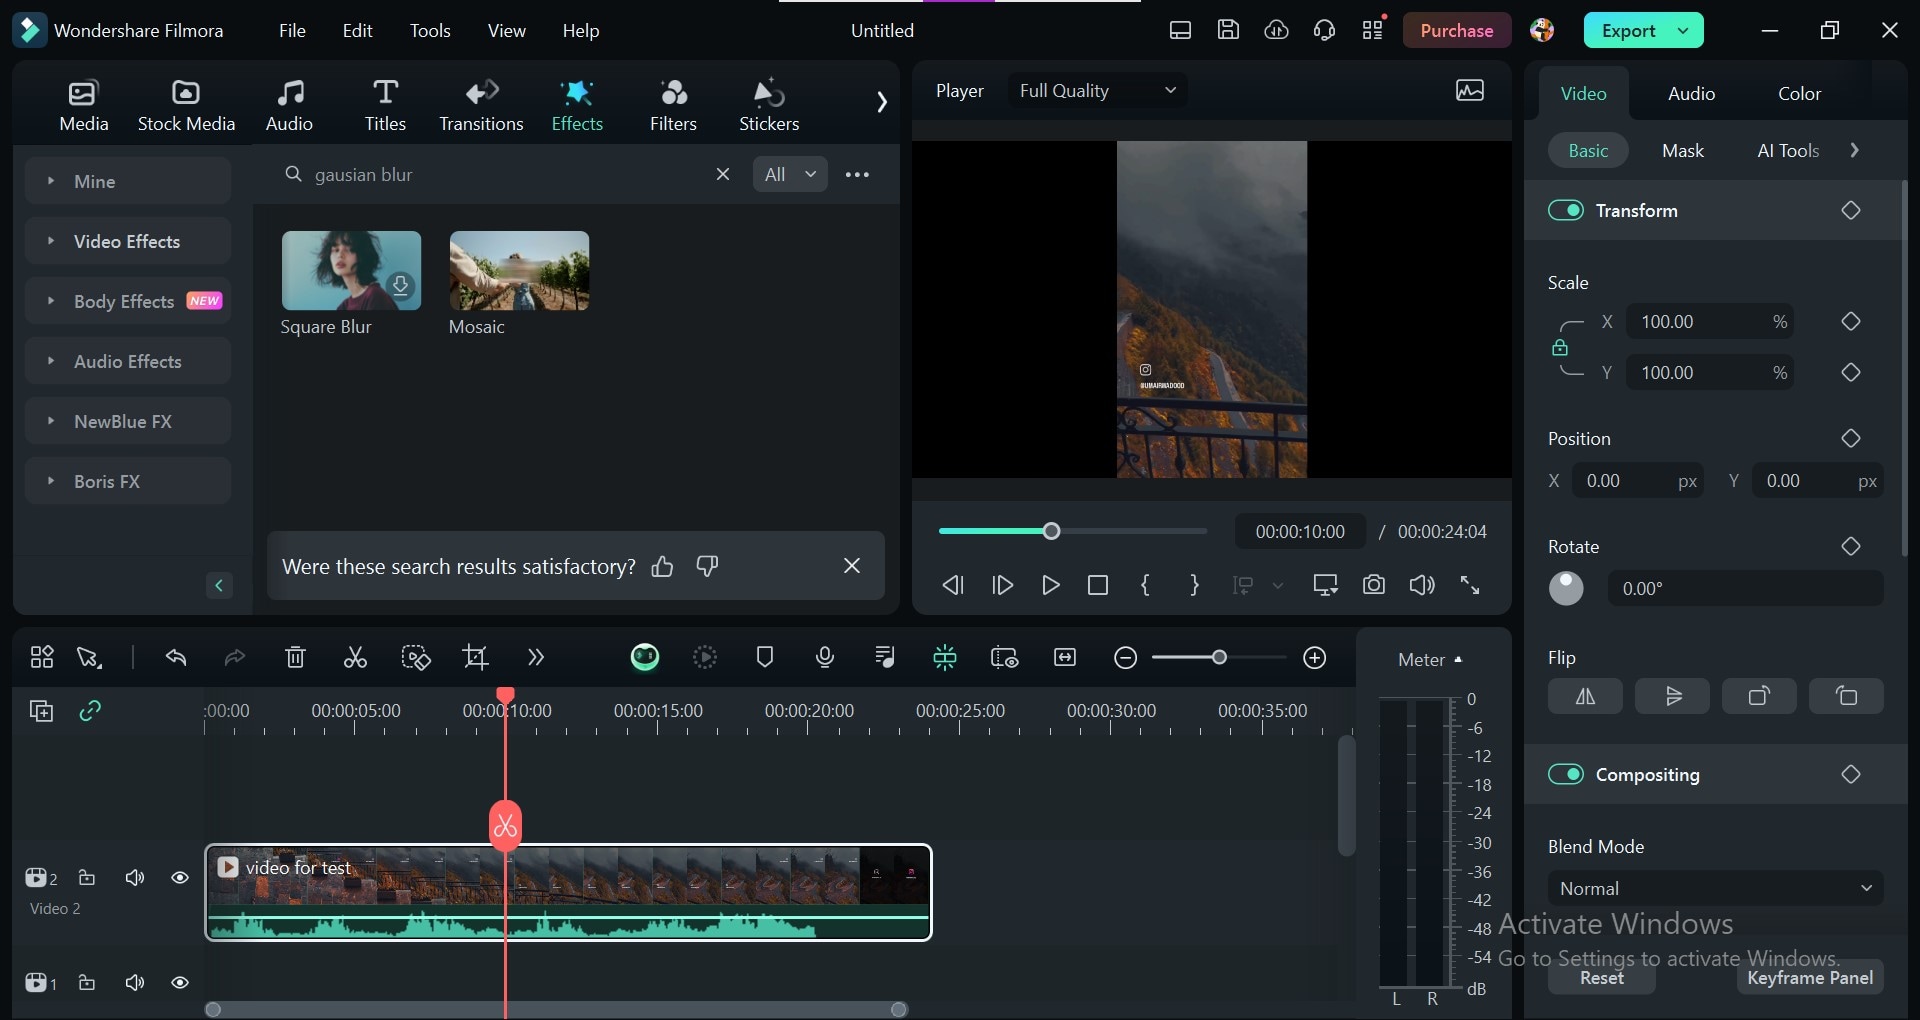
- Step 2. Double-click the "Gaussian Blur" effect and drag it on the timeline. Adjust the square size, opacity, and blur amount.
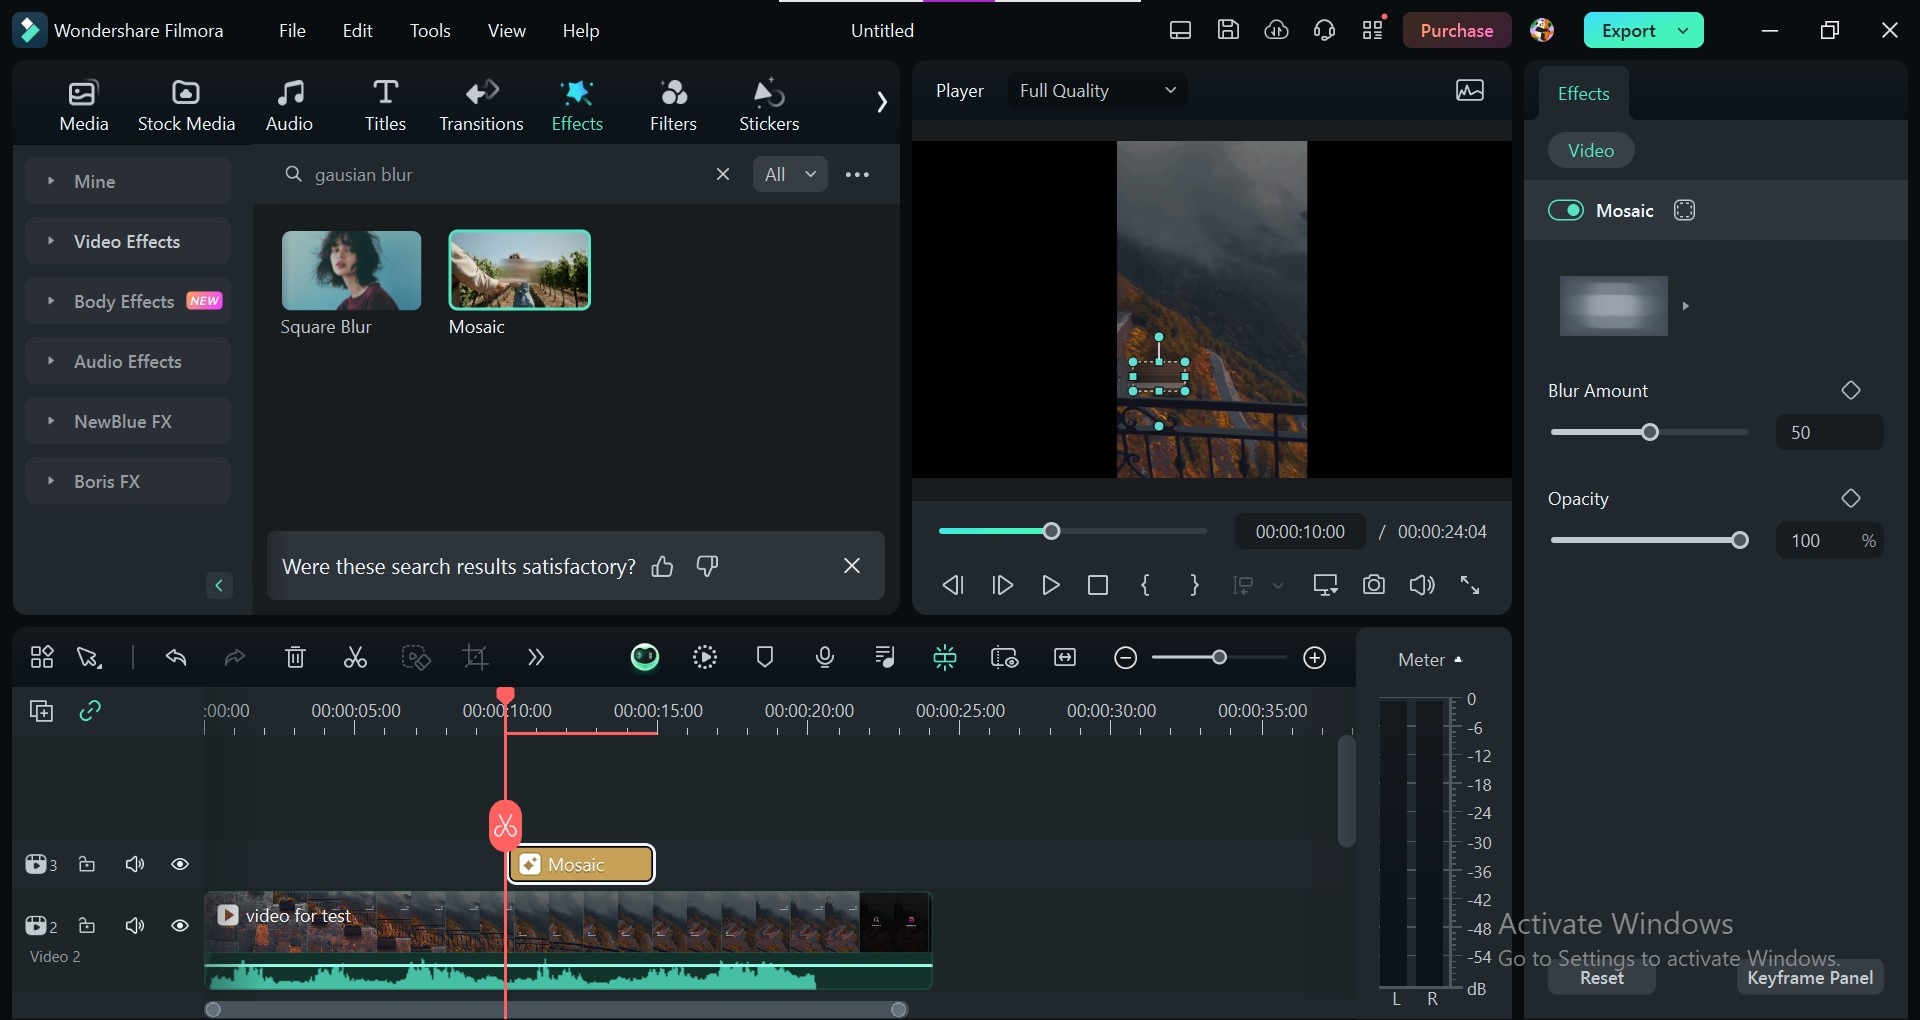
- Step 3. Play the video preview to check the effectiveness of the blur. Adjust the blur opacity until the watermark is invisible without compromising video quality.
Method 3: Blur the Watermark on the Video Using Motion Blur
Motion blur can be a more suitable choice to blur the watermark on the video that moves or the video with a dynamic background.

- Step 1. Go to > Effects and write "Motion Blur” in the search bar.
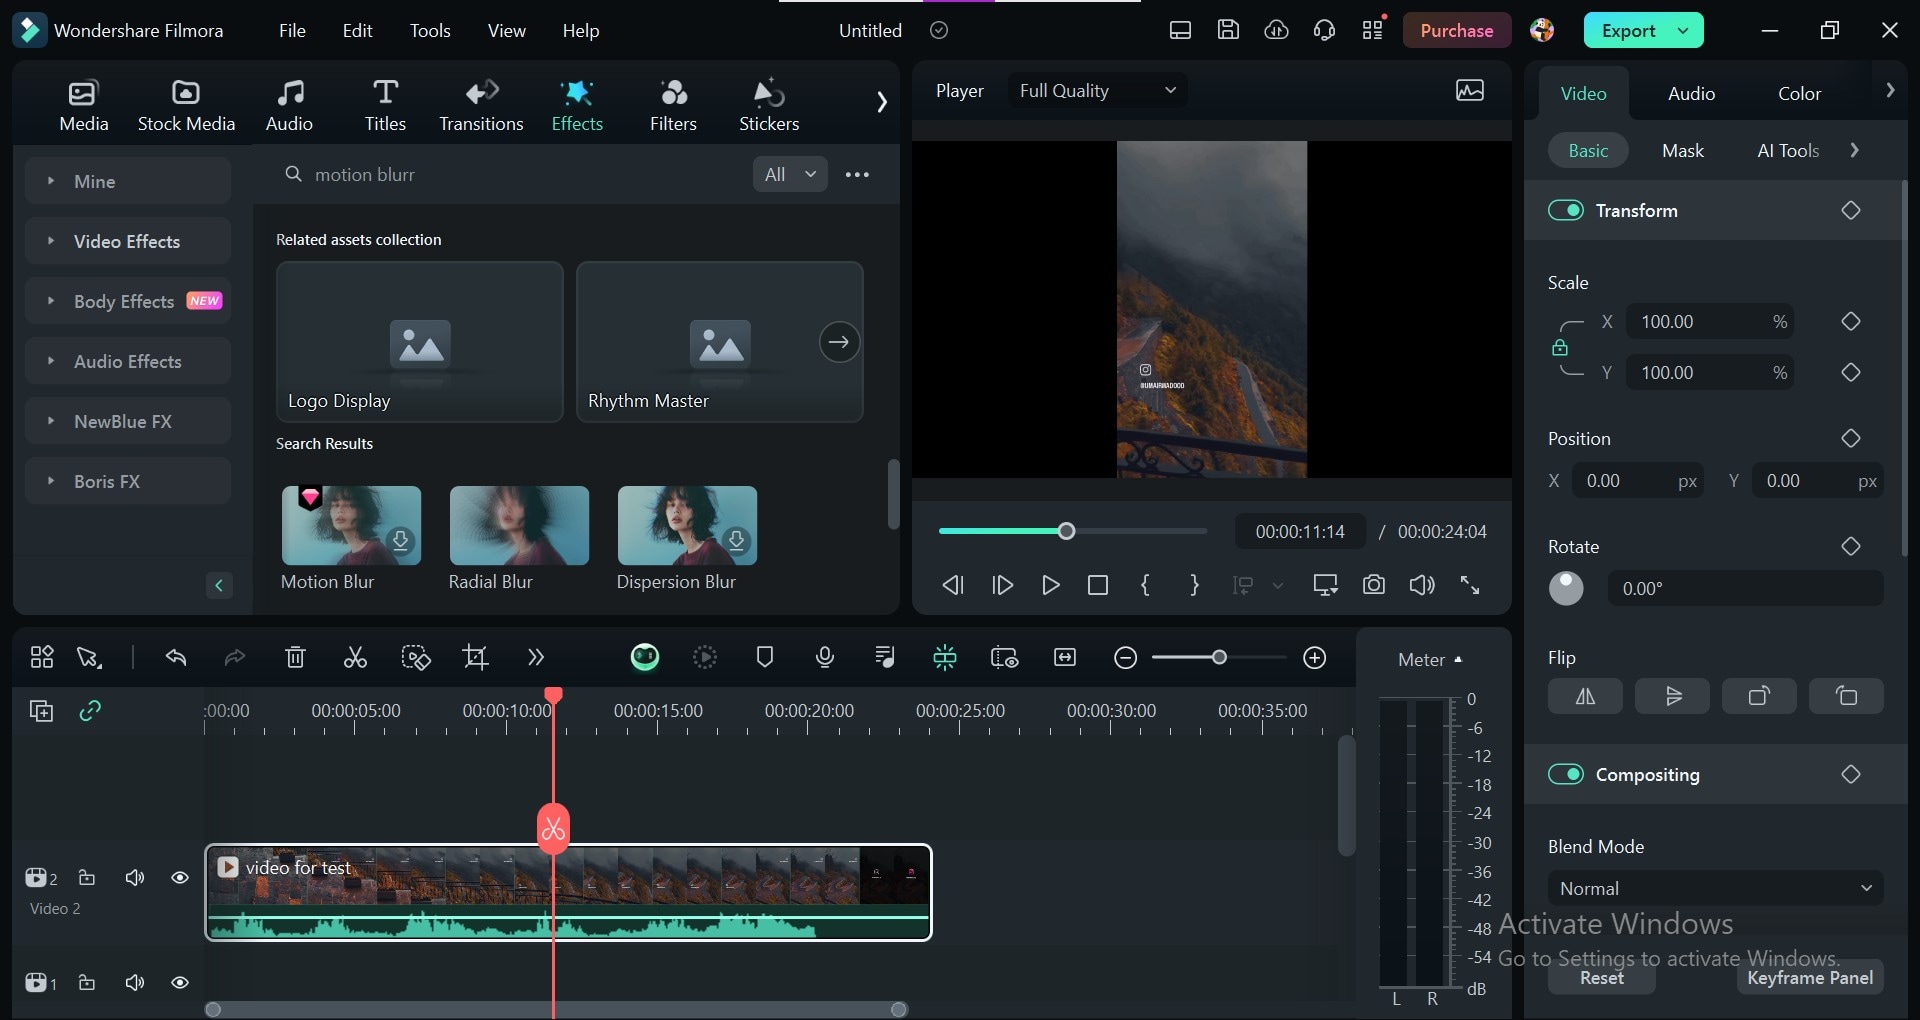
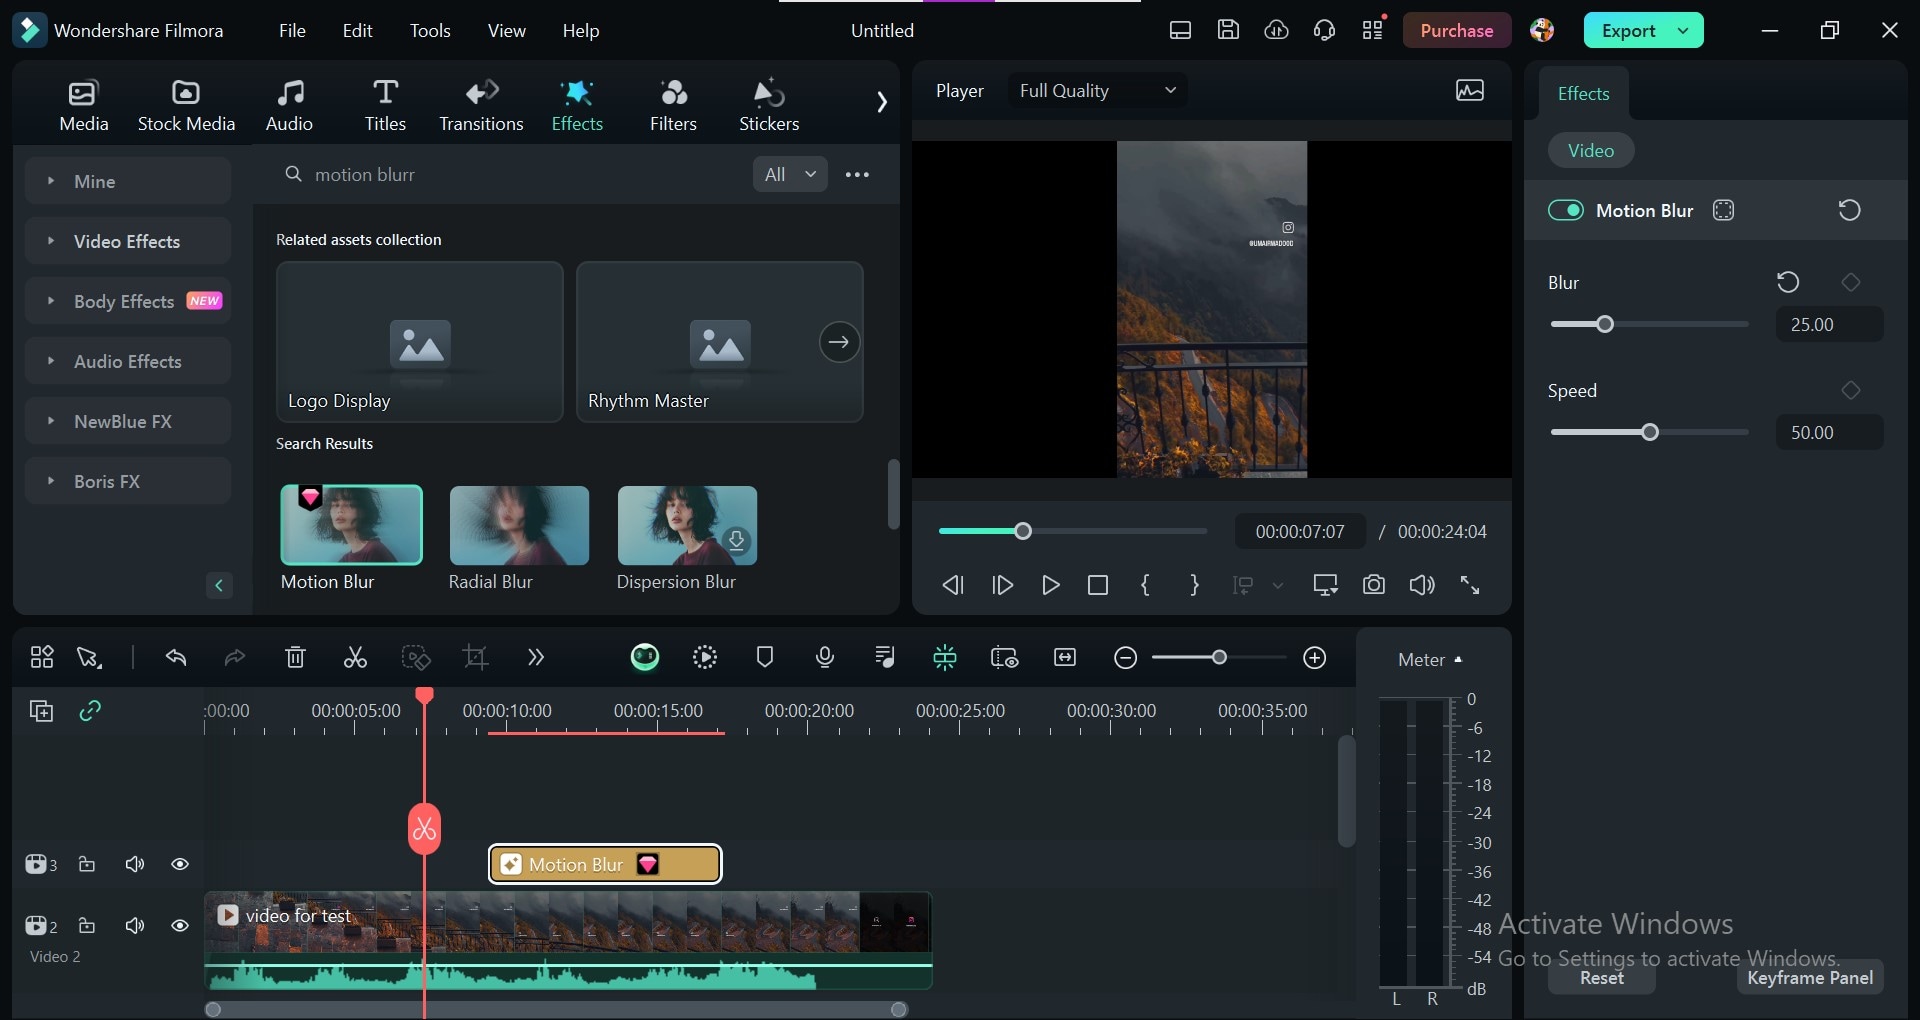
- Step 2. Drag and drop the effect onto the video track above the clip with the watermark. You'll see options for "Blur" and "Speed." Adjust the speed and increase the "Blur" to create a stronger blur effect that conceals the watermark.
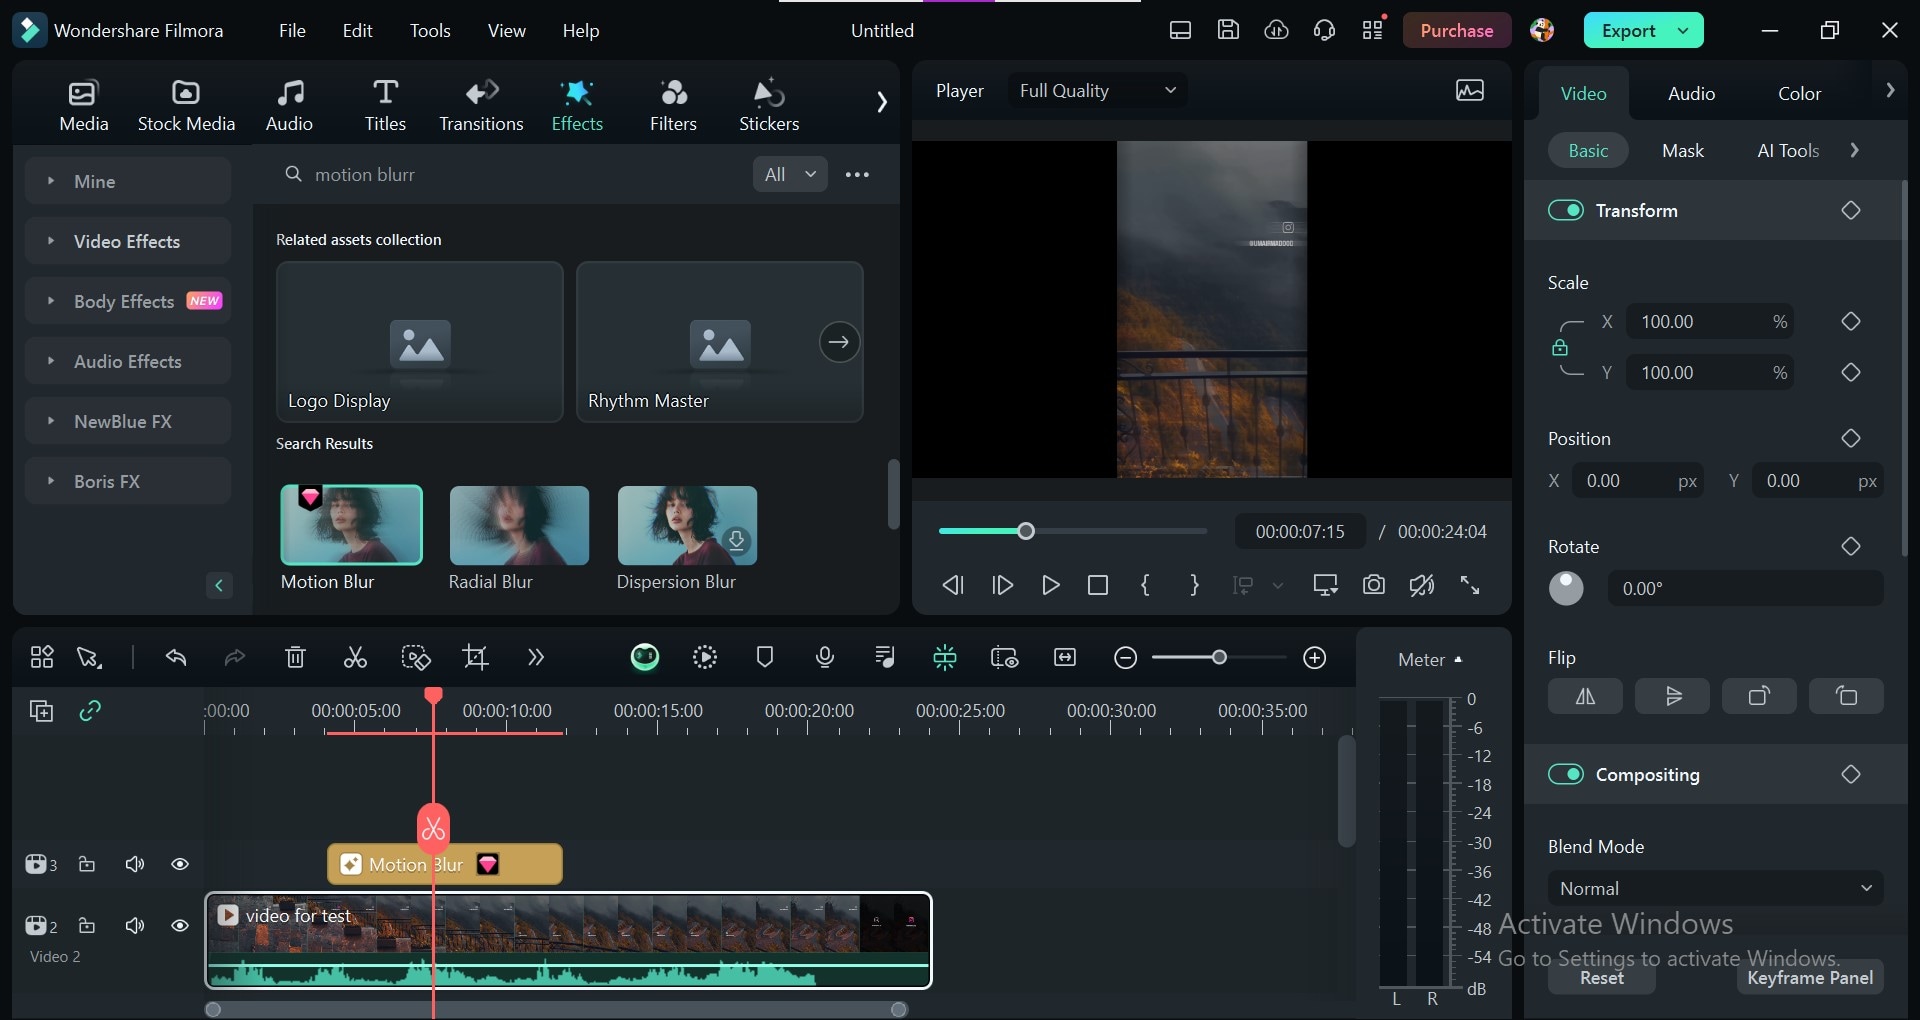
- Step 3. Play the preview to assess the effectiveness of the motion blur. Fine-tune the angle and intensity until the watermark is masked within the background motion.
Method 4: Cropping for Watermarks on Edges
Use the Filmora cropping tool to blur the watermark on the video if it’s located on the edge of the video and doesn't contain important content.
How to Do It?
- Step 1. Search Crop Tool in the toolbar. Its icon has square and diagonal lines.
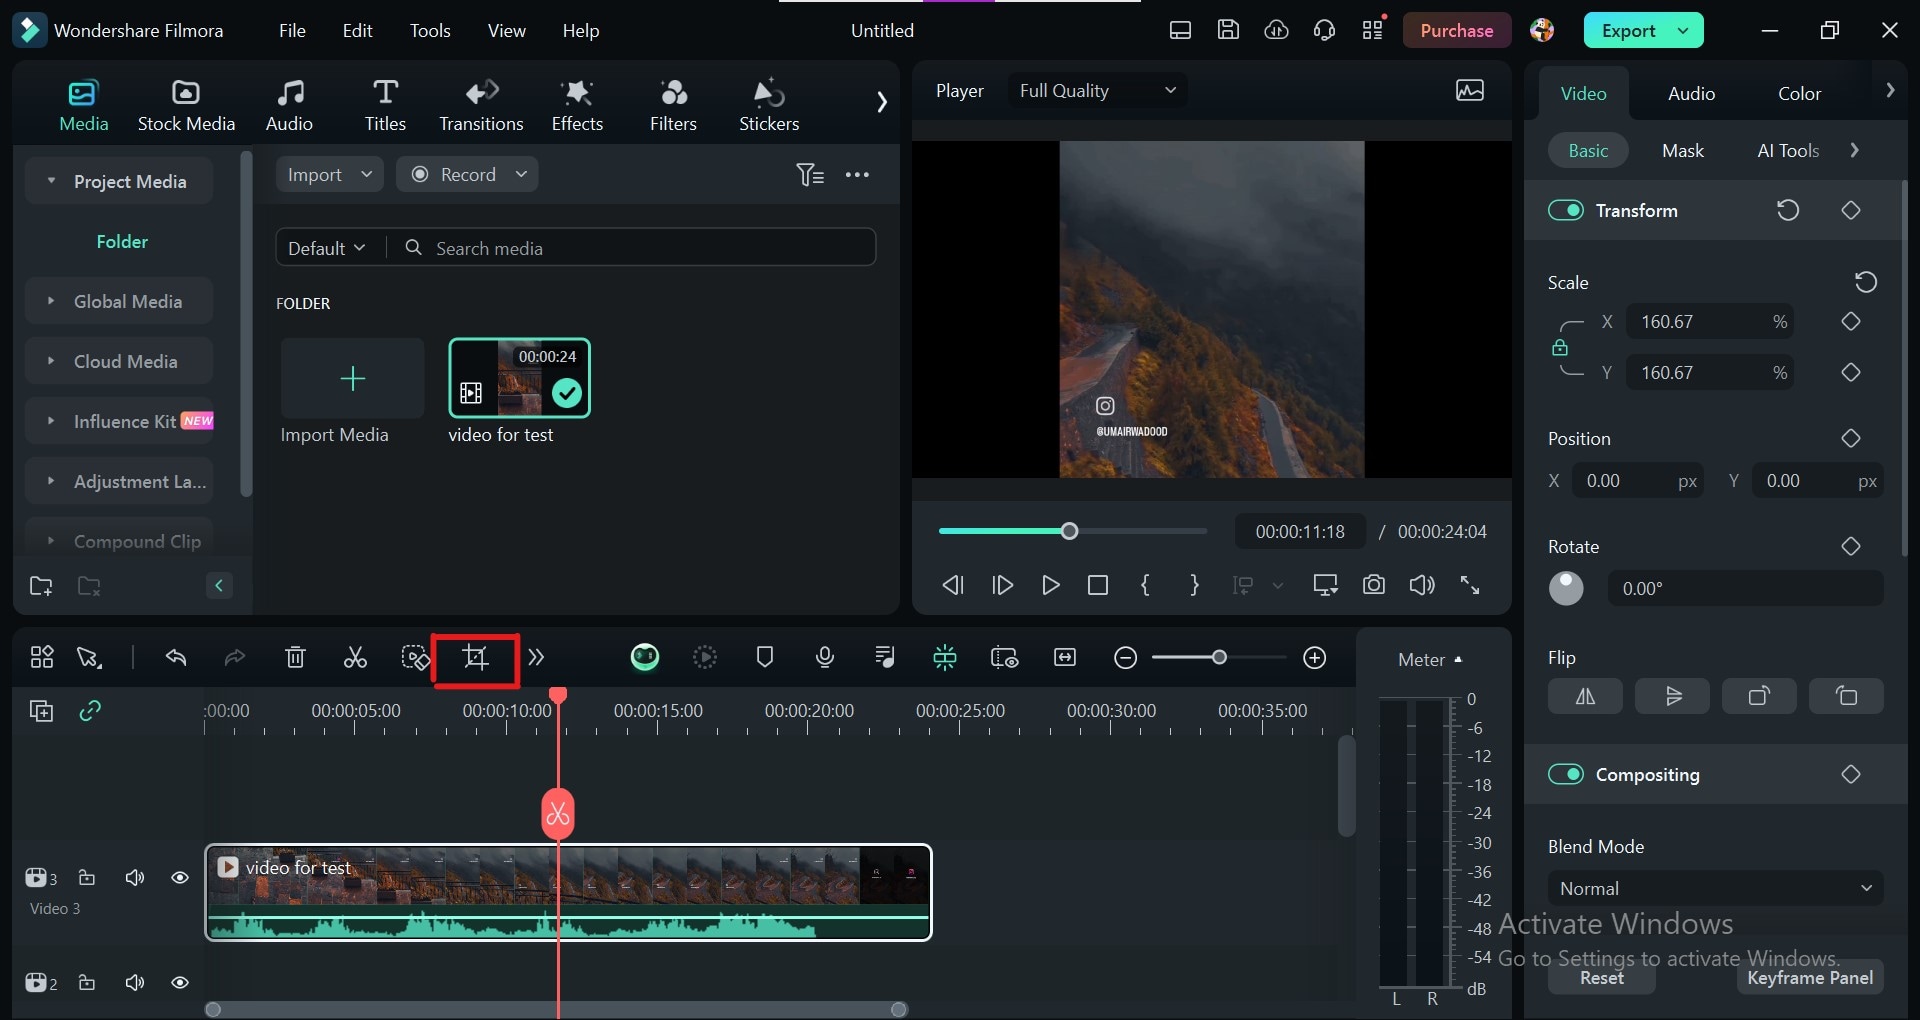
- Step 2. Click the crop tool icon. Drag the cropping handles inwards to exclude the watermark from the video frame. You can also adjust the crop area by dragging the entire crop box.

- Step 3. Click Apply to crop the watermark. Play the video preview to ensure the watermark is successfully cropped out. Cropping removes a portion of the video along with the watermark.
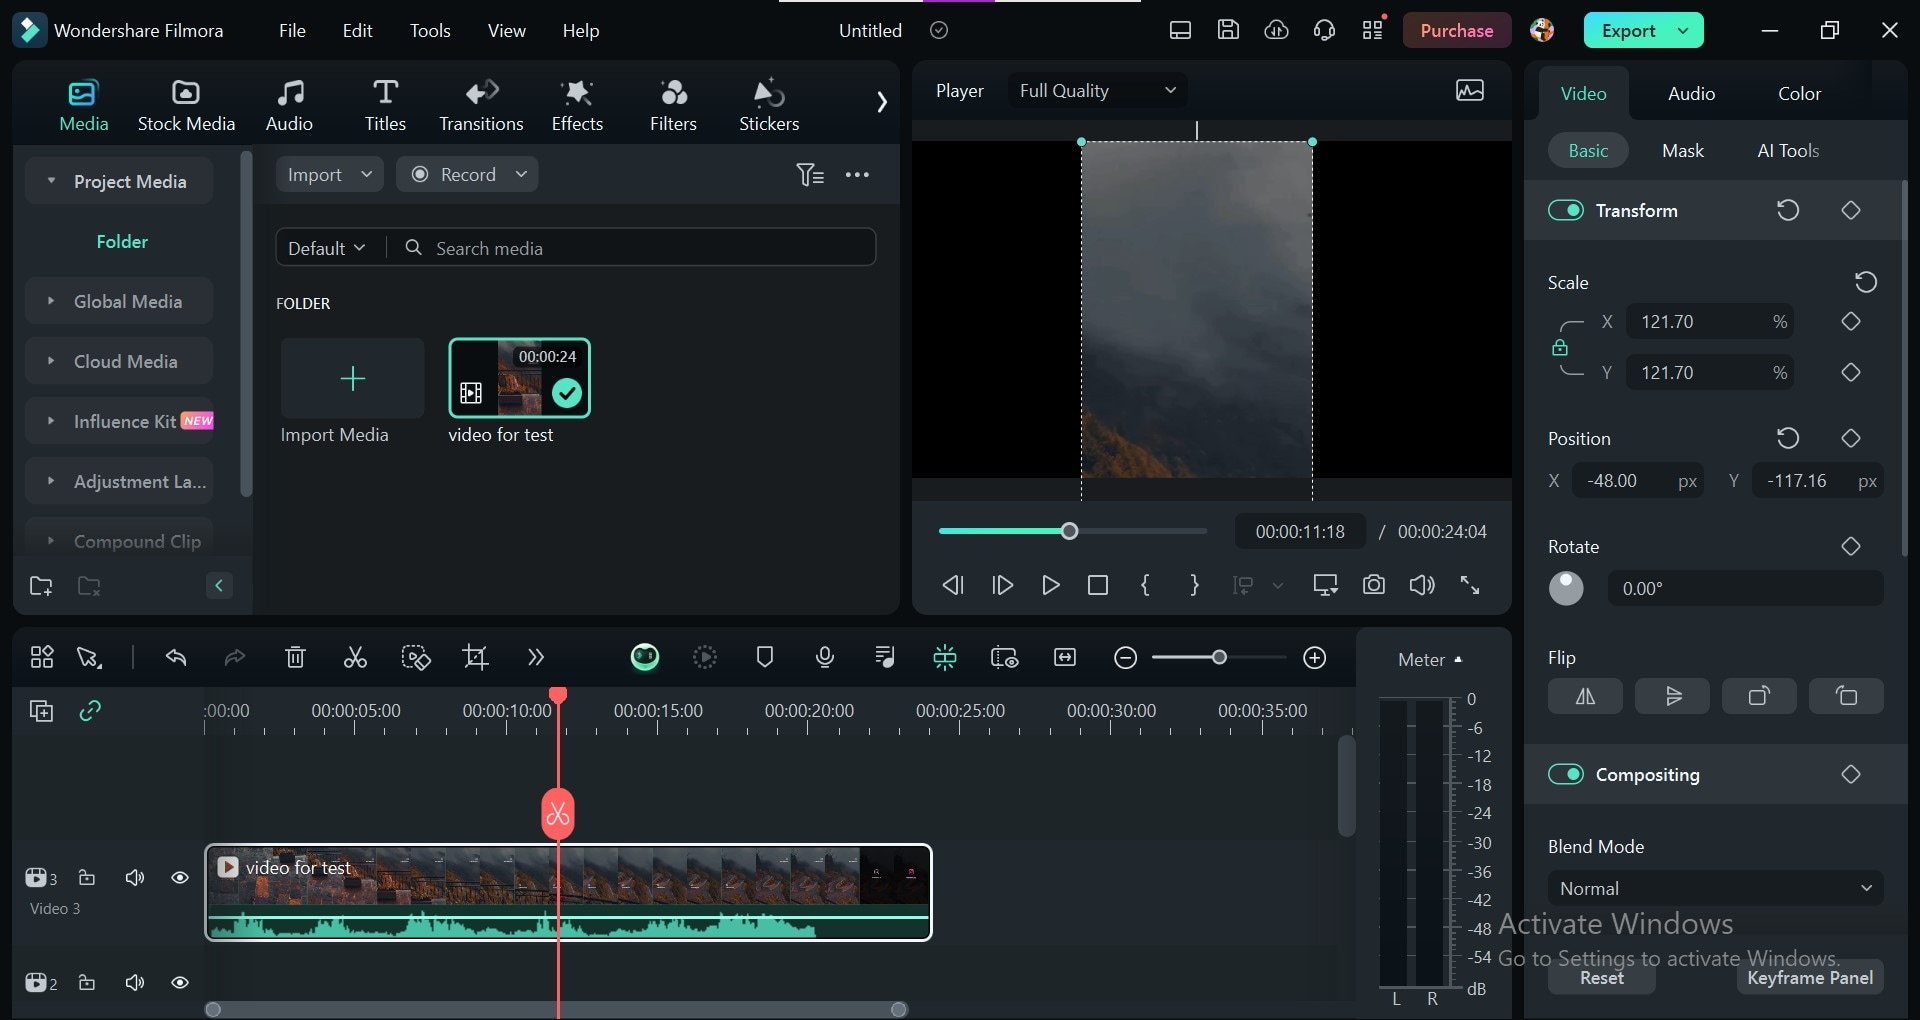
Remember! Cropping is a permanent edit and reduces the overall video size. Use it only when the watermark is on the edge and doesn't affect the core content.
Part 4. Pro Tips for Flawless Blurring
Besides using Filmora’s video watermark remover with no blur tool, level up your blurring with these simple tricks:
- Blur Gently:Don't blast the blurry intensity right away. Start slowly increasing it until the watermark hides. This gives a natural look and avoids a blurry mess.
- Match the Background Blur:For moving watermarks or backgrounds, blur in the same direction as the movement. This makes it look like the blur is part of the video, not a patch job.
- Color Correction: A slight color shift can occur around the blurred area after blurring. Use Filmora's color tools to fix any color shifts around the blurred area for a smooth transition.
- Sharpen Up: Blurring can soften the rest of the video. Use Filmora's sharpening tools to bring back a clear contrast with the blurred watermark.
- Preview and Repeat:Preview your video as you blur. Make the required changes- until the watermark vanishes out completely.
Conclusion
We discussed some simplest techniques to blur watermarks on the video. Now these watermarks don't stand a chance against your newfound knowledge.
Choosing the right blurring technique is important – for simple logos, a quick blur will do. For trickier watermarks, use Wondershare Filmora's video watermark remover with no blur. You don’t need to learn complex methods, this tool is quick and accurate. Moreover, it's easy to use and saves you time.
The best blur depends on the watermark itself. Wondershare Filmora makes it easy to try all the options and find the suitable one. With a little practice, you'll be creating videos without any watermark distractions.


