
Are you frustrated by manually cutting scenes without scene edit detection? Cutting the long videos into different scenes by hand can be complex. It takes a lot of hard work and can lead to many mistakes. Do not stress anymore!
Sence edit detection is the ultimate solution to your problem. It saves your energy by automatically cutting videos into smaller scenes for you. It works like magic and transforms hours of hard work into smart work.
This guide will explore what scene edit detection in Premium Pro is. You will also learn how it works and how to use it. Moreover, we will explore reputable tools like Wondershare Filmora to ease your life.
Let’s jump in!
In this article
Part 1 What is Scene Edit Detection in Premiere Pro
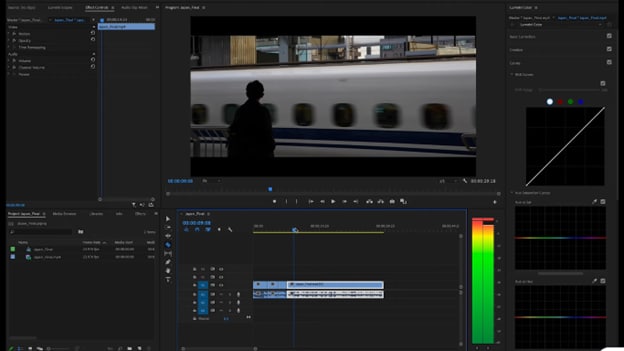
Scene edit detection is a feature in Premiere Pro that automatically cuts scene changes in videos. It identifies where one scene ends and the other starts. This allows you to focus more on creative editing than manually cutting scenes.
Without this feature, video editors face many problems. Finding original edit points in a final video file is hectic and time-consuming. Moreover, working by hand might lead to many errors.
However, scene edit detection saves a lot of time and makes video editing easy. You can smoothly add transitions and effects to your videos.
Key Features of Scene Edit Detection in Premiere Pro
Some of the key features of scene edit detection that you can benefit from are:
- Automatic Scene Detection: It automatically analyzes the videos and detects their scene changes. This saves you from manually splitting the scenes.
- Split the Video: Once the scenes are detected, the video is split into smaller clips.
- Efficient Editing: It helps you quickly add effects and transitions to each scene.
- Uses AI technology: Scene edit detection uses machine learning and AI to detect cuts in the videos automatically.
- Customization Options: You can adjust the settings to detect the right cut points for different videos.
Part 2 How To Use Scene Edit Detection With Premiere Pro
Imagine having a superpower that automatically detects edit points for you. Learning to use scene edit detection with Premiere Pro is that power. It enhances your overall productivity.
People always look for efficient solutions. With this feature, they can easily focus on the fun editing side.
So, grab your notes and learn how to use scene edit detection. Follow the steps to ease your editing process.
Method 1. Scene Edit Detection With Premiere Pro
Scene edit detection in Premiere Pro is an efficient way to identify edit points. This step is necessary before adding color grading, effects, or reframing the scenes. Say goodbye to hours of work. Learn this feature to level up your video editing.
It makes editing very easy and fast. Let’s explore the step-by-step guide for a better understanding.
Steps of Using Scene Edit Detection With Premiere Pro
Here are the detailed steps for using scene edit detection in Premiere Pro:
Step 1: Open Adobe Premiere Pro and the video you want to edit.
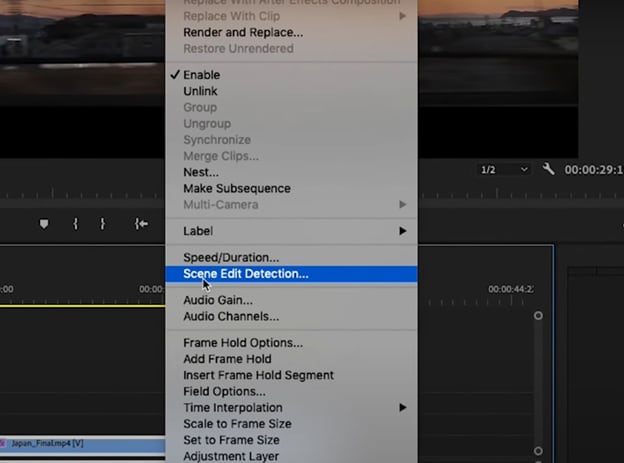
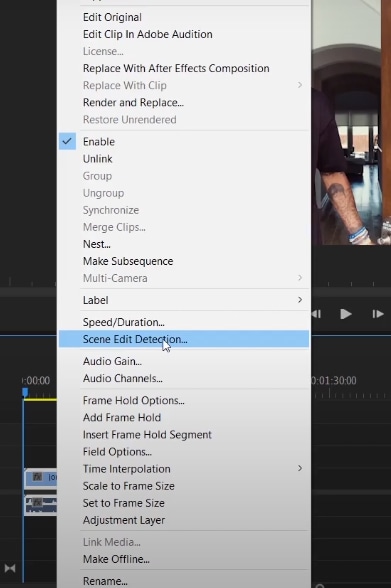
Step 2: Right-click on the clip in the timeline and choose the "Scene edit detection" option.
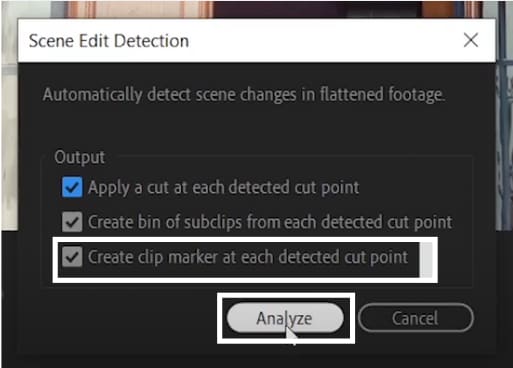
Step 3: A popup window will appear. You will have the option to add cuts and create markers at each edit point in the video. Then, click on the first option.
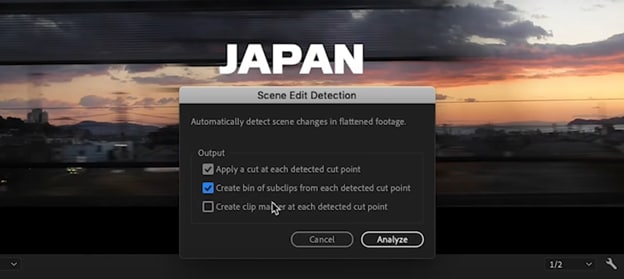
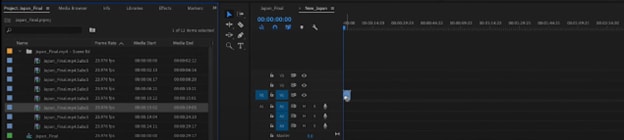
Step 4: Then, Click on the "Analyze" button. The cut clips are placed in a separate bin folder. They can be edited by placing them on the timeline.
Step 5: Then, you can apply the adjustments, such as color modification or automatic reframing, to each scene.
And Congratulations! You have learned scene edit detection in simple steps. If you want a neat and clean timeline, continue reading the following method.
Method 2. Scene Edit Detection with Premiere Pro Using Scene Markers Only
Using markers is the best way to keep your timeline organized. You don’t need to cut your videos into many pieces. Markers are the indicator points in your videos where the scene changes.
Video editors love this method. It is very helpful for future editing or transitions. So, don’t wait to learn how to apply this method to your videos. Let’s start!
Steps of Using Scene Edit Detection with Premiere Pro Using Markers
Here is the step-by-step guide to applying markers to your videos:
Step 1: Open Adobe Premiere Pro and your video project.
Step 2: Right-click your clip on the timeline and select the "Scene Edit Detection" option.
Step 3: You will see options on the screen. Select the third option, "Create a clip marker at each detected cut point." Then, click the "Analyze" button.
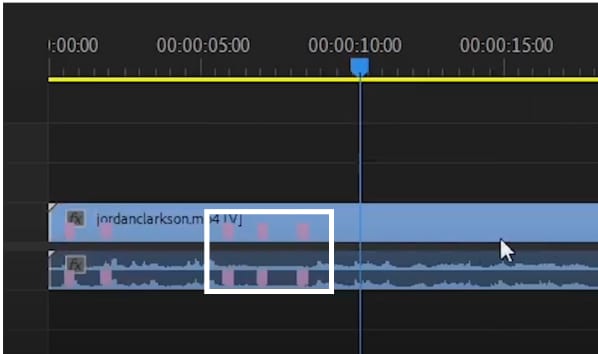
Step 4: You can see the markers on the clip by expanding it on your timeline.
Step 5: You can edit or save these cut points for future editing.
Part 3 Why Scene Edit Detection Premiere Pro Not Working
Are you frustrated that scene edit detection in Premiere Pro does not work? You are not alone! Although Adobe Premiere Pro is a powerful tool, sometimes you can face challenges. There could be multiple reasons for this problem.
Let’s explore some of these reasons:
- Low Accuracy: Scene edit detection might miss cuts or do incorrect splits in complex or lengthy videos.
- Performance Problem: Sometimes, Adobe Premiere Pro can get slow when working on lengthy videos. It might lag and slow down the whole process.
- Compatibility Issues: There can be compatibility issues if the feature is not working on your video.
- Difficulty on Complex Videos: It might incorrectly split scenes in too fast or complex videos.
- Time-consuming: Detecting cut points in large videos can take a lot of time. Users must wait long to proceed.
Solutions for Using Scene Edit Detection in Premiere Pro
Worry not! We are here to guide you. Some solutions to these problems are:
- Update Adobe Premiere Pro: Use the latest version of Adobe Premiere Pro. It will help to avoid compatibility issues.
- Work on Smaller Videos: Try working on smaller video projects. This will avoid slow performance and give accurate results.
Bonus Tips for Using Scene Edit Detection in Premiere Pro
Some bonus tips for using Scene Edit Detection in Premiere Pro are given as:
- Manually Check Results: After the scene edit detection process, always check whether the cuts are correct. This will provide more accurate results.
- Adjust Customization Settings: Adjust the settings manually to get the exact cut points.
If you want to explore more advanced and smart tools, keep reading.
Part 4 Wondershare Filmora: Let Your Video Cut Smarter
Are you looking for an efficient and more innovative tool to cut your videos? Worry not! Introducing the flawless software "Wondershare Filmora." It is a versatile solution for every sector.
It offers endless impressive features. Moreover, it has an easy-to-understand and interactive interface. Filmora is a game-changer for video editors. They can effortlessly detect and trim the cut points in videos.
Automatically cut scenes from a video and let your creativity shine.
Key Features of Smart Scene Cut in Filmora
Some of the key features of smart scene cut in Filmora are:
- Automatic Scene Detection: The smart scene cut in Filmora automatically detects and cuts scene changes in videos. It saves many hours of manual cutting.
- Integration of Effects: You can flawlessly add effects, transitions, or colors once cut points are identified.
- Use of AI: AI technology ensures exact cut points are identified. It provides more accuracy and reduces any mistakes.
- Smooth for Large Videos: It can smoothly identify the cut points in large video projects. You don’t have to wait too long—it only takes a few clicks and seconds.
- Audio Editing: It allows you to edit audio that aligns with each scene. You can adjust the sound levels and effects according to the scene changes.
- Effortlessly capture standout scenes with precision.
- Customize object selection for targeted highlights.
- Enhance storytelling with automated scene detection.


Step-by-Step Guide To Using smart scene Cut in Filmora
In this guide, we will learn about Filmora's smart scene cut and other effective features. These features include applying text, transition effects, and much more. Let’s learn!
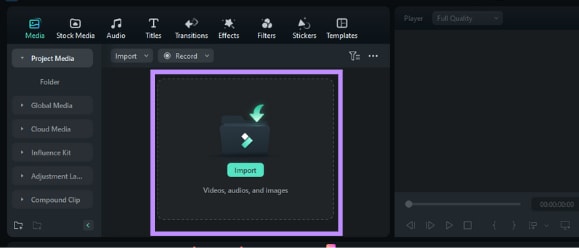
Step 1: Firstly, download and install Filmora software on your computer.
Step 2: Launch Filmora and import the video project you want to edit.
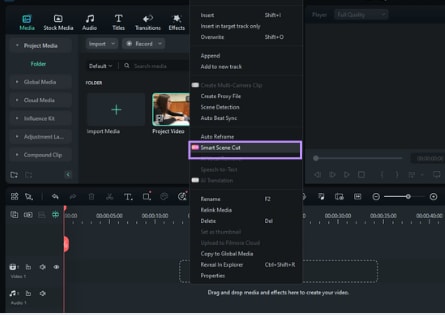
Step 3: Right-click on the video. Then, select the "smart scene Cut" option.
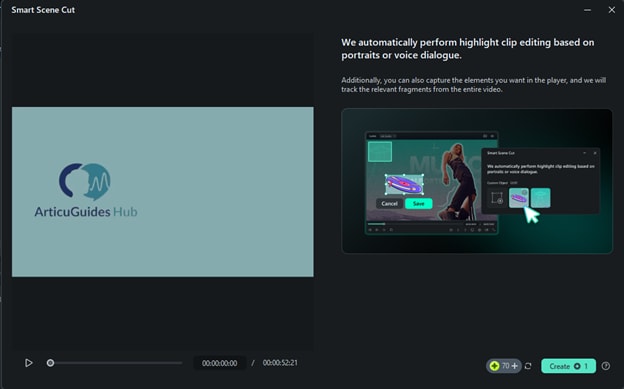
Step 4: A new popup window will appear. Click the "Create" button.
Then, wait for the upload to complete.
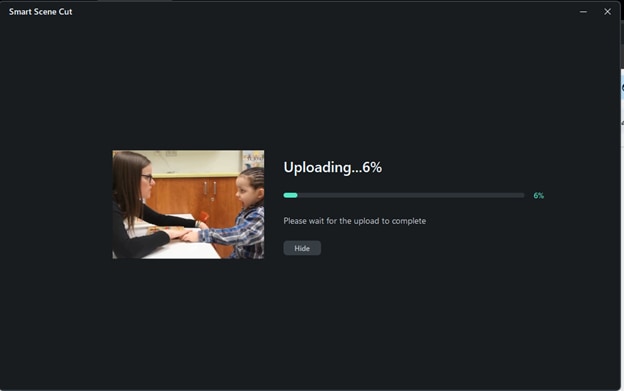
Step 5:
- The Smart Scene Cut uses one 1 point for each minute. The video in the tutorial was about a minute. So it took 1 minute to process.
- You can continue editing other videos. You will get a notification once the smart scene cut process is completed.

Step 6:
- You have three categories to choose from. These are: "Highlight Scene," "Character Scene," and "Custom Object."
- Select the scenes you want to edit from the "Number of scenes" section. Click the "Add all" button.
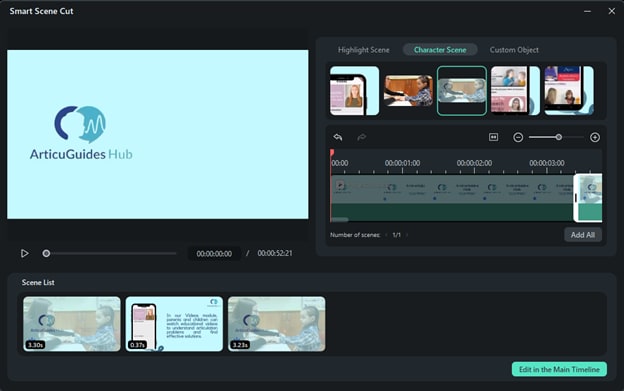
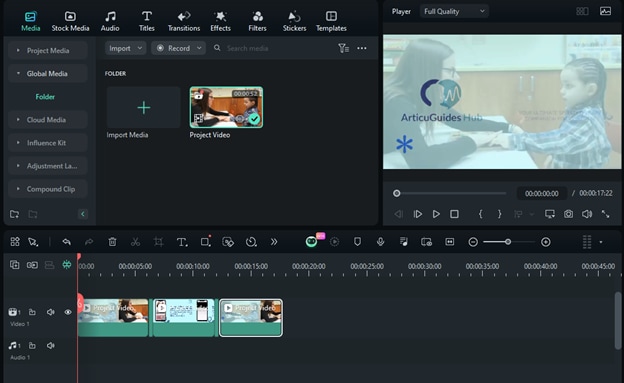
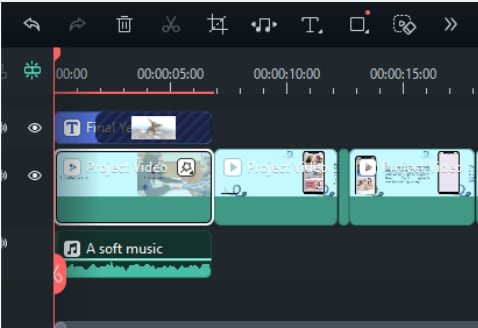
Step 7: After adding the scenes to the "scene list," click the "Edit in the Main Timeline" button.
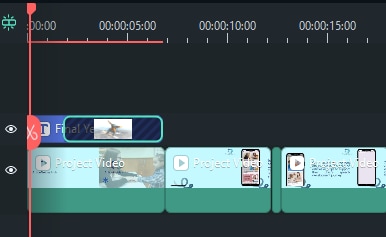
Step 8: The scenes are now in the timeline. You can apply any edits you want. You can add text, transition effects, and required soundtracks.
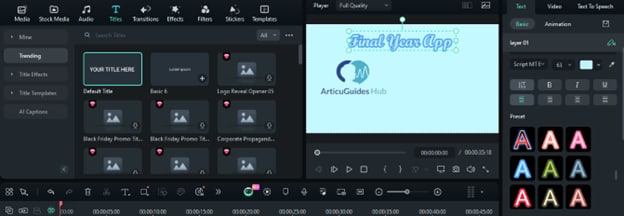
Step 9: Go to the "Titles" tab in the toolbar to apply text. Drag your required text style and paste it above the scene on the timeline.
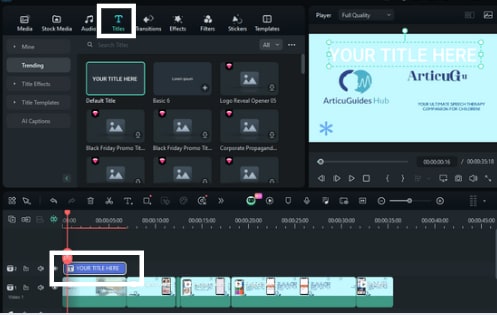
Step 10: Adjust the Text and Animation
- Then, double-click on the text in the timeline.
- Enter the text you want.
- Click "Text" in the panel on the right side.
- Go to "Basic."
- Then, select the required font size and style.
- You can also choose the text style from the presets given.
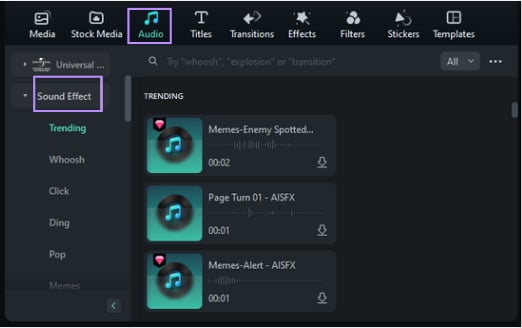
Step 11: Add Audio in Video
You can easily apply any soundtrack you want. Go to the "Audio" tab in the toolbar. Then, click "Sound Effect." Drag the required audio above the scene on the timeline.
Step 12: Add Transitions in Video
Now, go to the "Transitions" tab in the top toolbar. Then, drag your desired transition between the scenes on the timeline. This will allow you to apply eye-catching transitions to each scene.
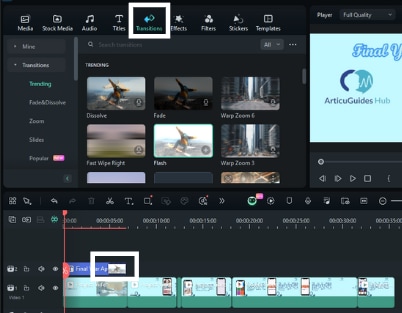
Step 13: You can adjust the transition effect between the scenes by dragging it.
Step 14: You can give each scene a unique look by applying effects. Go to the "Effects" tab. Click "Video Effects."
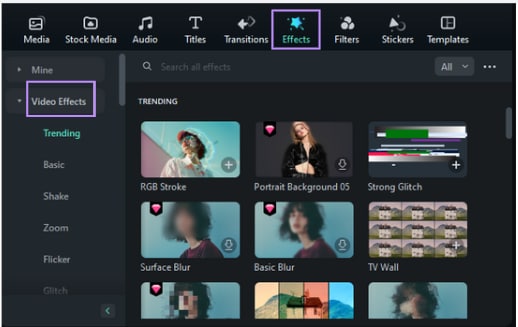
Step 15: Then, drag and drop your required effect on the specific scene you want to apply.
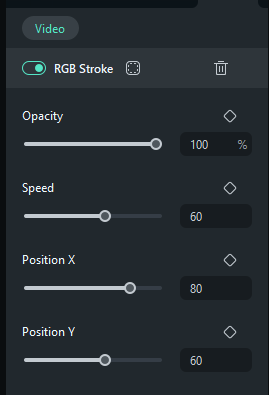
Step 16: Then, double-click the effect on the timeline. Now, from the panel, you can customize the effect settings. These settings include:
- Opacity
- Speed
- Position X
- Position Y
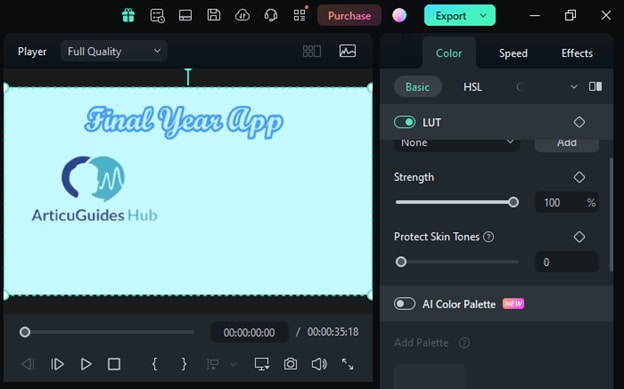
Step 17: After applying all the edits, play the video to preview it.
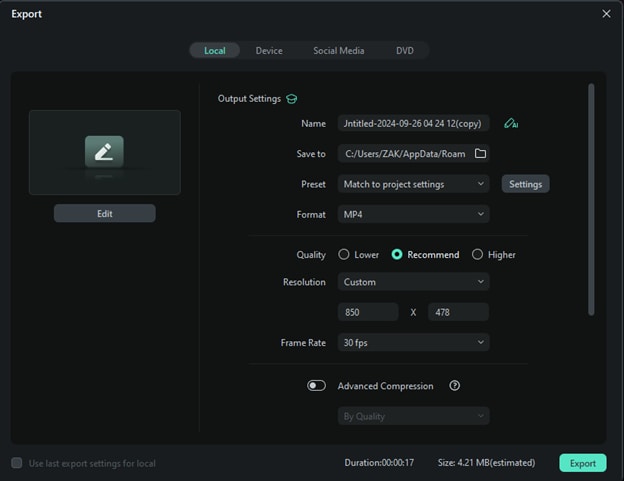
Step 18: Click the "Export" button to export the video project. Name your video project. Convert the format to "MP4" or another you desire. Customize the given settings as you want and click "Export."
Congratulations! You have edited a fantastic video effortlessly in Filmora using "Smart Scene Cut."
Let’s compare different tools for easy and quick scene edit detection.
Adobe Premiere Pro vs. Filmora for Scene Edit Detection
| Features | Adobe Premiere Pro | Filmora |
| Ease of Use | Require some manual settings adjustments | Fully automated and easy for beginners |
| Accuracy | Good, but it can sometimes create problems with complex videos | High, it has advanced AI integration |
| Performance | Slow if large and complex videos | Smooth performance with large and complex videos |
| Best for | The professional editors | Beginner-friendly |
| Pricing | Paid tool | Free trial with affordable paid plans |
Conclusion
In the article, we learned how to use scene edit detection in Premiere Pro. We explored the step-by-step guide, why it sometimes does not work, and the solutions. Moreover, we have explored the reputable Wondershare Filmora. It provides an efficient alternative feature called smart scene cut.
If you want to identify the cut points in your videos smoothly and apply different editing options, Filmora is for you. It is an excellent choice for effortless editing.
