
 100% Security Verified | No Subscription Required | No Malware


Do you want to record what's happening on your screen for a how-to video, a talk, or a game, but you're not sure how to do it? Perhaps you've tried recording your screen before, but the video wasn't very good, or the type of file wasn't right for what you needed. If you want to make high-quality AVI videos, you're in the right place.
AVI, which stands for Audio Video Interleave, is a type of file that can hold both sound and video. It's often used for screen recordings because it works well with many different video players and editing programs.
In this detailed guide, we'll show you four easy ways to record AVI videos without any trouble.
In this article
Part 1: What is an AVI Screen Recorder?
An AVI screen recorder is a software tool designed to capture whatever happens on your computer screen and save the recording in the AVI (Audio Video Interleave) file format. This means you can record your entire desktop, a selected window, or a specific area of your screen, and the output file will be an AVI video that includes both the visuals and accompanying audio, such as system sounds, microphone input, or both.
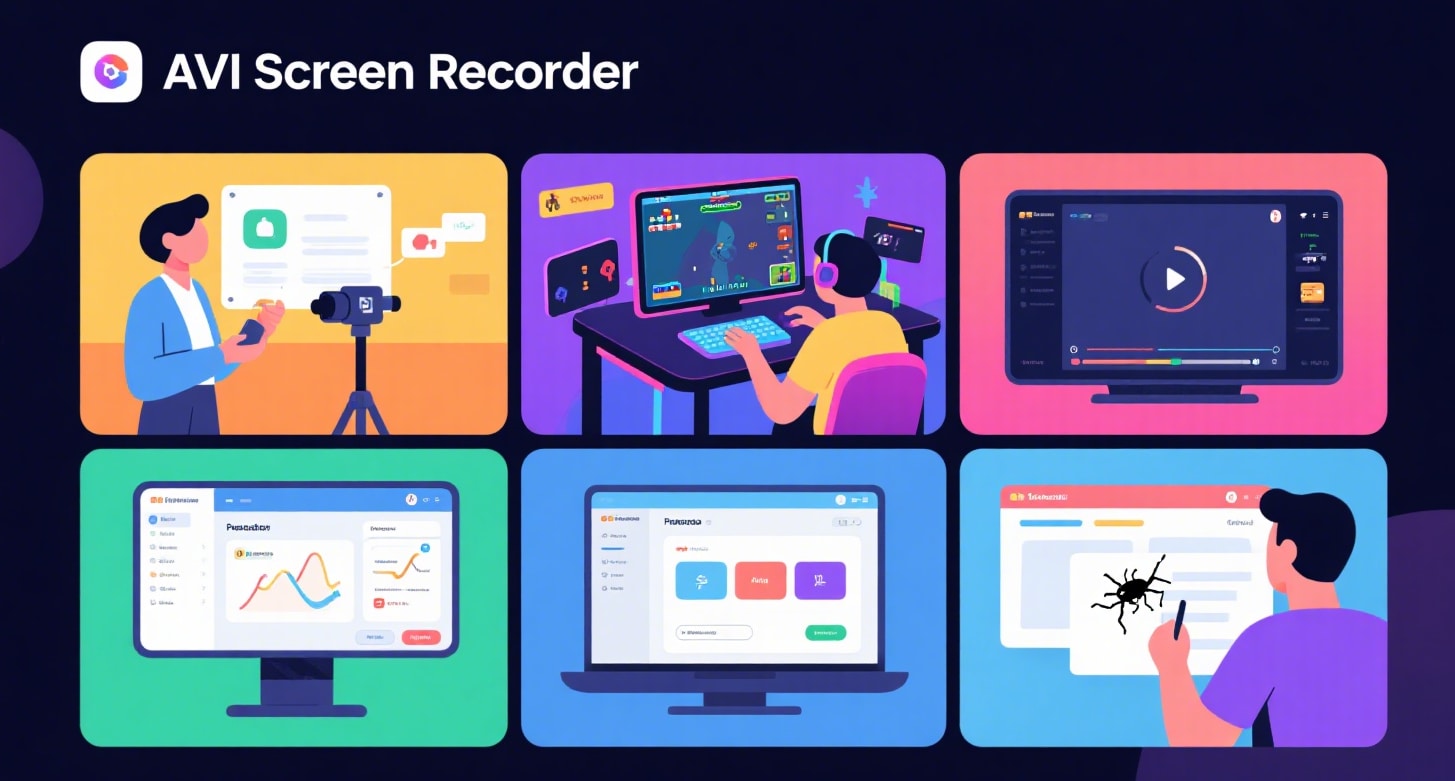
Common Uses of AVI Screen Recorders
- Educational Content: Teachers and tutors use AVI screen recorders to create instructional videos, software demonstrations, and online lessons.
- Gaming: Gamers capture gameplay highlights or walkthroughs in high quality with AVI recorders.
- Presentations and Webinars: Record live video calls, online meetings, or presentations for later review or sharing.
- Software Testing and Support: Developers and IT support teams record bugs or software behaviors to diagnose issues.
Part 2: How to Record AVI Videos
In this section of our guide, we have listed 4 simple methods to record AVI videos like a pro.
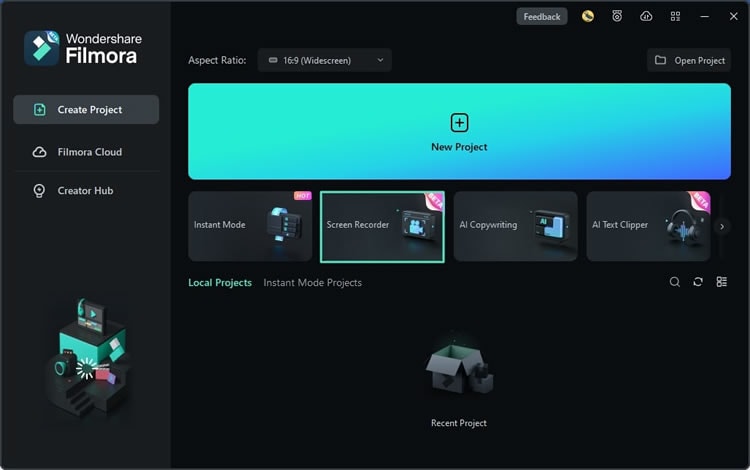
Method 1: Use Wondershare Filmora to Record AVI Videos (Recommended)
Wondershare Filmora is a powerful yet user-friendly video editor that also comes with a built-in AVI screen recorder. This all-in-one solution not only allows you to capture high-quality AVI videos but also provides a comprehensive suite of editing tools to enhance your recordings.
Here's how to record AVI videos with Wondershare Filmora:
Step 1: Click on the button below to install Wondershare Filmora on your computer. Launch the program and navigate to the "Screen Recorder” tab.
 secure download

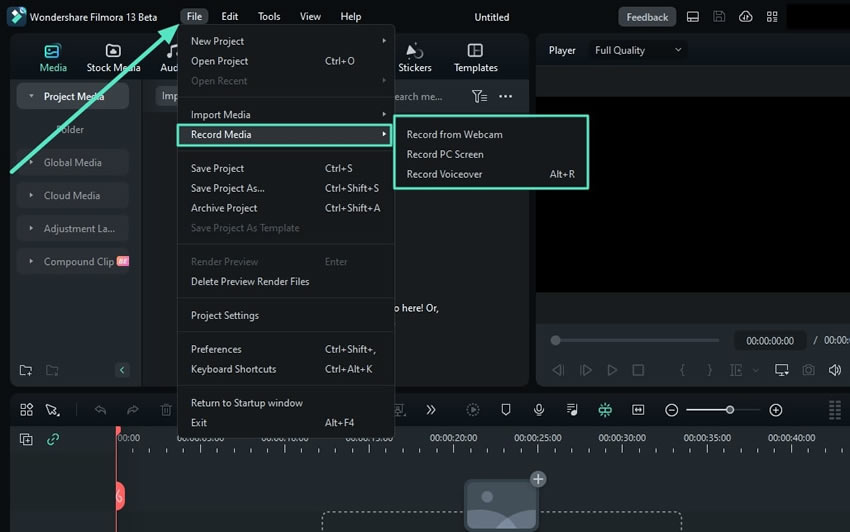
Step 2: Once the Player Panel loads, head to File> Record Media. Choose the preferred recording option and proceed.
Step 3: Now select the screen resolution whether you want to record full screen, custom screen, or a target window.
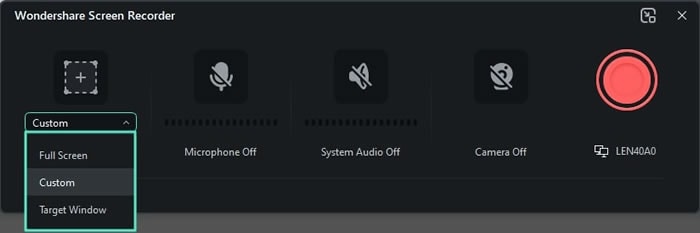
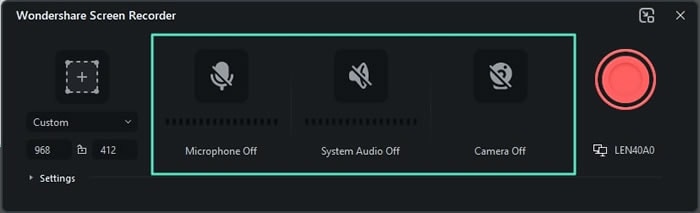
Step 4: The next step is to choose the recording mode. Filmora offers you 3 different options: Microphone, System Audio and Custom.
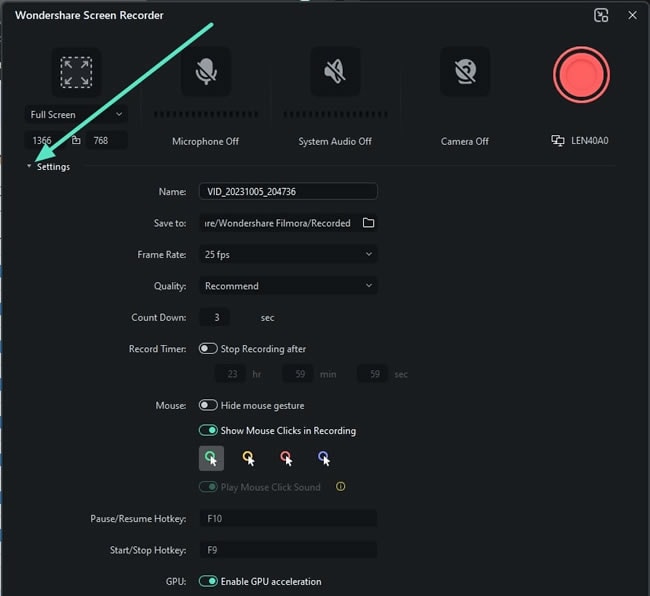
Step 5: Now, tap the “Settings” option placed on the left. Here you can find all the additional settings. Tweak and configure recording settings, if required.
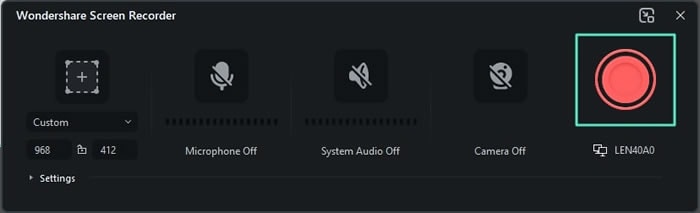
Step 6: All set? Hit the red recording icon to begin recording.
Wondershare Filmora is an excellent choice for both beginners and professionals alike, thanks to its intuitive interface and powerful features.
With the ability to record AVI videos directly, you can streamline your workflow and ensure high-quality recordings every time.
Method 2: Record AVI Videos with Bandicam
Bandicam is a dedicated AVI screen recorder that offers a wide range of customization options and advanced features. Whether you're recording gameplay, webinars, or tutorials, Bandicam has you covered.
Here's how to use Bandicam to record AVI videos:
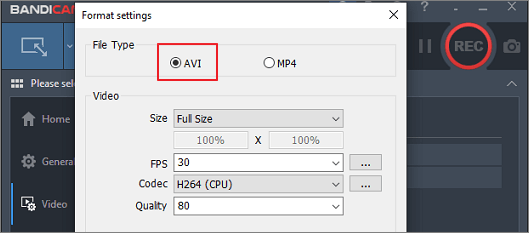
Step 1: Visit Bandicam’s official website to download and install the software. Open it, then go to the "Video" menu and click "Settings" under the "Format" section.
Step 2: In the settings window, select "AVI" as the output format.
Step 3: Click the dropdown next to "Screen Recording Mode" and choose your recording mode: full screen, region, or game capture.
Step 4: After setting up, click "REC" to start recording. Click "Stop" or press "F12" on your keyboard to end the recording.
Bandicam offers features like real-time drawing, webcam overlay, and simultaneous system audio and microphone recording. It’s powerful but slightly more complex, making it a great choice for AVI screen recording.
Method 3: Use Screencast-O-Matic
Screencast-O-Matic is a popular and user-friendly AVI screen recorder that's particularly well-suited for creating tutorial videos, software demonstrations, and webinars. Its simplicity and ease of use make it an excellent choice for beginners and casual users.
Here's how to record AVI videos with Screencast-O-Matic:
Step 1: Visit the Screencast-O-Matic website and download the screen recorder. Launch the program and select the recording area (full screen or specific region). Adjust the recording settings, such as video resolution, frame rate, and audio input.
Step 2: Click the "Rec" button to start recording your screen.
Step 3: Once you're done, click "Done" to stop the recording. Save your AVI video to your computer or upload it directly to Screencast-O-Matic's online platform.
Screencast-O-Matic offers a free version that allows recording up to 15 minutes. Paid plans remove time limits and watermarks, and add advanced editing tools and more features.
Method 4: Record AVI Videos with RecMaster
RecMaster is a comprehensive screen recording and video editing tool that allows you to record AVI videos with ease. Whether you need to capture gameplay, online meetings, or create instructional videos, RecMaster has you covered.
Here's how to use RecMaster to record AVI videos:
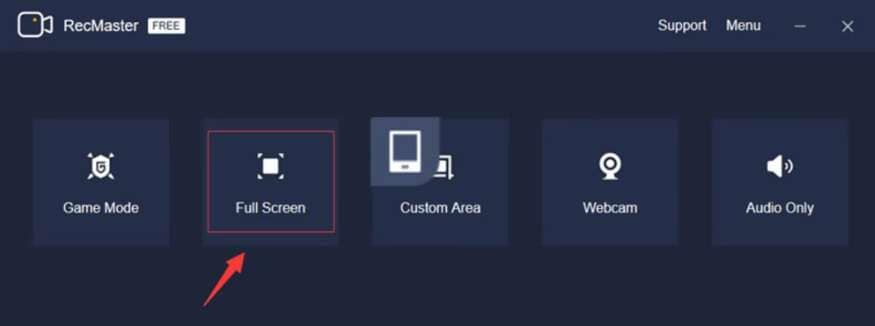
Step 1: Install RecMaster on your computer. Launch the program and select the "Full Screen” option.
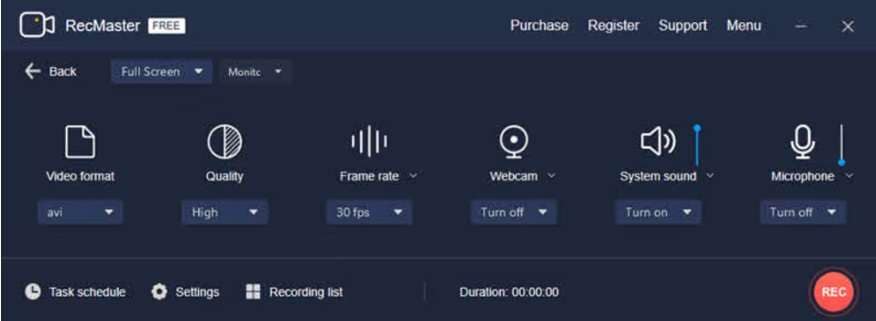
Step 2: Select the output format (AVI) and configure any additional options as needed. Click the ""Record"" button to start capturing your screen.
Step 3: Once you're done, click "Stop" to end the recording. Your AVI video will be saved to the specified location.
RecMaster offers a variety of advanced features, including the ability to schedule recordings, capture webcam footage, and edit your videos with built-in tools. Additionally, it supports recording in various formats, making it a versatile choice for different recording needs.
Part 3: Tips to Deal with AVI Recordings
While recording AVI videos can be straightforward, there are a few tips and tricks to help you get the best possible results:
- Optimize your system: Meet system requirements and close unnecessary apps.
- Adjust settings: Find balance between resolution, frame rate, and file size.
- Manage audio: Use quality mic; consider separate audio tracks.
- Preview and test: Do a quick recording test before starting.
- Edit and enhance: Trim, crop, and enhance with built-in or external tools.
Conclusion
Recording AVI videos has never been easier, thanks to the abundance of user-friendly AVI screen recorders available. Whether you're a professional content creator, educator, gamer, or simply want to capture your screen for personal use, the methods outlined in this guide will help you achieve high-quality AVI recordings with ease.
From the comprehensive and feature-rich Wondershare Filmora to the dedicated Bandicam, the user-friendly Screencast-O-Matic, and the versatile RecMaster, there's an AVI screen recorder to suit every need and skill level. By following the simple steps and tips provided, you'll be able to create professional-looking AVI videos that perfectly capture your on-screen activities.
So, what are you waiting for? Try out one of these AVI screen recorders today and take your screen recording game to the next level!
FAQ
-
Can I record AVI videos on a Mac?
Yes, most AVI screen recorders are available for both Windows and macOS platforms. However, some features or settings may vary depending on the operating system. -
How do I convert an AVI video to another format?
You can use video conversion software or online tools to convert your AVI videos to other formats like MP4, MOV, or WMV. Many video editing applications also offer conversion options within the program. -
Why is my AVI video lagging or choppy?
Lagging or choppy AVI videos can be caused by various factors, such as insufficient system resources, high video resolution or frame rate settings, or outdated graphics drivers. Try reducing the recording settings, closing unnecessary applications, and updating your graphics drivers to improve performance.
secure download
