


 100% Security Verified | No Subscription Required | No Malware

If you’ve spent any time in DaVinci Resolve, you’ve probably noticed how quickly things can get messy on your timeline. With multiple video and audio tracks, effects, and layers, managing your project can become overwhelming. To help you out, you can use a useful yet often overlooked feature: compound clips.
Compound clips in DaVinci Resolve can help you group together multiple video and audio clips, effects, and adjustments into a single, cohesive unit. This feature not only helps in reducing clutter on your timeline but also allows you to apply edits and effects to the entire group simultaneously.
If you are just getting started with DaVinci Resolve, compound clips might seem like an advanced feature, but they are quite straightforward once you get the hang of them. Read on to learn more about how it can transform your editing workflow.
In this article
Part 1. How Compound Clip Simplifies Workflow in DaVinci Resolve
DaVinci Resolve has become a go-to for video editors because of its powerful features and professional-grade tools. Moreover, let's not forget the fact that it offers a free version that packs a serious punch. It’s designed to handle everything from YouTube videos to Hollywood films. One of the reasons people love Resolve is its ability to manage complex timelines and large projects without overwhelming the editor.
This is where compound clips in DaVinci Resolve really shine. A compound clip essentially lets you take multiple clips—whether they’re video, audio, or even effects—and group them into one single clip. Think of it like putting several files into a folder; everything is still there, but it’s now bundled together and much easier to manage.
By using DaVinci Resolve compound clips, you can simplify your workflow in several ways:
- Compound clips help you keep your timeline clean. It’s especially useful when dealing with a large number of layers. Instead of scrolling through an endless timeline of individual clips, you can group them into compound clips and work with them as one.
- Compound clips make applying global effects or transitions much easier. Need to add the same color grade or effect to multiple clips? Just group them into a compound clip and apply it once instead of having to do it manually for each clip.
- Compound clips make revisiting edits smoother since everything is grouped together, so you’re less likely to lose track of individual elements when you need to make adjustments.
Part 2. How to Create a Compound Clip in DaVinci Resolve
You now know that creating compound clips in DaVinci Resolve is a straightforward process that can help you bundle multiple clips into one. DaVinci Resolve offers several timeline editing tabs, and you can use a compound clip on either the Edit tab or the Fusion/Color tab in the software. We’ve detailed both methods below.
1. How to Use a Compound Clip in the Edit Tab
The Edit tab is where you’ll likely spend most of your time assembling and arranging your clips. Here’s how to create a compound clip from the Edit tab following MrAlexTech’s tutorial on YouTube.
Step 1. Select the clips you want to group together. You can choose video, audio, effects, or any combination.
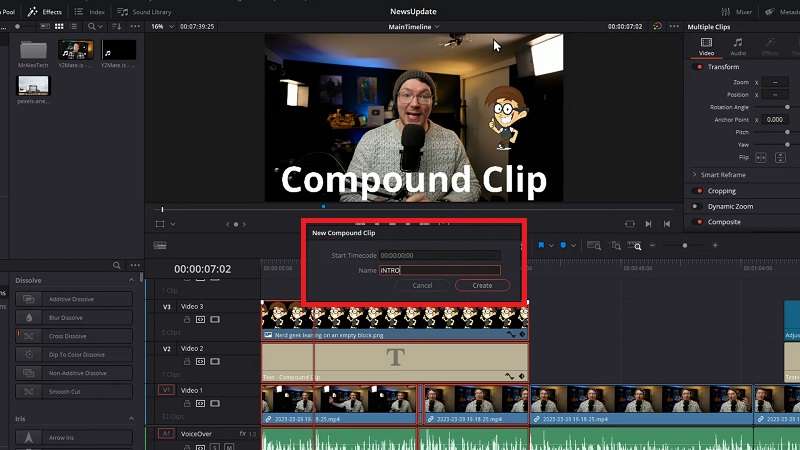
Step 2. Right-click on one of the selected clips. From the dropdown menu, choose New Compound Clip.

Step 3. A pop-up window will appear, allowing you to name your compound clip and set a timecode if needed. Hit Create.
Step 4. Now, your selected clips will be merged into one compound clip, which you can easily move, edit, or apply effects to. The compound clip will also be saved to your Media Pool for future use.
2. How to Use a Compound Clip in the Fusion or Color Tab
The Fusion and Color tabs in DaVinci Resolve are where you can take your visual effects and color grading to the next level. You can still work with DaVinci Resolve compound clips here to apply effects across multiple clips at once.
Fusion is DaVinci Resolve’s built-in visual effects and motion graphics tool. It’s where you can create complex animations, add effects, and use nodes to build intricate visual layers. Meanwhile, the Color tab is DaVinci Resolve’s legendary color grading workspace, which allows for advanced color correction and grading using tools like color wheels, curves, and LUTs.
How to create Compound Clips in the Fusion or Color Tab:
Step 1. First, create a compound clip in the Edit tab by following the same steps listed above.
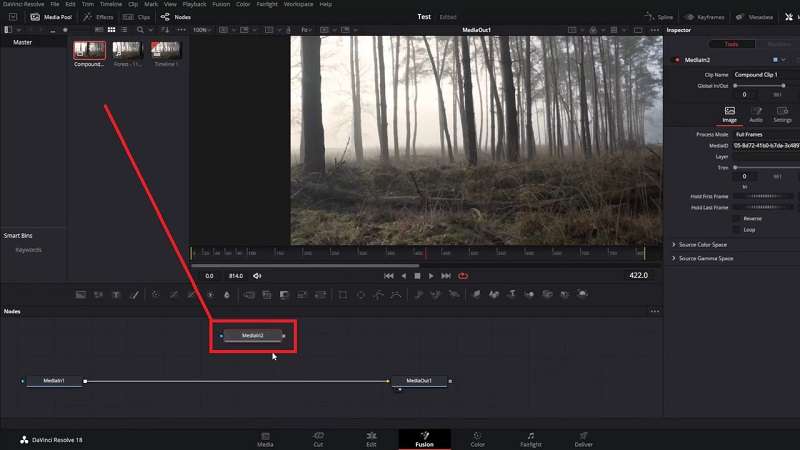
Step 2. Once your compound clip is created, select it in the timeline. Then, click on the Fusion tab or Color tab at the bottom of the interface.
Fusion Tab: Inside the Fusion tab, you’ll see the compound clip as a single node. You can now add additional nodes to create effects that will apply to all the layers within the compound clip. These changes will affect every clip inside the compound clip, streamlining your effects work.
Color Tab: In the Color tab, the compound clip behaves like a regular clip. You can apply LUTs, color wheels, curves, or other color correction tools to adjust the entire clip. Any color grading you do will apply to all the media files inside the compound clip. If you want to color grade an individual clip within the compound clip, right-click on it, select Open in Timeline, and edit the specific media file.
Part 3. How to Change the Compound Clip Content on DaVinci Resolve
If you need to modify the content inside a compound clip in DaVinci Resolve—whether it's adding, removing, or editing clips—here’s how you do it:
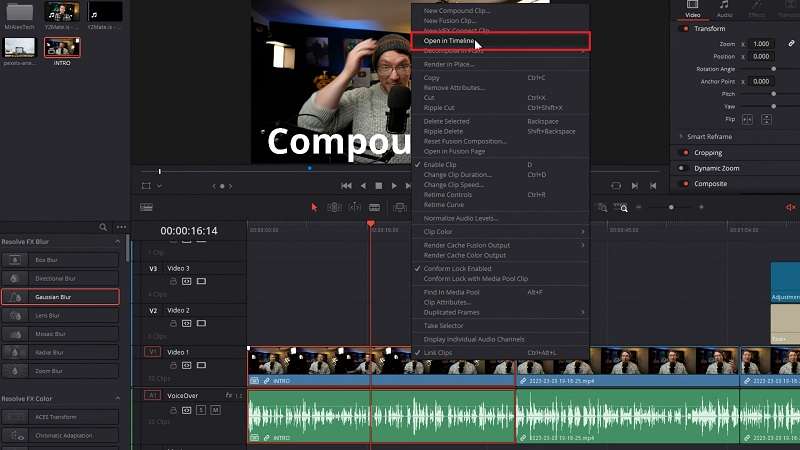
Step 1. Right-click on the compound clip in your timeline. From the dropdown menu, select Open in Timeline.
Step 2. A new timeline will open, displaying all the media files inside the compound clip. Here, you can make any necessary changes:
- Add new clips: Drag and drop new media into the timeline.
- Remove clips: Click on the clip you want to delete and press Delete on your keyboard.
- Edit clips: Adjust the position, trim, or split the clips just like you would in a regular timeline.
Step 3: Once you're finished, return to your main timeline by double-clicking on the original timeline name below the work area.
How to Apply Effects to a Compound Clip
Applying effects to a compound clip is as simple as doing it on any other clip. The effect will be applied to all the media within the compound clip.
Step 1. In the Edit tab, drag the desired effect from the Effects or FX library onto the compound clip in your timeline. The effect will now be applied to the entire compound clip, affecting all layers within it.
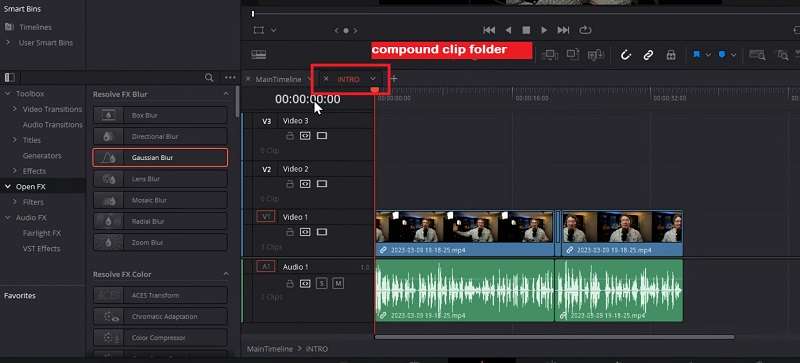
Step 2. If you need to apply an effect to just a specific clip inside the compound clip, right-click the compound clip and select Open in Timeline. Then, navigate to the compound clip folder and apply the effect directly to the clip you want.
How to Remove a Compound Clip in DaVinci Resolve
If you need to break apart a compound clip and return to working with the individual clips, right-click on the compound clip in the timeline. Then, choose Decompose in Place from the dropdown menu and select either Using Clips Only or Preserving Audio Data.
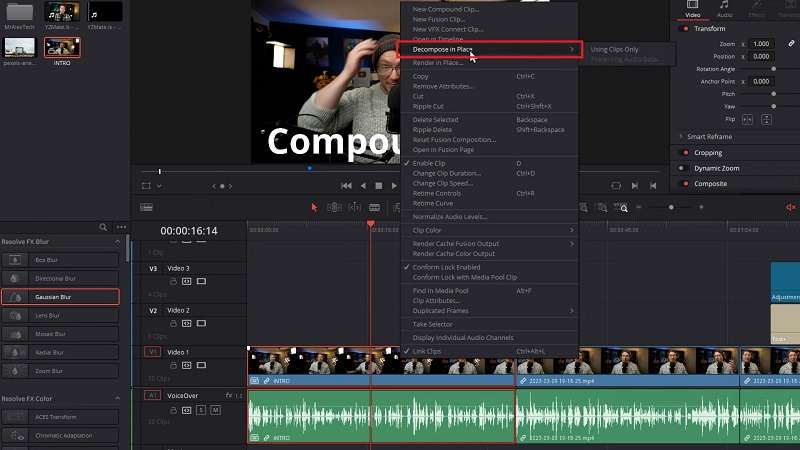
This step will split the compound clip back into its original individual clips, allowing you to work on them separately again.
Part 4. Use Best Practice to Create a Compound Clip
While DaVinci Resolve is powerful, sometimes you may want an alternative that’s a bit easier to pick up, especially for beginners or those looking for a more intuitive interface. This is where Wondershare Filmora comes in. Filmora is known for its user-friendly design, offering a streamlined editing experience without sacrificing powerful features. It’s an excellent choice for creators who want a simpler tool that still delivers professional results.
Filmora’s appeal lies in its simplicity. Unlike DaVinci Resolve, which can feel overwhelming for new editors due to its multitude of tools and tabs, Filmora offers an easier learning curve. It’s designed for creators who want to edit quickly and efficiently without getting bogged down by too many advanced settings.
Despite its simplicity, Filmora includes essential features like effects, transitions, color grading, and—of course—compound clips. This makes Filmora a great alternative for anyone looking to edit videos with professional-quality results but with less complexity.
Key reasons to choose Filmora:
- Intuitive Interface: Filmora’s layout is more straightforward, making it easy to navigate for beginners.
- Streamlined Workflow: It focuses on essential tools, so you’re not overwhelmed with too many options.
- Pre-built Effects and Transitions: Filmora comes packed with ready-to-use effects and transitions that are easy to apply, saving time and effort.
- Cross-Platform: Works seamlessly on both Windows and macOS.
How to Create a Compound Clip in Filmora Using the Top Toolbar
Creating a compound clip in Filmora is a breeze, whether you prefer using the top toolbar or the timeline control menu. Here's how to do it:
Step 1. Open Filmora and click on "Create Project" in the left-side panel. After that, choose "New Project".
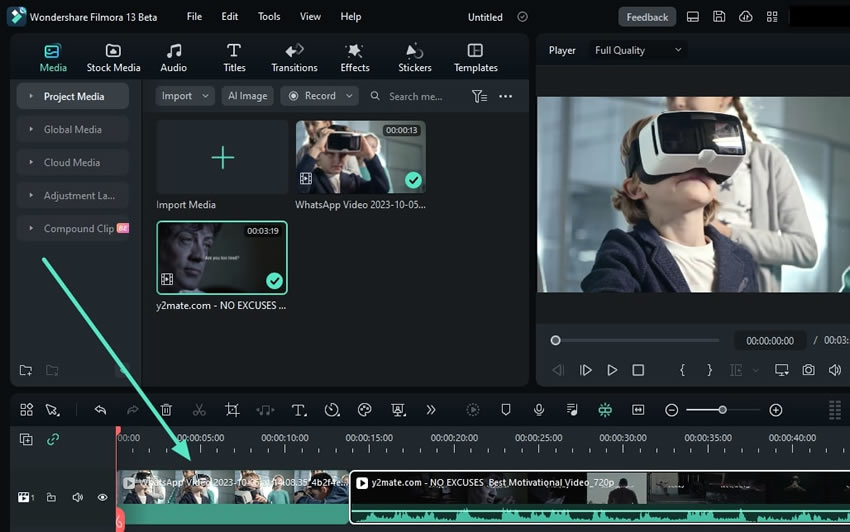
Step 2. Import your media by clicking Import or pressing Ctrl+I (or Cmd+I on Mac). Once imported, drag and drop your clips into the timeline track where you want to combine them.
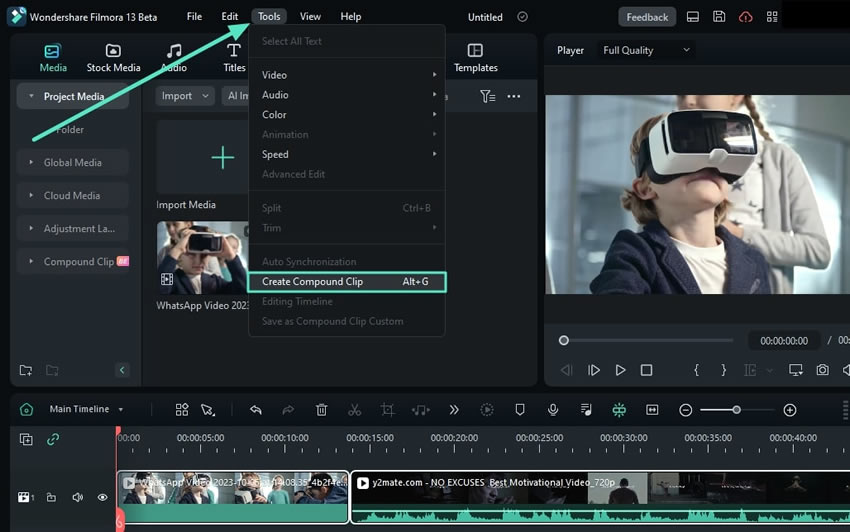
Step 3. After placing the clips on the timeline, select both clips. Then, go to the top toolbar, click on "Tools", and choose "Create Compound Clip" from the dropdown menu. A pop-up window will appear where you can name your compound clip. Click "OK" to confirm.
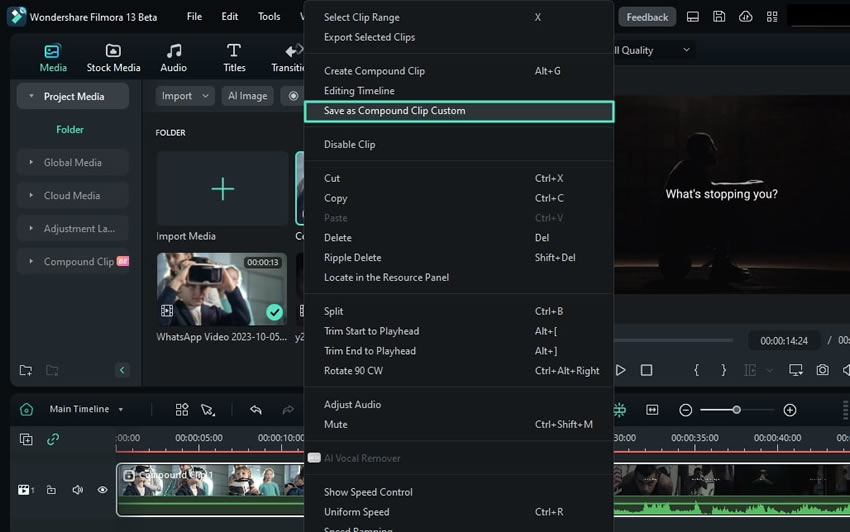
Step 4. Right-click on the compound clip in the timeline, then select "Save as Compound Clip Custom" from the options. This will store your compound clip in Filmora’s cloud storage.
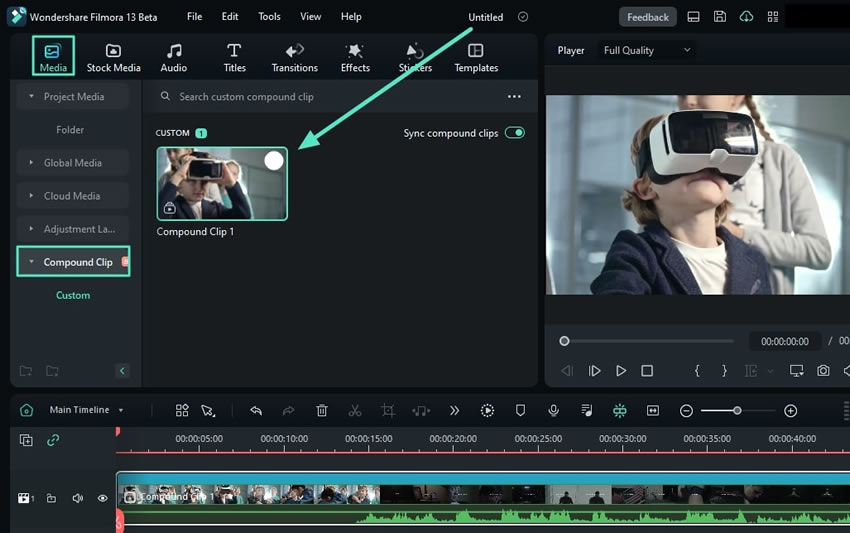
Step 5. To retrieve the saved compound clip, navigate to the Compound Clip section in the top-left panel. Your clip will be available for use in any project.
How to Create a Compound Clip in Filmora from the Timeline Control Menu
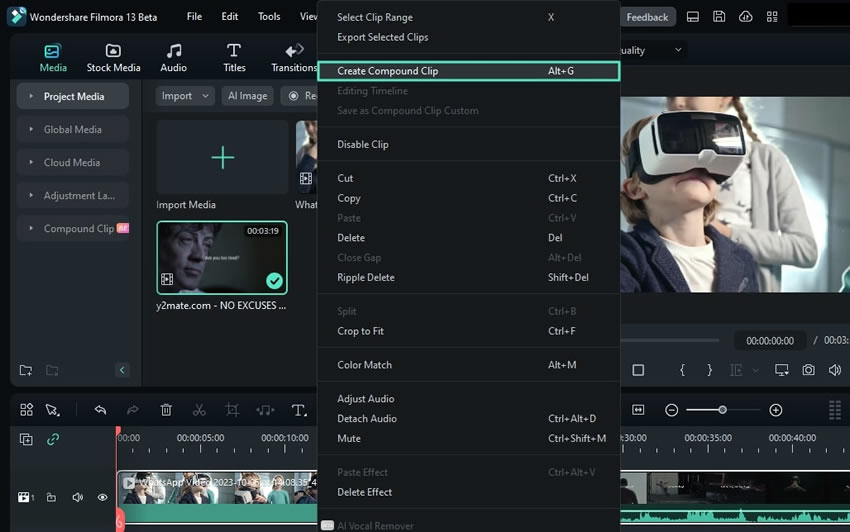
Step 1. Once your clips are in the timeline, right-click on the selected clips.
Step 2. Select "Create Compound Clip" from the control menu. A pop-up window will appear where you can name your clip. Click "OK" to complete the process.
Navigating Through Compound Clips in Filmora
Once you've created compound clips, Filmora makes managing them easy. Follow this guide to work with them effectively.
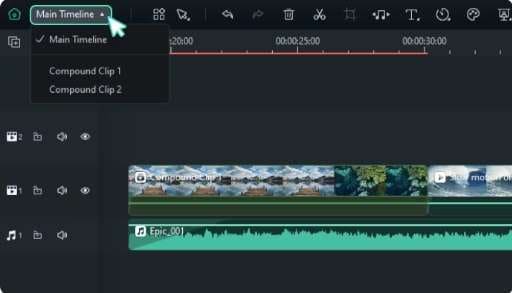
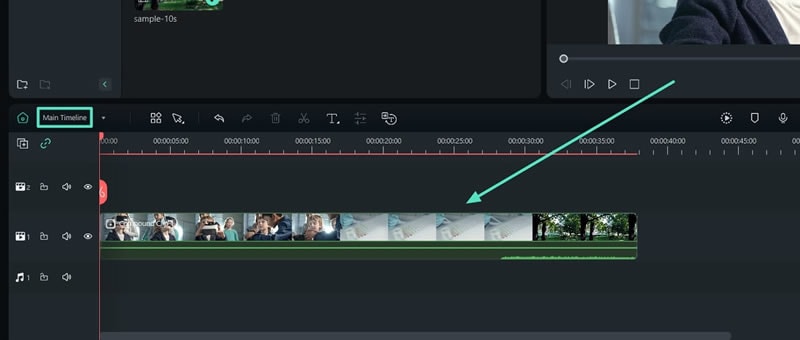
Step 1. Access Compound Clips in the Main Timeline
Your compound clips will appear in the media tab and in the main timeline. You can view and manage all layers in the Main Timeline layer.
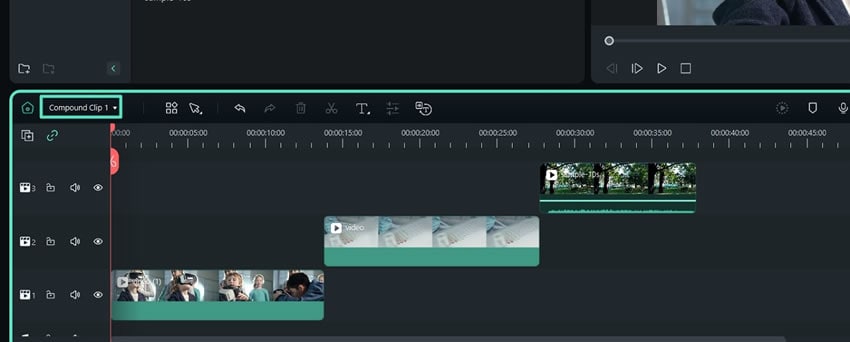
Step 2. Open Compound Clip in Timeline
To access and edit individual clips within the compound clip, right-click on the compound clip and select "Open in Timeline". This allows you to make precise edits to the internal clips without affecting the overall compound clip.
Conclusion
Using compound clips in your video editing can drastically simplify your workflow, whether you’re using DaVinci Resolve or a more beginner-friendly option like Filmora. Compound clips help you combine, manage, and edit multiple clips as one unit, keeping your timeline tidy while allowing for complex effects, transitions, and animations.
While DaVinci Resolve compound clips are ideal for professional editors, Filmora shines as an alternative for those seeking a simpler, more intuitive interface. Filmora makes it easy for beginners to create polished, professional-looking videos without being overwhelmed by too many features. Its Compound Clip feature allows you to merge clips, apply consistent effects, and save compound clips in the cloud.
By choosing the right tool for your needs and mastering compound clips, you can streamline your editing process and focus on what truly matters—creating great content.
