For the Best Results, Use the Latest Version.
-
Preparations
-
Account
-
Get Started & Basic Settings
-
Compatibility & Tech Specs
-
Performance Settings
-
-
Creating Projects
-
Creating New Projects
-
-
Importing & Recording
-
Video Editing for Windows
-
Basic Video Editing
- Enable/Disable Clip in Windows
- Magnetic Timeline for Windows
- Dual Monitor Setup for Video Editing on Windows
- Select All Clips on Timeline for Windows
- Manage Timeline and Tracks on Windows
- Auto Ripple for Windows
- Split & trim video
- Crop & Pan & Zoom Video in Filmora for Windows
- Compositing
- Change Video Speed on Windows
- Playing videos in reverse
- Mark In and Mark Out for Windows
- Markers for Windows
- Group editing
- Customizable Backgrounds for Videos and Images in Windows
- Video snapshot
- Using Freeze Frame in Filmora for Windows
- Logo Reveal For Windows
- Auto Enhance in Filmora for Windows
- Applying drop shadow
- Adjustment layer for Windows
- Apply Transforming for Windows
- Video Editing Ruler – Windows
-
Advanced Video Editing
- Drawing Tools for Windows | Filmora Guide
- Create Multi-Camera Clip in Filmora for Windows
- Compound Clip for Windows
- Multi-Clip Editing for Windows
- Filmora Motion Blur | Windows
- Filmora Flicker Removal Guide | Windows
- Apply mask to video
- Creating a PIP Effect for Windows
- Keyframe Graph Editor for Windows
- Add animation keyframing for Windows
- Keyframe Path Curve for Windows
-
AI-Powered Video Editing
- Smart Scene Cut for Windows
- Smart Short Clips for Windows
- AI Face Mosaic for Windows
- Filmora AI Eye Contact- Windows
- AI Video Enhancer for Windows
- AI Text-to-Video for Windows
- Planar Tracking for Windows
- AI Idea to Video for Windows
- Filmora Image to Video for Windows
- Filmora Image to Prompt for Windows
- Instant Cutter Tool for Windows
- AI Extend
- Filmora AI Relight - Windows
- Filmora AI Image Enhancer Guide - Windows
- AI Script to Video Guide for Windows
- AI Text-Based Editing for Windows
- AI Mate Editing for Windows
- Instant Mode in Filmora
- ChatGPT Plugin - AI Copywriting
- AI Smart Cutout for Windows
- Lens correction on Windows
- Auto Reframe Video for Windows
- AI Portrait Cutout
- Scene detection feature
- AI Smart Masking for Windows
- Motion Tracking on Windows
- Video Stabilization for Windows
- AI Video/Photo Object Remover for Windows
- AI Smart Search for Windows
- AI Skin Tone Protection for Windows
- AI Image for Windows
- Chroma key (green screen)
- Super Slow Motion with Optical Flow for Windows
- Video Denoise for Windows
-
-
Audio Editing for Windows
-
Basic Audio Editing
-
Advanced Audio Editing
-
AI-Powered Audio Editing
- Auto synchronization
- AI Sound Effects in Filmora for Windows
- Smart BGM Generation on Windows
- AI Voice Enhancer in Filmora
- AI Voice Cloning in Wondershare Filmora
- AI Music Generator for Windows
- Audio To Video
- AI Vocal Remover for Windows
- AI Auto Beat Sync for Windows
- AI Audio Stretch for Windows
- AI Audio Denoise for Windows
- Silence Detection on Windows
-
-
Text Editing for Windows
-
Basic Text Editing
-
Advanced Text Editing
-
AI-Powered Text Editing
-
-
Video Customizations
-
Video Effects
-
Audio Effects
-
Transitions
-
Stickers
-
Filters
-
Color Editing
-
Animations
-
Templates
-
Asset Center
-
-
Exporting & Share & Cloud Backup
Audio Gain for Windows
Audio Gain in Filmora for Windows is a powerful tool used to control and standardize the loudness of audio clips without affecting their quality. It allows editors to increase or decrease overall audio levels and maintain consistent sound across multiple clips in a project. With options like fixed gain adjustment, peak normalization, and batch processing, users can quickly balance audio from different sources.
This feature is especially useful for ensuring professional sound quality in videos that include mixed recordings. It helps prevent volume inconsistencies and delivers a smoother, more uniform listening experience across the entire timeline.
Index
Steps to Use Audio Gain
Filmora provides multiple access points and flexible gain controls to help users manage audio levels efficiently across single or multiple clips. To learn how to use this feature, read the steps provided below:
Access Audio Gain in Filmora
Step 1. Set Up a Filmora Project
Start Filmora on your computer and click New Project on the homepage. Import your required media and drag it into the editing timeline to begin.

Step 2. Open Audio Gain Tool
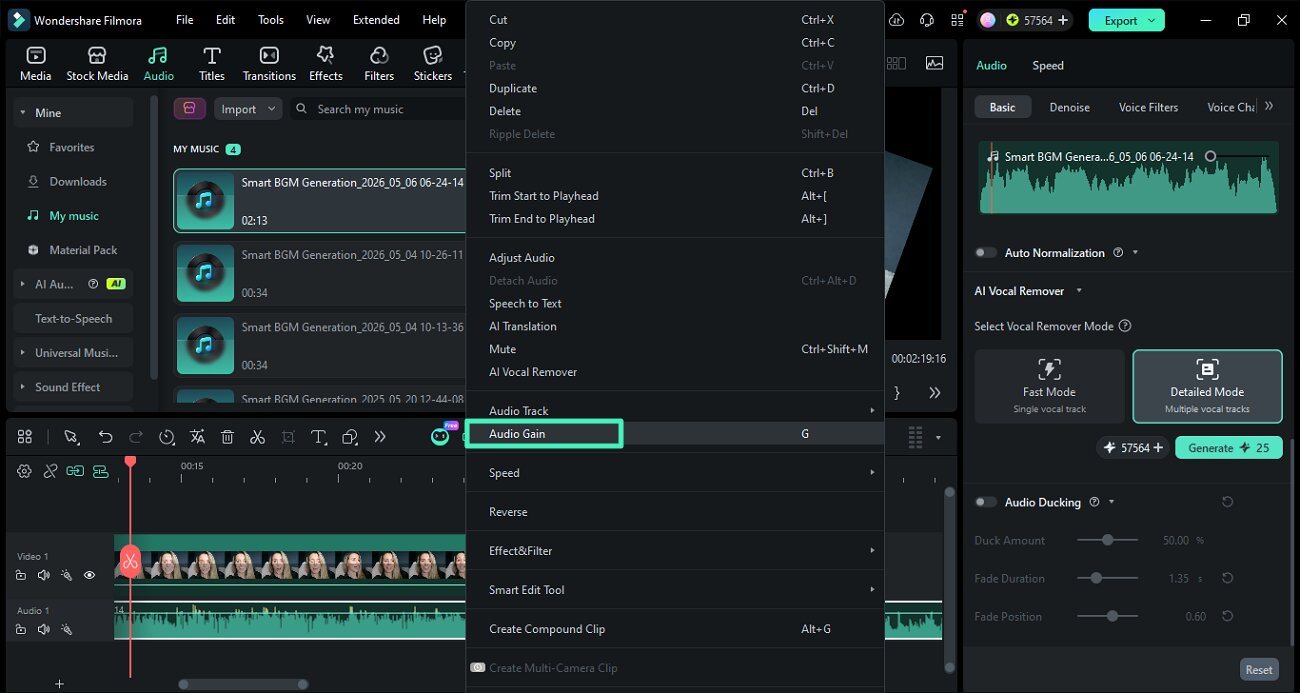
Right-click the selected audio clip and choose Audio Gain from the menu.
Step 3. Choose Audio Gain From Tools
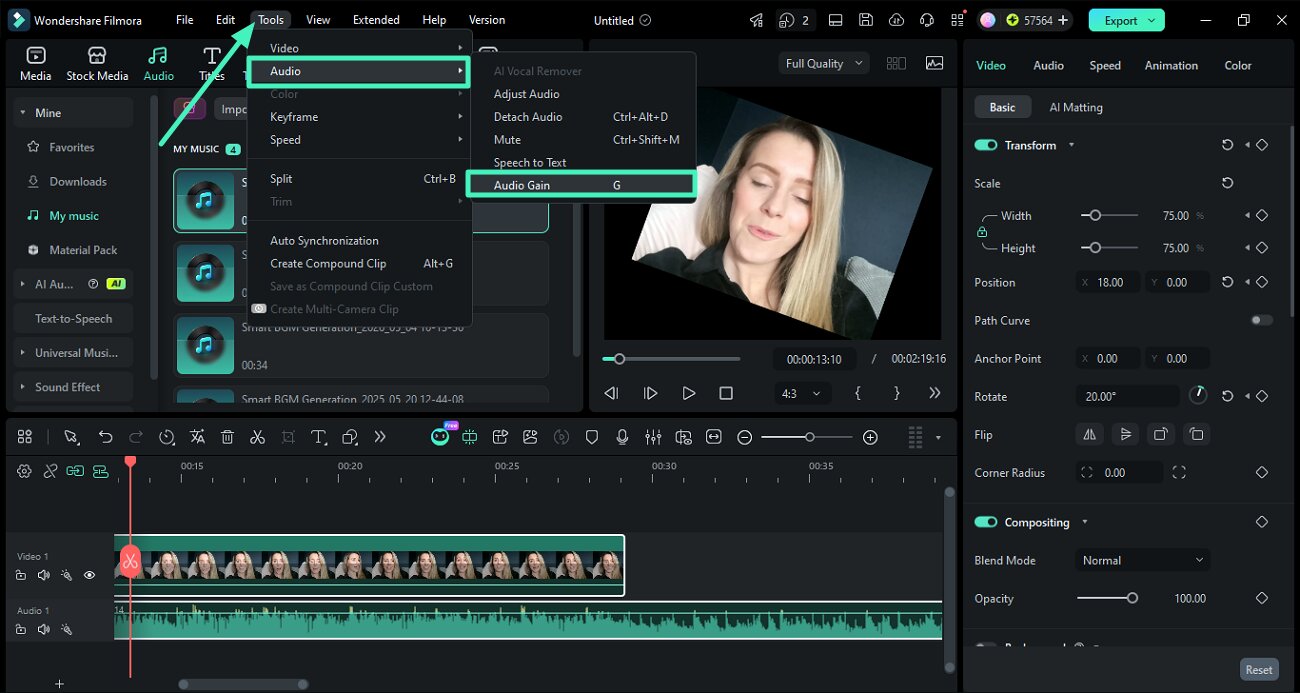
Go to the top toolbar of the interface and select the Tools option. Now expand the Audio option and choose the Audio Gain option from the list.
Step 4. Set Fixed Gain Level
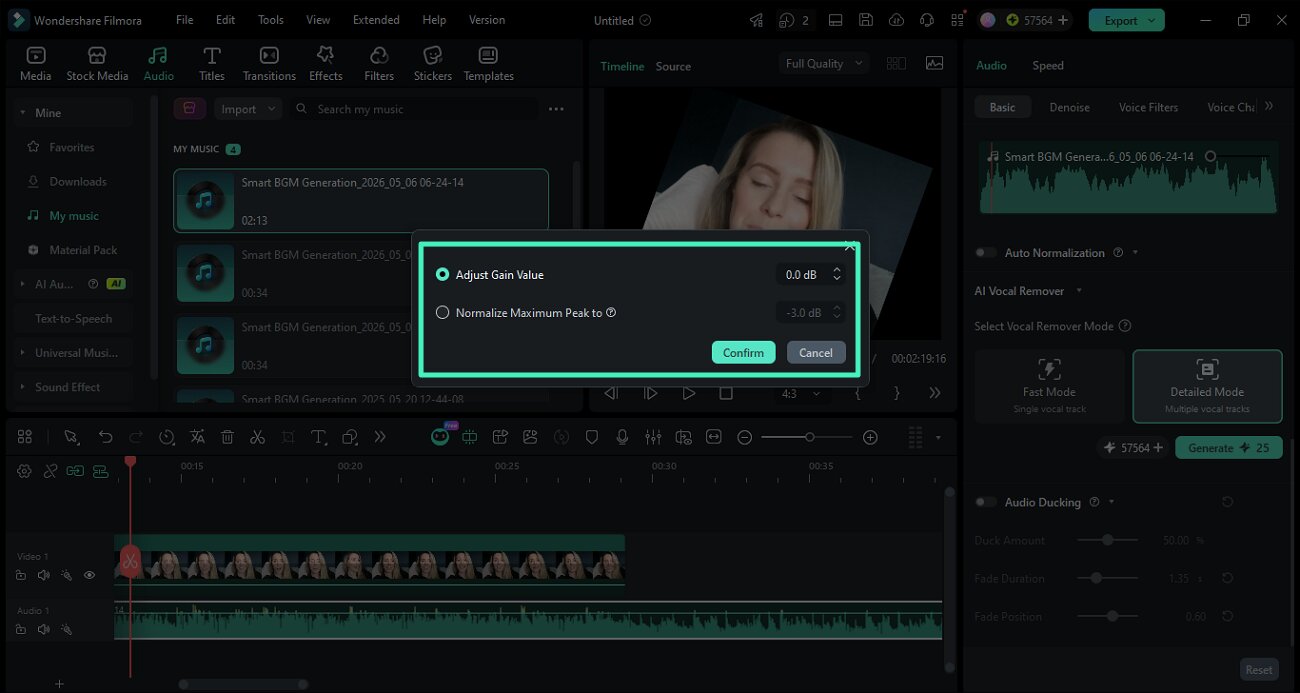
In the Audio Gain window, select Adjust Gain Value. Enter a desired value in dB (positive or negative) to increase or decrease volume, then confirm to apply changes. Select Normalize Maximum Peak to automatically adjust audio so the loudest point reaches a safe level. Press the Confirm button to save the changes.
Step 5. Batch Processing Multiple Clips
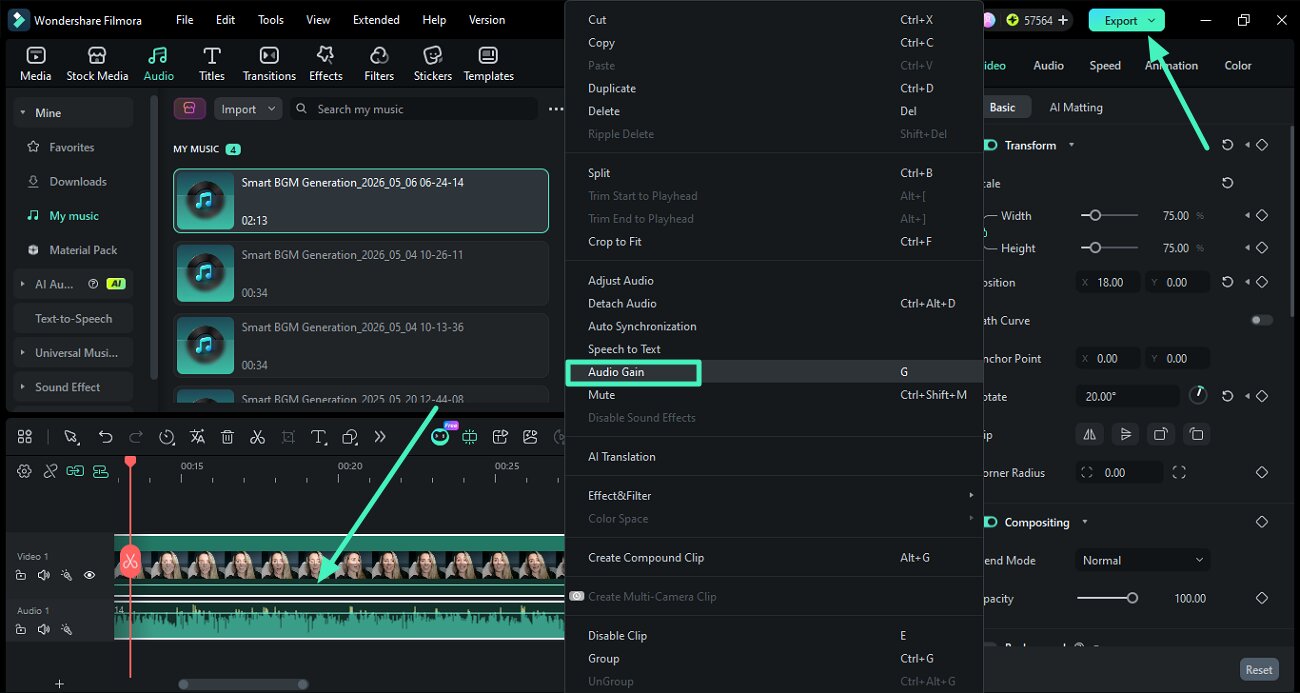
Hold Ctrl select multiple audio clips in the timeline. Open Audio Gain to apply adjustments across all selected clips simultaneously, ensuring consistent audio levels throughout the project. Once done, press the Export button to save the results.
Related Posts
Featured Articles
10 Funny President's Day Memes to Post on Your Feeds
Find the best President's Day memes and GIFs from our selection here, or create your own to celebrate the day with a touch of humor.
7 Effective Convert Twitter Video to MP4 Tools
Facing a hard time while sharing an X video across devices? Read this article and learn about the top 7 tools and effectively convert Twitter video to MP4.
Best Free Discord Logo Maker | Updated 2026
This article will look at the best free Discord server logo makers as well as some download sites for Discord logos. Read on to discover more.
Recommended User Guide
Audio Ducking for Windows
This is a guide about Filmora audio ducking.
Audio equalizer
Learn how to use Audio Equalizer in Filmora 11.
Auto Normalization for Mac
Learn to set auto normalization in Filmora Mac
