For the Best Results, Use the Latest Version.
-
Preparations
-
Account
-
Get Started & Basic Settings
-
Compatibility & Tech Specs
-
Performance Settings
-
-
Creating Projects
-
Creating New Projects
-
-
Importing & Recording
-
Video Editing for Windows
-
Basic Video Editing
- Enable/Disable Clip in Windows
- Magnetic Timeline for Windows
- Dual Monitor Setup for Video Editing on Windows
- Select All Clips on Timeline for Windows
- Manage Timeline and Tracks on Windows
- Auto Ripple for Windows
- Split & trim video
- Crop & Pan & Zoom Video
- Compositing
- Change Video Speed on Windows
- Playing videos in reverse
- Mark In and Mark Out for Windows
- Markers for Windows
- Group editing
- Customizable Backgrounds for Videos and Images in Windows
- Video snapshot
- Using freeze frame
- Logo Reveal For Windows
- Apply auto enhance
- Applying drop shadow
- Adjustment layer for Windows
- Transforming
- Video Editing Ruler – Windows
-
Advanced Video Editing
- Drawing Tools for Windows | Filmora Guide
- Create Multi-Camera Clip
- Compound Clip for Windows
- Multi-Clip Editing for Windows
- Filmora Motion Blur | Windows
- Filmora Flicker Removal Guide | Windows
- Apply mask to video
- Creating a PIP effect
- Keyframe Graph Editor for Windows
- Add animation keyframing for Windows
- Keyframe Path Curve for Windows
-
AI-Powered Video Editing
- Smart Scene Cut for Windows
- Smart Short Clips for Windows
- AI Face Mosaic for Windows
- Filmora AI Eye Contact- Windows
- AI Video Enhancer for Windows
- AI Text-to-Video for Windows
- Planar Tracking for Windows
- AI Idea to Video for Windows
- Filmora Image to Video for Windows
- Filmora Image to Prompt for Windows
- Instant Cutter Tool for Windows
- AI Extend
- Filmora AI Relight - Windows
- Filmora AI Image Enhancer Guide - Windows
- AI Script to Video Guide for Windows
- AI Text-Based Editing for Windows
- AI Mate Editing for Windows
- Create with instant mode
- ChatGPT Plugin - AI Copywriting
- AI Smart Cutout
- Lens correction on Windows
- Auto reframe video
- AI Portrait Cutout
- Scene detection feature
- AI Smart Masking for Windows
- Make motion tracking
- Video Stabilization for Windows
- AI Video/Photo Object Remover for Windows
- AI Smart Search for Windows
- AI Skin Tone Protection for Windows
- AI Image for Windows
- Chroma key (green screen)
- Super Slow Motion with Optical Flow for Windows
- Video Denoise for Windows
-
-
Audio Editing for Windows
-
Basic Audio Editing
-
Advanced Audio Editing
-
AI-Powered Audio Editing
-
-
Text Editing for Windows
-
Basic Text Editing
-
Advanced Text Editing
-
AI-Powered Text Editing
-
-
Video Customizations
-
Video Effects
-
Audio Effects
-
Transitions
-
Stickers
-
Filters
-
Color Editing
-
Animations
-
Templates
-
Asset Center
-
-
Exporting & Share & Cloud Backup
Filmora AI Relight - Windows
Filmora AI Relight is designed to simplify professional-looking lighting adjustments without requiring complex color-grading skills. The feature uses AI to intelligently analyze the lighting conditions in a video and enhance them with natural, balanced results. It offers different presets according to the facial and environmental settings.
With multiple customization options and ready-made relighting effects, creators can fix poor lighting, add mood, or create cinematic depth directly inside the editor. Whether you’re editing vlogs, interviews, or creative videos, Filmora AI Relight for Windows offers both speed and creative control.
Highlights of This Feature
- One-Click AI Relighting: Automatically analyzes the video’s lighting and applies optimized relighting effects using ready-to-use presets, saving time while delivering professional results.
- Flexible Custom Lighting: Supports up to 8 adjustable light sources, allowing precise control over light position, color temperature, and intensity to match different scenes and styles.
- Visual & Real-Time Editing: Enables users to drag and adjust light orbs directly in the preview window, with changes reflected instantly for a smooth, intuitive editing experience.
Index
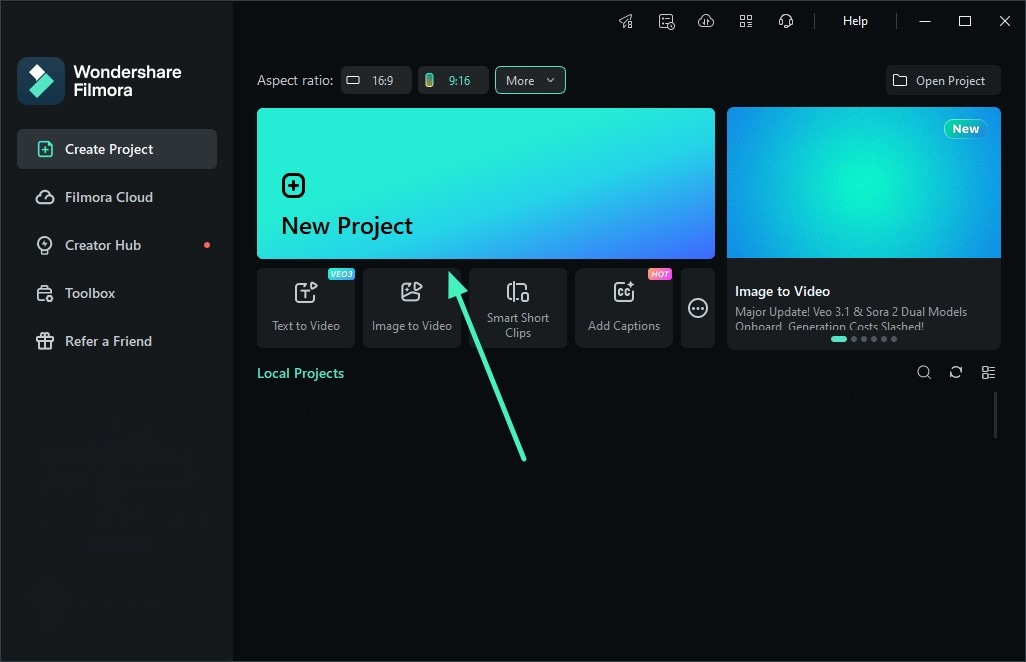
Mode 1. Begin By Creating a New Project
To initiate the process, launch Filmora on your Windows and press the New Project tab. Now, import the video for which you want to adjust the lighting and drag it to the editing timeline.
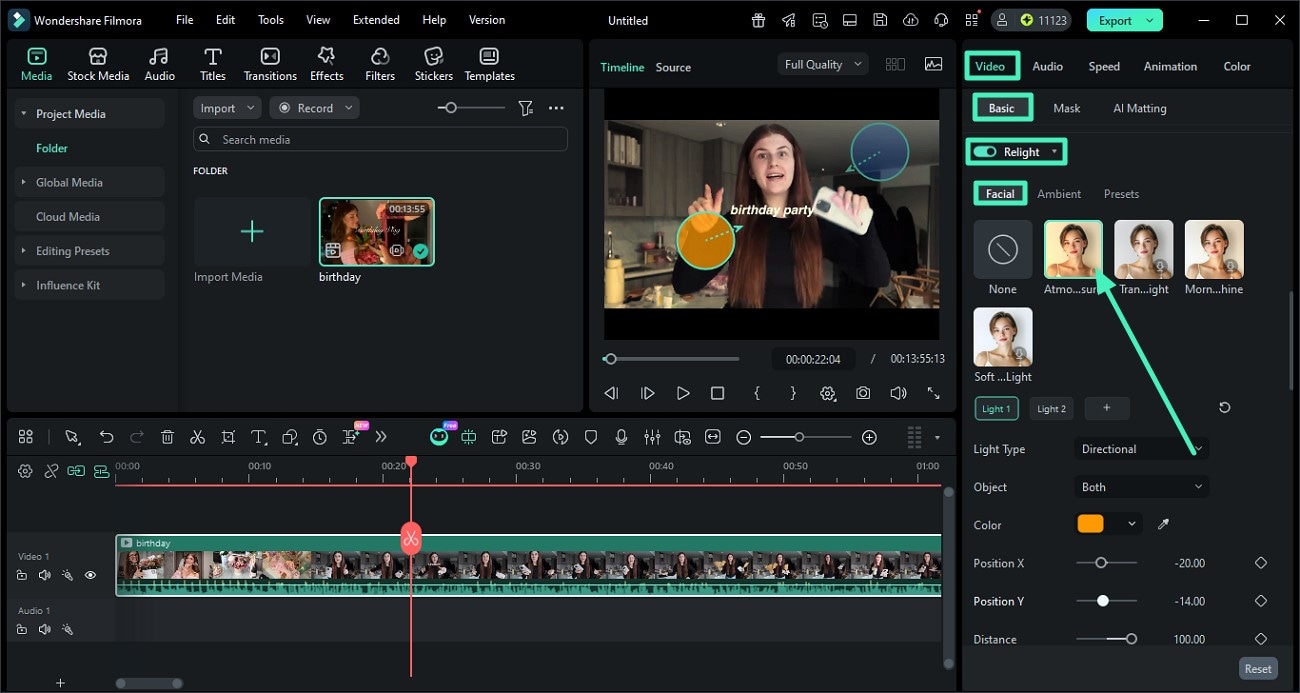
Mode 2. Access AI Relight Feature
In the main editing interface of Filmora, access the Video properties panel on the right. Now, open the Basic tab and turn the toggle on for Relight. Within the Relight feature, access the Facial tab. Select the lighting effect of your choice from the options. Adjust the lighting by dragging the cursor within the preview window. You can make changes to the visuals by dragging positions and choosing a color.
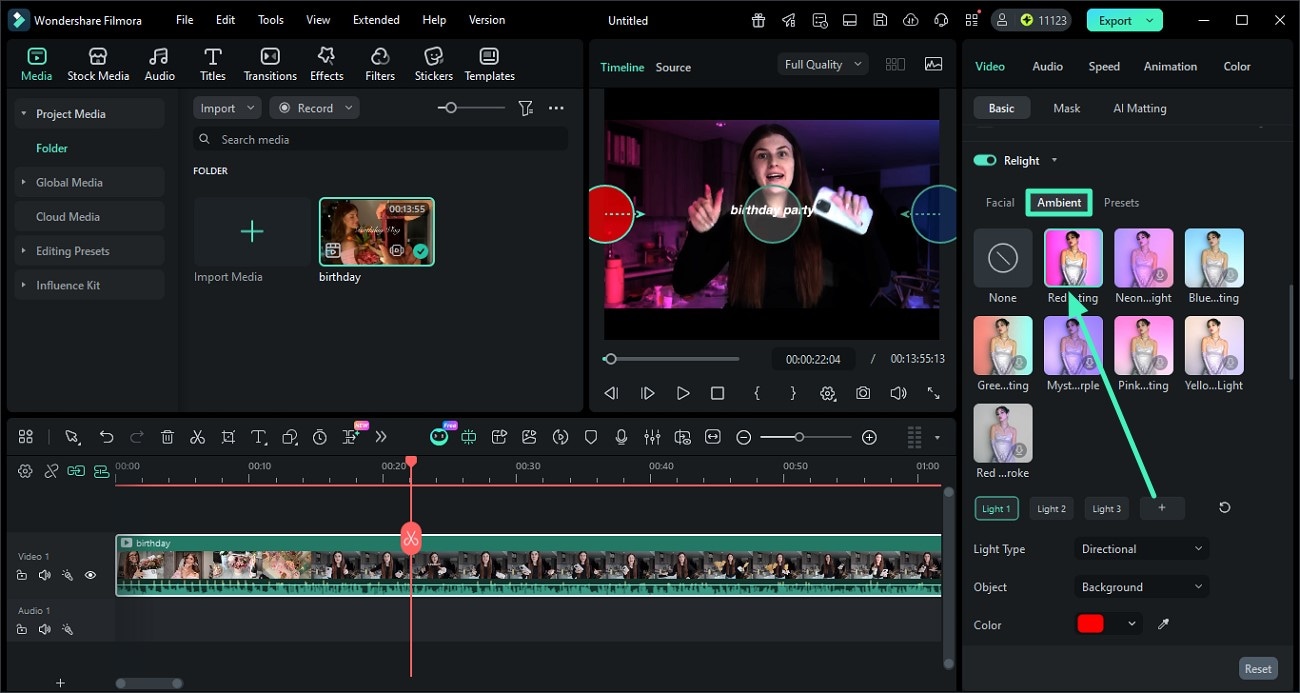
Mode 3. Adjust Lighting for Ambience
Moving forward, access the Ambient tab and choose the lighting effect from the options. Apply the effect by clicking on it and preview it within the preview window. Adjust all the lights according to your preferences within the preview window.
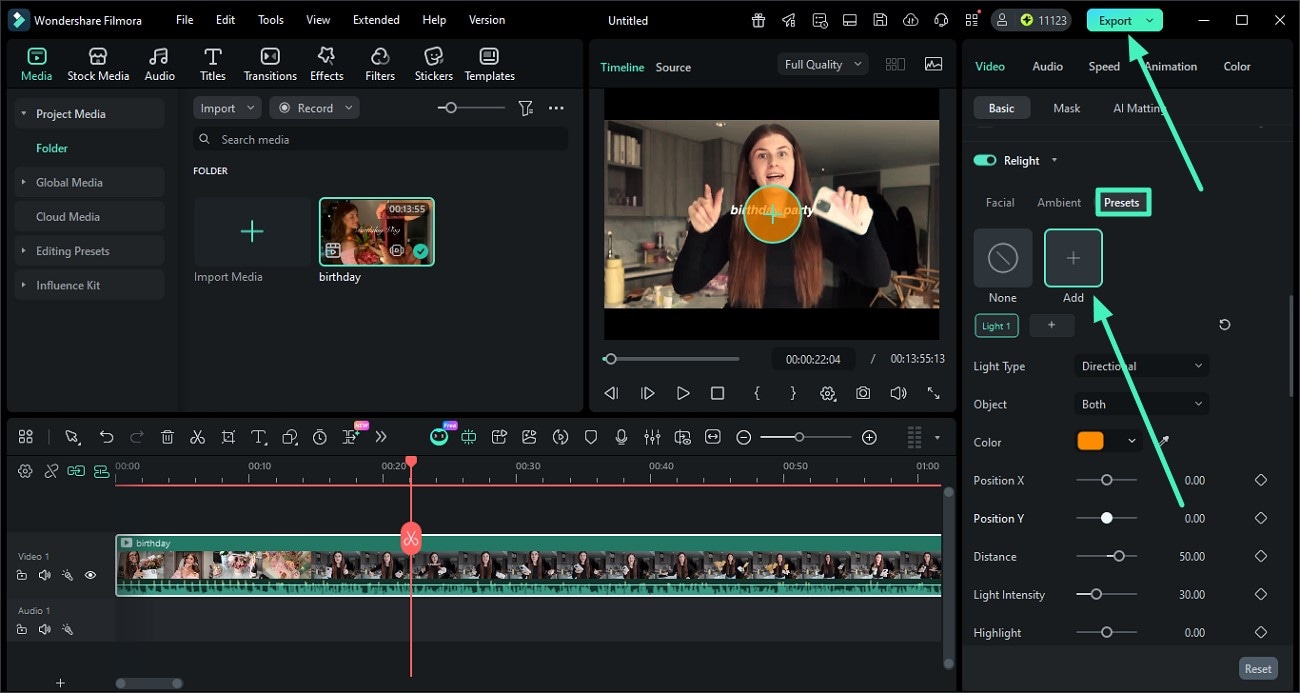
Mode 4. Save as Preset and Export Video
You can also save the customized lighting effect using the Preset option and then clicking the Add icon. Once the settings are configured, press the Save as Preset option to save the effects as presets. When you have the final results, press the Export button to save the results successfully to your device.
Related Posts
Featured Articles
5 Best Video Overlay Apps to Add Overlay Effects
If you are looking for the best video overlay apps, check this article and explore the best apps to overlay photos and videos.
Top Funny Halloween GIFs: Find, Create & Share Your Spooky Laughs
Spice up your Halloween by making and sharing unique, animated Halloween GIFs with Wondershare Filmora. Design your own GIFs using themed stickers, eerie text, and smooth transitions.
How to Uplift Your Video Projects with Multi Camera Setup: Step-by-Step Guide
Learn how to level up your video projects with a multi-camera setup. Follow this step-by-step guide to enhance your content with multicam in Adobe Premiere Pro.
Recommended User Guide
Scene detection feature
Learn how to perform scene detection in Filmora.
Video Denoise for Windows
Don't know how to remove grain from videos in Filmora? Check the video denoise guide here.
Filmora AI Image Enhancer Guide - Windows
Here is the guide on how to use the AI image enhancer feature in Filmora on Windows.
