For the Best Results, Use the Latest Version.
-
Preparations
-
Account
-
Get Started & Basic Settings
-
Compatibility & Tech Specs
-
Performance Settings
-
-
Creating Projects
-
Creating New Projects
-
-
Importing & Recording
-
Video Editing for Windows
-
Basic Video Editing
- Enable/Disable Clip in Windows
- Magnetic Timeline for Windows
- Dual Monitor Setup for Video Editing on Windows
- Select All Clips on Timeline for Windows
- Manage Timeline and Tracks on Windows
- Auto Ripple for Windows
- Split & trim video
- Crop & Pan & Zoom Video
- Compositing
- Change Video Speed on Windows
- Playing videos in reverse
- Mark In and Mark Out for Windows
- Markers for Windows
- Group editing
- Customizable Backgrounds for Videos and Images in Windows
- Video snapshot
- Using freeze frame
- Logo Reveal For Windows
- Apply auto enhance
- Applying drop shadow
- Adjustment layer for Windows
- Transforming
- Video Editing Ruler – Windows
-
Advanced Video Editing
- Drawing Tools for Windows | Filmora Guide
- Create Multi-Camera Clip
- Compound Clip for Windows
- Multi-Clip Editing for Windows
- Filmora Motion Blur | Windows
- Filmora Flicker Removal Guide | Windows
- Apply mask to video
- Creating a PIP effect
- Keyframe Graph Editor for Windows
- Add animation keyframing for Windows
- Keyframe Path Curve for Windows
-
AI-Powered Video Editing
- Smart Scene Cut for Windows
- Smart Short Clips for Windows
- AI Face Mosaic for Windows
- Filmora AI Eye Contact- Windows
- AI Video Enhancer for Windows
- AI Text-to-Video for Windows
- Planar Tracking for Windows
- AI Idea to Video for Windows
- Filmora Image to Video for Windows
- Filmora Image to Prompt for Windows
- Instant Cutter Tool for Windows
- AI Extend
- Filmora AI Relight - Windows
- Filmora AI Image Enhancer Guide - Windows
- AI Script to Video Guide for Windows
- AI Text-Based Editing for Windows
- AI Mate Editing for Windows
- Create with instant mode
- ChatGPT Plugin - AI Copywriting
- AI Smart Cutout
- Lens correction on Windows
- Auto reframe video
- AI Portrait Cutout
- Scene detection feature
- AI Smart Masking for Windows
- Make motion tracking
- Video Stabilization for Windows
- AI Video/Photo Object Remover for Windows
- AI Smart Search for Windows
- AI Skin Tone Protection for Windows
- AI Image for Windows
- Chroma key (green screen)
- Super Slow Motion with Optical Flow for Windows
- Video Denoise for Windows
-
-
Audio Editing for Windows
-
Basic Audio Editing
-
Advanced Audio Editing
-
AI-Powered Audio Editing
-
-
Text Editing for Windows
-
Basic Text Editing
-
Advanced Text Editing
-
AI-Powered Text Editing
-
-
Video Customizations
-
Video Effects
-
Audio Effects
-
Transitions
-
Stickers
-
Filters
-
Color Editing
-
Animations
-
Templates
-
Asset Center
-
-
Exporting & Share & Cloud Backup
Filmora Flicker Remover for Windows
Filmora's Flicker Remover is built for creators who want to clean their footage and make it usable. Powered by cloud AI, it automatically detects and reduces common flicker issues caused by indoor lighting, LED panels, screen refresh rates, and time-lapse capture. Subtle banding and striped flicker are smoothed out while preserving natural motion and color.
The feature is especially useful for night scenes, LED-lit interiors, and venues filled with screens or stage lights, where flicker can ruin an otherwise great shot. Time-lapse clips also benefit, as exposure shifts are balanced frame by frame for a steadier look. Results can be previewed instantly and remain intact after export.
Designed with beginners and fast-turnaround creators in mind, Flicker Remover offers a one-click quality boost. Vloggers, event editors, and small business marketers can fix distracting artifacts quickly and deliver polished videos on tight timelines.
Steps for Removing Flicker with Filmora
As discussed, Filmora allows users to make their videos clean and flicker-free. To learn how to use the Flicker Remover feature, read the steps provided next:
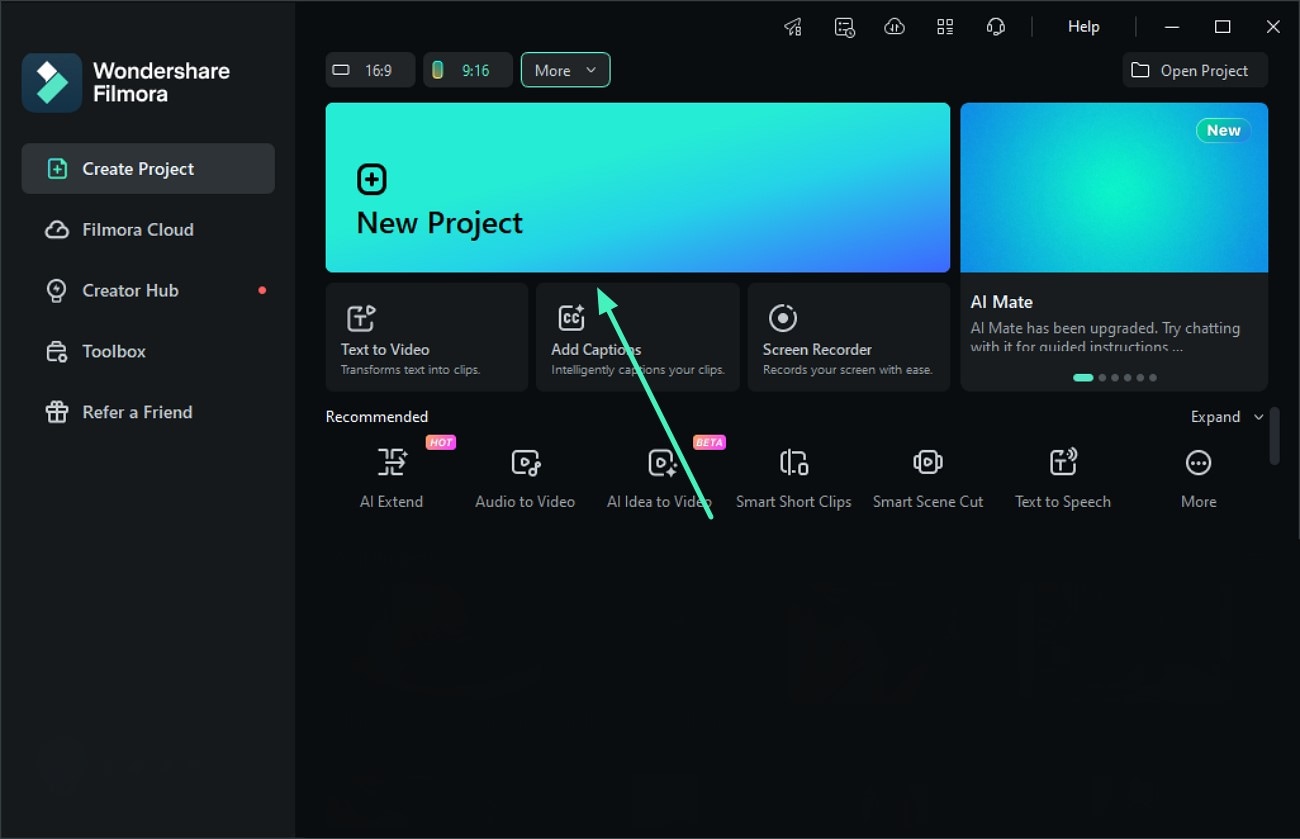
Step 1. Create New Filmora Project
To begin, launch Filmora on your device and press the New Project tab to create a new project. Next, import the video to the tool's interface and drag it to the editing timeline.
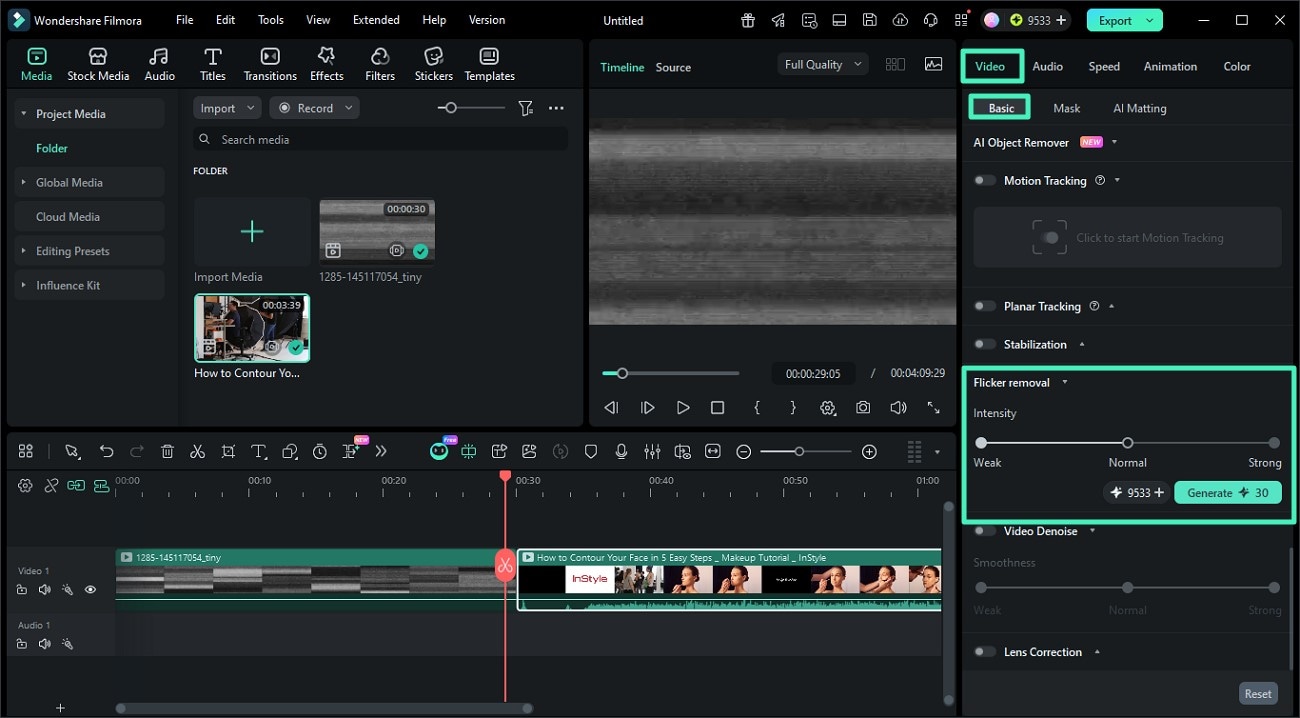
Step 2. Enable Flicker Remover
Once the video is imported, head to the properties panel on the right and access the Video section. Next, enable the Basic section and scroll through the options to opt for Flicker Removal. Now, select the intensity for the removal between Weak, Normal, and Strong. Once selected, press the Generate button to start removing the flicker.
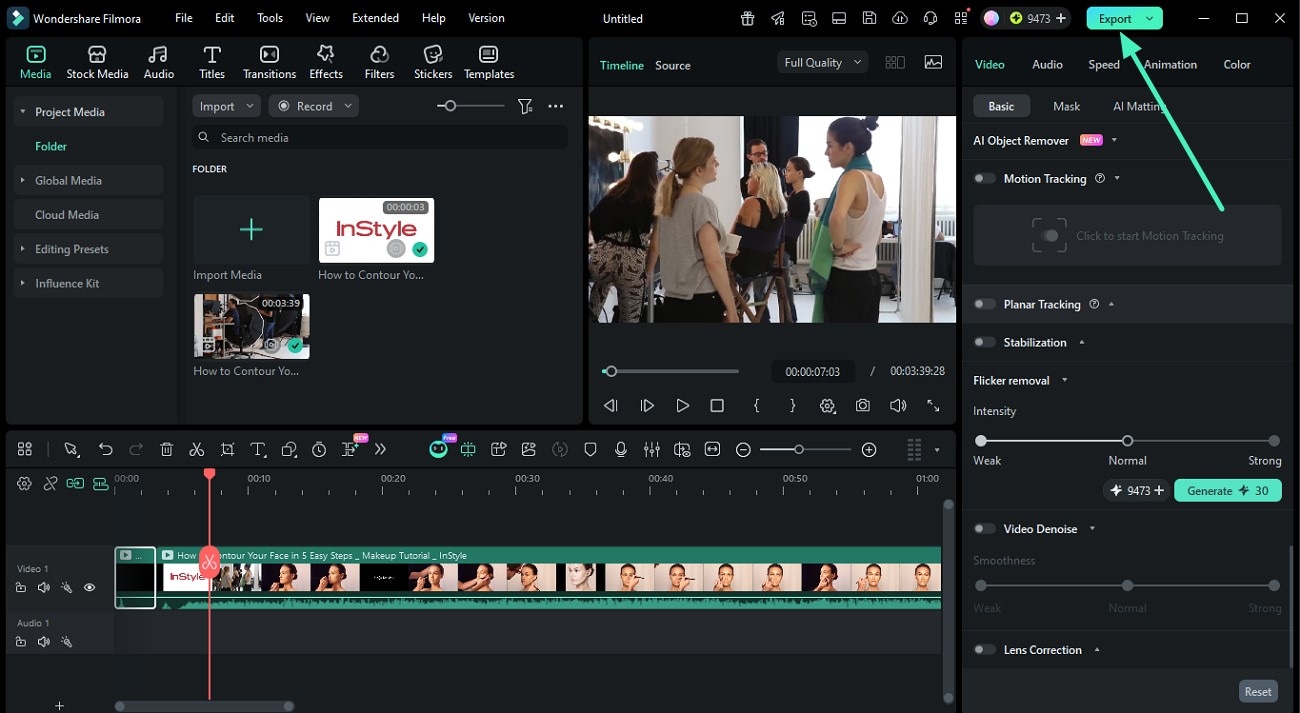
Step 3. Export Final Video
When the flicker is removed from the video and clear results are generated, head to the top-right corner of the interface and press the Export button to save the video.
Related Posts
Featured Articles
Ultimate Guide to YouTube Shorts Ads: How to Create Them for Our Busines
Are you trying to find ways to create YouTube Shorts ads to boost your Business or sales? Read more to find out how to create YouTube shorts and increase your audience through good effects and graphics.
How to Uplift Your Video Projects with Multi Camera Setup: Step-by-Step Guide
Learn how to level up your video projects with a multi-camera setup. Follow this step-by-step guide to enhance your content with multicam in Adobe Premiere Pro.
2026 Updated | Step by Step: Cropping a Video in QuickTime Player
If you’re having trouble cropping your videos in Quicktime Player on a Mac, this guide can help. Keep reading to learn more.
Recommended User Guide
Add animation keyframing for Windows
This is a guide teaching you to add animation keyframing in Filmora.
Multi-Clip Editing for Windows
Wondershare Filmora already has a timeline feature in which users can drag and drop many videos and effects for professional editing.
Filmora Motion Blur | Windows
Here is the guide on how to use the Motion Blur feature in Filmora.
