For the Best Results, Use the Latest Version.
-
Preparations
-
Account
-
Get Started & Basic Settings
-
Compatibility & Tech Specs
-
Performance Settings
-
-
Creating Projects
-
Creating New Projects
-
-
Importing & Recording
-
Video Editing for Windows
-
Basic Video Editing
- Enable/Disable Clip in Windows
- Magnetic Timeline for Windows
- Dual Monitor Setup for Video Editing on Windows
- Select All Clips on Timeline for Windows
- Manage Timeline and Tracks on Windows
- Auto Ripple for Windows
- Split & trim video
- Crop & Pan & Zoom Video in Filmora for Windows
- Compositing
- Change Video Speed on Windows
- Playing videos in reverse
- Mark In and Mark Out for Windows
- Markers for Windows
- Group editing
- Customizable Backgrounds for Videos and Images in Windows
- Video snapshot
- Using Freeze Frame in Filmora for Windows
- Logo Reveal For Windows
- Auto Enhance in Filmora for Windows
- Applying drop shadow
- Adjustment layer for Windows
- Apply Transforming for Windows
- Video Editing Ruler – Windows
-
Advanced Video Editing
- Drawing Tools for Windows | Filmora Guide
- Create Multi-Camera Clip in Filmora for Windows
- Compound Clip for Windows
- Multi-Clip Editing for Windows
- Filmora Motion Blur | Windows
- Filmora Flicker Removal Guide | Windows
- Apply mask to video
- Creating a PIP Effect for Windows
- Keyframe Graph Editor for Windows
- Add animation keyframing for Windows
- Keyframe Path Curve for Windows
-
AI-Powered Video Editing
- Smart Scene Cut for Windows
- Smart Short Clips for Windows
- AI Face Mosaic for Windows
- Filmora AI Eye Contact- Windows
- AI Video Enhancer for Windows
- AI Text-to-Video for Windows
- Planar Tracking for Windows
- AI Idea to Video for Windows
- Filmora Image to Video for Windows
- Filmora Image to Prompt for Windows
- Instant Cutter Tool for Windows
- AI Extend
- Filmora AI Relight - Windows
- Filmora AI Image Enhancer Guide - Windows
- AI Script to Video Guide for Windows
- AI Text-Based Editing for Windows
- AI Mate Editing for Windows
- Instant Mode in Filmora
- ChatGPT Plugin - AI Copywriting
- AI Smart Cutout for Windows
- Lens correction on Windows
- Auto Reframe Video for Windows
- AI Portrait Cutout
- Scene detection feature
- AI Smart Masking for Windows
- Motion Tracking on Windows
- Video Stabilization for Windows
- AI Video/Photo Object Remover for Windows
- AI Smart Search for Windows
- AI Skin Tone Protection for Windows
- AI Image for Windows
- Chroma key (green screen)
- Super Slow Motion with Optical Flow for Windows
- Video Denoise for Windows
-
-
Audio Editing for Windows
-
Basic Audio Editing
-
Advanced Audio Editing
-
AI-Powered Audio Editing
- Auto synchronization
- AI Sound Effect
- Smart BGM Generation on Windows
- AI Voice Enhancer
- AI Voice Cloning in Wondershare Filmora
- AI Music Generator for Windows
- Audio To Video
- AI Vocal Remover for Windows
- AI Auto Beat Sync for Windows
- AI Audio Stretch for Windows
- AI Audio Denoise for Windows
- Silence Detection on Windows
-
-
Text Editing for Windows
-
Basic Text Editing
-
Advanced Text Editing
-
AI-Powered Text Editing
-
-
Video Customizations
-
Video Effects
-
Audio Effects
-
Transitions
-
Stickers
-
Filters
-
Color Editing
-
Animations
-
Templates
-
Asset Center
-
-
Exporting & Share & Cloud Backup
Motion Blur for Windows
Filmora’s Motion Blur feature helps add smooth and natural-looking motion effects to fast-moving footage with just a single click. Designed to make movement appear more cinematic and realistic, the tool automatically creates soft motion trails that reduce rigid or choppy visuals in action scenes, gameplay clips, sports videos, and dynamic camera movements.
Whether you are working with panning shots, zoom effects, rotations, or tracking scenes, Motion Blur improves viewing comfort while enhancing the overall visual quality.
Steps to Use Motion Blur in Filmora
This feature also provides flexible controls for adjusting Blur Intensity, Blur Range, and Motion Direction to match different creative styles and editing needs. To learn how to use this feature, read the steps mentioned below:
Index
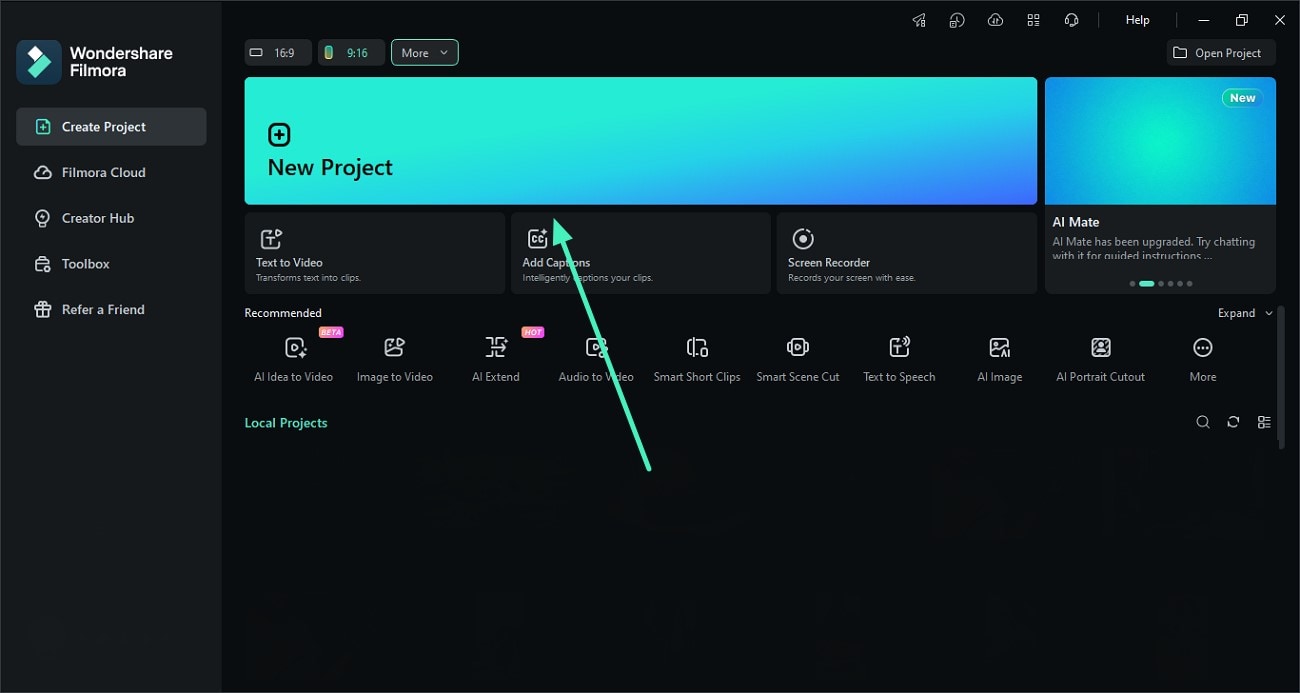
Step 1. Open New Project Import Video
Launch Filmora on your device and create a New Project. Import the video into the media library and drag it onto the editing timeline.
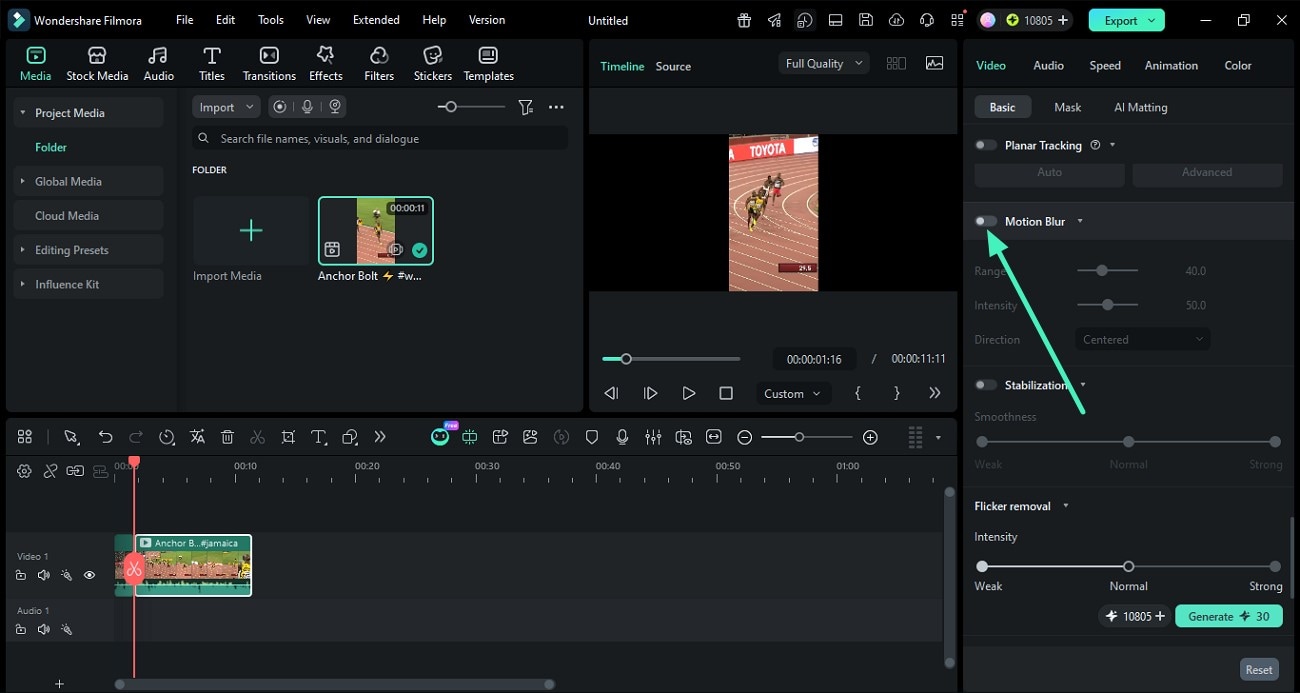
Step 2. Enable the Motion Blur Feature
Turn on the Motion Blur toggle to let Filmora automatically apply motion blur effects to fast-moving elements in the footage.
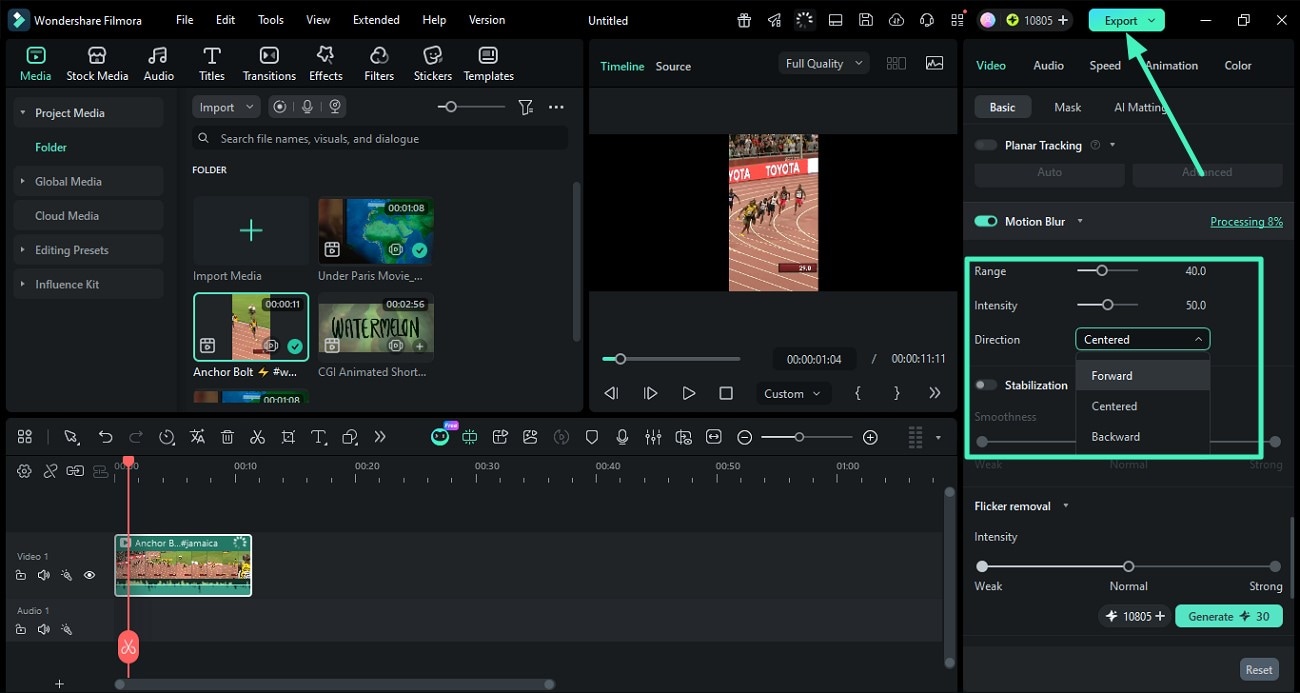
Step 3. Adjust Blur Range and Intensity
Use the Range slider to control the spread of the blur effect and adjust the Intensity slider to define how strong the motion blur appears in the video. Expand the Direction drop-down menu and select the preferred motion style. Once the adjustments are complete, preview the enhanced motion effect within the player window. If satisfied with the results, click the Export button to save the final video.
Related Posts
Featured Articles
Best AI Classical Music Generators in 2026
Looking for classical music without the long search or composing? AI classical music generators make it easy, and we've rounded up the six best tools.
Full Review of REAPER in 2026 with Best Alternative
Get a full REAPER review for 2026, including key features, pros and cons, performance tests, and the best alternative for creators needing a faster, easier audio and video editing workflow.
Top 6 Drum Beat Creator Apps | Create Drum Beat Videos Easily
Whether to create a new beat or detect a beat in videos or MP3s, drum beat creator apps are your best bet. Our expert guide contains a list of the best drum beat applications.
Recommended User Guide
Apply mask to video
Learn how to use Masks in Filmora.
Multi-Clip Editing for Windows
Wondershare Filmora already has a timeline feature in which users can drag and drop many videos and effects for professional editing.
Filmora Flicker Removal Guide | Windows
Learn how to use Filmora Flicker Remover on Windows to remove video flicker and fix lighting issues quickly and easily.
