For the Best Results, Use the Latest Version.
-
Preparations
-
Account
-
Get Started & Basic Settings
-
Compatibility & Tech Specs
-
Performance Settings
-
-
Creating Projects
-
Creating New Projects
-
-
Importing & Recording
-
Video Editing for Windows
-
Basic Video Editing
- Enable/Disable Clip in Windows
- Magnetic Timeline for Windows
- Dual Monitor Setup for Video Editing on Windows
- Select All Clips on Timeline for Windows
- Manage Timeline and Tracks on Windows
- Auto Ripple for Windows
- Split & trim video
- Crop & Pan & Zoom Video in Filmora for Windows
- Compositing
- Change Video Speed on Windows
- Playing videos in reverse
- Mark In and Mark Out for Windows
- Markers for Windows
- Group editing
- Customizable Backgrounds for Videos and Images in Windows
- Video snapshot
- Using Freeze Frame in Filmora for Windows
- Logo Reveal For Windows
- Auto Enhance in Filmora for Windows
- Applying drop shadow
- Adjustment layer for Windows
- Apply Transforming for Windows
- Video Editing Ruler – Windows
-
Advanced Video Editing
- Drawing Tools for Windows | Filmora Guide
- Create Multi-Camera Clip in Filmora for Windows
- Compound Clip for Windows
- Multi-Clip Editing for Windows
- Filmora Motion Blur | Windows
- Filmora Flicker Removal Guide | Windows
- Apply mask to video
- Creating a PIP Effect for Windows
- Keyframe Graph Editor for Windows
- Add animation keyframing for Windows
- Keyframe Path Curve for Windows
-
AI-Powered Video Editing
- Smart Scene Cut for Windows
- Smart Short Clips for Windows
- AI Face Mosaic for Windows
- Filmora AI Eye Contact- Windows
- AI Video Enhancer for Windows
- AI Text-to-Video for Windows
- Planar Tracking for Windows
- AI Idea to Video for Windows
- Filmora Image to Video for Windows
- Filmora Image to Prompt for Windows
- Instant Cutter Tool for Windows
- AI Extend
- Filmora AI Relight - Windows
- Filmora AI Image Enhancer Guide - Windows
- AI Script to Video Guide for Windows
- AI Text-Based Editing for Windows
- AI Mate Editing for Windows
- Instant Mode in Filmora
- ChatGPT Plugin - AI Copywriting
- AI Smart Cutout for Windows
- Lens correction on Windows
- Auto Reframe Video for Windows
- AI Portrait Cutout
- Scene detection feature
- AI Smart Masking for Windows
- Motion Tracking on Windows
- Video Stabilization for Windows
- AI Video/Photo Object Remover for Windows
- AI Smart Search for Windows
- AI Skin Tone Protection for Windows
- AI Image for Windows
- Chroma key (green screen)
- Super Slow Motion with Optical Flow for Windows
- Video Denoise for Windows
-
-
Audio Editing for Windows
-
Basic Audio Editing
-
Advanced Audio Editing
-
AI-Powered Audio Editing
- Auto synchronization
- AI Sound Effects in Filmora for Windows
- Smart BGM Generation on Windows
- AI Voice Enhancer in Filmora
- AI Voice Cloning in Wondershare Filmora
- AI Music Generator for Windows
- Audio To Video
- AI Vocal Remover for Windows
- AI Auto Beat Sync for Windows
- AI Audio Stretch for Windows
- AI Audio Denoise for Windows
- Silence Detection on Windows
-
-
Text Editing for Windows
-
Basic Text Editing
-
Advanced Text Editing
-
AI-Powered Text Editing
-
-
Video Customizations
-
Video Effects
-
Audio Effects
-
Transitions
-
Stickers
-
Filters
-
Color Editing
-
Animations
-
Templates
-
Asset Center
-
-
Exporting & Share & Cloud Backup
Video Chapter in Filmora on Windows
The Video Chapters feature in Filmora automatically creates a chapter-based progress bar that visually divides your video into meaningful sections based on timestamps and titles. Instead of manually designing segmented progress bars you can simply define your chapters and let Filmora generate the navigation bar for you.
Whether you're creating tutorials, online courses, product reviews, or corporate training videos, Video Chapters provide viewers with a clearer understanding of your video's structure.
Key Highlights of This Feature
- Chapter Setup: You can add, remove, or reorder chapters as needed. You get the ability to add chapter text up to 50 characters with emojis. Filmora automatically validates each timestamp to ensure every chapter appears in chronological order.
- Chapter Text Customization: Once your chapters are created, you can customize how every chapter title appears on the progress bar, including font family, font size, font color, bold/italic, alignment, uppercase/lowercase, letter spacing, outline, shadow, and opacity.
- Progress Bar Customization: Personalize the chapter progress bar appearance (height, corner radius, border thickness, played/un-played colors, opacity, and shadow effects). The bar divides automatically based on timestamps.
- Playhead Customization: Choose a built-in rectangular playhead or upload your own PNG/animated GIF to match branding or style.
Steps to Use Video Chapter Feature in Filmora
As discussed, this feature allows users to add video chapters to their exported content automatically. Follow the steps mentioned below to learn how to use this feature:
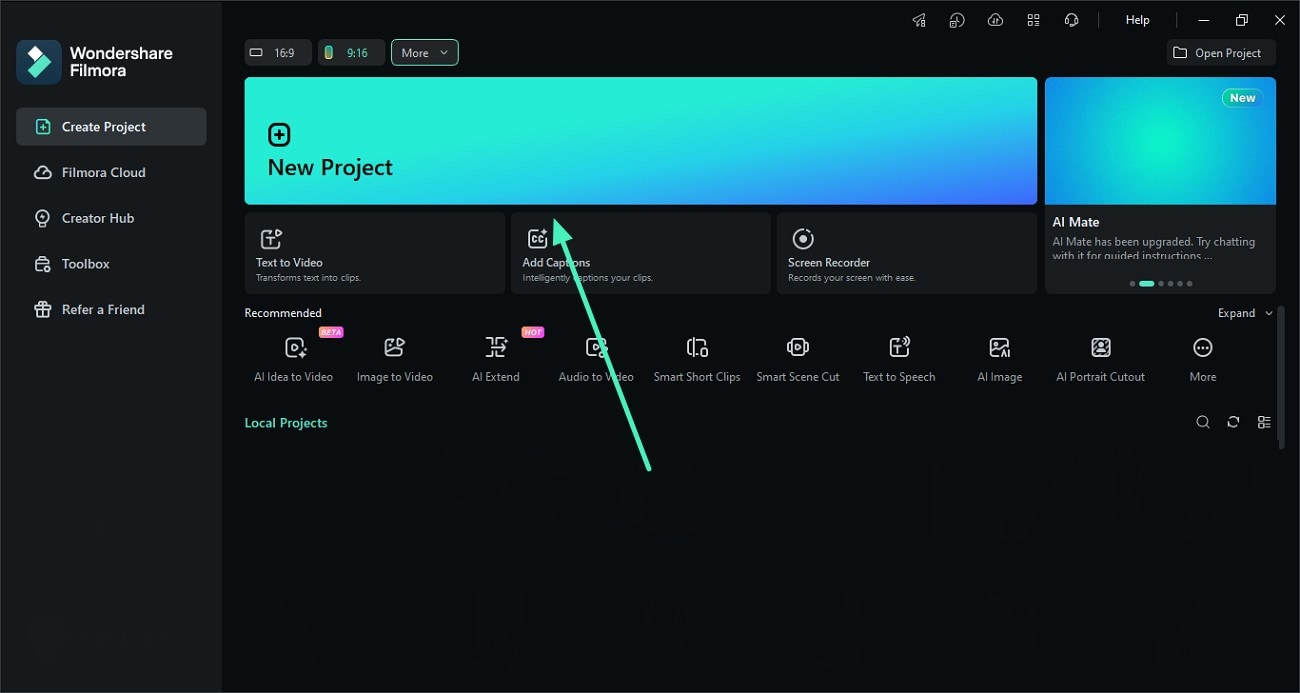
Step 1. Create New Filmora Project
Start the process by creating a new Filmora project using the Create Project tab. Next, import the video to the tool’s interface for which you want to create chapters.
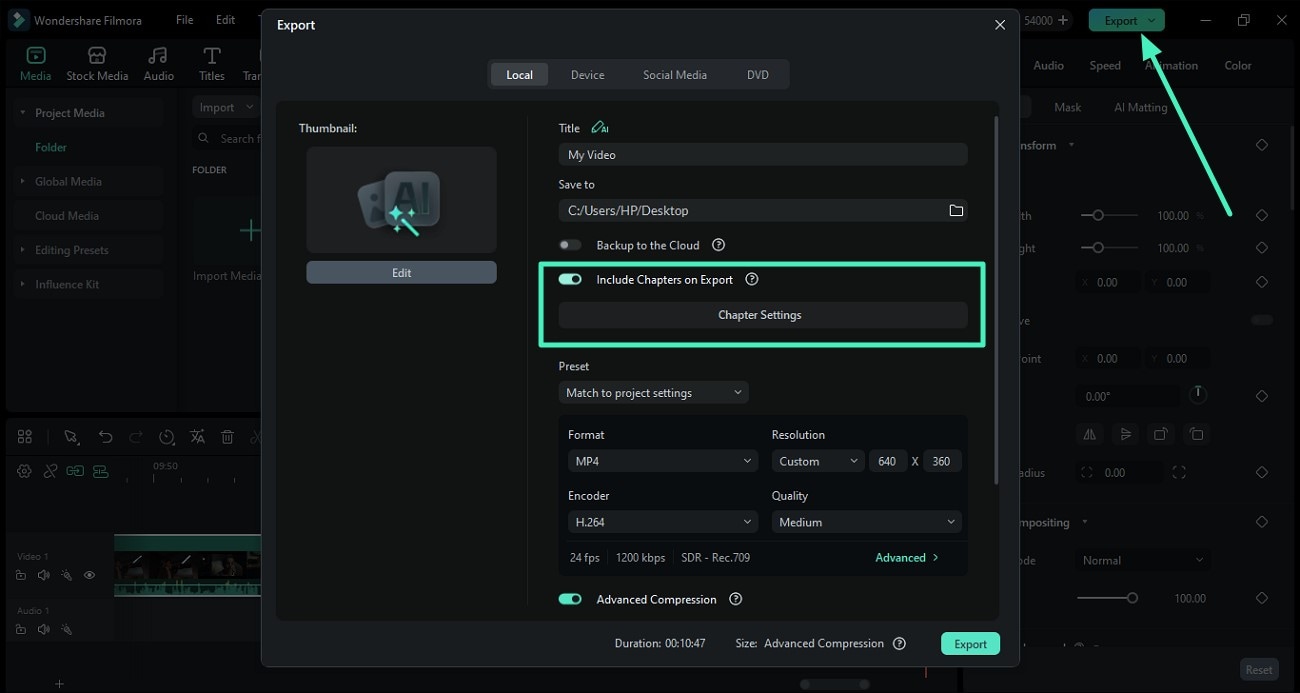
Step 2. Click Export Select Video Chapter
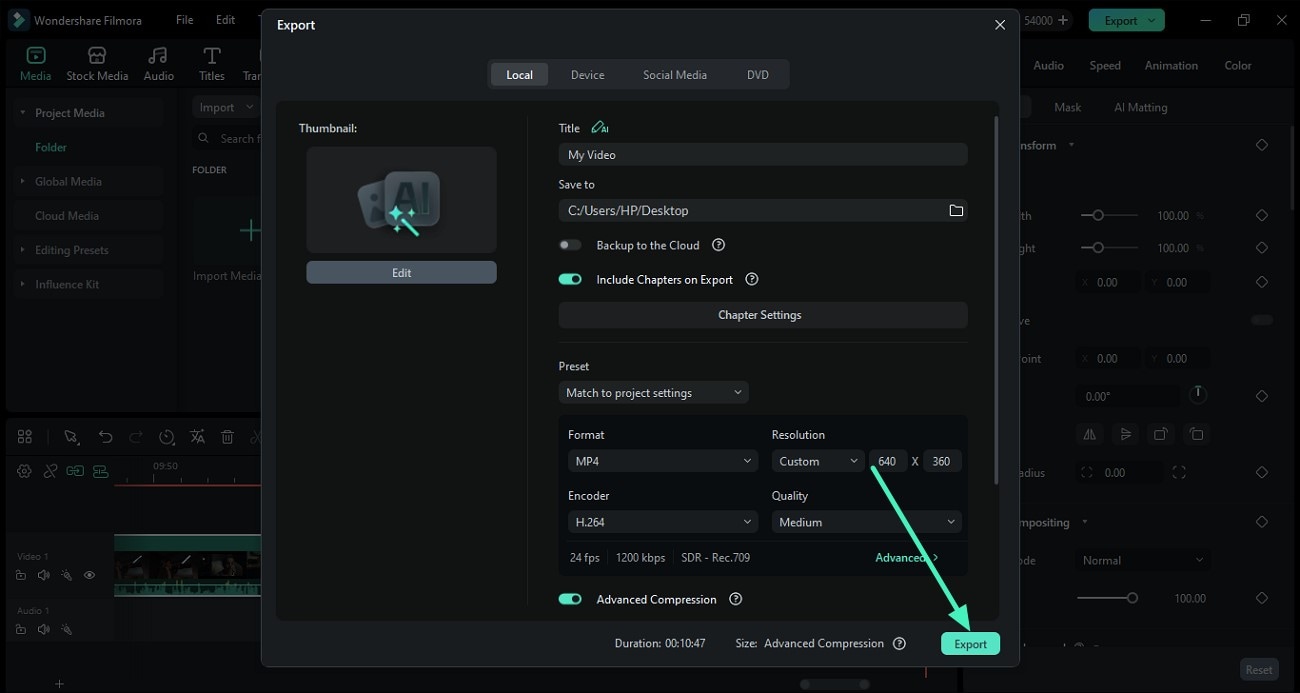
Next, edit the video using the features offered by Filmora and click on the Export button located at the top right corner. In the Export window, turn the toggle on for Include Chapters on Export and click on Chapter Settings.
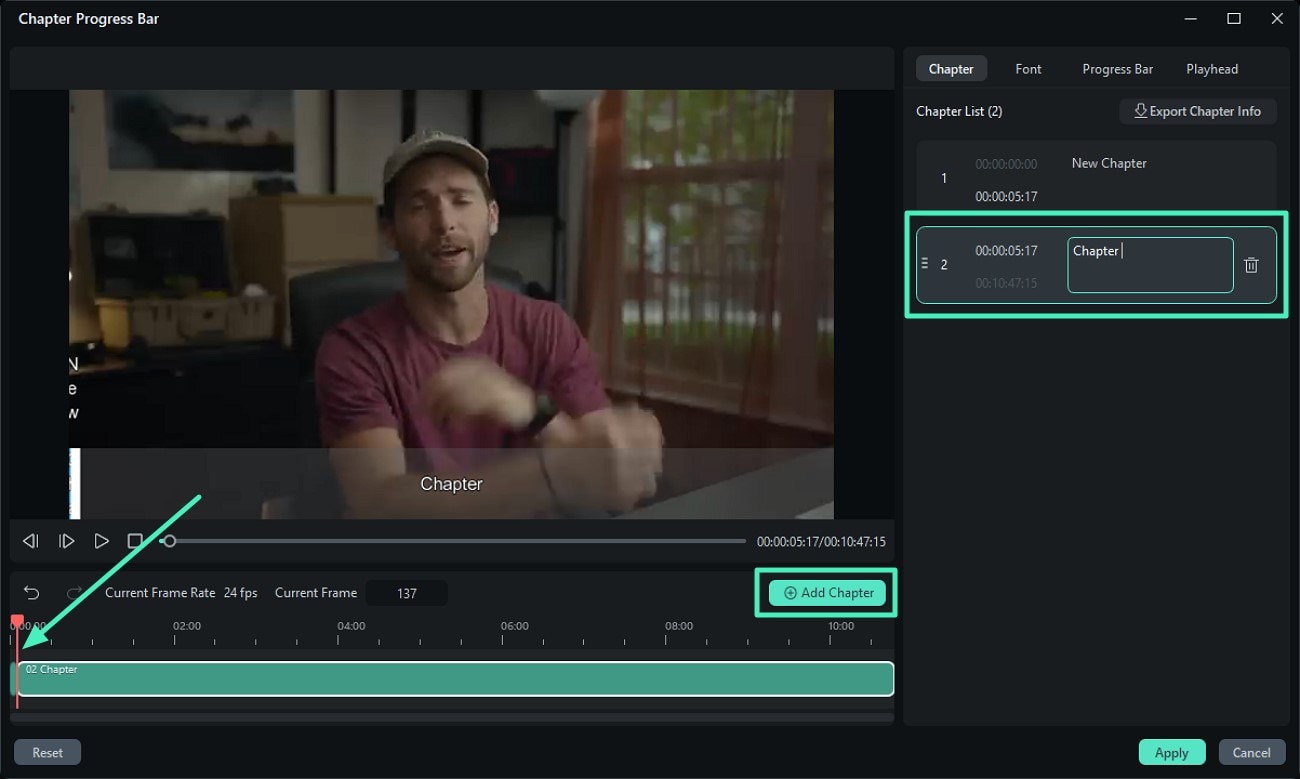
Step 3. Add Chapters
In the following interface, place the playhead where you want to add a chapter and click on Add Chapter. Name the chapter according to your preferences in the text field on the right. Add multiple chapters by changing the position of the playhead.
Step 4. Customize Fonts for Chapter
Access the Font section and customize the font for the chapter as per your choice. You can modify different attributes and can even add background to the text.

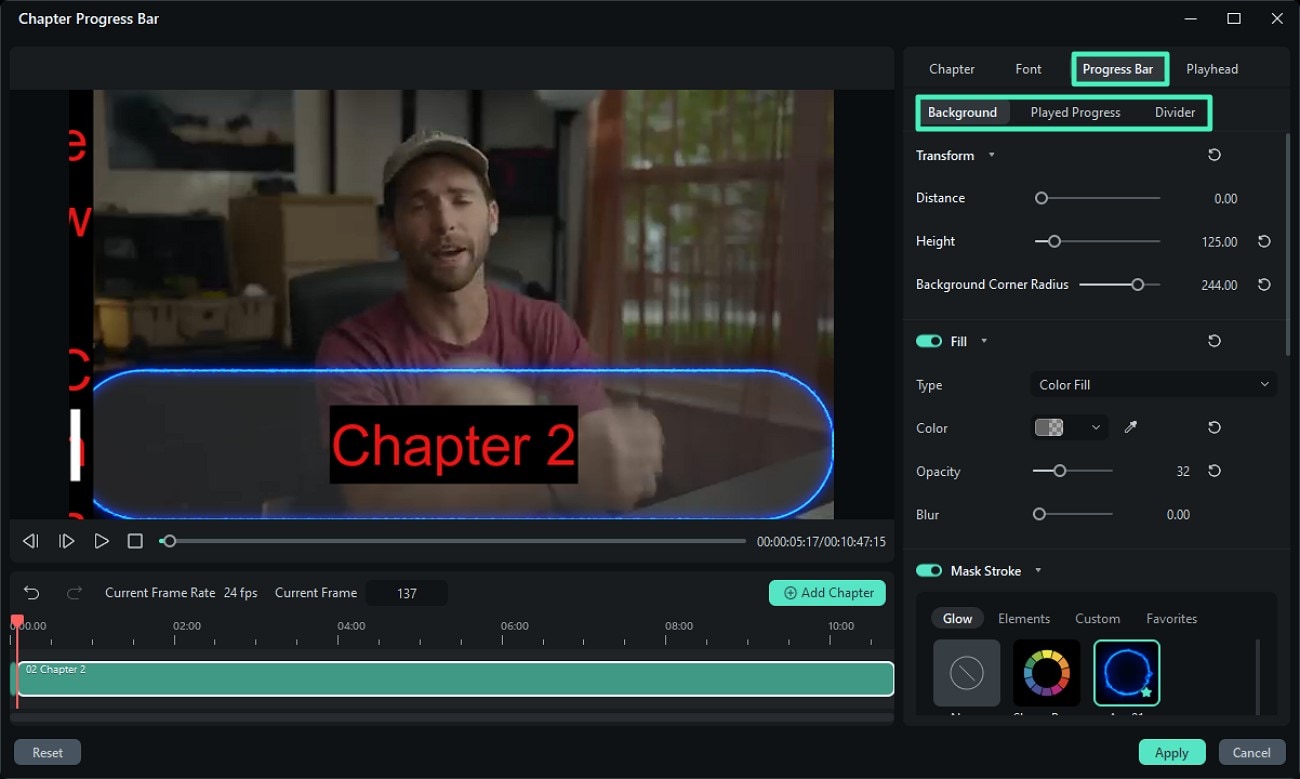
Step 5. Edit Progress Bar
Enable the Progress Bar section and customize the Background, Played Progress, and Divider according to your choice. Add Strokes and Fills to the progress bar and customize different attributes.
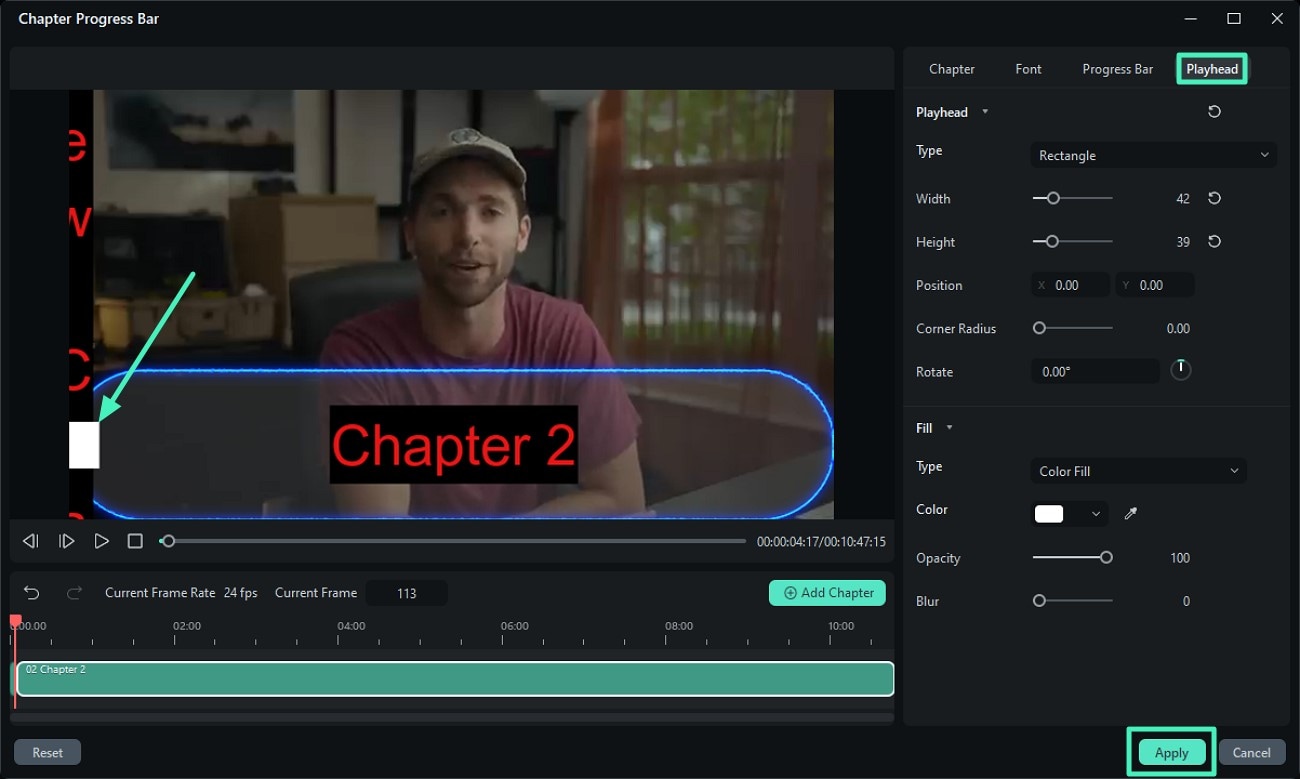
Step 6. Modify the Playhead
Next, modify the playhead by enabling the Playhead section from the top. You can change position, color, opacity, and other elements of the playhead using the functions provided. Once all the settings are done, press the Apply button to apply the changes.
Step 7. Export the Video With Chapters
Once the video chapters are added, press the Export button in the export window to successfully save video with chapters to your device.
Related Posts
Featured Articles
Top 10 Music Video Fonts to Make Your Lyrics Stand Out
Did you know that music video fonts play an important role? Choosing the right font to match your song’s theme is easy with these 10 best font ideas and simple how-to tips.
2026 Updated | Top 8 Free Online Tools You Can Use to Crop Photos
If you’re looking for reliable online tools for cropping images, this list can help you make the right choice.
2026 Updated | Top 8 Apps for Cropping Videos on Android
If you want to crop videos on Android, here are some top apps you should try.
Recommended User Guide
Add animation keyframing for Windows
This is a guide teaching you to add animation keyframing in Filmora.
Creating a PIP Effect for Windows
Learn how to create a PIP effect in Filmora.
Compound Clip for Windows
Users can try out one of the new functionalities in Filmora, navigating under the name of compound clip.
