For the Best Results, Use the Latest Version.
-
Preparations
-
Account
-
Get Started & Basic Settings
-
Compatibility & Tech Specs
-
Performance Settings
-
-
Creating Projects
-
Creating New Projects
-
-
Importing & Recording
-
Video Editing for Windows
-
Basic Video Editing
- Enable/Disable Clip in Windows
- Magnetic Timeline for Windows
- Dual Monitor Setup for Video Editing on Windows
- Select All Clips on Timeline for Windows
- Manage Timeline and Tracks on Windows
- Auto Ripple for Windows
- Split & trim video
- Crop & Pan & Zoom Video
- Compositing
- Change Video Speed on Windows
- Playing videos in reverse
- Mark In and Mark Out for Windows
- Markers for Windows
- Group editing
- Customizable Backgrounds for Videos and Images in Windows
- Video snapshot
- Using freeze frame
- Logo Reveal For Windows
- Apply auto enhance
- Applying drop shadow
- Adjustment layer for Windows
- Transforming
- Video Editing Ruler – Windows
-
Advanced Video Editing
- Drawing Tools for Windows | Filmora Guide
- Create Multi-Camera Clip
- Compound Clip for Windows
- Multi-Clip Editing for Windows
- Filmora Motion Blur | Windows
- Filmora Flicker Removal Guide | Windows
- Apply mask to video
- Creating a PIP effect
- Keyframe Graph Editor for Windows
- Add animation keyframing for Windows
- Keyframe Path Curve for Windows
-
AI-Powered Video Editing
- Smart Scene Cut for Windows
- Smart Short Clips for Windows
- AI Face Mosaic for Windows
- Filmora AI Eye Contact- Windows
- AI Video Enhancer for Windows
- AI Text-to-Video for Windows
- Planar Tracking for Windows
- AI Idea to Video for Windows
- Filmora Image to Video for Windows
- Filmora Image to Prompt for Windows
- Instant Cutter Tool for Windows
- AI Extend
- Filmora AI Relight - Windows
- Filmora AI Image Enhancer Guide - Windows
- AI Script to Video Guide for Windows
- AI Text-Based Editing for Windows
- AI Mate Editing for Windows
- Create with instant mode
- ChatGPT Plugin - AI Copywriting
- AI Smart Cutout
- Lens correction on Windows
- Auto reframe video
- AI Portrait Cutout
- Scene detection feature
- AI Smart Masking for Windows
- Make motion tracking
- Video Stabilization for Windows
- AI Video/Photo Object Remover for Windows
- AI Smart Search for Windows
- AI Skin Tone Protection for Windows
- AI Image for Windows
- Chroma key (green screen)
- Super Slow Motion with Optical Flow for Windows
- Video Denoise for Windows
-
-
Audio Editing for Windows
-
Basic Audio Editing
-
Advanced Audio Editing
-
AI-Powered Audio Editing
-
-
Text Editing for Windows
-
Basic Text Editing
-
Advanced Text Editing
-
AI-Powered Text Editing
-
-
Video Customizations
-
Video Effects
-
Audio Effects
-
Transitions
-
Stickers
-
Filters
-
Color Editing
-
Animations
-
Templates
-
Asset Center
-
-
Exporting & Share & Cloud Backup
Filmora VST3 Plugins for Windows
Filmora's VST3 plugin support is an exciting upgrade that gives creators far more control over their audio design. With VST3 compatibility, you can bring in professional third-party audio plugins directly into Filmora and enhance everything from vocals and music to ambient effects. This feature makes it easy to apply advanced EQs, compressors, reverbs, noise reducers, and creative sound effects without leaving the editor.
Whether you're polishing dialogue or crafting cinematic soundscapes, Filmora's VST3 integration lets you achieve richer, cleaner, and more precise audio results. This turns your video projects into polished, studio-quality productions with far less effort.
Step Overview
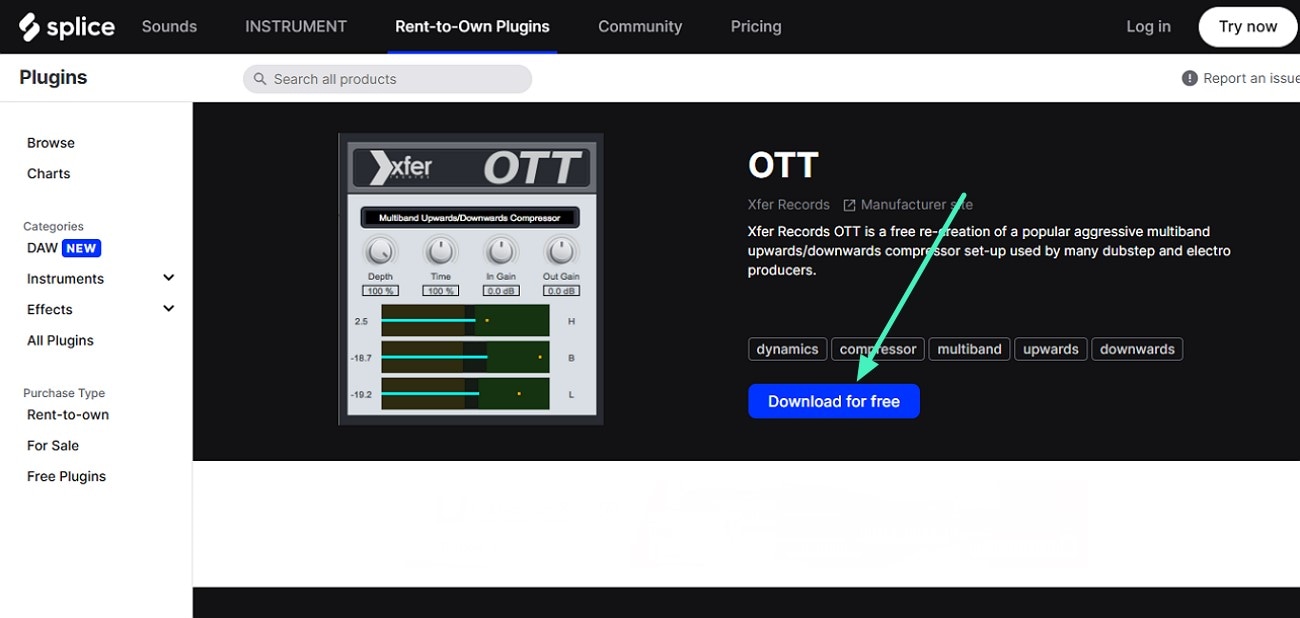
Step 1. Download the VST3 Plugin
To begin, head to the official website of the audio plugin and press the Download button to save it to your Windows device.
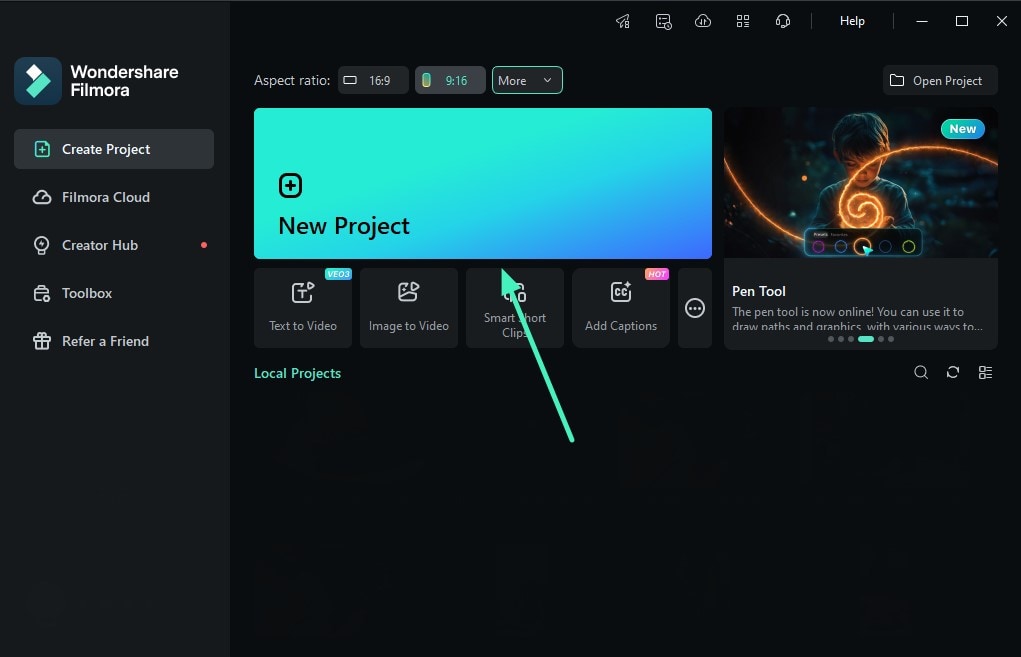
Step 2. Create New Filmora Project
Launch Filmora on your Windows device and create a project using the New Project tab. Now import your audio file and drag it to the editing timeline.
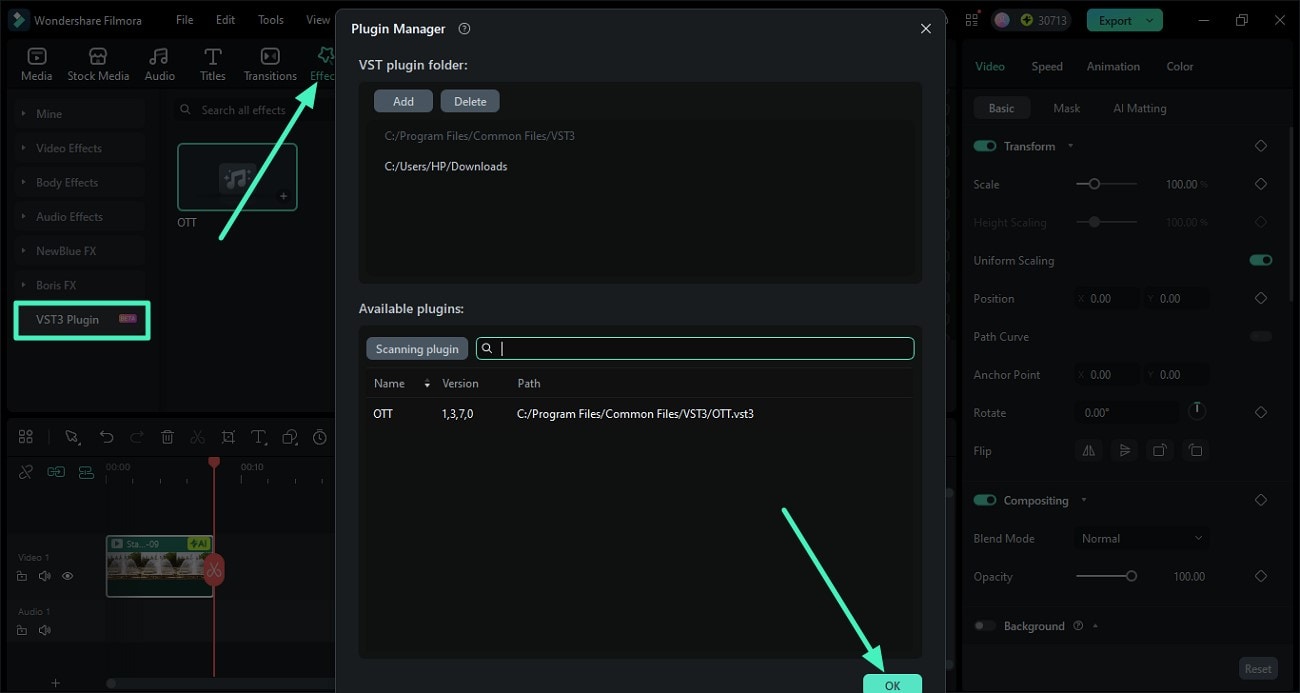
Step 3. Choose Effects Add Plugin
Head to the top toolbar of Filmora and select the Effects option from there. Navigate to the section on the left and scroll through it to locate the VST3 Plugin option. Click on it and press the Add button to add the downloaded plugin to Filmora's interface. Complete the process by pressing the OK button.
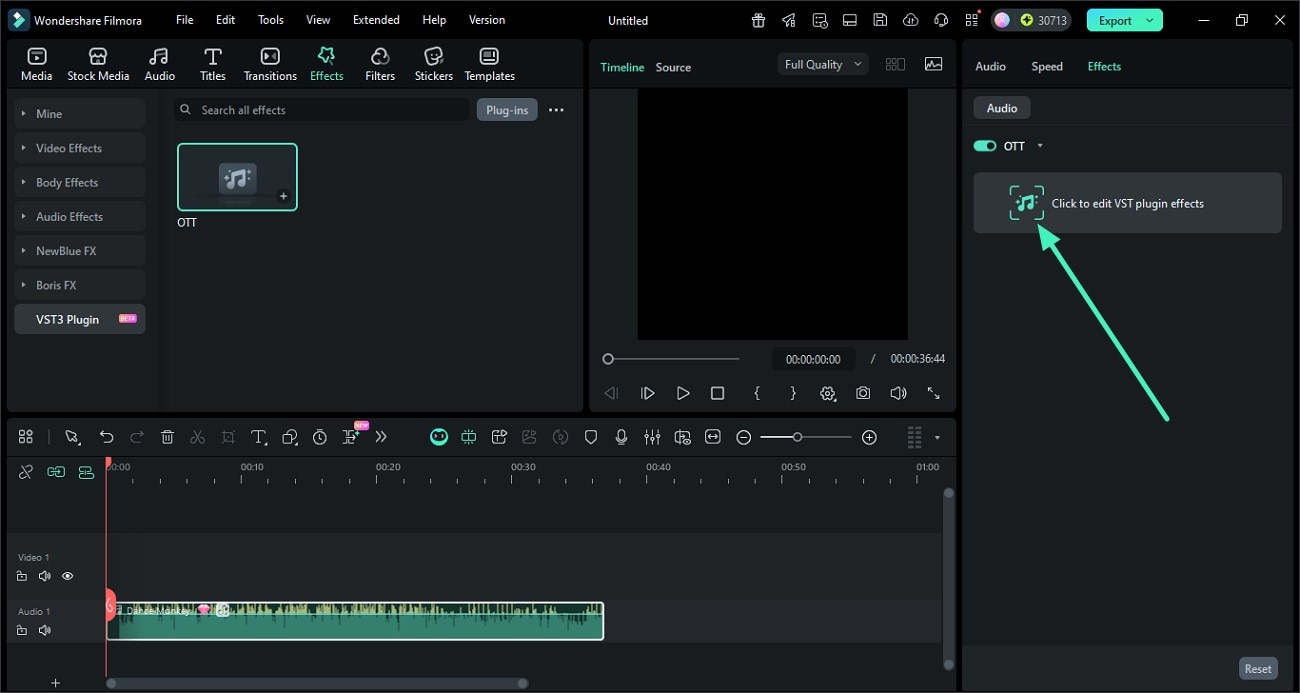
Step 4. Access Effects Panel From Left
Once the plugin is installed, head to the panel on the left and enable the Effects section. Now, click on the Click to Edit VST Plugin Effects.
Step 5. Modify the Audio and Export
In the following plugin window, adjust the audio by adjusting the knobs and sliders of the elements according to your preferences. Once done, preview the audio in the window and save the file using the Export button located at the top-right corner.

Step 6. Save Results as Audio File
In the following interface, select the output as MP3 or any audio format and hit the Export button to successfully export the results to your device.

Related Posts
Featured Articles
22+ Cool Christmas Vacation Memes and How to Make One Easily
It is time to laugh to dive into the joys of this festive season with some Christmas vacation memes. Learn also how to make funny Christmas vacation memes with Filmora meme maker.
Best Jazz AI Music Generators for Creators in 2026
Create rich soundscapes with AI jazz music generator platforms. From chords to full jazz tracks, find the best AI tools for musicians and editors.
Make Fun: How to Make Yourself Look Old in Minutes
See your past and future self instantly using the three top old-face filter apps. Our AI age filter guide will show you how to watch yourself age from baby to adult in seconds.
Recommended User Guide
Animated Charts
Learn how to create professional animated charts effortlessly with Filmora. Turn your data into visually appealing animated graphs.
Filmora OpenFX Plugins for Windows
Learn how to install and use the Filmora OpenFX Plugin on Windows to enhance videos with professional visual effects easily.
