For the Best Results, Use the Latest Version.
-
Preparations
-
Account
-
Get Started & Basic Settings
-
Compatibility & Tech Specs
-
Performance Settings
-
-
Creating Projects
-
Creating New Projects
-
-
Importing & Recording
-
Video Editing for Windows
-
Basic Video Editing
- Enable/Disable Clip in Windows
- Magnetic Timeline for Windows
- Dual Monitor Setup for Video Editing on Windows
- Select All Clips on Timeline for Windows
- Manage Timeline and Tracks on Windows
- Auto Ripple for Windows
- Split & trim video
- Crop & Pan & Zoom Video
- Compositing
- Change Video Speed on Windows
- Playing videos in reverse
- Mark In and Mark Out for Windows
- Markers for Windows
- Group editing
- Customizable Backgrounds for Videos and Images in Windows
- Video snapshot
- Using freeze frame
- Logo Reveal For Windows
- Apply auto enhance
- Applying drop shadow
- Adjustment layer for Windows
- Transforming
- Video Editing Ruler – Windows
-
Advanced Video Editing
- Drawing Tools for Windows | Filmora Guide
- Create Multi-Camera Clip
- Compound Clip for Windows
- Multi-Clip Editing for Windows
- Filmora Motion Blur | Windows
- Filmora Flicker Removal Guide | Windows
- Apply mask to video
- Creating a PIP effect
- Keyframe Graph Editor for Windows
- Add animation keyframing for Windows
- Keyframe Path Curve for Windows
-
AI-Powered Video Editing
- Smart Scene Cut for Windows
- Smart Short Clips for Windows
- AI Face Mosaic for Windows
- Filmora AI Eye Contact- Windows
- AI Video Enhancer for Windows
- AI Text-to-Video for Windows
- Planar Tracking for Windows
- AI Idea to Video for Windows
- Filmora Image to Video for Windows
- Filmora Image to Prompt for Windows
- Instant Cutter Tool for Windows
- AI Extend
- Filmora AI Relight - Windows
- Filmora AI Image Enhancer Guide - Windows
- AI Script to Video Guide for Windows
- AI Text-Based Editing for Windows
- AI Mate Editing for Windows
- Create with instant mode
- ChatGPT Plugin - AI Copywriting
- AI Smart Cutout
- Lens correction on Windows
- Auto reframe video
- AI Portrait Cutout
- Scene detection feature
- AI Smart Masking for Windows
- Make motion tracking
- Video Stabilization for Windows
- AI Video/Photo Object Remover for Windows
- AI Smart Search for Windows
- AI Skin Tone Protection for Windows
- AI Image for Windows
- Chroma key (green screen)
- Super Slow Motion with Optical Flow for Windows
- Video Denoise for Windows
-
-
Audio Editing for Windows
-
Basic Audio Editing
-
Advanced Audio Editing
-
AI-Powered Audio Editing
-
-
Text Editing for Windows
-
Basic Text Editing
-
Advanced Text Editing
-
AI-Powered Text Editing
-
-
Video Customizations
-
Video Effects
-
Audio Effects
-
Transitions
-
Stickers
-
Filters
-
Color Editing
-
Animations
-
Templates
-
Asset Center
-
-
Exporting & Share & Cloud Backup
Filmora Image to Prompt for Windows
The Image-to-Prompt feature helps users generate detailed prompts directly from reference visuals, making it easier to control style, structure, and motion in AI video creation. By analyzing images or videos, it extracts prompt information that can be reused to recreate similar visual aesthetics in future generations.
This capability also allows creators to refine prompts for better image-to-video results and maintain consistent visual styles across multiple outputs. By editing and adjusting the extracted prompts, users can quickly improve motion accuracy, replicate design elements, and enhance overall video quality with greater creative control.
When to Use
- Replicate a specific visual style using reference images or video clips.
- Achieve more precise control over scene composition and motion in AI-generated videos.
- Maintain a consistent visual theme across multiple video generations.
- Enhance Image-to-Video (I2V) output quality by refining and improving prompts.
Supported Inputs & Best Uses
- Single Image → Prompt: Analyze one image to capture and reuse its visual style.
- Start Frame + End Frame → Prompt: Guide motion transitions and improve scene continuity.
- Multiple Reference Images → Prompt: Merge elements from several images to build a richer style.
- Video Clip → Prompt: Study a video’s pacing and aesthetics to recreate a similar look.
- Prompt Editing (After Extraction): Adjust style, details, and instructions to achieve better results before generating the final video.
Steps to Use the Image to Prompt Feature
Index
For Image to Video
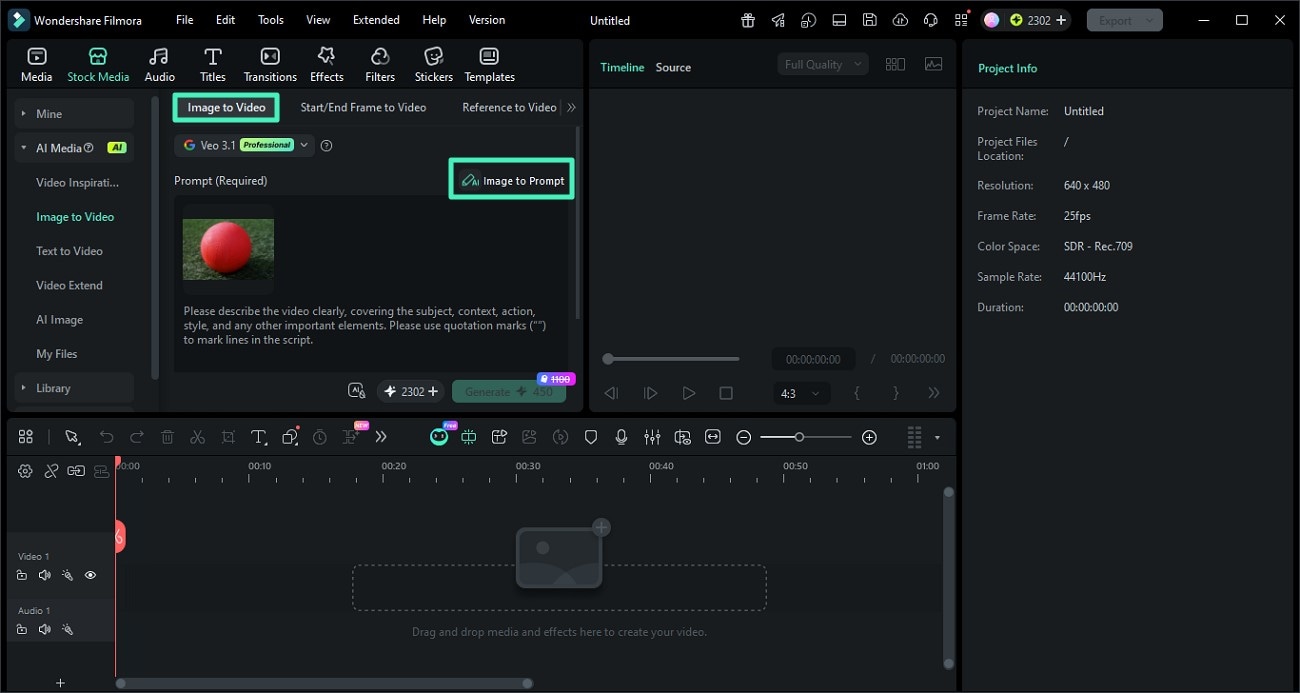
Step 1. Upload Image Choose Image to Prompt
Upload the image to the tool’s interface after selecting the Image to Video feature. Now, locate the Image to Prompt option and click on it to generate the prompt.
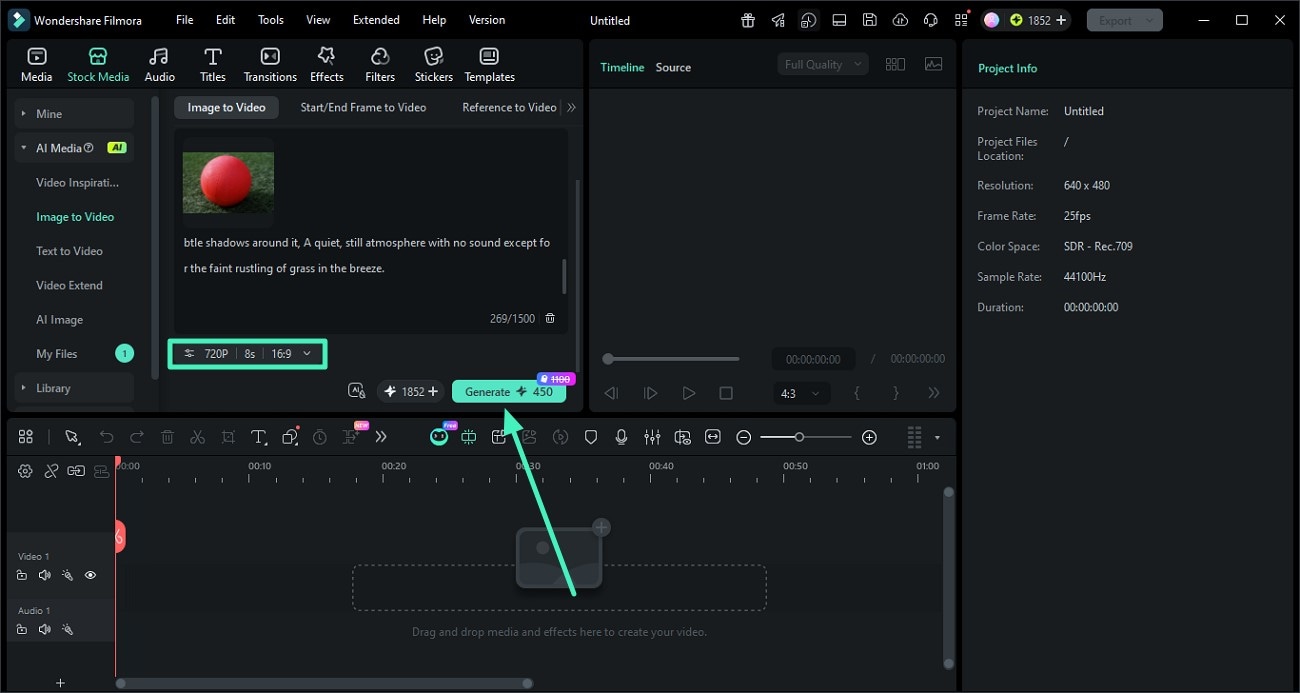
Step 2. Select Setting and Generate Video
Once the prompt is generated, select the resolution of the video and configure the aspect ratio and duration. Hit the Generate button to execute the generation process.
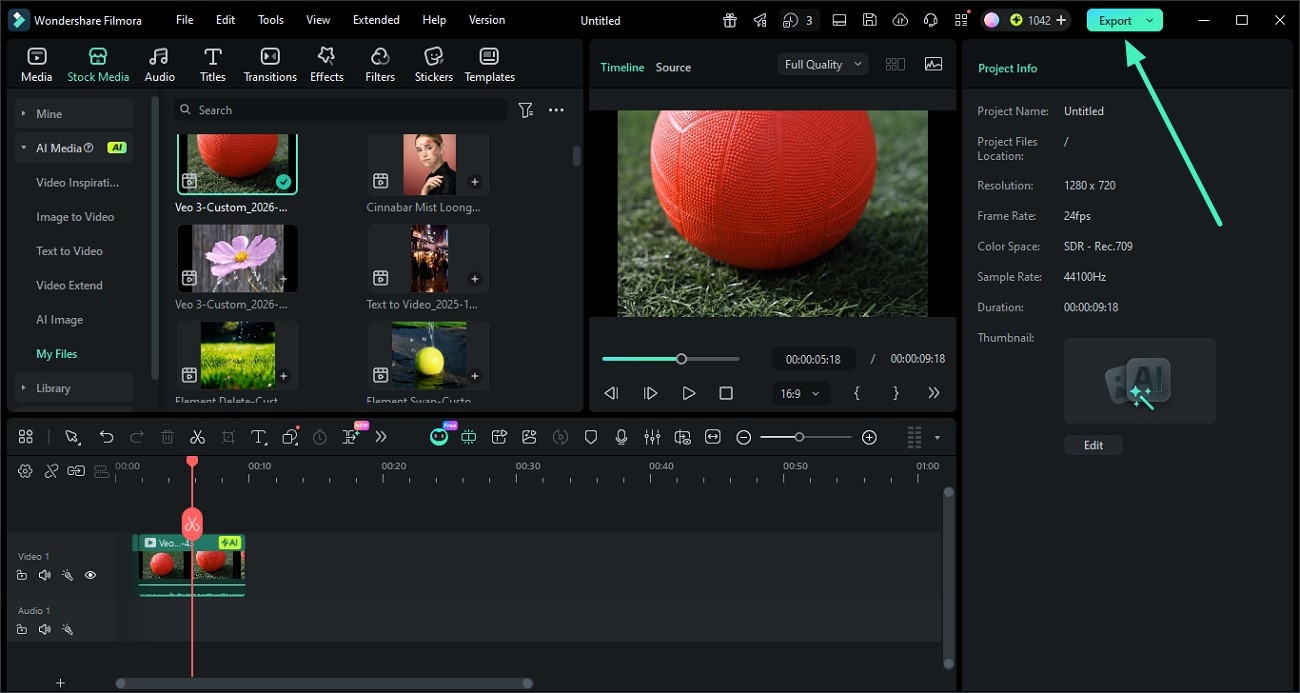
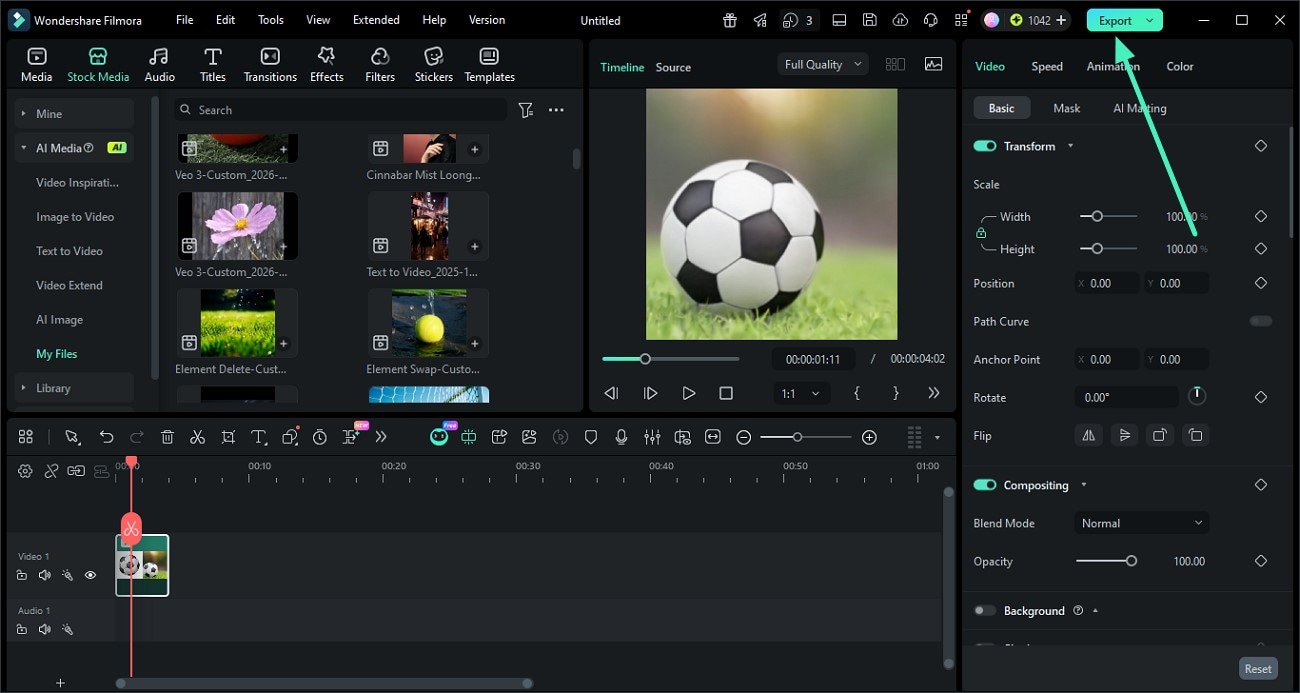
Step 3. Review Results and Export
After the successful generation of the video, press the Export button to save the results.
For Start/End Frame to Video
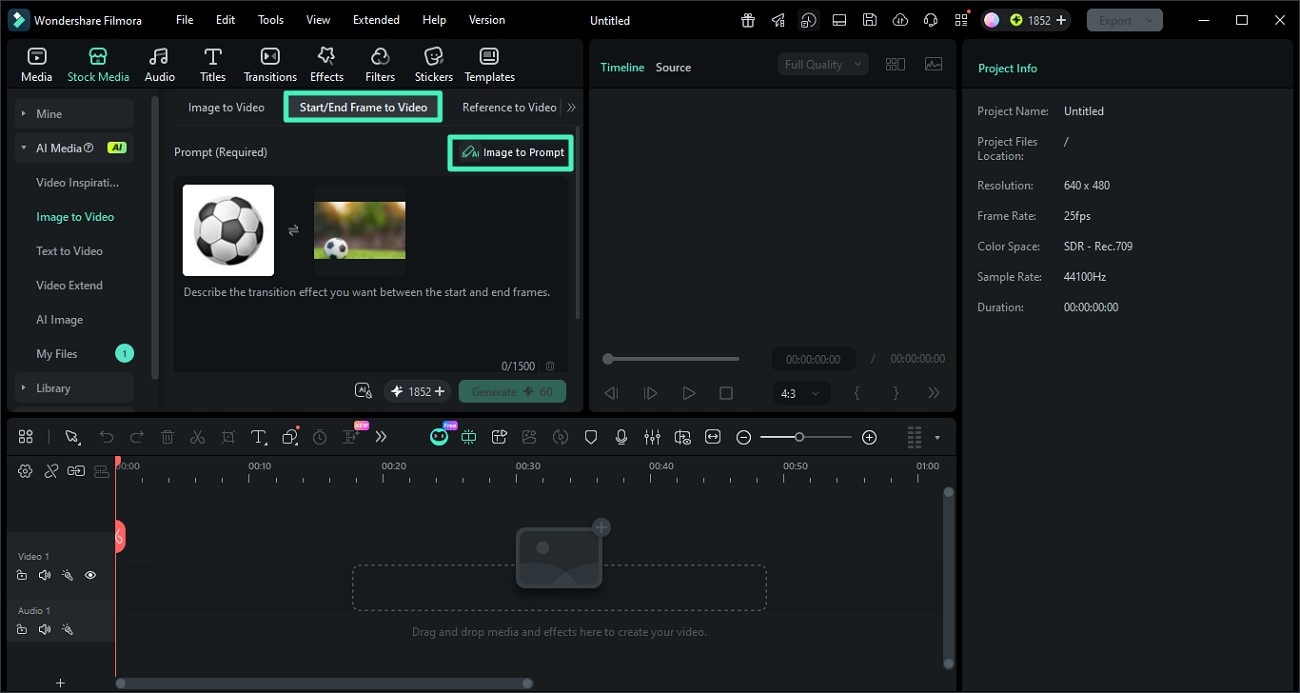
Step 1. Upload Frame Images Generate Prompt
Import the start and end frames using the designated options. Next, locate the Image to Prompt option and click on it.
Step 2. Review Prompt Generate Video
When the prompt is generated by AI, review it and select the resolution and duration for the video. Now, press the Generate button to let the tool start generating the video.

Step 3. Preview Video and Save
Once the video is generated, press the Export button to save the generated results to your device.
For Reference to Video
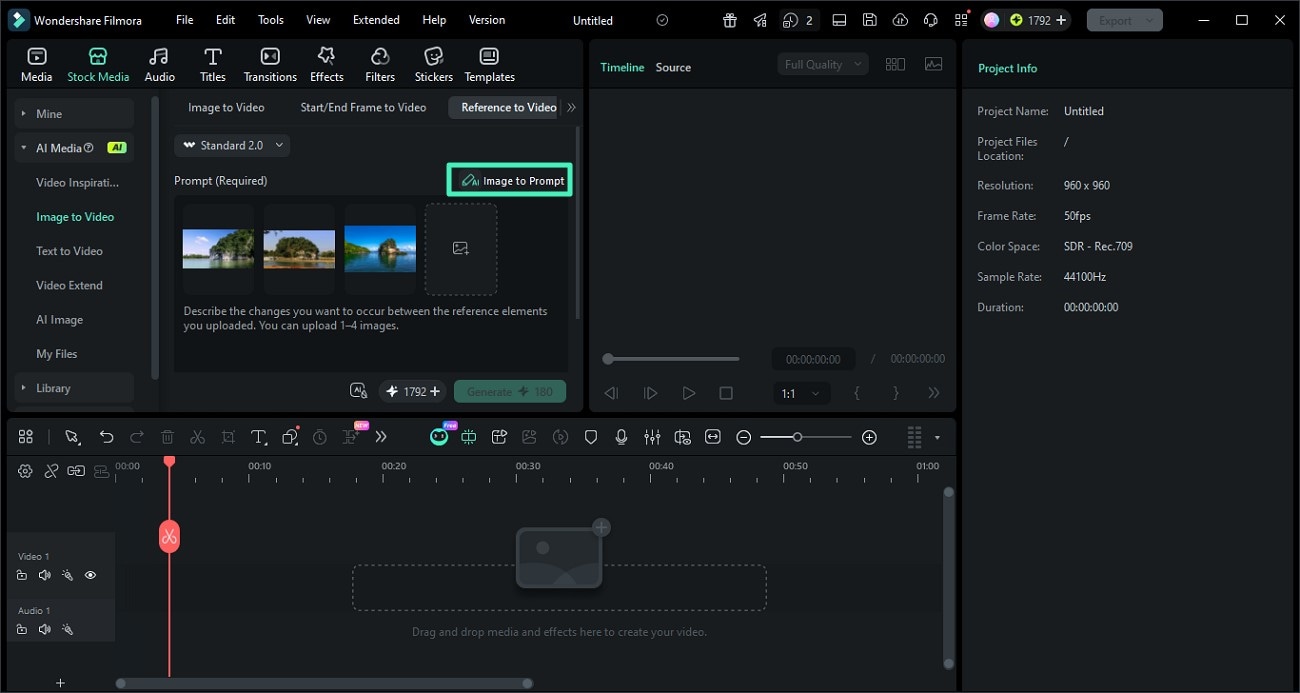
Step 1. Import Frames and Choose Image to Prompt
After selecting the Reference to Video feature, upload multiple reference images. Next, press the Image to Prompt option to generate a prompt.
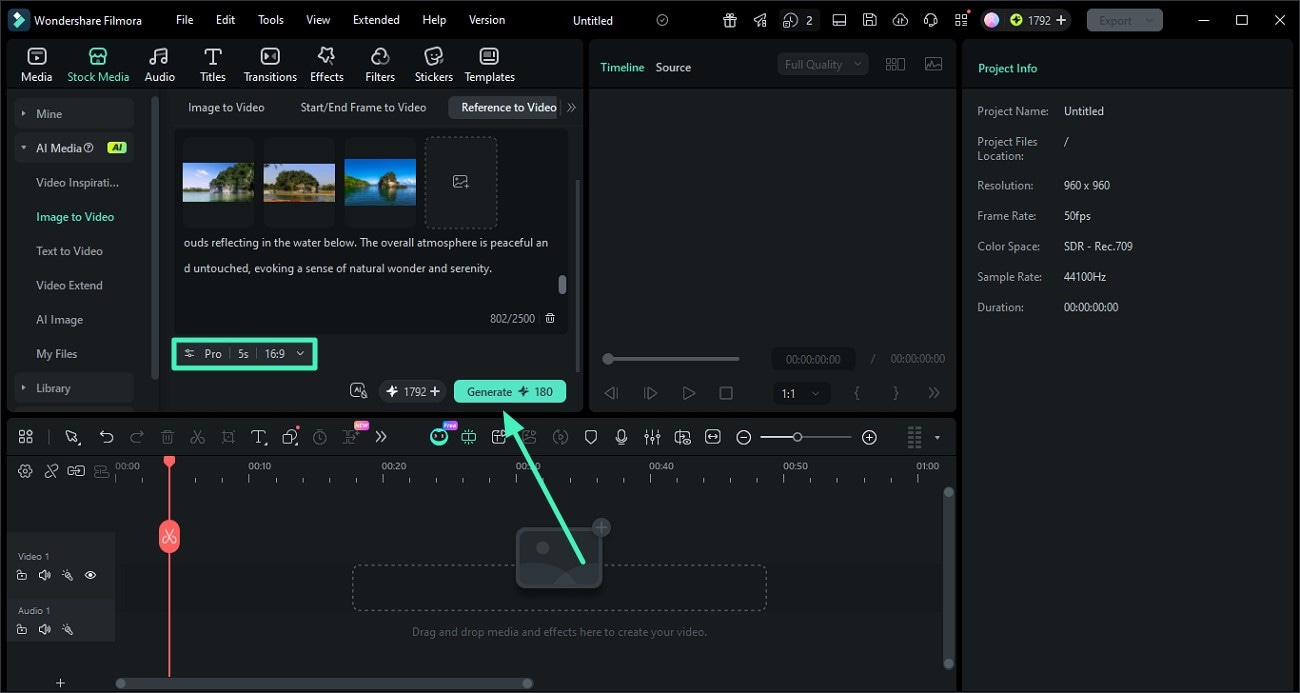
Step 2. Configure Settings and Generate
When the prompt is generated, preview it and make changes if required. Select the quality, duration, and aspect ratio for the video, and hit the Generate button.
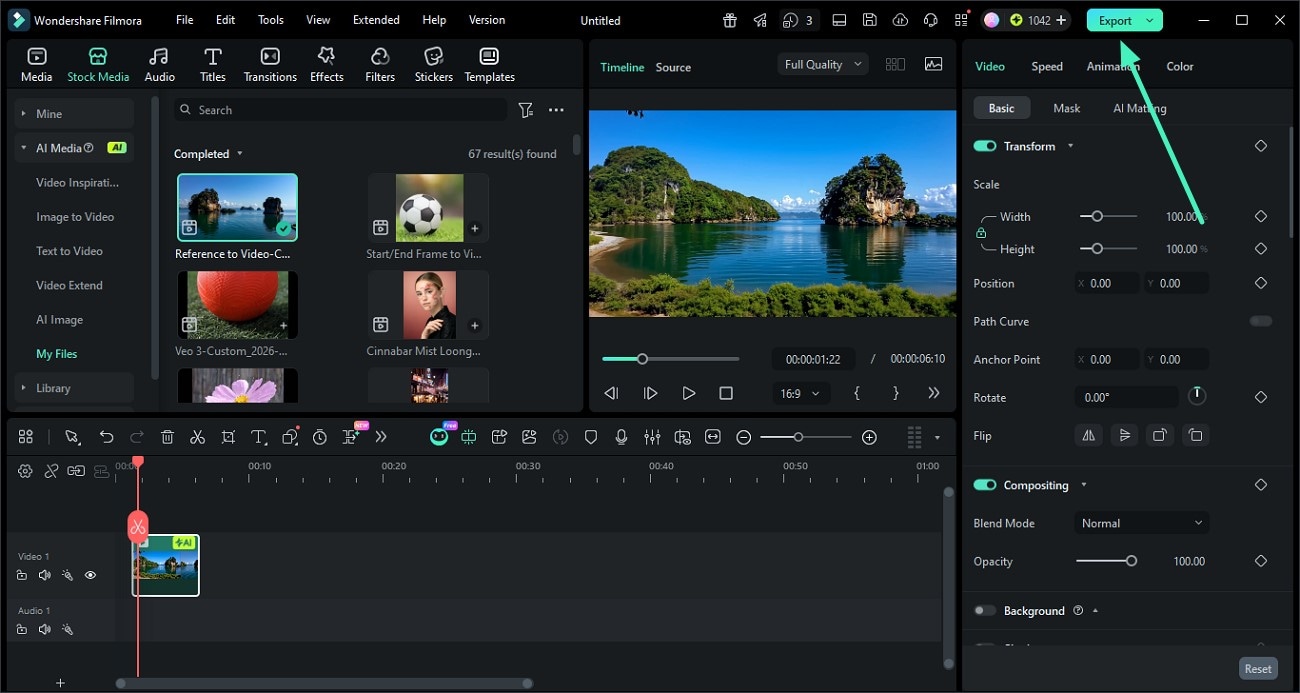
Step 3. Check Results and Save Video
Once the video is generated against the prompt, click Export to save the results.
Related Posts
Featured Articles
Cat Ear Filter: How to Add Cat Ears to Photos
Learn how to use the best cat ear filters on Instagram, Snapchat, and online tools. Also, discover how one of the best apps gives you endless creative options.
Funny Dog Video TikTok: The Right Way to Make Viral Videos
Want your pet to go viral on social media? Read this article to learn how to craft compelling and funny dog videos on TikTok effortlessly.
Transform Text to Voice: Benefits, Uses, and Steps
Explore the latest tech advances in audio and video editing and discover how to transform text to voice for more accessible content.
Recommended User Guide
Chroma key (green screen)
Learn how to use Chroma Key( Green Screen) in Filmora 11.
Lens correction on Windows
Learn how to use Lens Correction in Filmora 11
Planar Tracking for Windows
This guide explains how to use Planar Tracking in your videos on Windows
