


 TL;DR:
Creating a professional animated travel map involves either utilizing Adobe After Effects' built-in Stroke and 3D spatial tools for advanced compositing, or choosing Wondershare Filmora for a lightweight, template-driven alternative.
● Building a map manually in After Effects requires no paid plugins but involves a strict sequence of drawing routes with the Pen tool, animating Stroke paths using Easy Ease keyframes, and managing spatial movements via a Null object parented to a 3D Camera.
● Pre-made Envato templates offer workflow shortcuts with specific constraints: Flight Maps requires manual customization for 2D city-to-city routes, Place on Earth targets single 3D globe locations but demands quarter-resolution editing to mitigate slow rendering, and the World Map Toolkit (.MOGRT) can cause major playback delays in Premiere Pro.
● Content creators wanting to avoid hardware-intensive rendering, Mask paths, and Expressions can use Filmora's built-in Trim Path and Path Follower tools to automatically attach and track moving graphics along a drawn route.
Ask AI for a summary
 ChatGPT
 Perplexity
 Gemini
 Claude
 Grok
Grok
Animated Maps have come a long way, and their possibilities are endless. Today, we see the expansive incorporation of animated mapping in the fields of travel & tourism, education, journalism, and healthcare. They are used in videos to illustrate changes in data over a period of time.
These maps are primarily used as a 'state-of-art' tool for geographic visualization. Viewers and readers today expect stories to have these dynamic maps.
Creating spectacular animated maps has become easier with the latest technology. This article will look at the basic steps of making 3D animation travel maps in Adobe After Effects and discuss a few popular templates alongside.
Part 1: How to Create 3D Animated Travel Map in After Effects?
This comprehensive tutorial will guide you through creating a professional-grade after effects animated map from scratch. You won't need to purchase any expensive plugins or presets – everything can be accomplished using Adobe After Effects' built-in tools to create stunning 3d map animation after effects.
Creating a spectacular after effects travel map tutorial becomes straightforward when you follow our systematic approach. The techniques covered here are used by professional motion graphics artists worldwide for creating cinematic-quality map animations for documentaries, travel shows, and corporate presentations.
Note: You can watch the video tutorial from YouTuber to check how he animated the map with AE.
Step 1: Animate your Line
The foundation of any successful animated world map after effects project begins with properly setting up your composition and creating the travel path animation.
- First, create a new composition under Composition Settings. Here you can set your presets. Change the quality to full HD (1080p) and ensure that you check off the locked aspect ratio. You can change the width, if required and don't forget to rename the composition.
- Next, import your road map. You can pre-compose it and change it from After Effects later, as needed.
- Right-click to create a new solid layer; that'll be your Stroke. Pick any color and click 'Ok.'
- Next, you have to decide your travel location. Before that, uncheck the new layer.
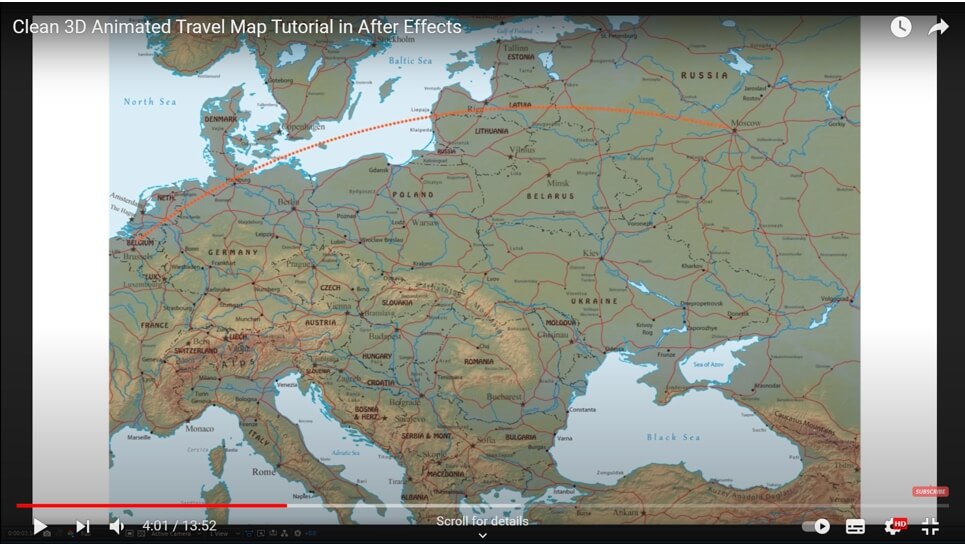
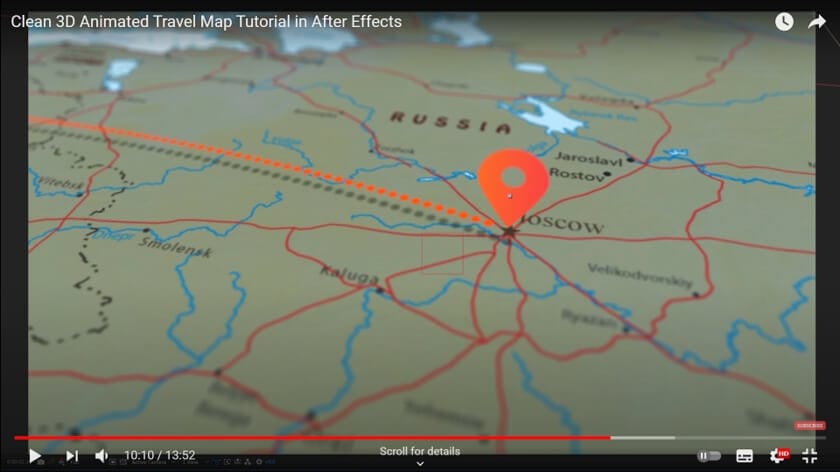
- Check the unchecked new layer box, find the pen tool (below the toolbar) and click and drag on your current location (e.g., Belgium). Similarly, create another line on your desired area (e.g. Moscow).
- Add Animation to your line curve- go to effects and presets, search for "stroke," and apply it. This will auto choose Mask 1 from this layer.
- Enable the Stroke layer & change the brush size, change your paint style, color and add spacing to the line across the map.
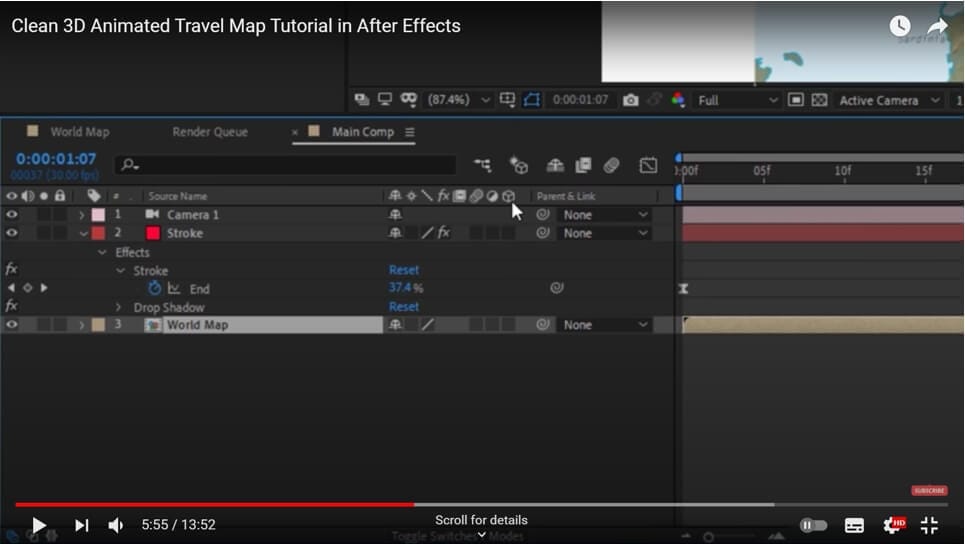
- To animate the line, click on the end stopwatch in presets. You can either have a linear or easy ease animation.
For the first, click on stop lunch and move the time forward, around 3 seconds and set the stopwatch to a 100%. Press "E" on the keyboard to make another keyframe and go back to the previous keyframe and set stopwatch to zero.
Easy-ease is slightly more complicated. Right click, go to keyframe assistance & select the easy ease option. Go to the graph editor to adjust the animation speed.
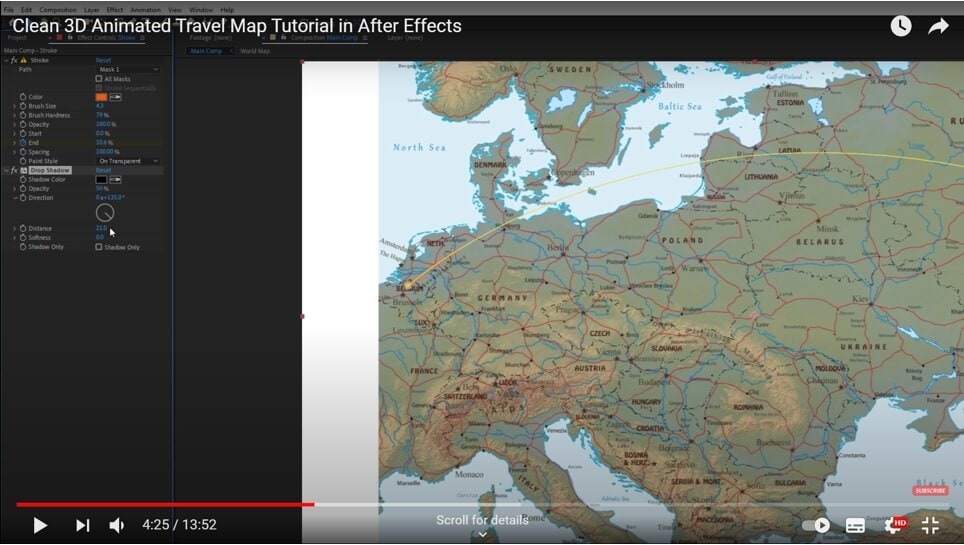
Step 2: Adding a Drop Shadow in After Effects Animated Map
To enhance the three-dimensional appearance of your map animation after effects project, adding depth through shadows is essential for professional results.
Navigate to your layer effects and add a "Drop Shadow" effect to your animated path layer. Adjust the distance parameter in the left menu to create subtle depth that doesn't overpower your map design. This technique adds professional polish to your after effects video mapping project.
Step 3: 3D Animation
Transform your flat map into a dynamic world map for after effects experience by implementing true 3D camera movement and spatial relationships.
- Right click to create a New Camera and click on the World Map layer.
- Enable 3D for stroke effect and the current layer If you can't see the 3D icon, be sure to toggle the switches.
- Next, alongside the new camera, create a "New null object" similarly with a right click. Turn 3D on for this as well.
- You can make the Animation even more remarkable if you click on the camera and parent it to your Null. It means the Null will be your control, i.e., the camera will follow the Null's rotation to create a better Animation than the simple pan and tilts.
- To view rotation, click on Null & press "R" and for position tags, hold Shift and press "P".
- Zoom-in with "Z rotation" & go to you starting location. You can also put a stopwatch on every rotation tag. Go to the 3 seconds and rotate it to the other way.
- To make the easy ease effect follow equally, you also need to add it on this Animation on all the keyframes.
- Play it back to you see the 3D Animation you just created.
Step 4: Depth of Field
If you go to the Camera settings by clicking on "camera", you will find camera options where you can enable the depth of field. You further have to change the aperture to 130, followed by playing with focus distance to sharpen your travel end point. There, you've created a depth of field look. You can repeat the same for your start point as well.
The remaining image blur will be lesser as you lower the aperture value.
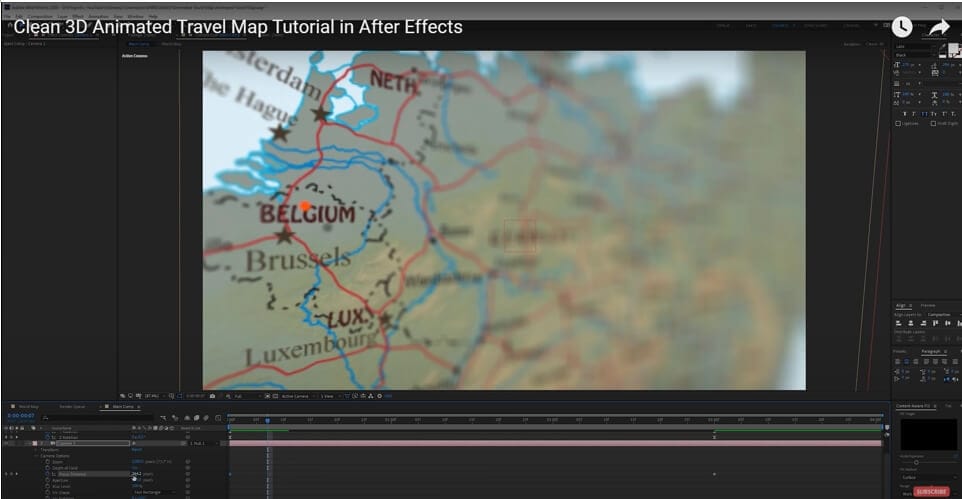
Step 5: Adding Pin Location
In your after effects map animation you can import a pin location in your travel scene. Make it another 3D layer, if needed, and reposition it to the start and finish destinations.
- The anchor point can be moved to the beginning using the pan behind tool.
- Rotate the pin upwards by pressing "R."
- To make this feature pop up in the Animation, press "S." For scale, click on the stopwatch, set the frame to zero and then click on the previous keyframe. Right-click on it, enable Easy Ease.
Part 2: Best Travel MAP Animation Templates in Adobe After Effects
Note, the following travel map animation templates are from Envato, you can also find the similar map animation templates in some After Effects templates downloading sites.
1. Flight Maps:
Flight Maps is a simple template option that helps you create quick 2D animations between two cities. It offers users with pre-animated regional maps to choose from. It also allows you want to reverse the travel direction between the cities.
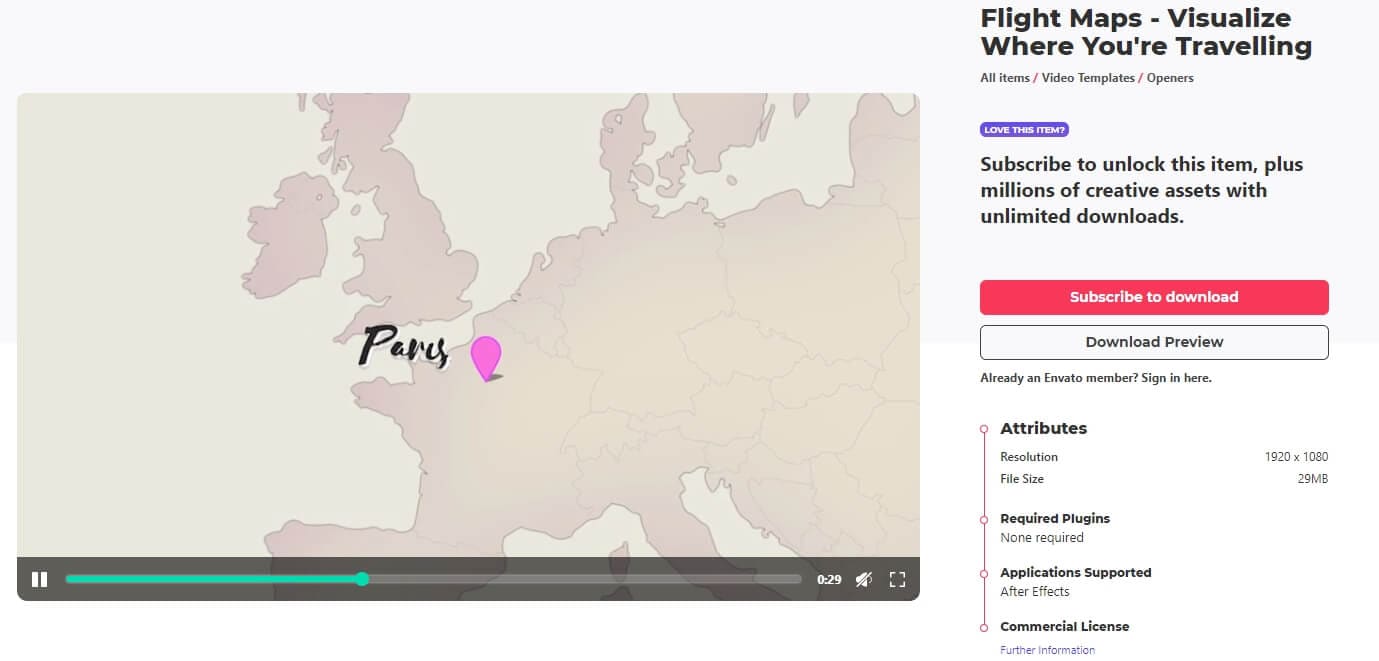
The template gives you 6 map color themes on the dashboard. They can each be turned on and customized from the effect controls panel. Extra features like turning on clouds can add more depth to your composition. Stunning effects like dirt texture can take your design to a whole new level, allowing you to add more dynamism to the animated map.
Suppose you want to add graphics like a car or a sailboat. For that, click on the icon layer from the template dashboard composition. Aspects like route line style and the pin is also customizable. Using Flight Maps lets you add animations in the opening by selecting a transition style layer.
All in all, this template requires some manual work. It isn't a panel where you can easily plugin cities and doesn't move automatically. It is part of Envanto Elements travel map after effects template free download, making it super accessible.
2. Map Connector:
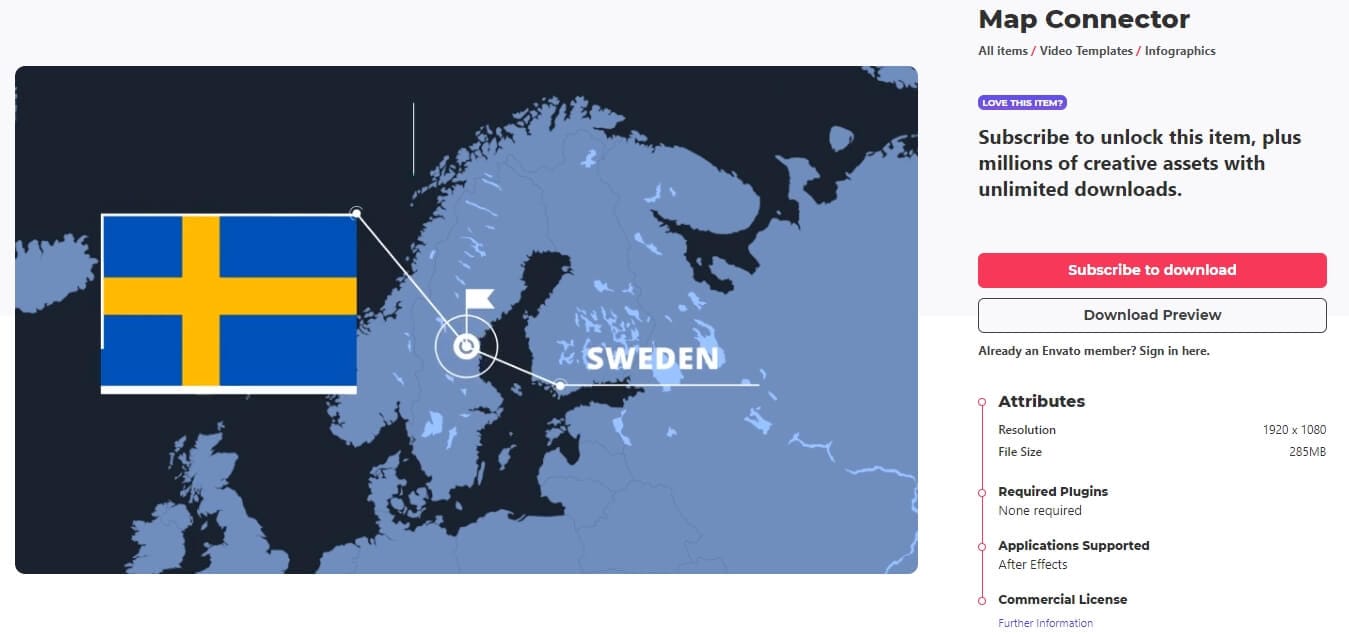
If you want to connect 2 different cities, this is probably not a good template to go with. However, Map Connector is an excellent 2D template when it comes to illustrating metadata or other related information about various locations.
Unlike Flight Maps, this template has no built-in templates for you to select, but you can still customize color, timing and position. Users can alter city locations by first opening the destination composition and pressing "p" to review the camera's position, which they can change to go over the location you want to show. Going back to the main composition will show that the destinations have been shifted to the new cities.
Map Connector needs you to return to the project panel and open different positions to update the information boxes and text for these new locations.
The keyframes on this template are slightly more challenging to use for beginners. It may lack a few vital effects but, is quite easy-to-use.
3. Place on Earth:
Do you want to show a single location using a 3D globe? In that case, this particular map template works perfectly. You can edit the location with edit composition. You need to scrub the composition until the default city tag appears and you can double click to change the city name (with an updated font, if required).

Next, click on the position layer and move the tag to correct location. When you go to the render tab, scrub through to preview the movement from point a to point b. Now, in this template you can also add a visual effect to the place you are trying to point out.
To get the changed location better into the frame, you have to update the point 2 parameter from Effect Controls. You can play around with all the parameters here till it looks just right.
You might want to make the changes in a quarter resolution to edit faster before you decide to render. Render time can take longer because of the 3D Animation. Also, it is better to type values instead of scrubbing because these parameters are super sensitive.
4. World Map Toolkit (Premiere Pro):
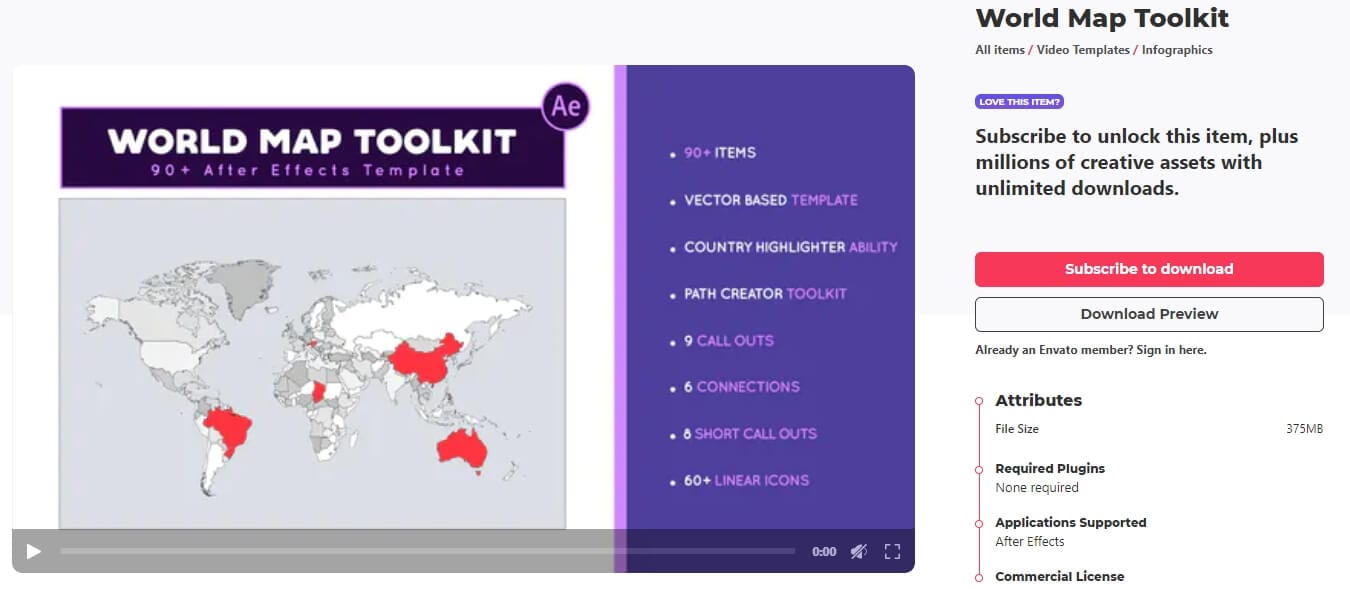
This template was primarily created in Adobe After Effects. However, it was exported as motion graphics template to use in Premiere Pro as a. MOGRT file. This means that you perform all the edits within Premiere Pro. Unless the file is optimized within Premiere Pro, you will continue to experience major delays while editing.
⭐ Alternative: Create Animated Travel Maps Without After Effects
For many beginners, creating an animated travel map in After Effects can be time-consuming due to the complex workflow involving Trim Paths, Mask paths, Graph Editor, and expressions. If you're looking for a faster and easier way to build a map animation without advanced compositing, Wondershare Filmora's Pen Tool offers a highly beginner-friendly solution. It's ideal for vloggers, educators, travel content creators, and social media storytellers who want to produce a polished world map animation quickly and efficiently.
Why Use Filmora for Map Animation?
Filmora dramatically simplifies route animation, making animated maps accessible to everyone—even without professional training.
| Traditional After Effects Workflow | Filmora Pen Tool Workflow |
| Requires knowledge of Mask, Trim Path, Graph Editor, Expressions | Draw route with Pen Tool → Apply route animation in one click |
| Steep learning curve | Beginner-friendly, easy to learn in minutes |
| Heavy rendering, hardware-intensive | Lightweight performance and fast export |
| Template modifications are complex | Built-in editable map templates with drag-and-drop control |
| Best for high-end video production | Perfect for travel vloggers, teachers, and social media creators |
✨ In short: Filmora makes animated map creation less about technical skills and more about creative storytelling.
How to Create a Travel Map Animation in Filmora
Follow these steps to design a clean, professional travel route animation:
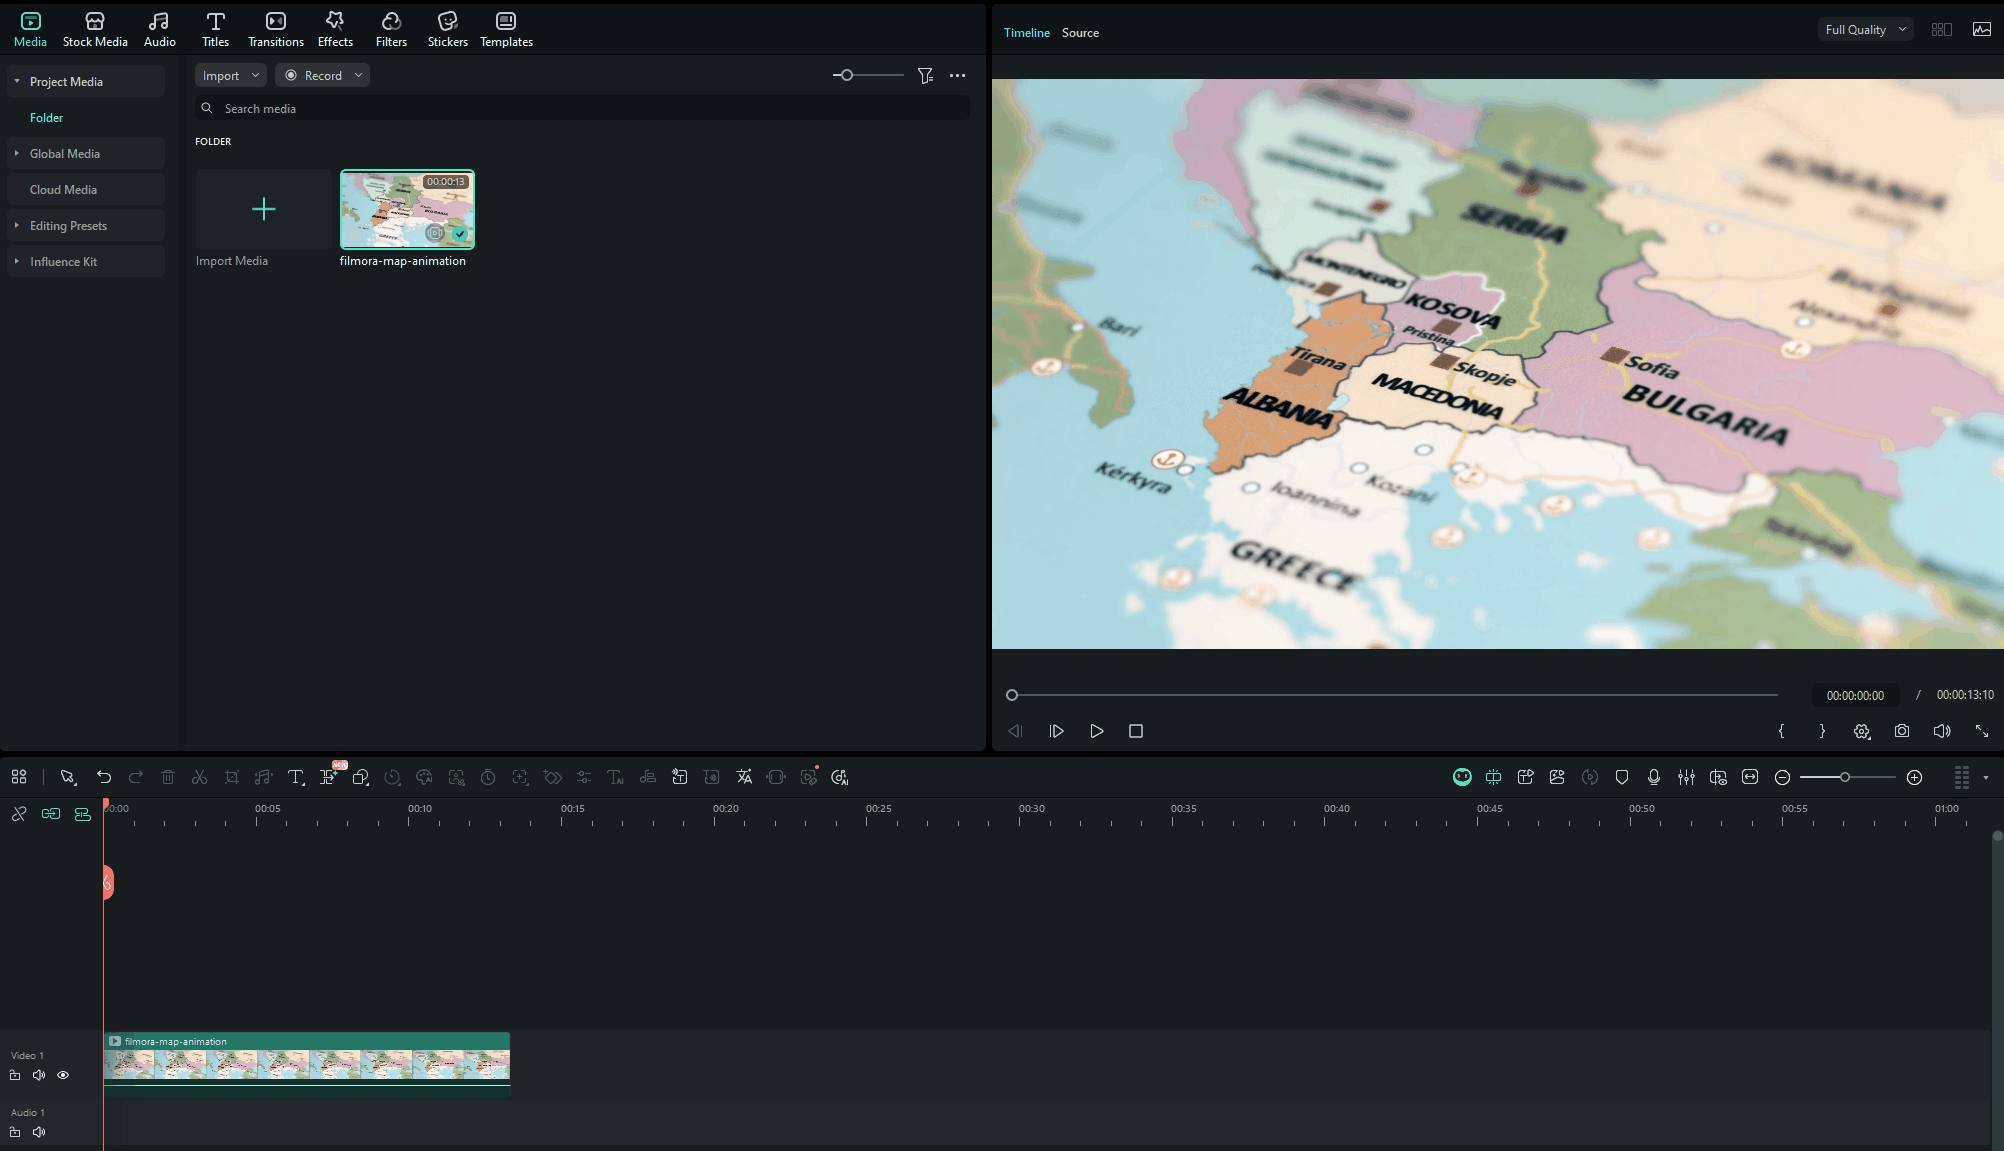
Import your world map or city map image into the Media panel. You can also search for map assets directly in Stock Media if you don't have one prepared.
Drag the map to the main video track to set your background.
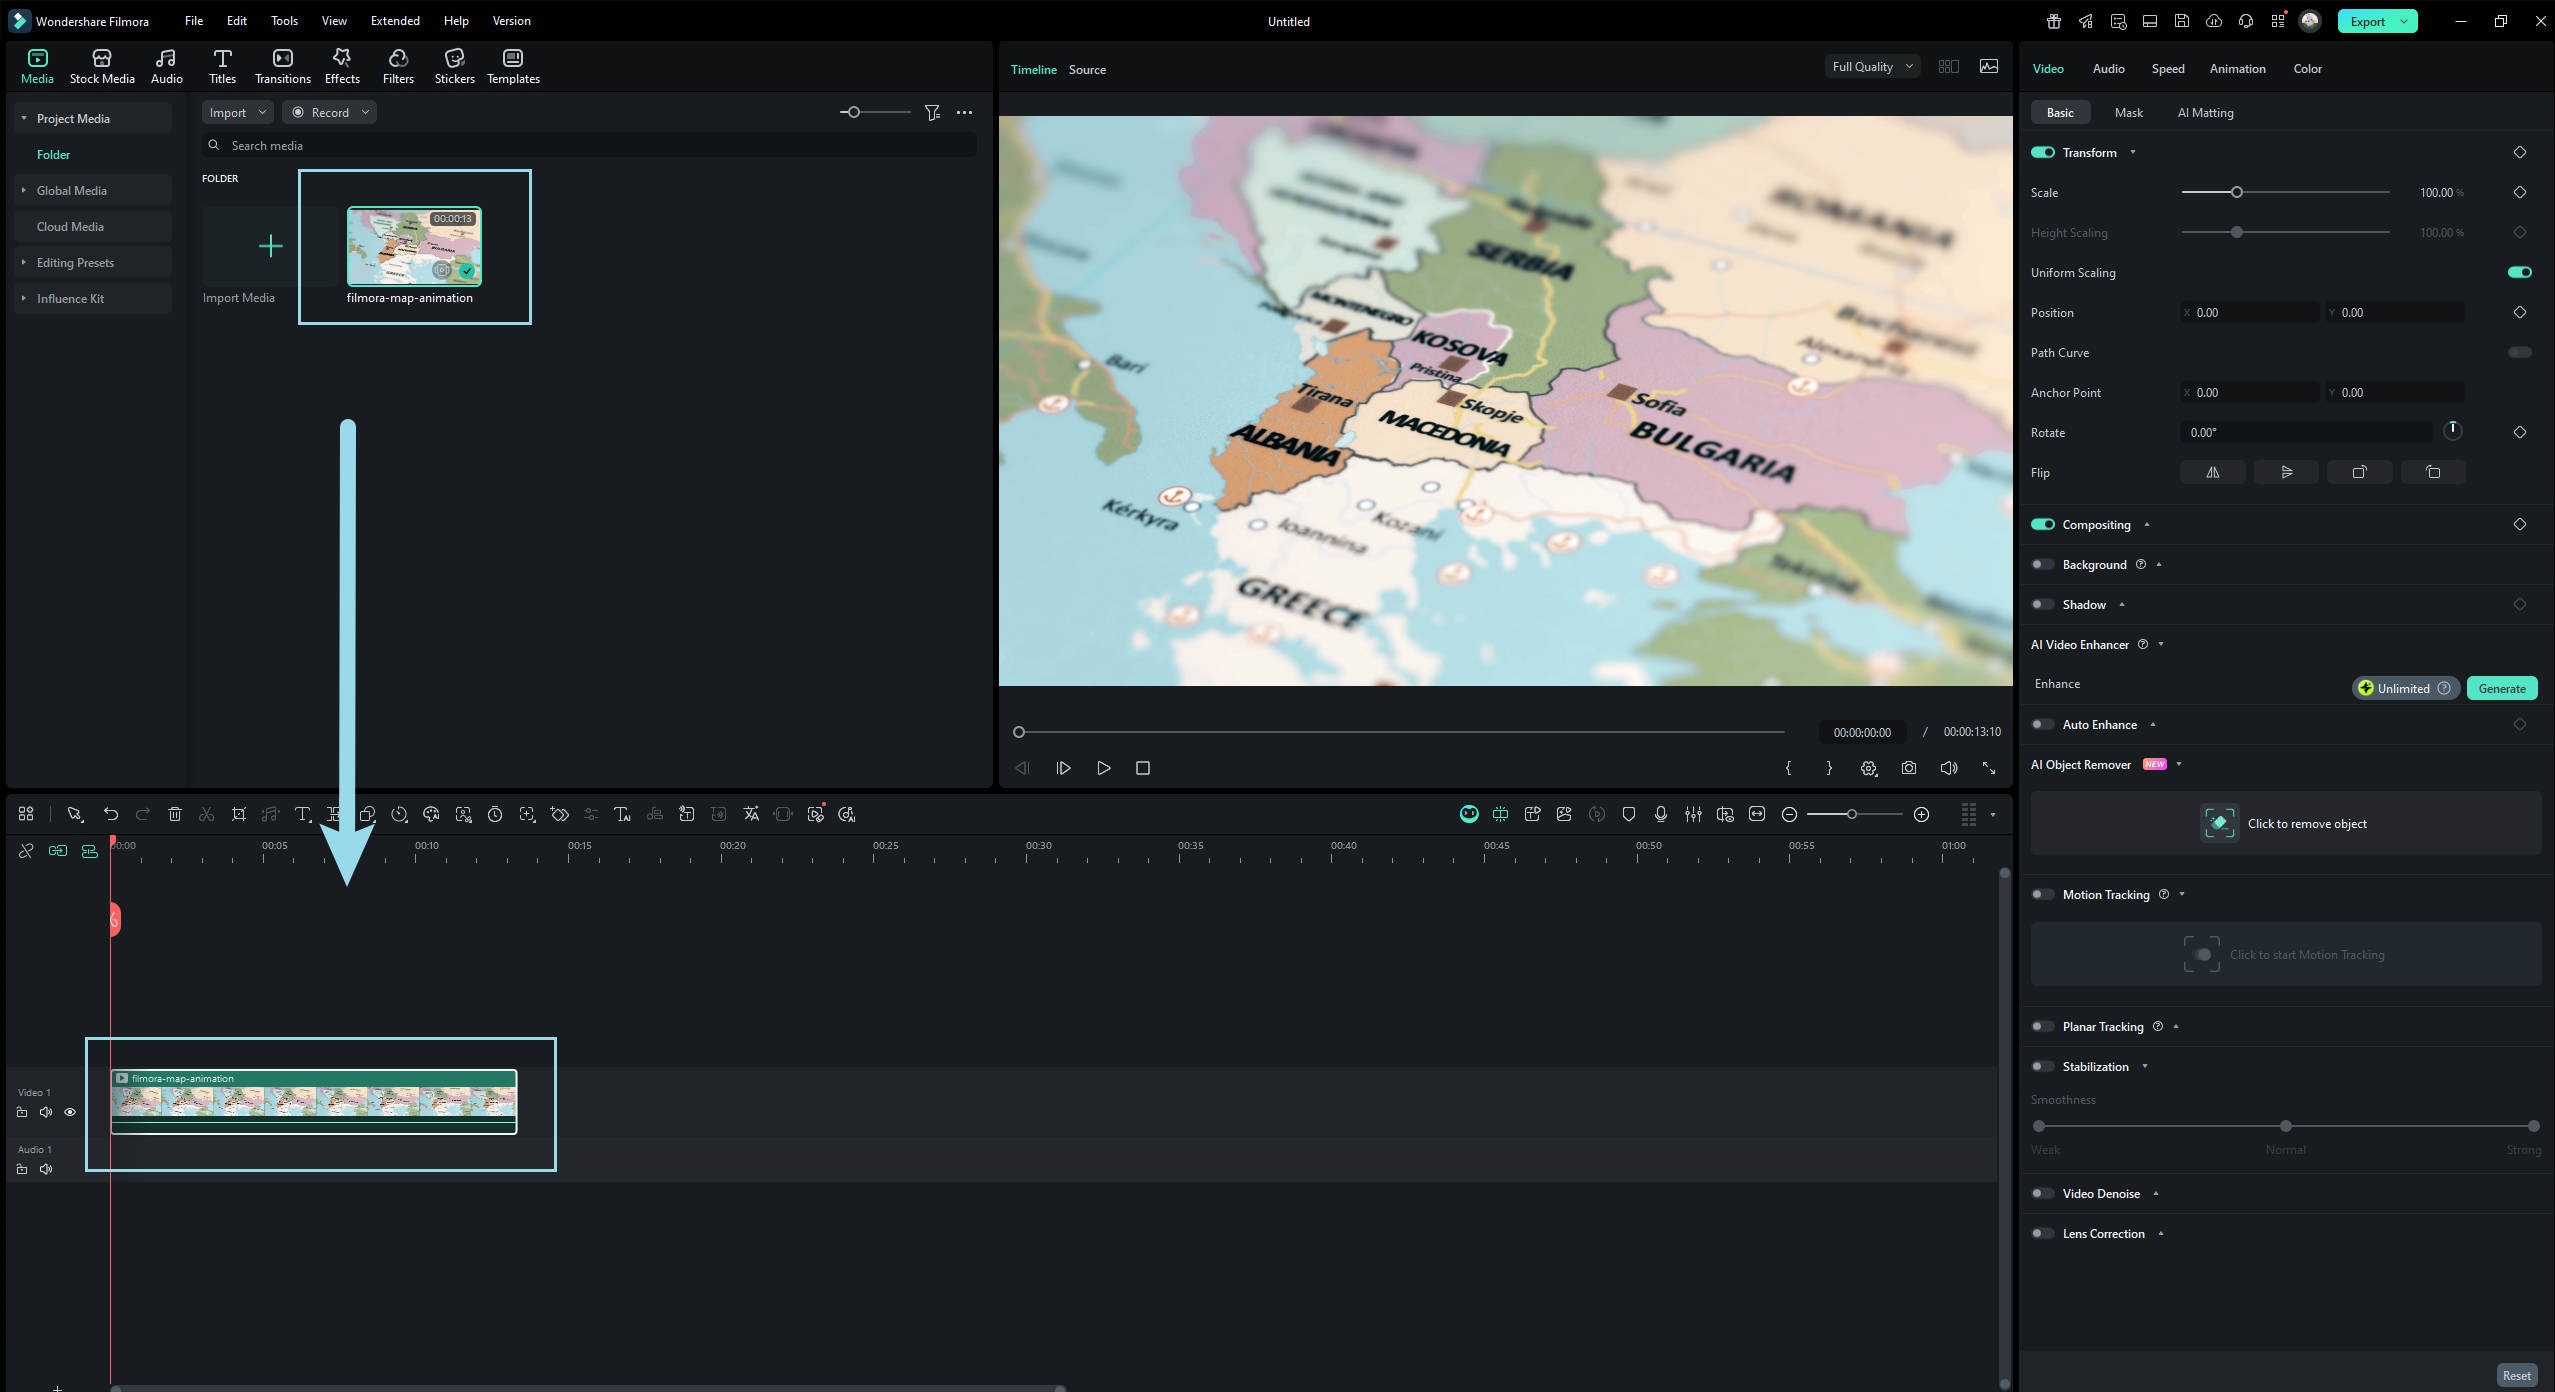
Use the Pen Tool to trace the route you want to animate.
- Click the Shape icon above the timeline
- Select Pen Tool
- Click on the canvas to create points
- Create straight lines or hold and drag to form smooth curved paths for natural motion
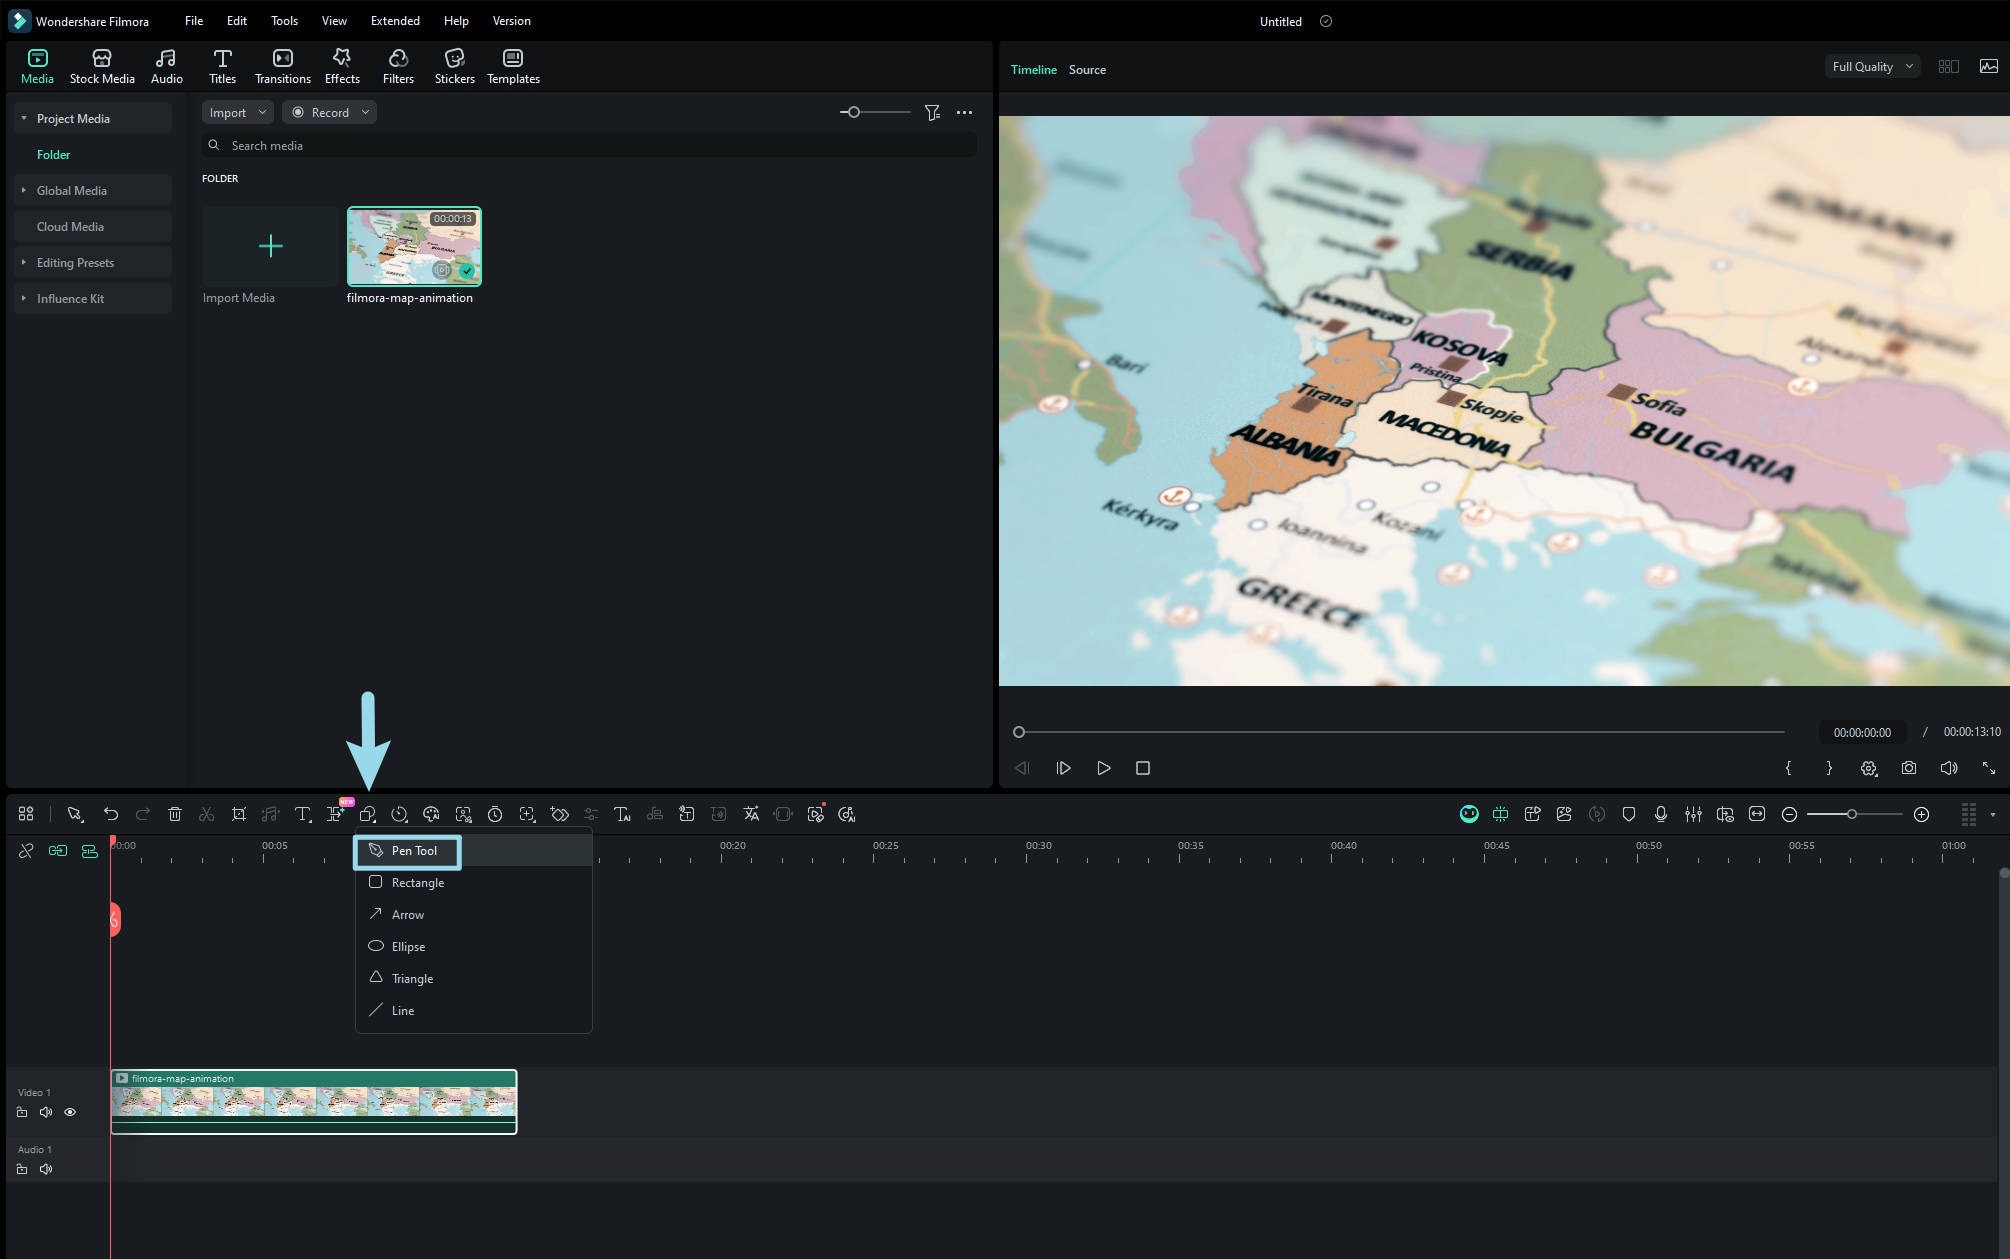
This forms the base travel route for your animated map.
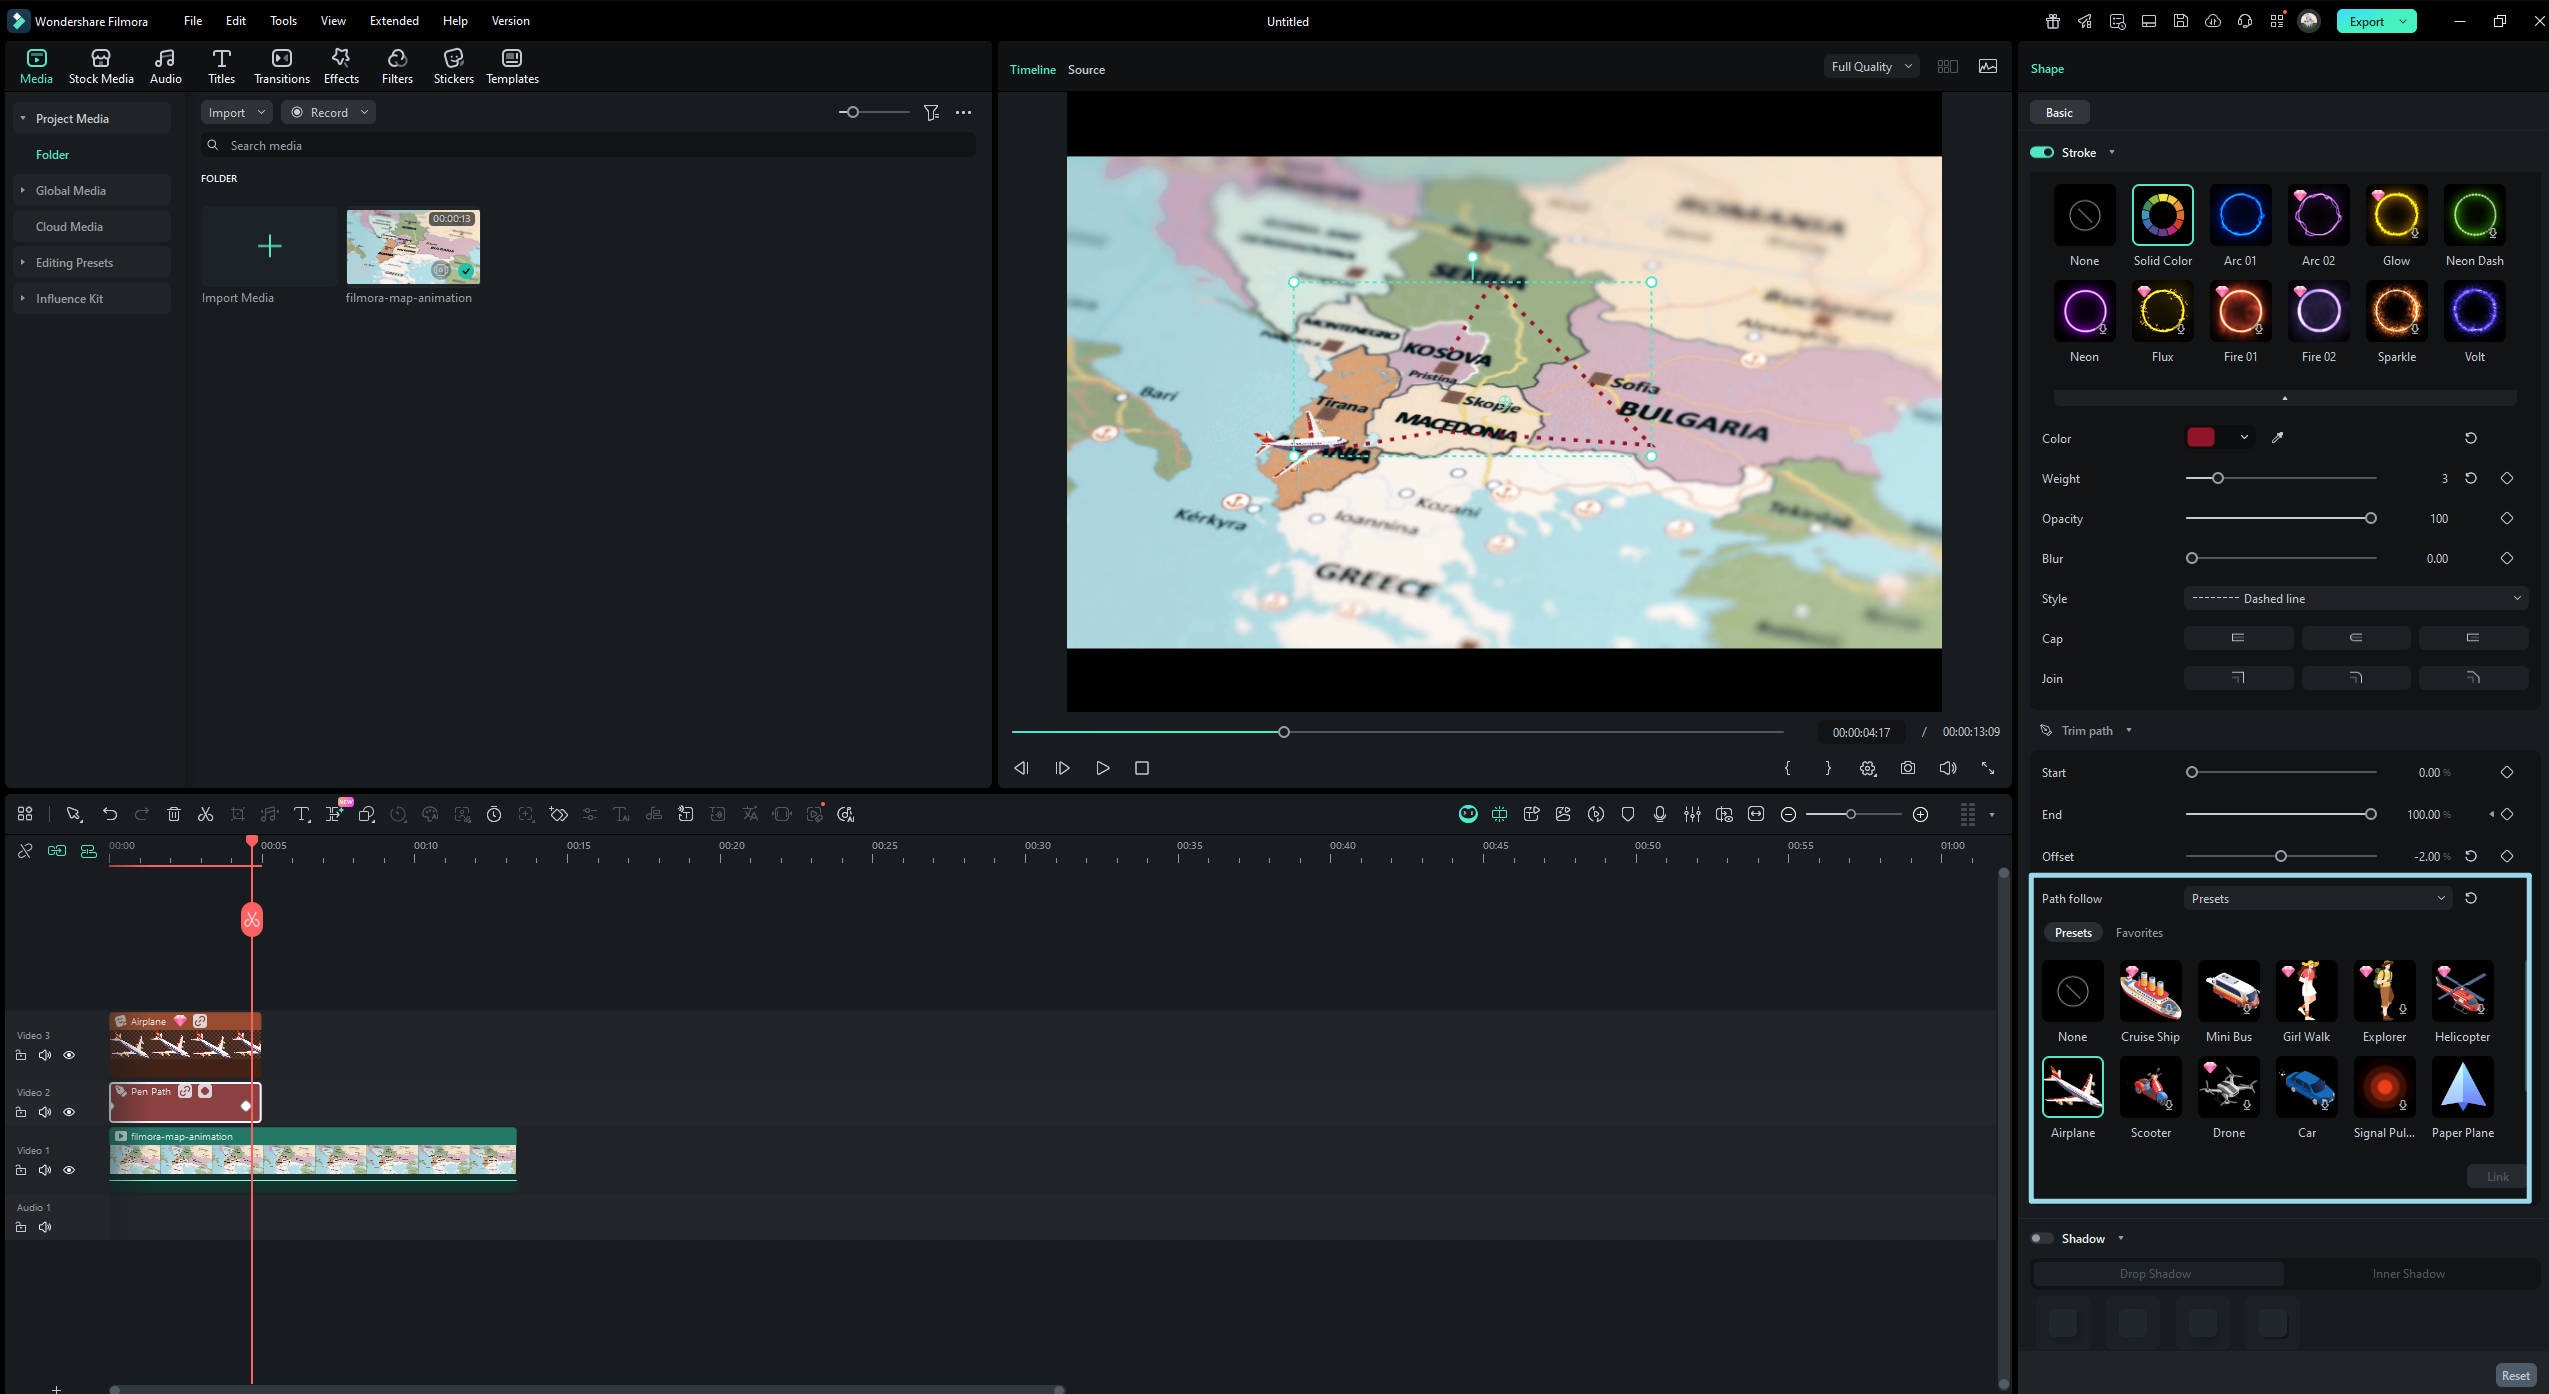
In the Properties panel on the right, go to: Shape → Basic → Stroke
- Adjust line color, thickness, and opacity
- Apply stroke style presets for stylistic effects such as glow or dashed lines
This helps visually highlight your travel route.

To create the write-on travel animation:
- Open Trim Path in the Properties panel
- Move the playhead to the beginning of the timeline
- Set Start = 0% and End = 0%, then add a keyframe on End
- Move the playhead to where the path animation should finish
- Change End to 100%
You can adjust Offset if you want the animation to begin at a different segment of the line.

To animate a plane following the path:
- Open Path Follower
- Select a plane icon from Stickers, or import your own graphic
- Click Apply
A motion track will appear on the timeline, automatically attaching the icon to the animated path.
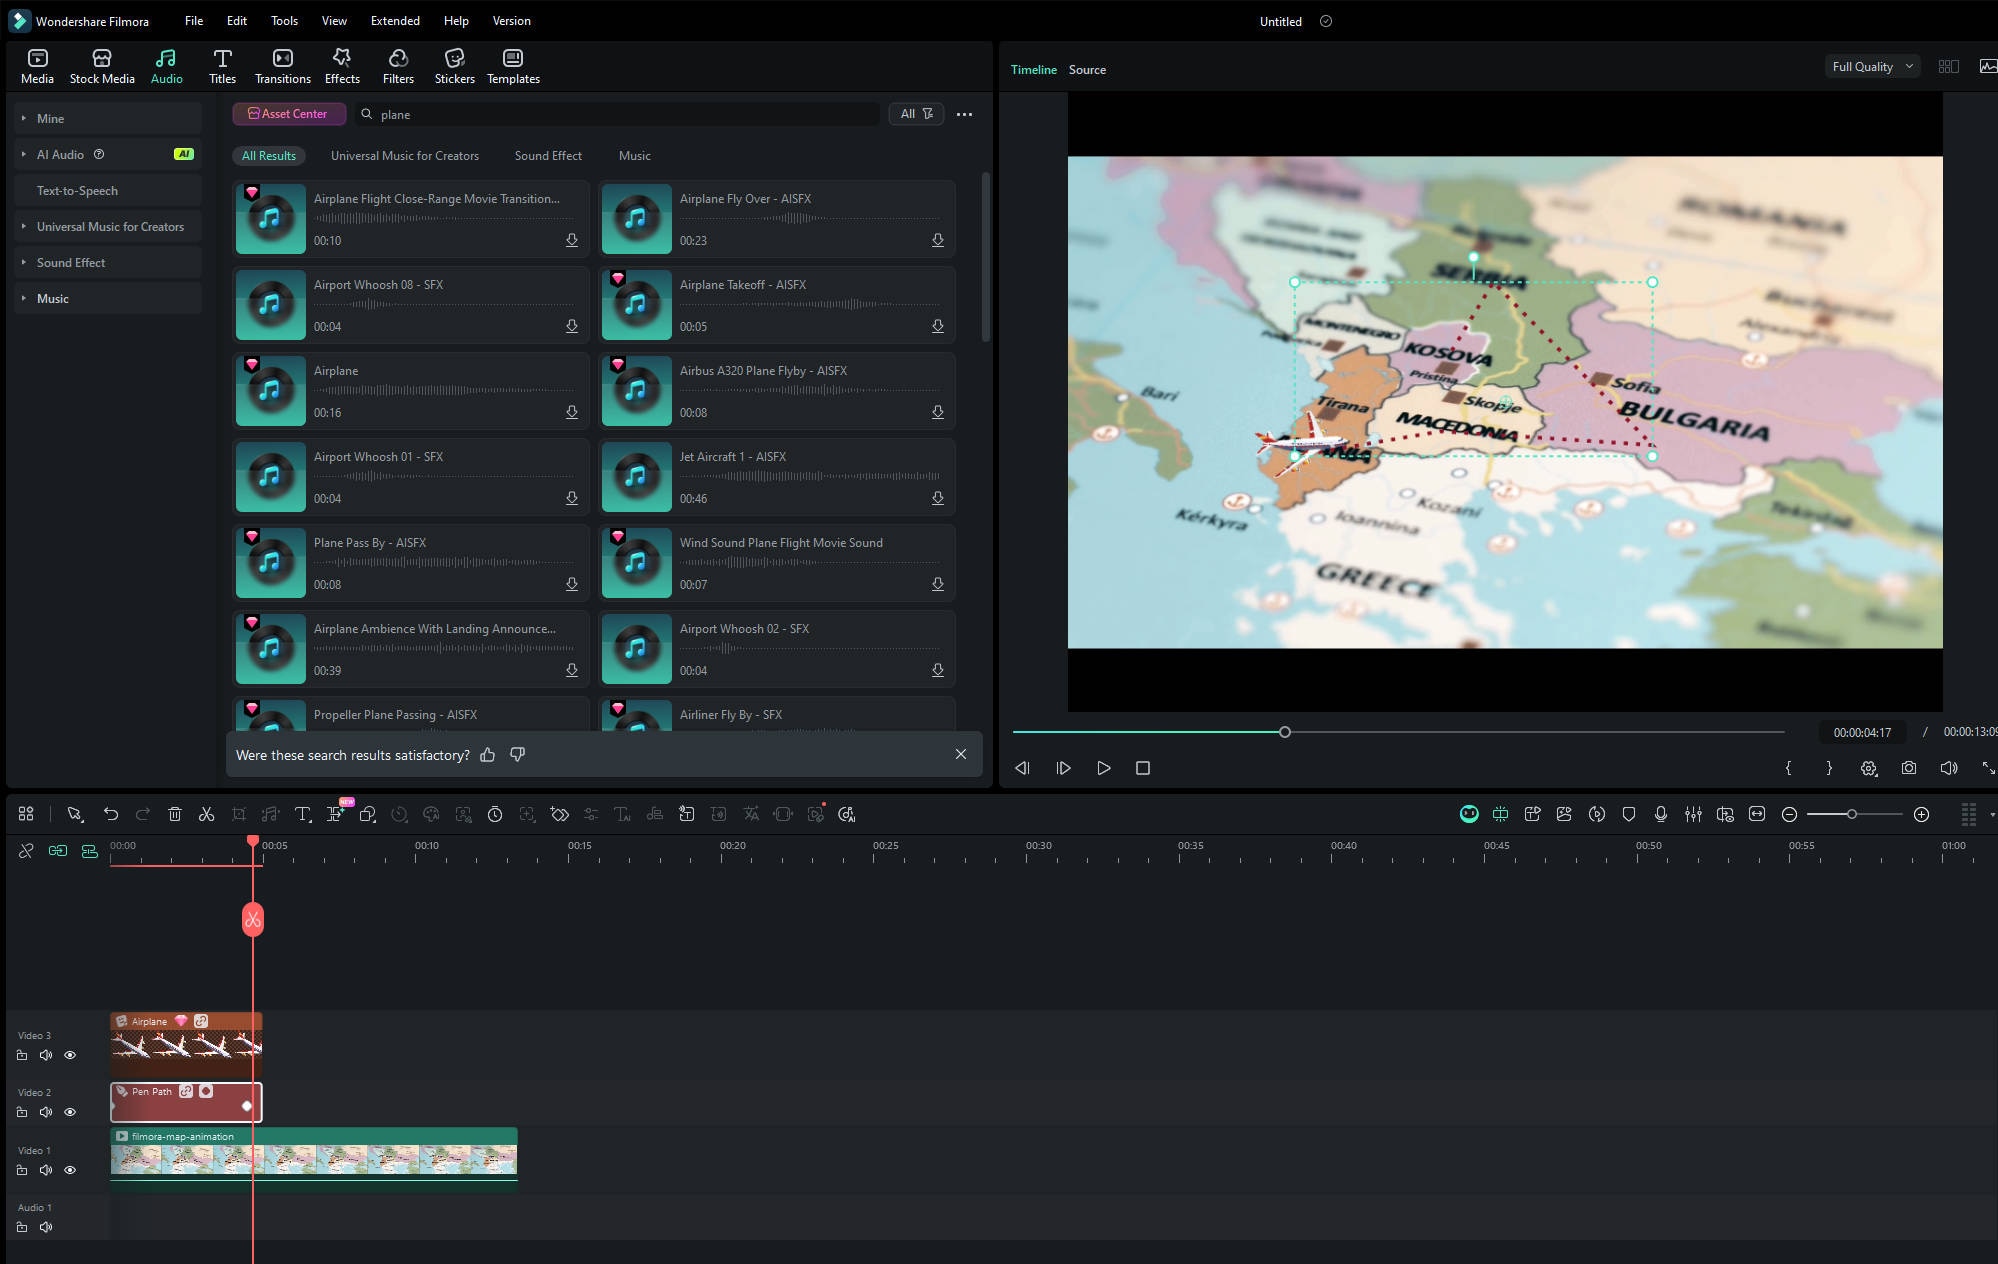
Go to the Audio tab and search for plane, wind, or travel-themed sound effects. Drag them onto the audio track for added realism and emotional impact.
Optional finishing touches:
- Add camera zoom keyframes for dynamic movement
- Use text or title callouts for destination labels
- Apply glow or shadow effects for visual depth
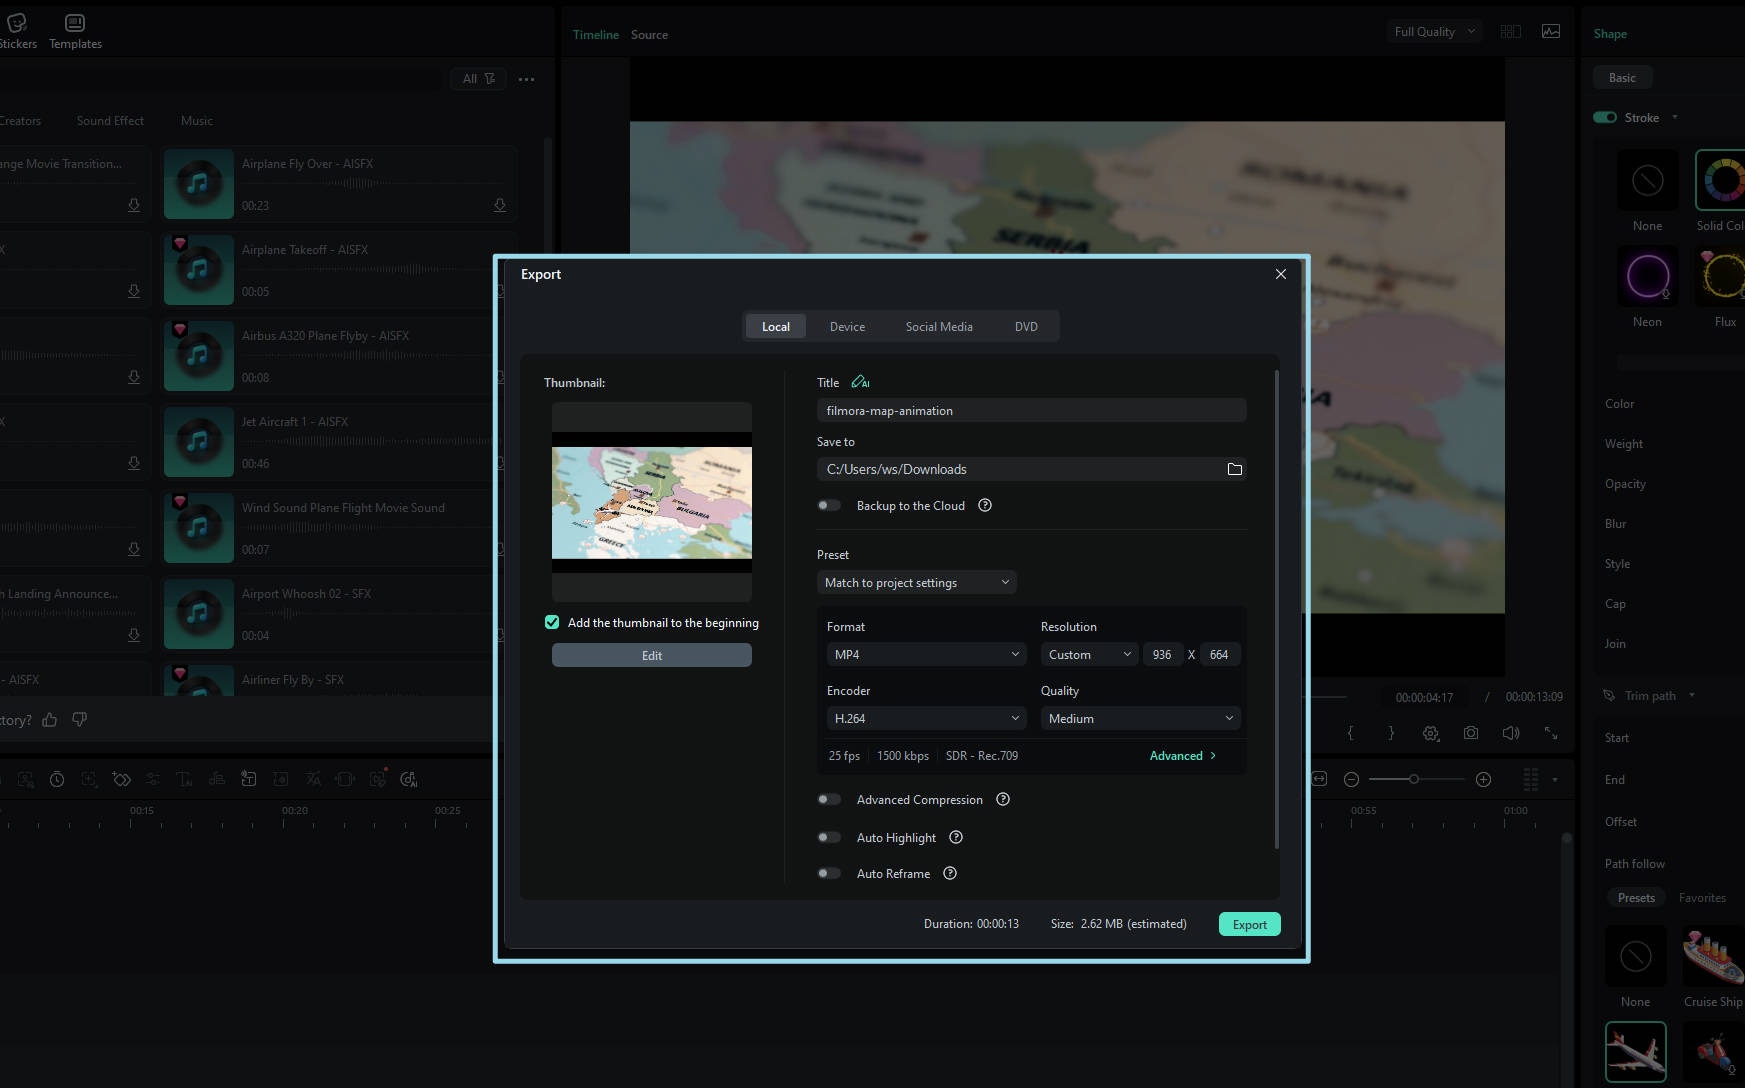
Export your animated travel map in the resolution you need—1080p for social platforms or 4K for higher production quality.
Final Recommendation:
Both tools can create impressive animated travel maps, but the right choice depends on your workflow needs:
- Choose After Effects for cinematic map animation, professional compositing, or advanced after effects video mapping projects.
- Choose Filmora if you want fast results, an easier learning curve, and a practical alternative for map animation after effects style visuals—without the complexity.
Conclusion
Since we live in an evolved world, our brains and eyes have become wired to respond better to a moving environment. Animated maps tap efficiently into our visual processing skills. Thus, they are being used extensively off late.
We hope our step-by-step guide and template suggestions help you create animated travel maps in Adobe After Effects and make your video content more impressive.
