
 100% Security Verified | No Subscription Required | No Malware


 ChatGPT
 Perplexity
 Gemini
 Claude
 Grok
Grok
As a brand manager, creating a slideshow for a Facebook page you're handling for your company is an everyday job. The algorithm itself favors video content, and it gets more organic reach than images or long text posts. Slideshows offer a video-like experience and grab the attention of the viewers as they play automatically while they scroll through their feeds.
But do you know how to make a slideshow on Facebook? This article discusses everything in detail to make the process easier for you.

Table of Contents
- Part 1. Use Cases of Slideshows on Facebook: Some Basics
- Part 2. How To Make a Slideshow on Facebook: Convert Pictures Into Video
- Part 3. Creating Slideshow Ads on Facebook: A Derivative Guide
- Part 4. How To Create The Perfect Slideshow For Facebook: Using Wondershare Filmora
- Final Thoughts
- Frequently Asked Questions
Part 1. Use Cases of Slideshows on Facebook: Some Basics
Facebook slideshows offer a quick and easy way to help businesses make their content stand out online. Here are some of the major use cases for putting a slideshow on your Facebook page or account:
- You can show your product from different angles to highlight its features.
- Share the details of an upcoming event and the ongoing preparations.
- Show your team working to let everyone know about your company culture.
- Provide detailed instructions on how to use a product or perform a simple task related to your industry.
- Share your client success stories with images that highlight their journey and how your offerings helped them.
Part 2. How To Make a Slideshow on Facebook: Convert Pictures Into Video
You must learn how to create a Facebook slideshow because static images aren't enough to grab attention. Facebook slideshows offer a fantastic way to transform your collection of pictures into engaging content. They automatically play and are the best way to tell a story or promote your products. The following are the detailed steps that you can follow to convert your pictures into a video for an engaging slideshow:
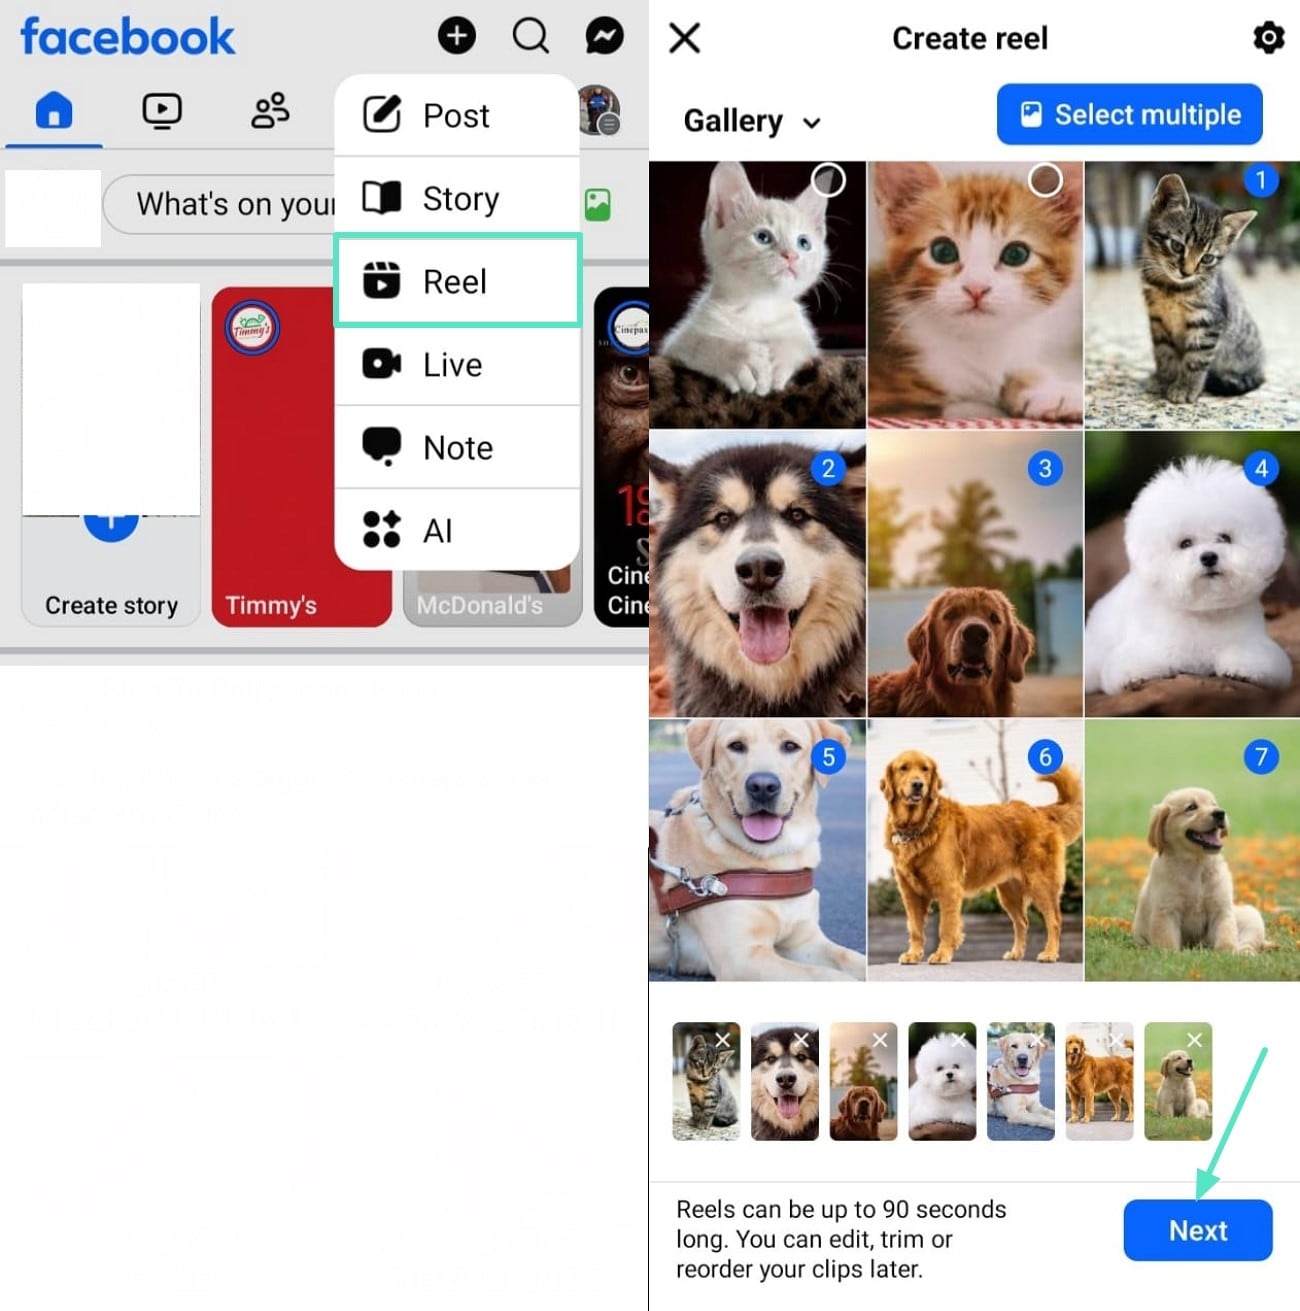
Step 1. Open Facebook on your phone and hit the “+” icon to access different uploading options. Select the "Reel" option, pick multiple images from your gallery, and proceed with the process by hitting the "Next" button in the bottom right corner.
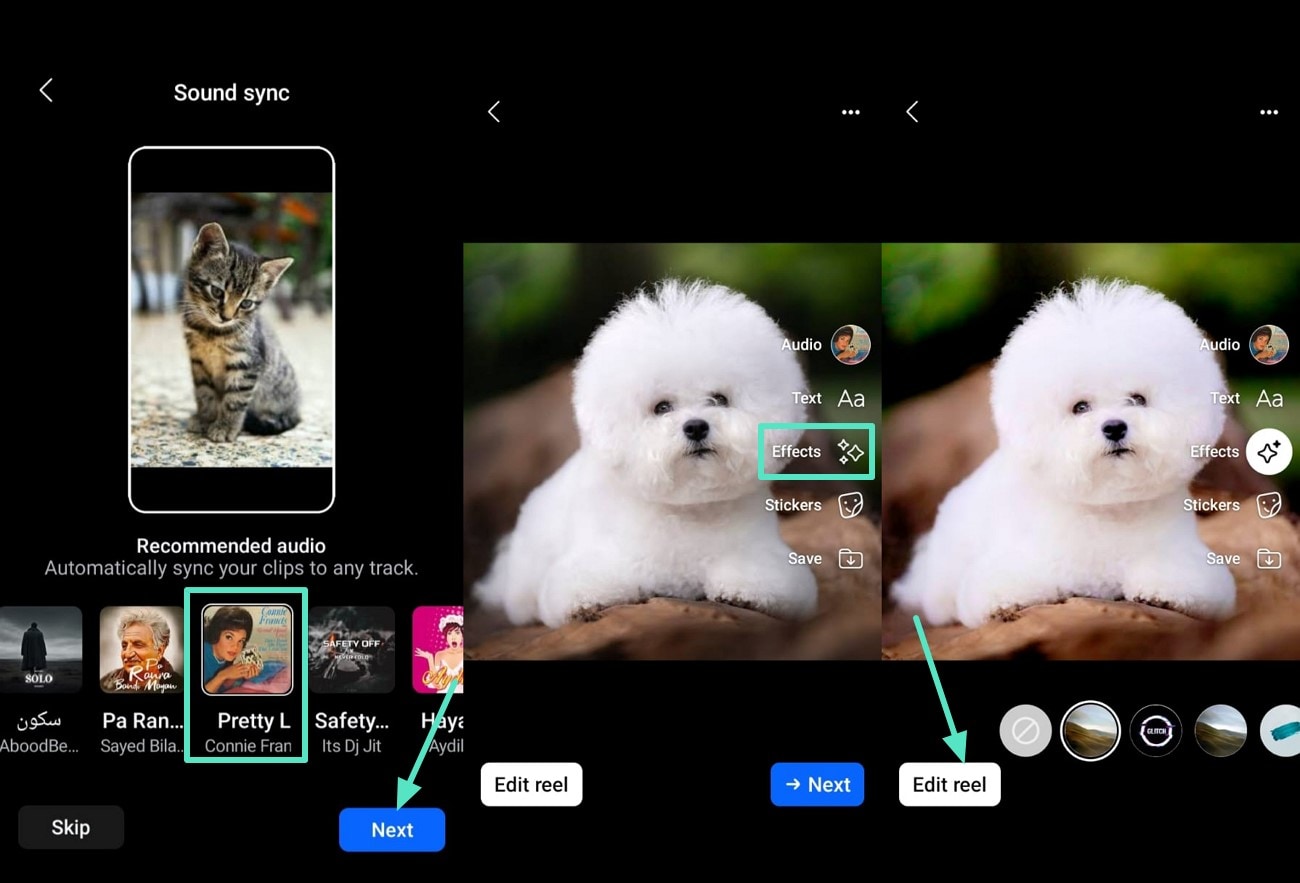
Step 2. Pick "Audio" from the available options and hit the "Next" button to access more editing features. When you get into editing mode, choose the "Effects" option, select an effect, and choose the "Edit Reel" option to apply it.
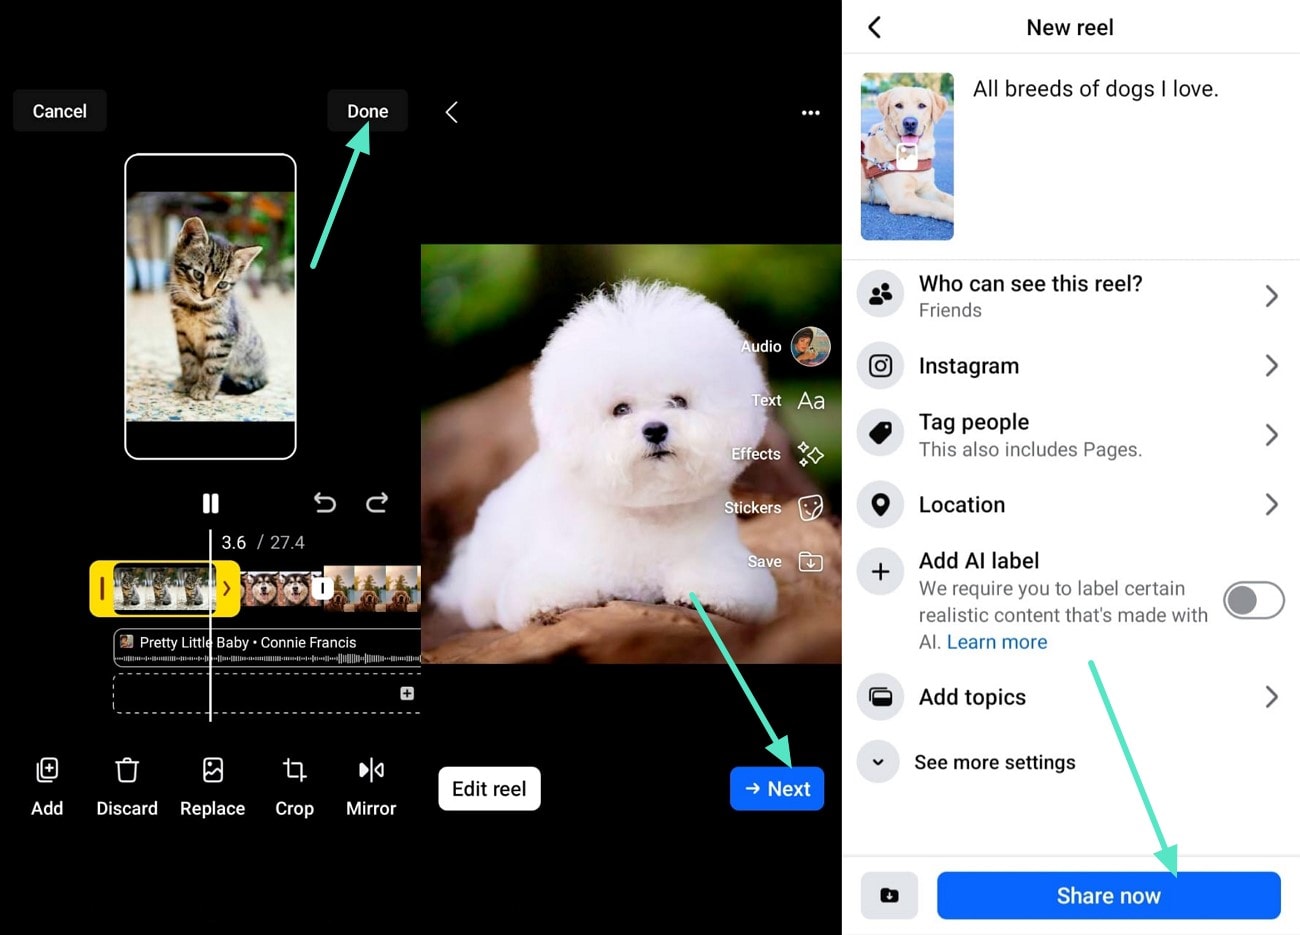
Step 3. Once you've applied the effects, use the "Done" option from the top-right corner to save changes. Then, proceed using the "Next" option, write a caption according to your slideshow, and reveal it to the world by using the "Share Now" button below.
Part 3. Creating Slideshow Ads on Facebook: A Derivative Guide
Having discussed how to make a slideshow on Facebook for free, now we'll explore how to create engaging slideshow ads because they stand out easily. Slideshow advertisements on Facebook are particularly effective for businesses that want to maximize their ad spend and let their message reach a broader audience. Here is a derivative guide to creating slideshow ads on Facebook through your desktop:
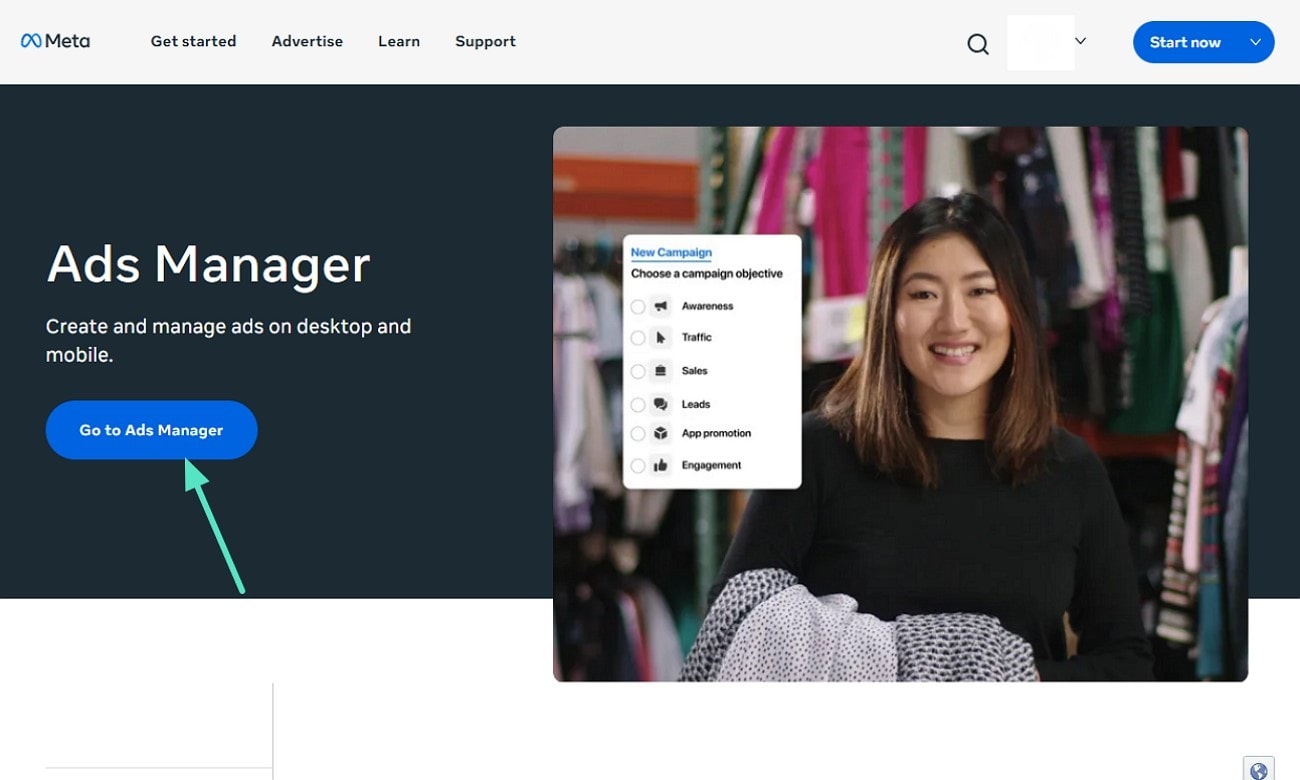
Step 1. You can easily access the “Ads Manager” website by Facebook Meta from the browser.
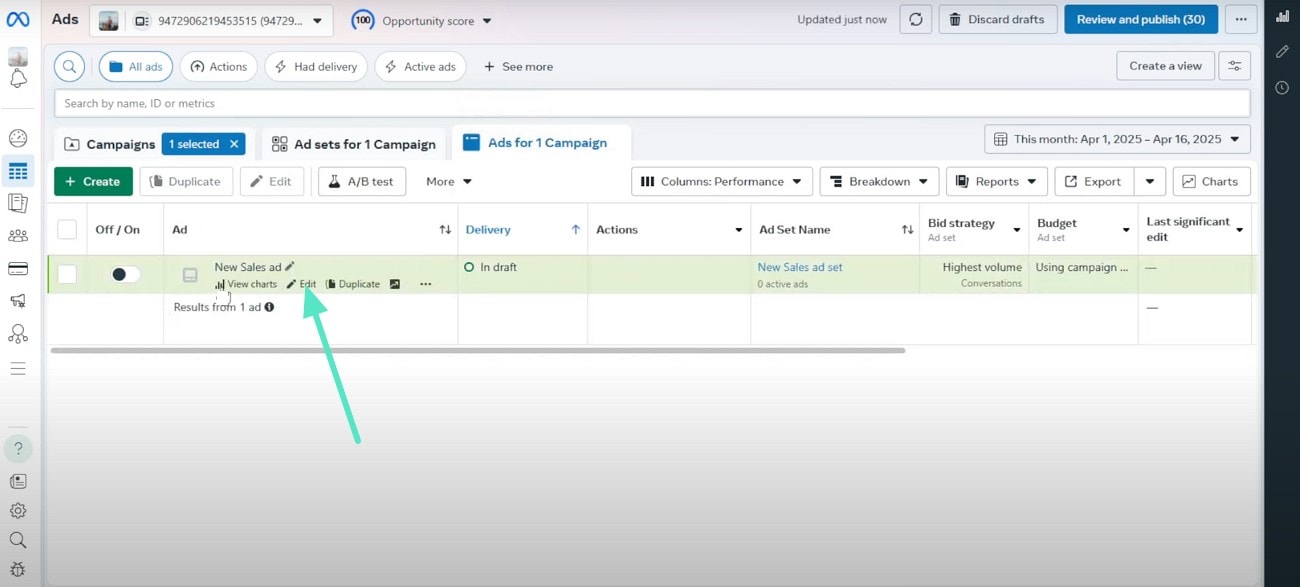
Step 2. Once you enter the credentials, you’ll be logged in and can now access “Ads for 1 Campaign” and pick one. Next, use the “Edit” option on it to make changes to it.
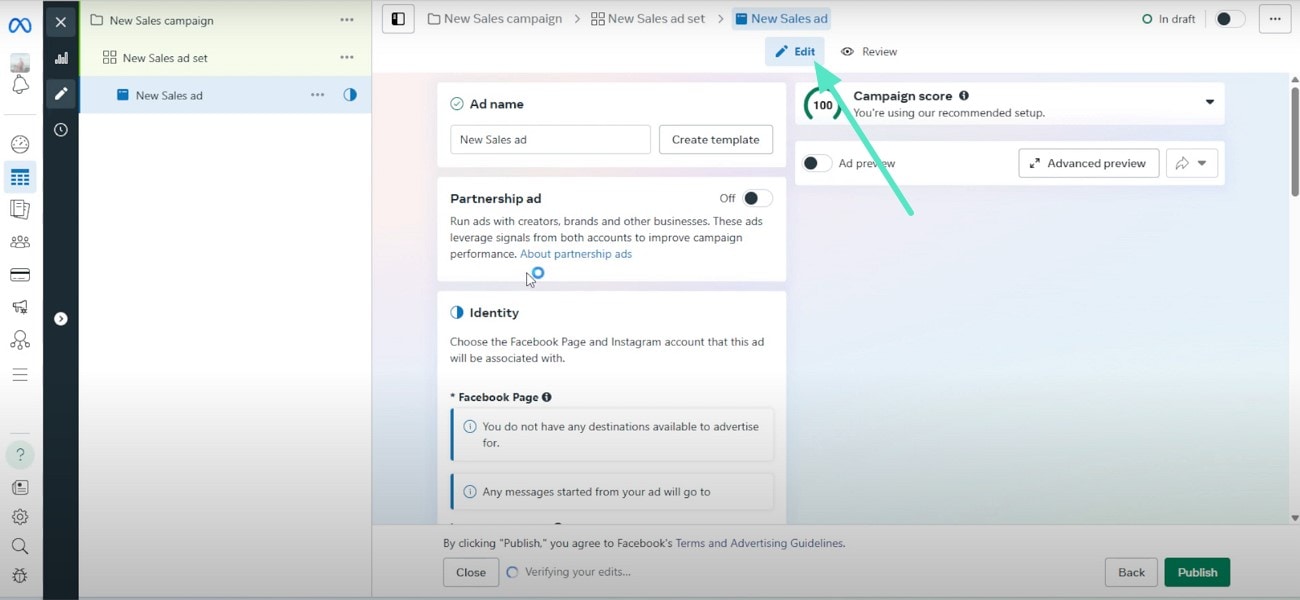
Step 3. Moving to the ads level, click the "Edit" button from above to add your images as a slideshow and let the magic begin.
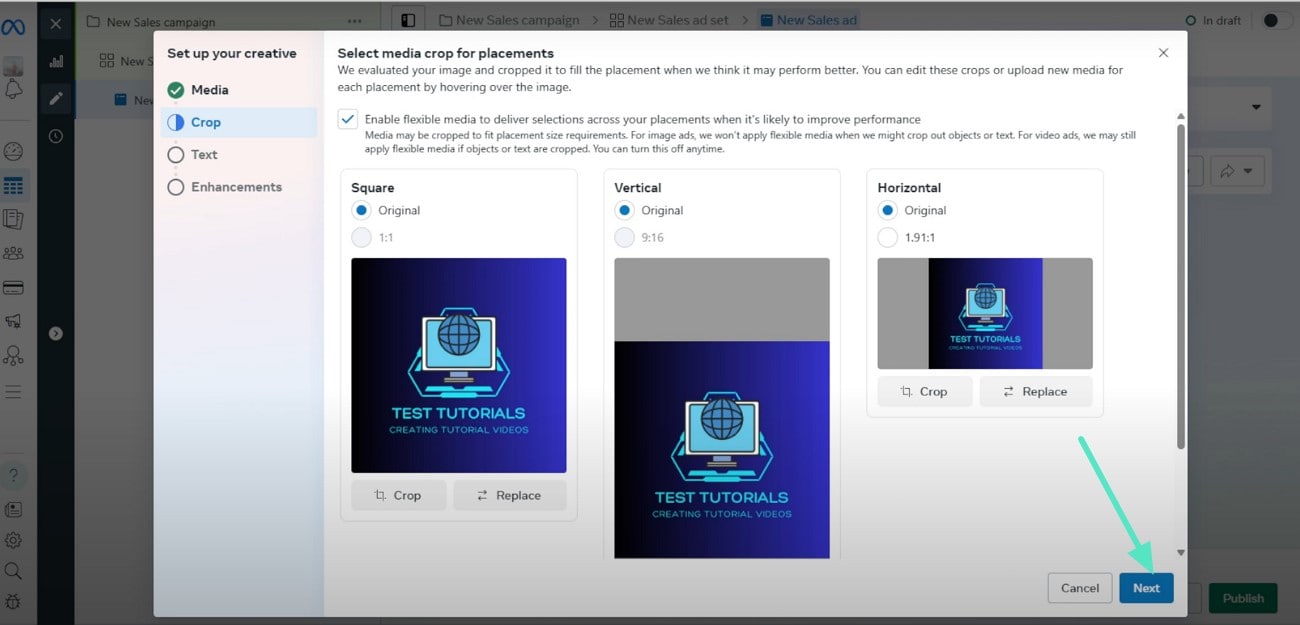
Step 4. Crop your images according to your requirements after uploading them, and then click the "Next" button.
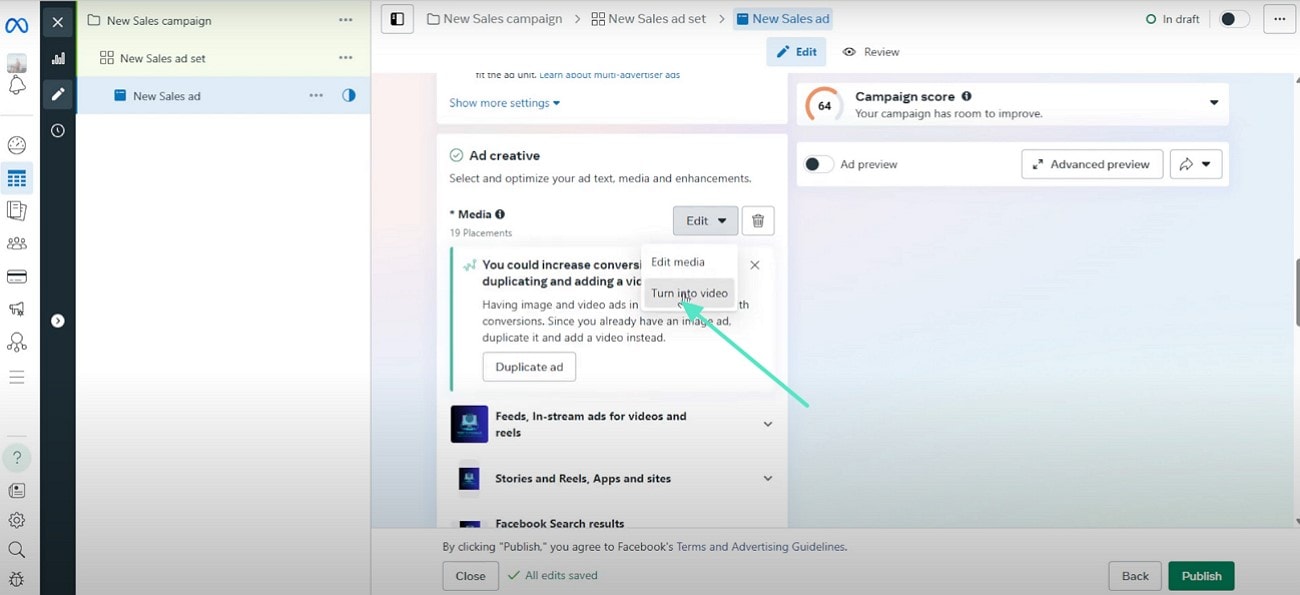
Step 5. After adding your content, such as the primary text and headline, select the “Turn Into Video” option and hit “Publish.”
🤩 Post You Might Be Interested In:
- Making a slideshow with music and titles in Filmora
- Memorial Video Maker: How to Make a Funeral Slideshow
- Easy Guide to Facebook Slideshow Ads with Examples
Part 4. How To Create The Perfect Slideshow For Facebook: Using Wondershare Filmora
You have to use different tools to make a perfect slideshow, as one tool does not contain all the functions. This poses a problem for many social media managers, and they have to invest a lot of time in editing slideshows. This poses a problem for many social media managers, and they need to use different tools to create a perfect slideshow.
However, Wondershare Filmora resolves this problem and serves as a platform where you can do complete editing of your slideshow, both through desktop and mobile.
Users can import multiple images in minutes for their slideshow on Facebook and add transitions after each of them to make it look engaging. Moreover, the tool contains a large collection of music tracks, and users can also generate new ones based on their emotions.
 secure download

Steps for Making a Perfect Facebook Slideshow Using the Filmora App
The following are the steps that you can follow to make your perfect Facebook slideshow using the Filmora App [Android/iOS]:
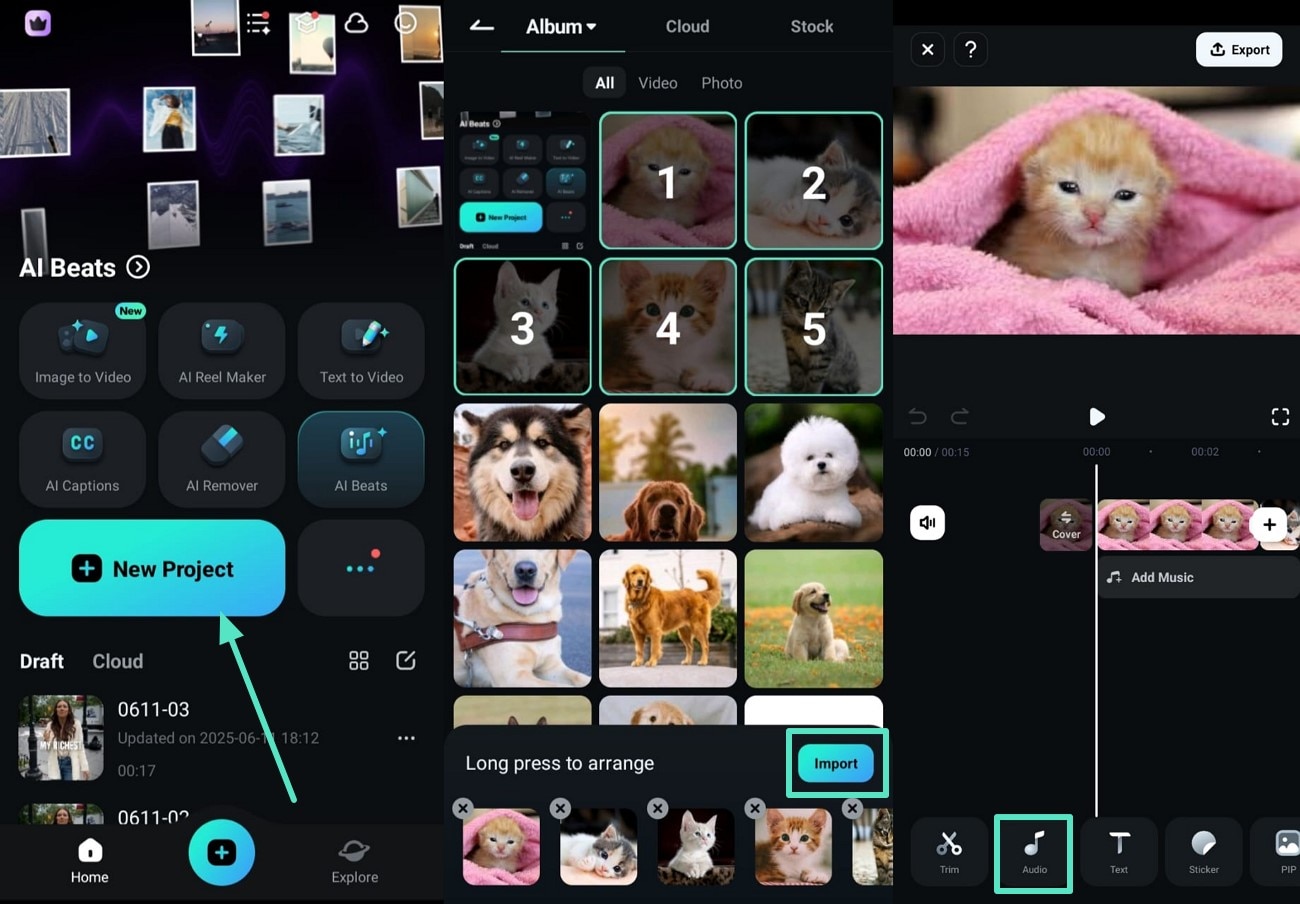
Step 1. Create a New Project to Import Images and Add Music. Begin by hitting the “New Project” option from the Filmora App's homepage and picking images from your gallery. After selecting them, choose the "Import" option from the bottom. Once they appear on the editing timeline, select the "Audio" option from below to add a matching song to your Facebook slideshow.
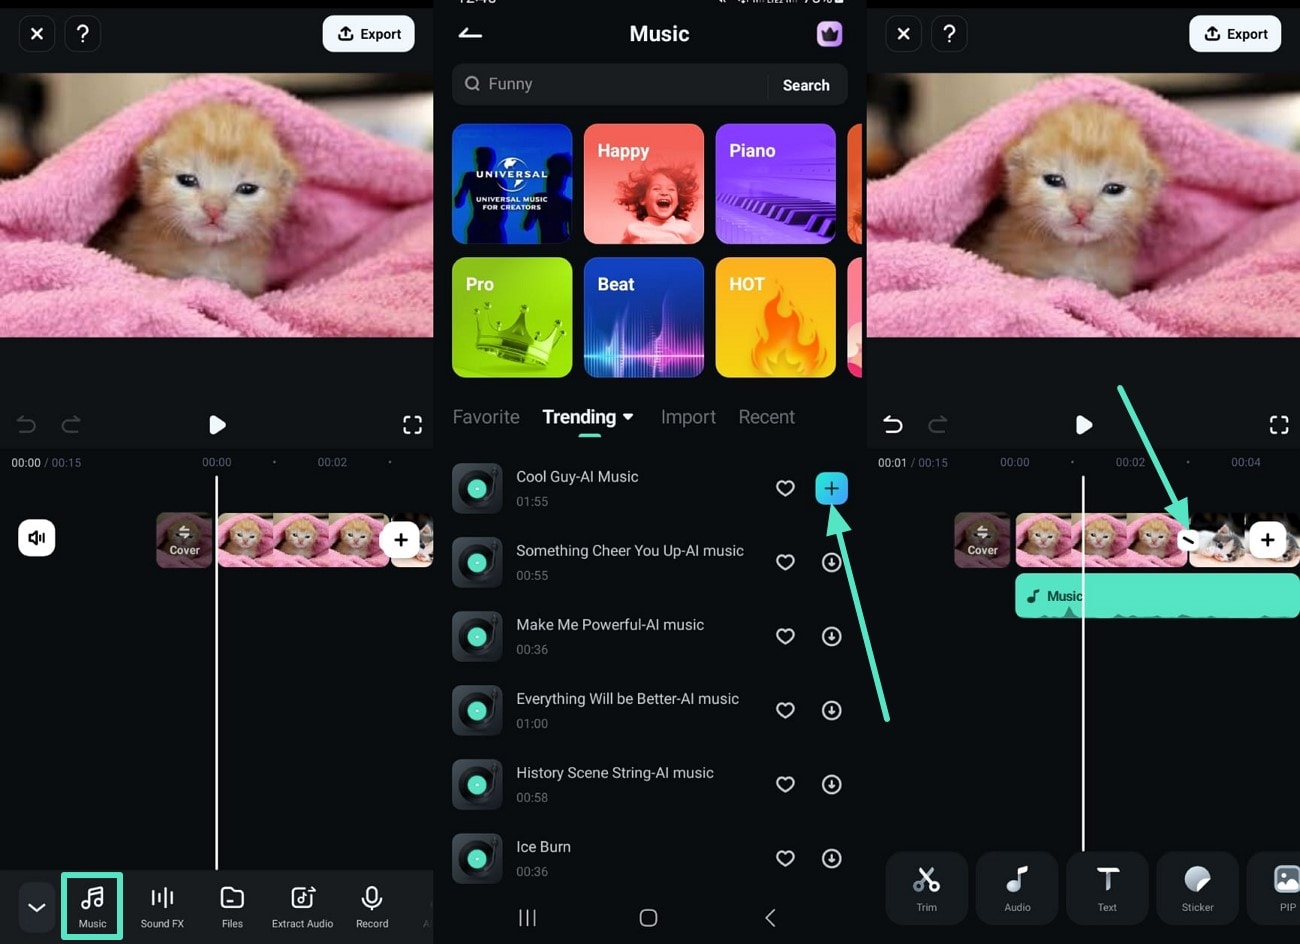
Step 2. Pick Music and Access Transitions to Enhance the Look. Hit the "Music" option from below, and after selecting one from the tool's collection, hit the "+" button on it. Afterward, play your video to check how it looks and choose the "Transition" icon between two images to access the collection of transitions.
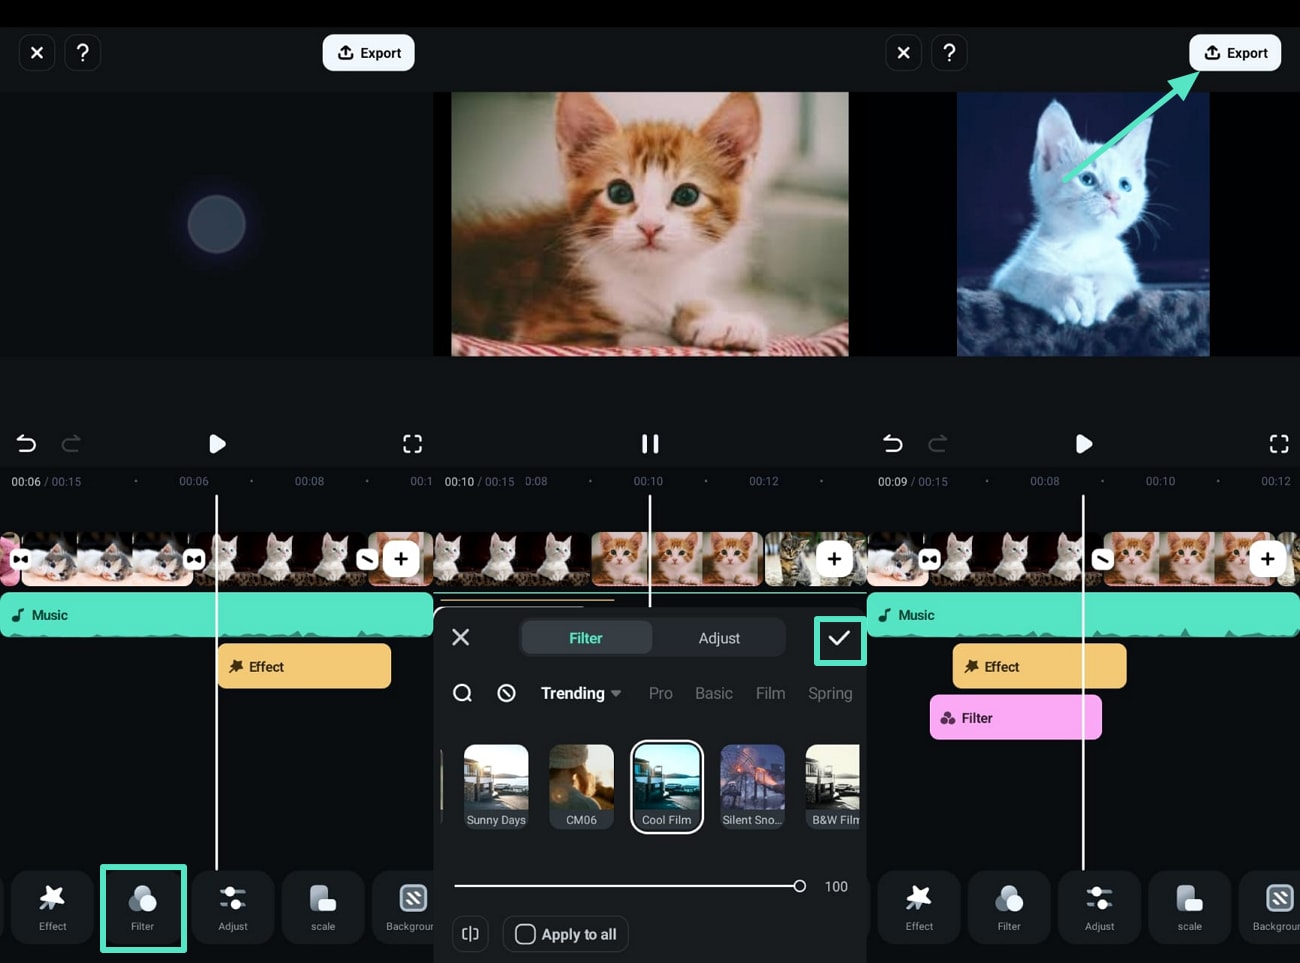
Step 3. Add Transitions and Effects to Make the Slideshow Engaging. Next, pick a transition and hit the “Tick” button to apply it between the images in your slideshow. Once you’re done, use the “Effect” option from below to access the templates and choose the “Tick” button on the right side to save the changes.

Step 4. Use a Filter and Export Your Final Facebook Slideshow. Use the “Filter” option below to access different filters and apply them to your Facebook slideshow with the “Tick” button. Finally, when your Facebook slideshow is ready, select the “Export” option from the top-right corner and save it to your phone’s gallery.
Detailed Guide for Creating a Slideshow Through Filmora Desktop
Here is a detailed guide that you can rely on for using Filmora desktop as your Facebook slideshow maker:
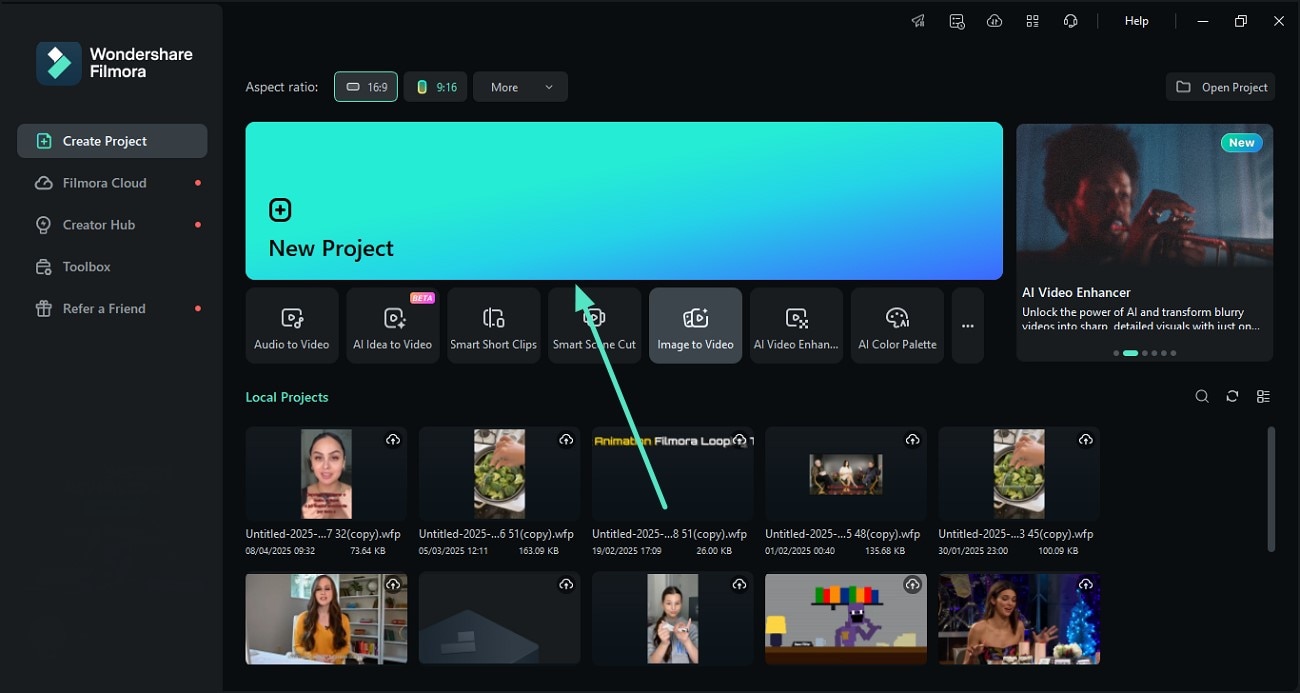
Step 1. Start a New Project to Make Your Facebook Slideshow. To initiate, launch Filmora on your desktop and hit the “New Project” option from the homepage to import your images for the slideshow. Once you’re done, drag those imported images to the editing timeline below to start with the Facebook slideshow creation process.
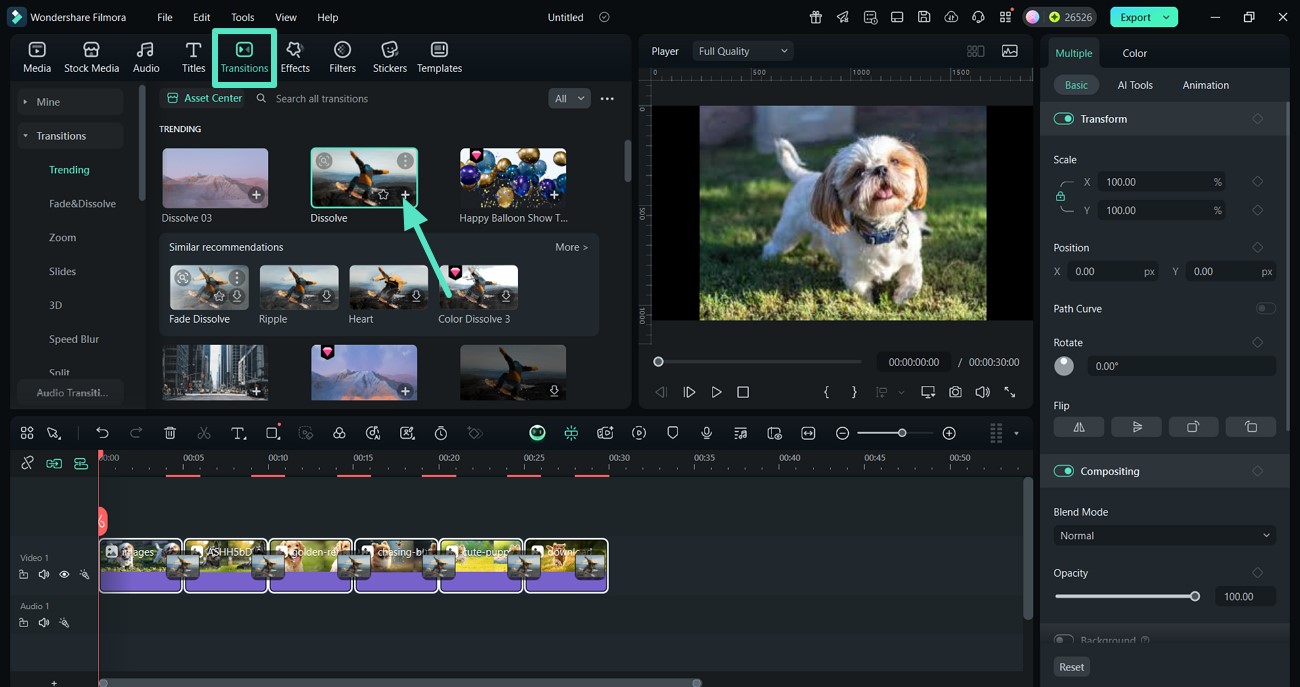
Step 2. Add Transitions In Between The Images in the Slideshow. Next, when your images load on the editing timeline, use the "Transitions" option from above, select a trending one, and hit the "+" button on it. This will automatically add the transition between the images, and users can also utilize more than one in a single slideshow.
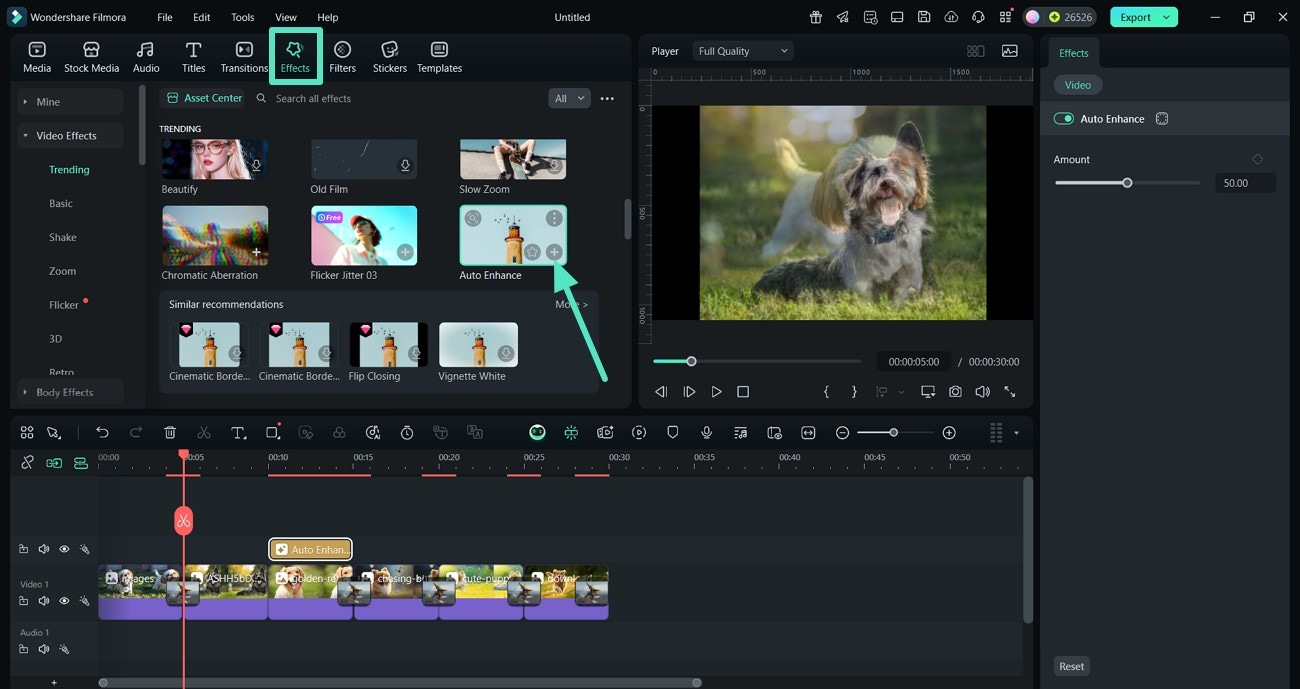
Step 3. Use Effects to Enhance Your Facebook Slideshow. To enhance the look of your Facebook slideshow during editing on Filmora, hit the "Effects" option from the above timeline. Then, pick an effect and use the "+" on it, and Filmora will apply it to your Facebook slideshow.
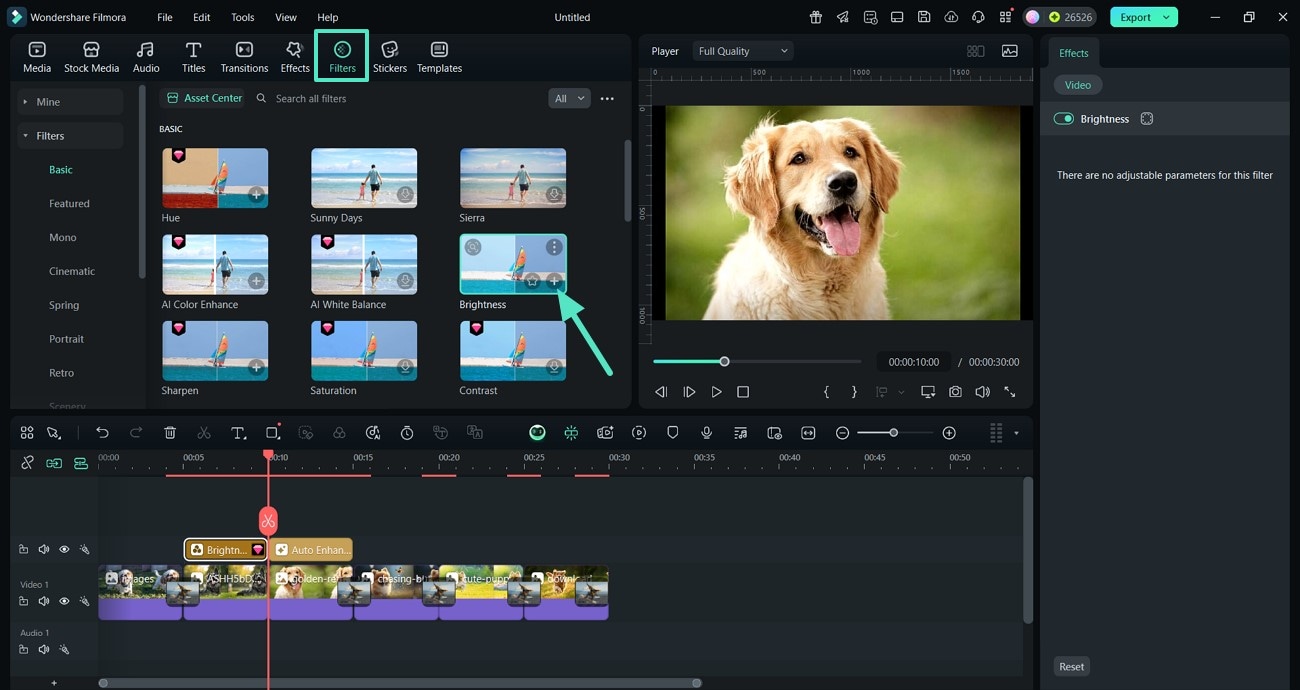
Step 4. Apply Filters to Improve the Overall Look. Viewers need to stop scrolling at your video, and this is only possible when you enhance your slideshow by using the "Filters" option from above. Choose one, such as brightness, and use the "+" button on it to add the filter to your Facebook slideshow.
Step 5. Put Background Music to Enhance the Appeal and Export. Make your Facebook slideshow complete by adding matching background music. Use the "Audio" option from above, use the "Trending" button from the left to find music, and hit the "+" button on it. Play your Facebook slideshow and save the final output to your PC using the “Export” option from the top-right corner.

secure download
Final Thoughts
To conclude, this article discussed how to make a slideshow on Facebook using the platform’s own features. It also elaborated on a tool, Wondershare Filmora, that you can rely on to make your Facebook slideshows engaging and stand out in the busy News Feed of your prospects. Filmora is a complete editing tool that allows you to create a slideshow from scratch and refine it by adding transitions and matching background music.
Frequently Asked Questions
FAQ
-
How do I create a slideshow on Facebook?
You can create a slideshow on Facebook by clicking on the "Create Ad" button from the Meta Business Suite. Then, choose a slideshow and upload your images to make one and finalize it. -
Is the slideshow feature available on mobile devices?
You can mainly access the slideshow feature through the Meta Business Suite app, but not in the standard Facebook app. -
Can I add music to my Facebook Slideshow?
Yes, you can add music while editing your Facebook slideshow with Filmora and also select free background music while creating on Facebook. -
Can I schedule a slideshow to post later?
After learning how to make a slideshow on Facebook, you can utilize Meta’s Business Suite publishing tools and schedule it for later.
