
 100% Security Verified | No Subscription Required | No Malware

Sometimes you want to keep it real and make your videos feel raw and unfiltered, making the viewer feel that they are right there with you. The slight shaky footage you usually try to avoid creates a powerful and intense vibe, especially in action movies. This camera shake effect makes your videos more exciting and immersive for the audiences.
Want to learn how to add shake effect to video and make it look more impactful and engaging? This guide will show you how to do it effectively but in a completely simple manner.
In this article

Part 1. What Does The Video Shake Effect Imply?
It is commonly known as the camera shake and is a post-production technique that makes the picture look like the camera was shaking. Here are the major common implications that the video shake effect implies:
- It gives the impression that the person was capturing the moment himself, which makes the footage more real and less produced.
- The shaking effect often shows explosions or sudden movements and makes them feel more powerful.
- Irregular shakes in thriller and horror movies show the feelings of fear and panic of the protagonist.
- When viewers see the shaking camera, they start watching the scene with more interest.
- The video shake effect adds more energy and intensity to the scenes that earlier felt static.
Part 2. The Perfect Video Editor For Adding Shake Effect to Video
In most of the tools, you don’t get to control exactly when the shake starts and ends. As a result, the shake effect looks unnatural, and the audience fails to connect to it. In such situations, Wondershare Filmora rises as your savior and ensures that you get complete control over when the shake will start and end.
Users can access the tool on a desktop and also enjoy the Filmora shake effect on mobile to edit projects while traveling or sitting in a cafe. Moreover, copying and pasting the keyframes is also simple in Filmora once you create a perfect one in a part of the video.
Detailed Guide to Add the Shake the Camera Effect With Filmora Desktop
Here is a detailed guide that you can follow for adding a shake edit to your clips effectively and easily using Filmora:
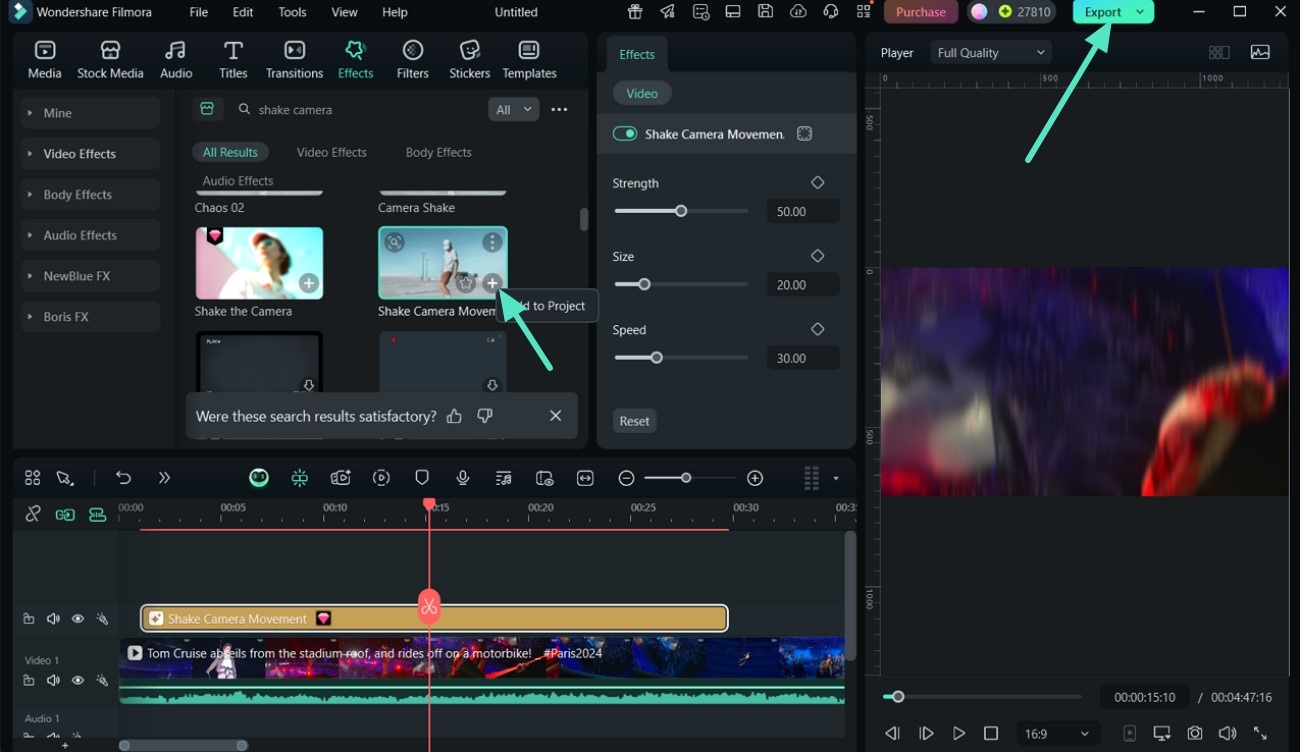
- Step 1: Start a New Project to Apply the Shake Effect. To initiate, click the “New Project” from Filmora’s homepage and import your video to apply the shake effect to it。

- Step 2: Apply the Shake the Camera Effect and Export. Next, head to the "Effects" section from above and type shake camera effect in the search bar. Afterward, hit the "+" button on the "Shake The Camera" effect to add it to your video, and use the “Export” button from the top-right corner to save it。
 secure download

Elaborated Guide to Add Shake the Camera Effect Using the Filmora App
The following is an elaborated guide that you can follow for adding a shake effect to your clips with the Filmora App:
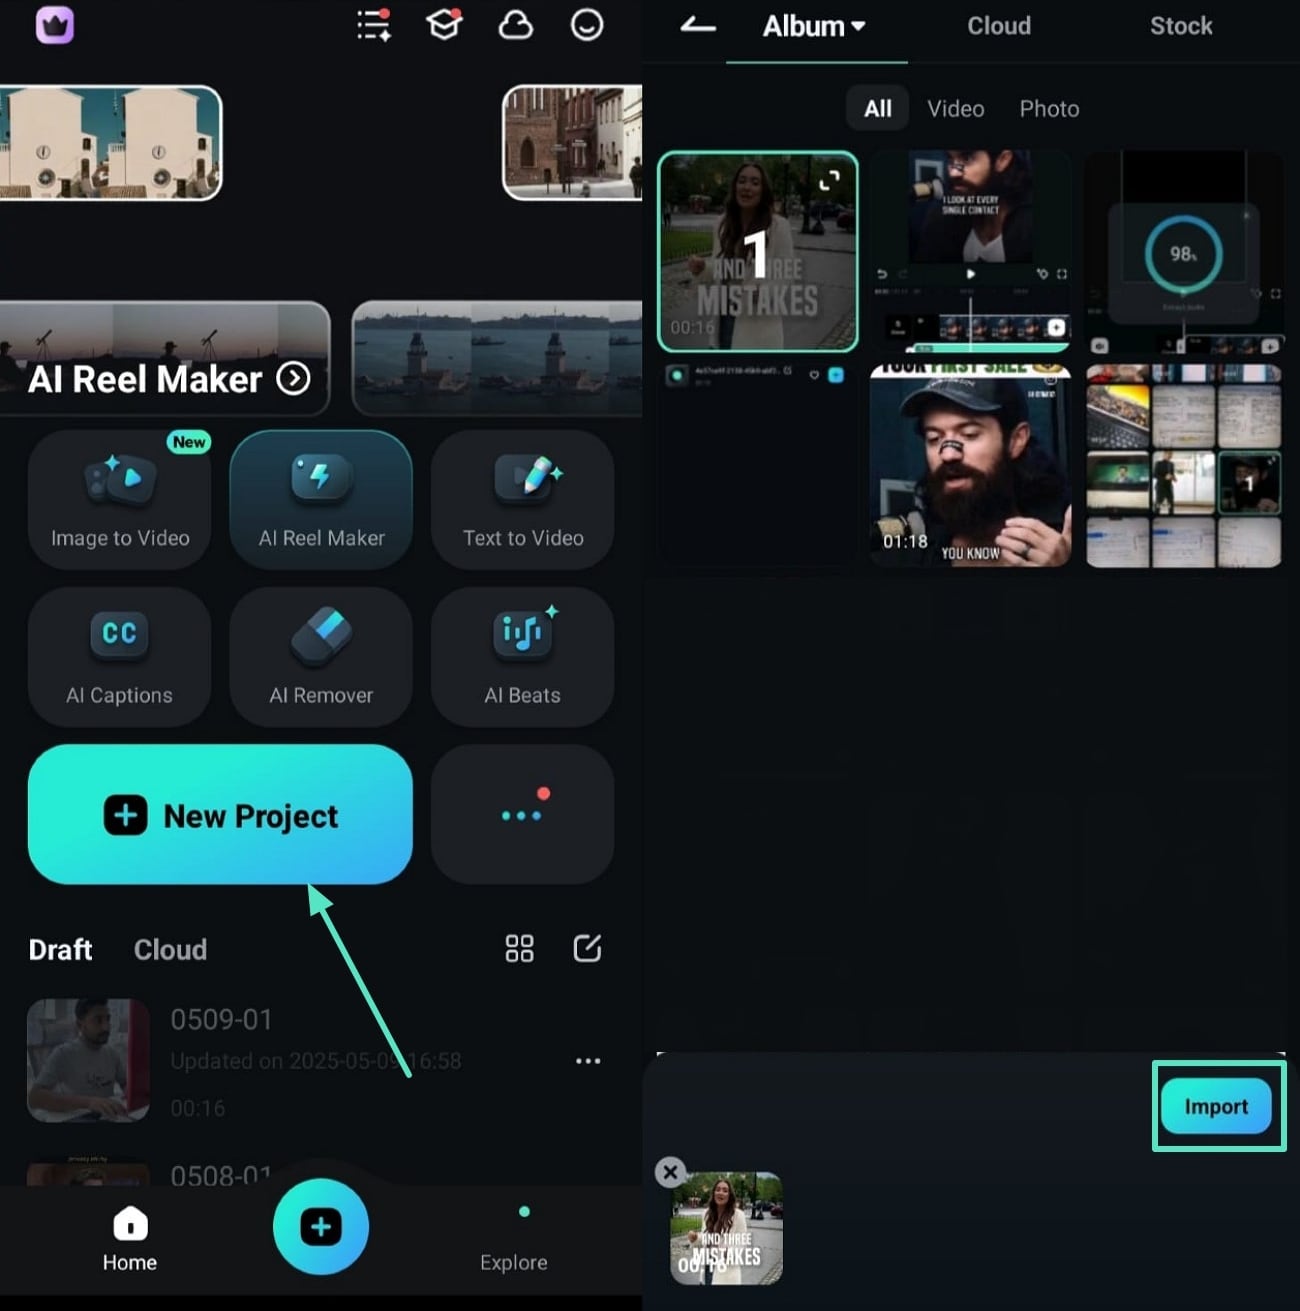
- Step 1: Import a Clip For Shaking Effect. To initiate, use the “New Project” option from Filmora’s homepage, select a clip from the gallery, and hit the “Import” option from the bottom to add a shaking effect。
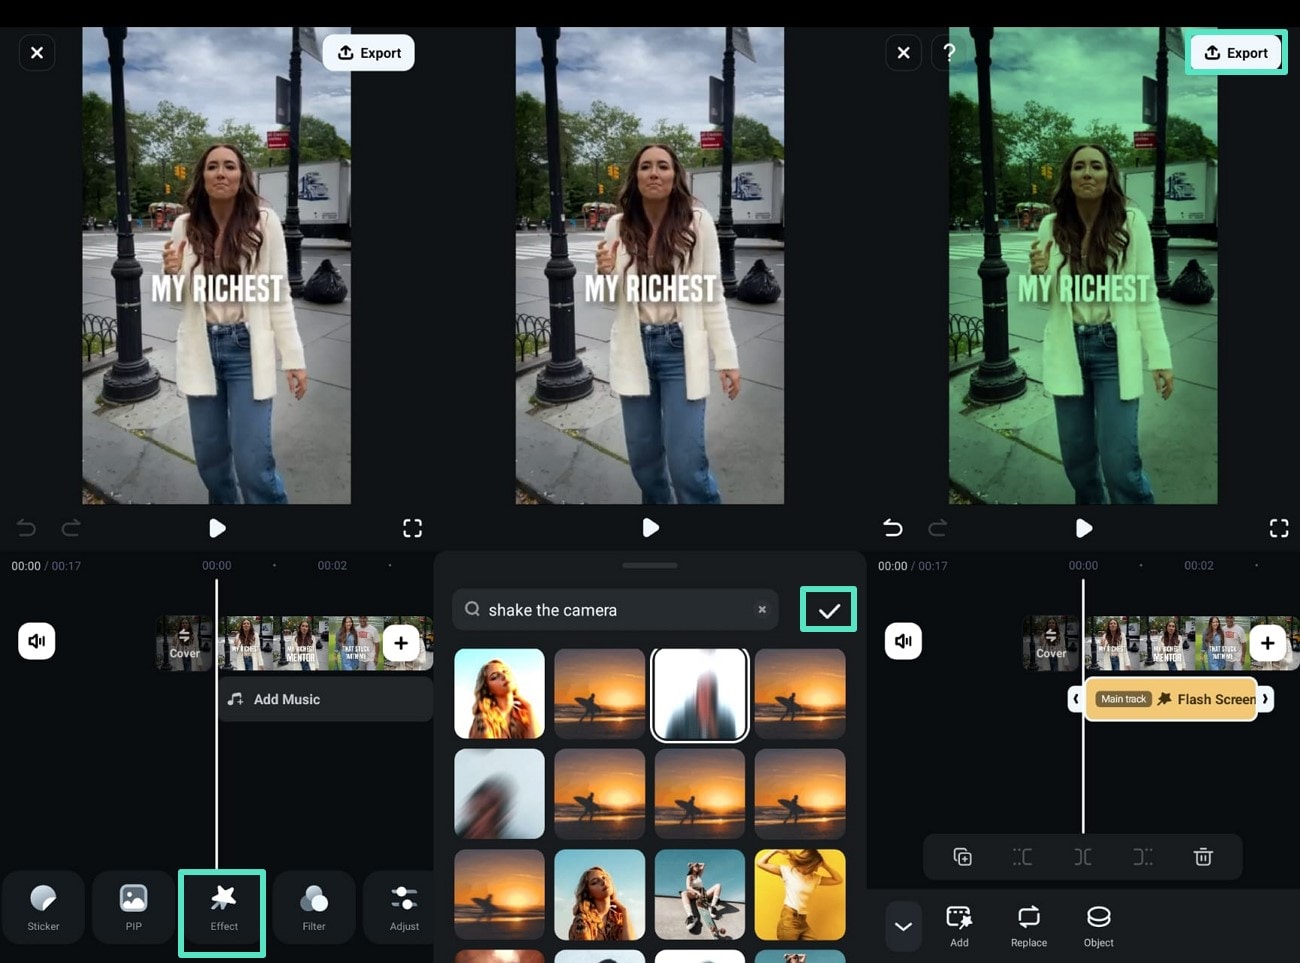
- Step 2: Utilize the Shake the Camera Effect and Export. Next, select the “Effect” option from the bottom and type shake the camera in the search bar. After finding the right effect, choose it and hit the “Tick” icon to apply it to your video and save using the “Export” option。
secure download
Part 3. Alternatives For Quick Video Shake Effect
Here are the common alternatives that you can completely rely on for creating a video-shaking effect in your content:
1. VEED.io
VEED is an online editor that contains several cool effects to increase the appeal of your video. The tool contains different filters, such as glitch and glitch party, that can add a shaking effect to your clips with a single click. With VEED.io, apply multiple effects simultaneously and also adjust their intensity percentage after applying them.
Key Features
- Users can search for matching music from the tool’s library and add it to their clips.
- Add different emojis from the collection in your videos to make them look more engaging.
- Upload your file in different formats and add as many effects as you like.
Steps to Add Shake Effect to Your Video Using VEED.io
Step 1. Open the website and click on the “Choose Video” option from the main interface to import your video.
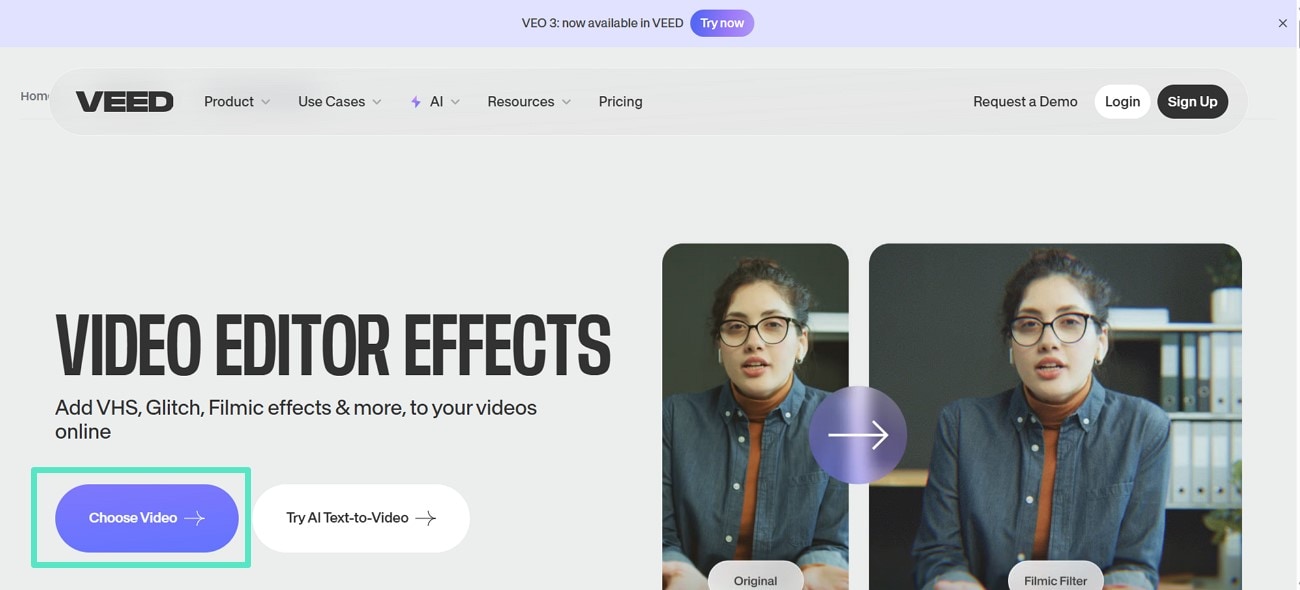
Step 2. Once your video uploads hit the "Three Dots" under it and access the "Filters" option.
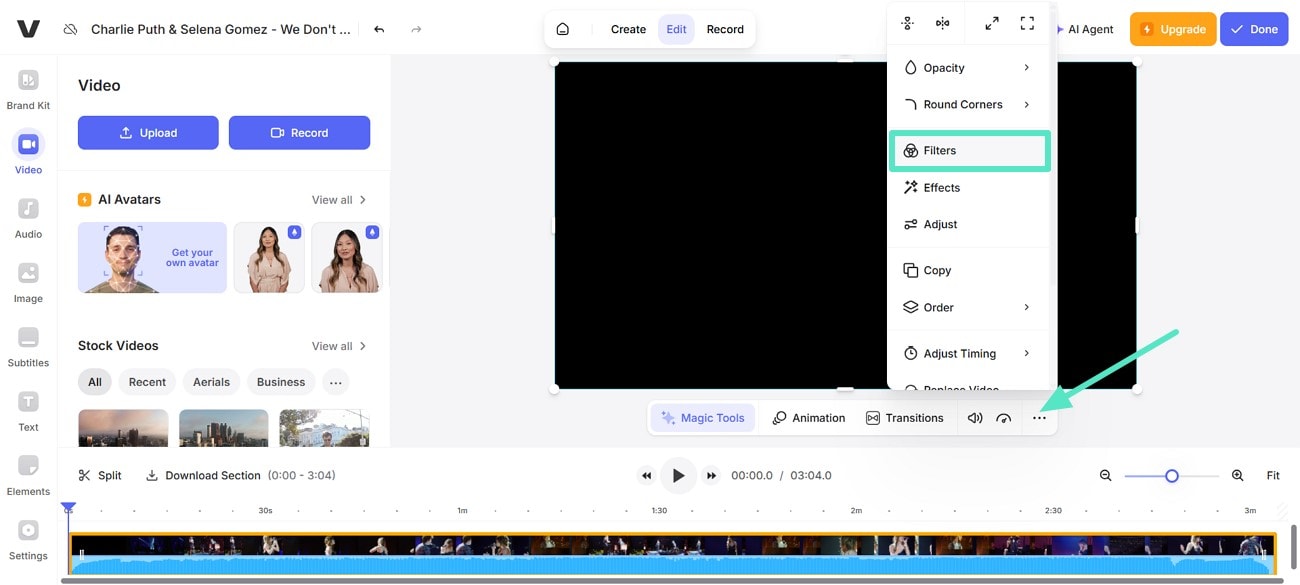
Step 3. Hit the “Effects” option, look for the "Glitch Party" effect, select it to apply to the video, and click “Done” to export the video to your device.
Compatibility
Windows, Mac, Linux, Android
2. Premiere Pro
Adding the shake effect through Premiere Pro gives a unique touch to your media content. In Premiere Pro, you can create a copy of the clip before adding the shake effect so your original clip remains unchanged. Furthermore, you can set key frames at specific points in your clip for complete customization of the effects.
Key Features
- Decide the exact point from where you want to start and end your effect.
- Benefit from the motion blur to make the frame movement appear smooth.
- Increase or decrease the value of skew to set the shake effect in your clip.
Steps to Add a Shake Effect Using Premiere Pro
Step 1. Begin by going to "Effects," searching for "Transform," and dragging it onto your video.
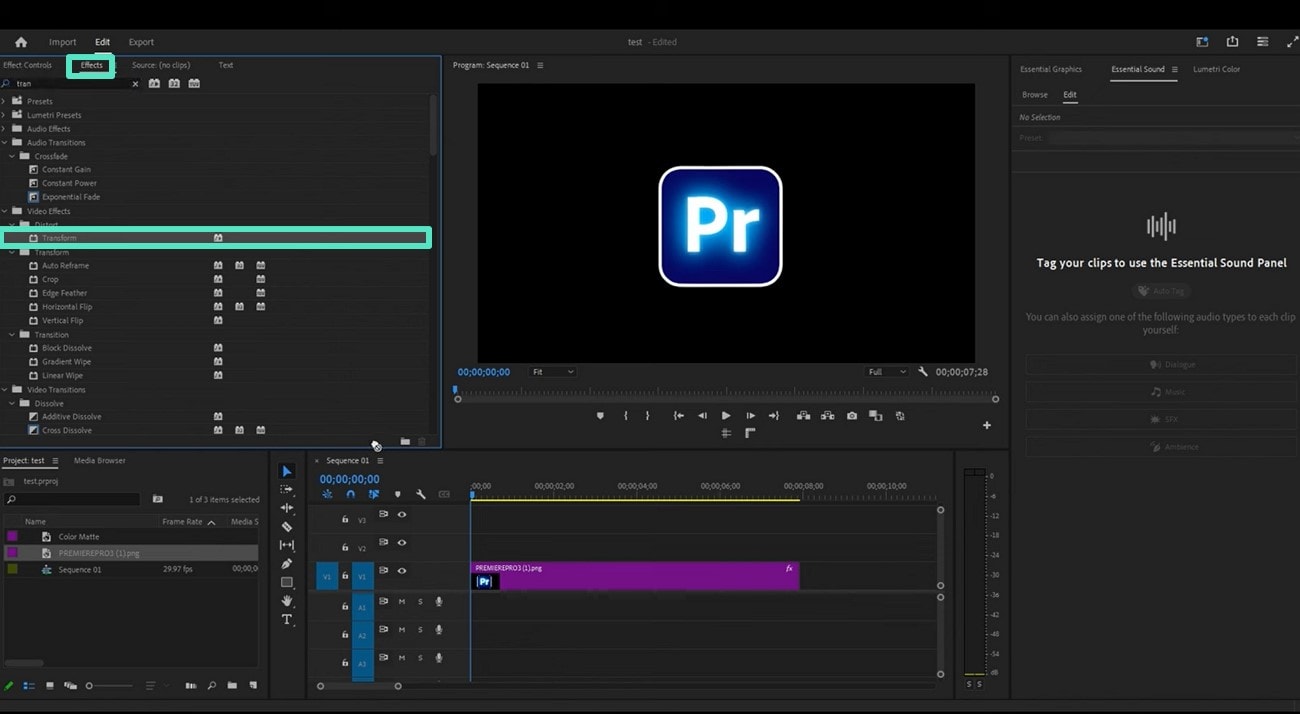
Step 2. Next, move your timeline slider from the point where you want to start the shake effect under the effect controls.
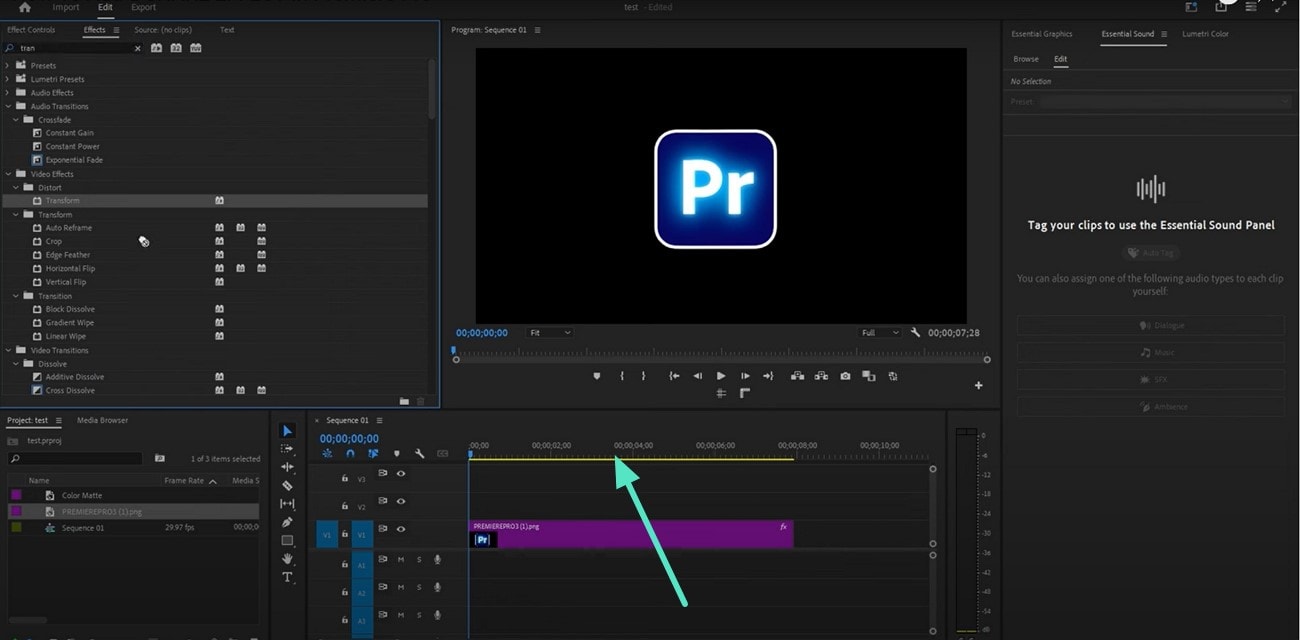
Step 3. Scroll down and use the stopwatch icon beside the “Skew Axis” and change the value of skew according to your requirements.
Compatibility
Windows, macOS
3. Media.io
If you’re looking for a video editing tool that contains different AI video effects and requires no editing experience, then Media.io is the best option. With this tool, users can edit their clips like a pro and add different video shaking effects to create engaging videos and grab the viewer's attention.
Key Features
- Contains several effects so users can choose the exact shake effect they want.
- Adjust Blend properties to give the final result a natural shake look.
- Use artistic text styles from the templates and enhance their clip.
Steps to Add a Shake Effect to Your Clip With Media.io Online
Step 1. Begin by opening Media.io on your PC and hitting the “Upload Your Video” option to import a video and add a shake effect to it.
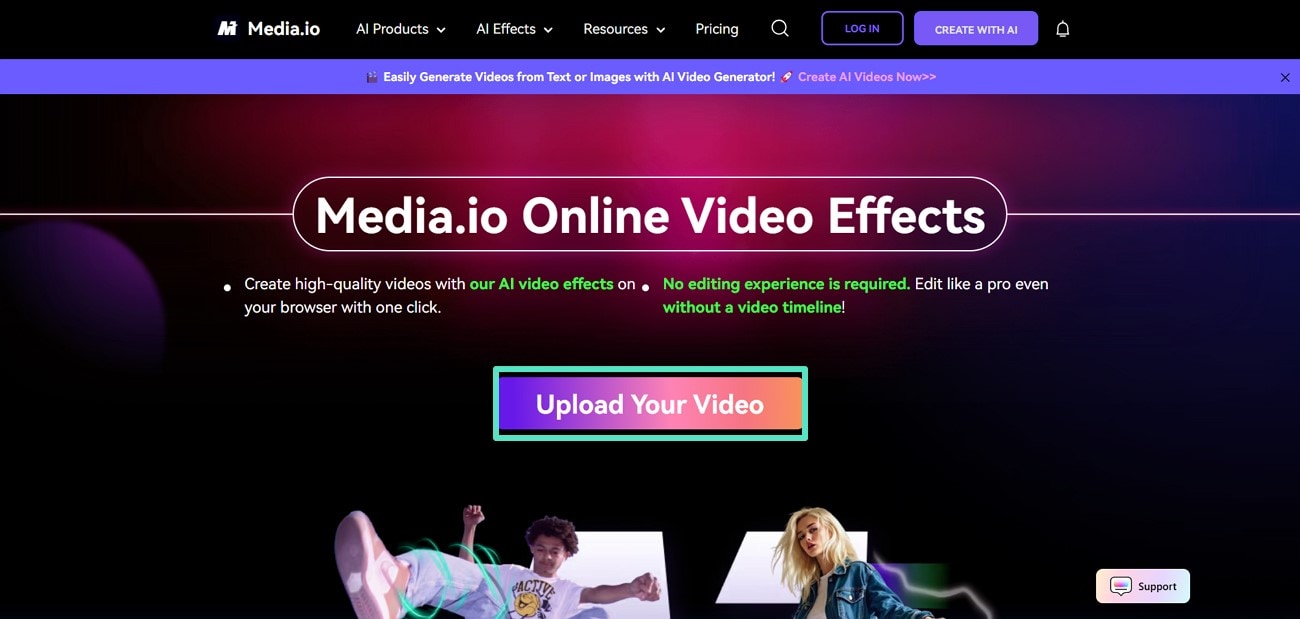
Step 2. When your video uploads, click on the “Effect” icon on the left side and type shake the camera in the search bar. Once the effects show up, pick one, apply it to the video, and “Export” your final product.
Compatibility
Windows, MacOS
4. CapCut
CapCut is a tool that acts as a complete video editing tool for small filmmakers who want to create and edit a short movie. In this tool, you will find different filmmaking effects, such as shaking the camera, and that too in different variations. Users can also save shaky camera effects as favorites to use them later on and can also increase their intensity.
Key Features
- In CapCut, users can customize the duration of their shaking camera effect.
- Take royalty-free, shake the camera templates, and customize them according to your requirements.
- Use the shake the camera transitions at different points in the video while editing on CapCut.
Steps to Add Shake Effect to Your Video Using CapCut
Step 1. Start by opening CapCut on your PC and using the “New Video” option to import your video to add a shake effect.
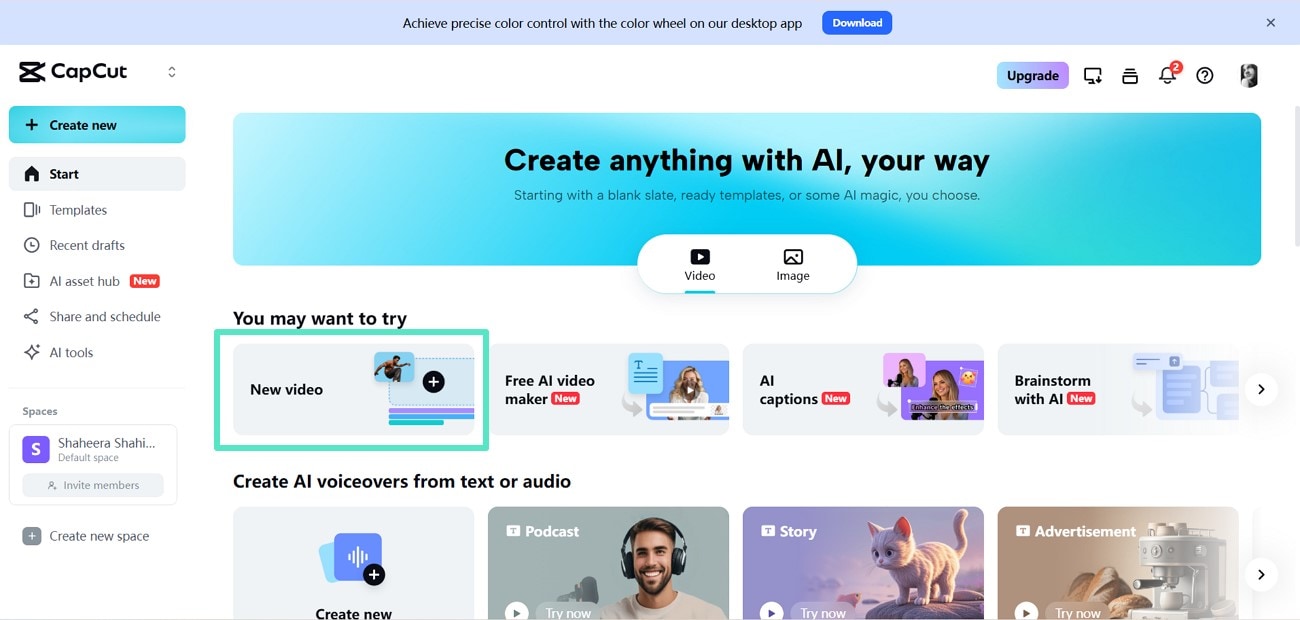
Step 2. Next, use the “Effects” option from the left side of the screen and type shake the camera in the search bar. When the effects show up, choose one click it to apply to your video and save it to your device with the "Export" button at the top.
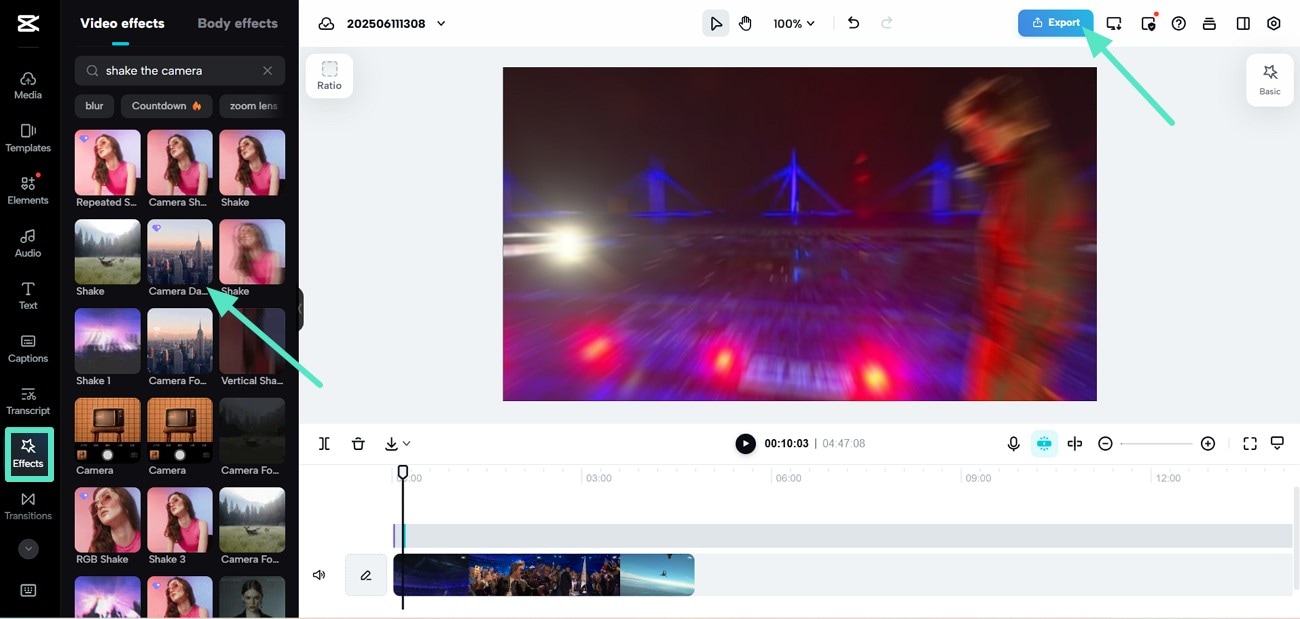
Compatibility
Windows, MacOS, iOS, Android
Part 4. Tips To Excel in Creating Shake Effect in Video
Having discussed the tools to utilize to add a shaking effect to video, here are the tips you must follow to generate accurate results:
- Apply keyframes to the shake effect so you can control exactly when the shake starts and ends, making it match the action in the clip.
- Enable or increase motion blur to make the shake look more realistic, as the real camera movement often causes blurring in the image.
- When shaking the video, increase the scale slightly to prevent black edges from appearing around your footage as it moves.
- Match the shake effect to important scenes, such as loud sounds or explosions, to make the effect more convincing and connected to the scene.
- Once you create a good shake effect, copy and paste the keyframes to other parts of your video where you want the same effect.
- Shake the video up, down, and right and left so the camera movement can feel more natural.
Conclusion
To summarize, this article discussed the simple techniques on how to add shake effect to video. It also talked about a perfect tool, Wondershare Filmora, that you can utilize for adding shake effects and several other effects using its AI-integrated abilities. With Filmora, you can make the shaking effect in your clips look natural and make the audience experience it completely and feel connected to it.
secure download
