For the Best Results, Use the Latest Version.
-
Preparations for Mac
-
Account (Mac)
-
Get Started & Basic Settings (Mac)
- Release notes for Mac
- Latest Versions and Features for Mac
- Get Started on Mac - Full Guide
- Download/register/uninstall on Mac
- Panel Layout on Mac
- Keyboard shortcuts on Mac
- Touchbar on Mac
- Change playback quality on Mac
- Render preview files on Mac
- Manage Timeline on Mac
- Media for use on Mac
- Logo Reveal For Mac
- Marked Favorites for Mac
-
Compatibility & Tech Specs (Mac)
-
Performance Settings (Mac)
-
-
Creating Projects - Mac
-
Creating New Projects (Mac)
-
-
Importing & Recording - Mac
-
Importing (Mac)
-
Recording (Mac)
-
-
Video Editing for Mac
-
Basic Video Editing for Mac
- Edit Live Photos on Mac
- Enable/Disable Clip for Mac
- Magnetic Timeline For Mac
- Dual Monitor Setup for Video Editing on Mac
- Select All Clips on Timeline for Mac
- Auto Ripple for Mac
- Split & cut videos on Mac
- Compositing on Mac
- Crop and zoom on Mac
- Playback Zoom Level for Mac
- Change speed on Mac
- Play video in reverse on Mac
- Mark In and Mark Out for Mac
- Markers for Mac
- Group clips on Mac
- Customized Backgrounds for Videos and Images in Mac
- Video snapshot on Mac
- Freeze frame on Mac
- Auto enhance on Mac
- Applying Drop Shadow for Mac
- Adjustment Layer for Mac
- Mark clip on Mac
- Video Editing Ruler – Mac
- Apply Transforming for Mac
-
Advanced Video Editing for Mac
- Text Animation Path for Mac
- Create Multi-Camera Clip for Mac
- Drawing Tools for Mac | Filmora Guide
- Compound Clips for Mac
- AI Video Enhancer for Mac
- Filmora Flicker Removal Guide | Mac
- Multi-Clip Editing for Mac
- Keyframe Graph Editor for Mac
- Animation keyframing on Mac
- Mask on Mac
- PIP (picture in picture) on Mac
-
AI-Powered Video Editing for Mac
- Smart Scene Cut for Mac
- Smart Short Clips for Mac
- Filmora Image to Video for Mac
- AI Idea to Video for Mac
- AI Text-to-Video for Mac
- Instant Cutter Tool on Mac
- AI Face Mosaic for Mac
- Filmora Image to Prompt for Mac
- Keyframe Path Curve for Mac
- Filmora AI Image Enhancer Guide – macOS
- Planar Tracking for Mac
- Filmora AI Relight - Mac
- AI Extend For Mac
- AI Script-to-Video for Mac
- AI Text-Based Editing in Mac
- Create With Instant Mode on Mac
- ChatGPT Plugin - AI Copywriting on Mac
- AI Smart Cutout for Mac
- Auto reframe on Mac
- Lens correction on Mac
- AI Portrait Cutout on Mac
- Scene detection on Mac
- AI Smart Masking for Mac
- AI Mate Editing for Mac
- Motion Tracking on Mac
- Video Stabilization for Mac
- AI Object Remover For Mac
- AI Smart Search for Mac
- AI Skin Tone Protection for Mac
- Green screen on Mac
- Super Slow Motion with Optical Flow for Mac
- AI stylizer on Mac
- Video Denoise for Mac
-
-
Audio Editing for Mac
-
Basic Audio Editing for Mac
-
Advanced Audio Editing for Mac
-
AI-Powered Audio Editing for Mac
- Audio To Video for Mac
- AI Sound Effect for Mac
- Smart BGM Generation for Mac
- AI Voice Enhancer for Mac
- Audio Stretch for Mac
- AI Audio Denoise for Mac
- Auto synchronization for Mac
- AI Vocal Remover for Mac
- Auto Beat Sync on Mac
- AI Music Generator for Mac
- How to Perform AI Voice Cloning in Wondershare Filmora?
- Silence detection on Mac
-
-
Text Editing for Mac
-
Basic Text Editing for Mac
-
Advanced Text Editing for Mac
-
AI-Powered Text Editing for Mac
-
-
Video Customizations for Mac
-
Video Effects (Mac)
-
Audio Effects (Mac)
-
Transitions (Mac)
-
Stickers (Mac)
-
Filters (Mac)
-
Color Editing (Mac)
-
Animations (Mac)
-
Templates (Mac)
-
Asset Center (Mac)
-
-
Exporting & Share & Cloud Backup - Mac
Filmora Image to Video for Mac
The Image-to-Prompt feature in Filmora for Mac allows users to automatically generate prompts by analyzing reference images or short video clips. This process extracts key visual details such as composition, style, and motion patterns to guide AI video generation more effectively.
Using these AI-generated prompts, creators can recreate similar visual aesthetics and maintain consistent styles across multiple projects. The prompts can also be edited or refined, giving users more flexibility to improve image-to-video results.
With this capability, users can replicate visual elements, enhance motion accuracy, and refine scene structure without manually writing complex prompts. As a result, it becomes easier to maintain creative consistency while producing high-quality AI videos.
When To Use
- Copy visual styles directly from reference images or videos.
- Gain better control over scene structure and motion in AI video generation.
- Reuse consistent visual aesthetics across multiple generations.
- Improve Image-to-Video (I2V) results quickly through prompt refinement.
Supported Inputs & Best Uses
- Single Image → Prompt: Extract and reuse the visual style from one image.
- Start Frame + End Frame → Prompt: Improve motion flow and scene structure.
- Multiple Reference Images → Prompt: Combine styles to create a richer visual look.
- Video Clip → Prompt: Analyze a video to recreate its style and pacing.
- Prompt Editing (After Extraction): Refine style, details, and quality before generating the video.
Steps to Use the Image-to-Prompt Feature on Mac
Index
For Image to Video
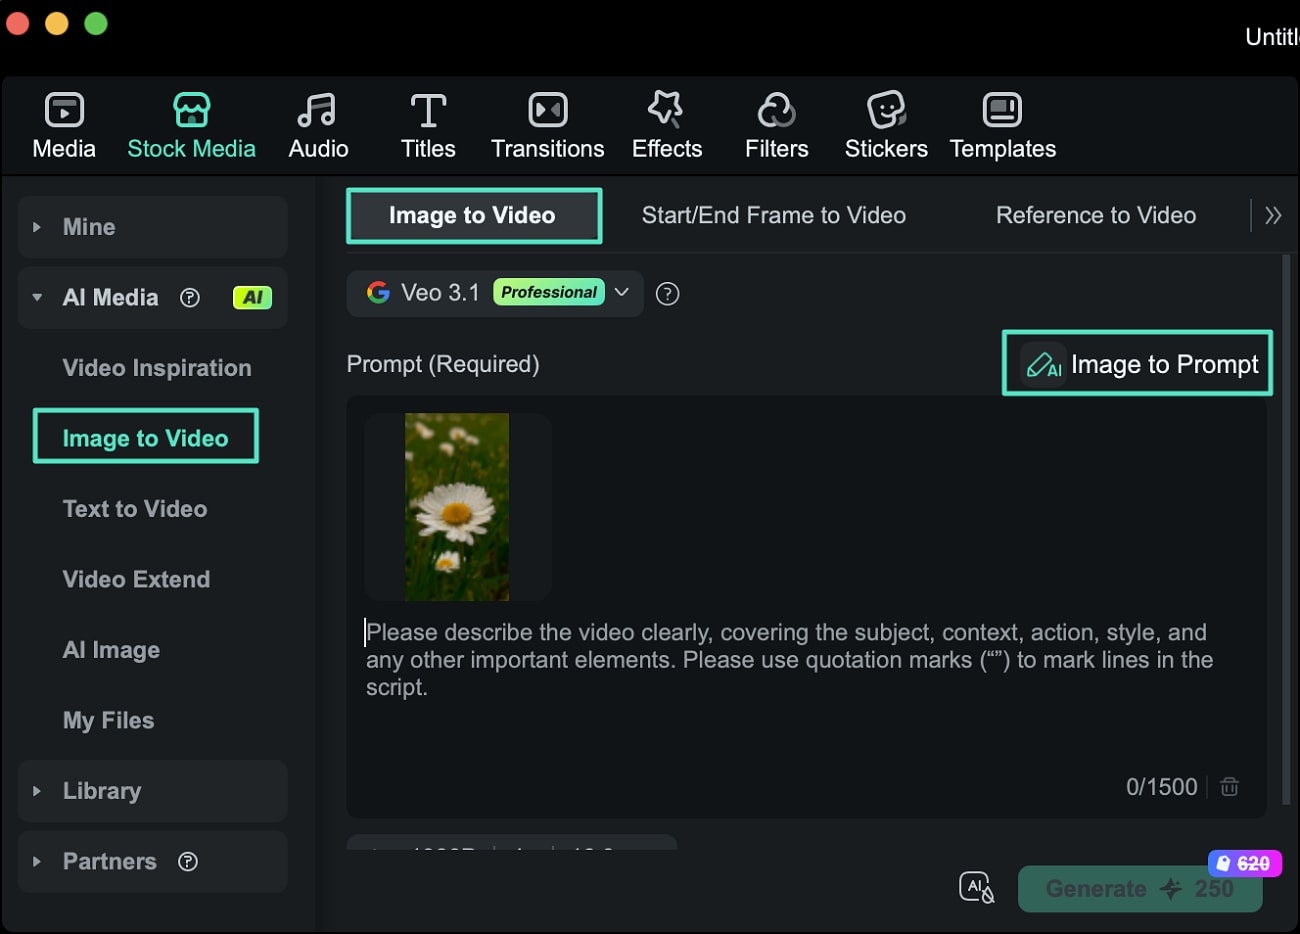
Step 1. Upload an Image and Select Image to Prompt
Open the Image to Video feature and upload the image you want to use. After the image appears in the interface, find the Image to Prompt option and click it to automatically generate a prompt from the visual.
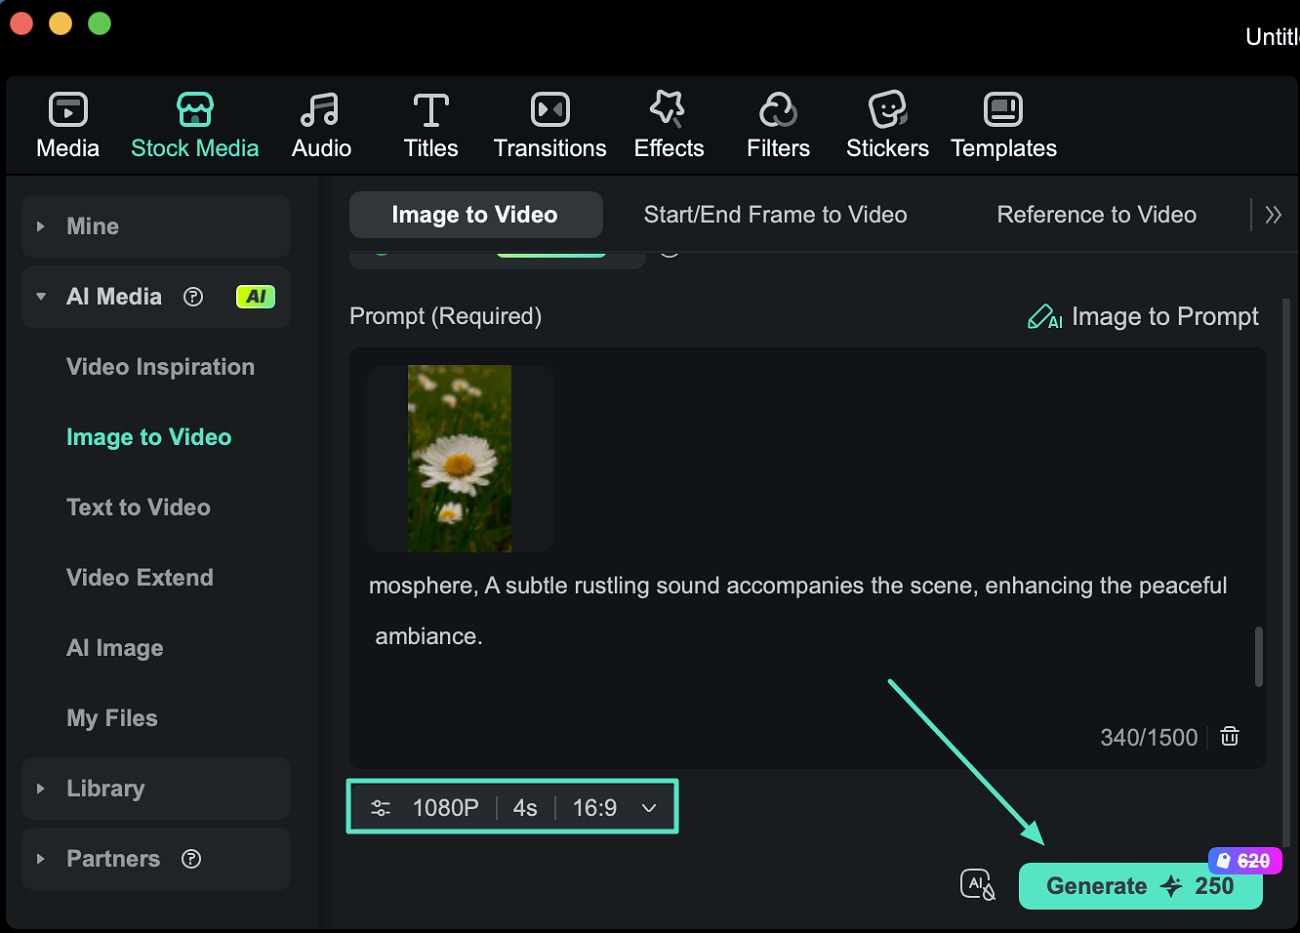
Step 2. Adjust Settings and Generate the Video
Once the prompt is created, edit it according to your preferences, like subject, style, and even motion. Choose the video resolution and set the desired aspect ratio and duration. After configuring these options, click the Generate button to begin creating the video.
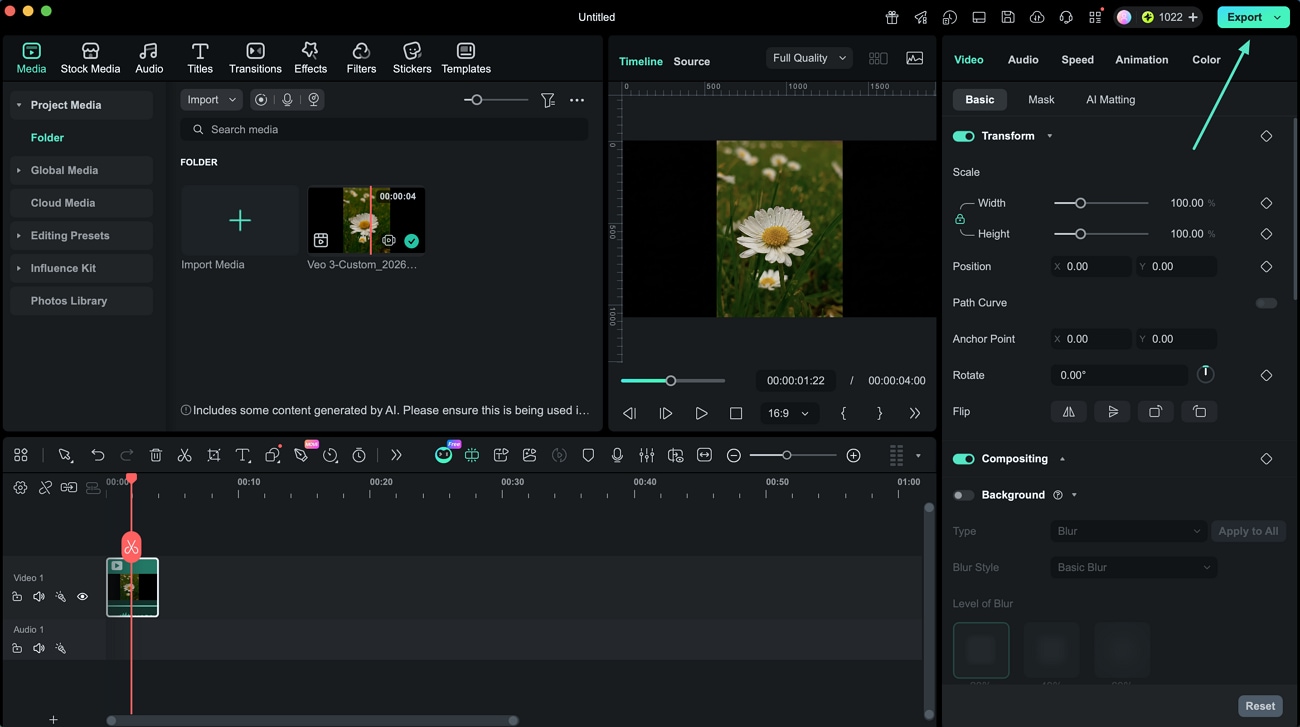
Step 3. Check Results and Save
When the video is successfully generated, preview it within the preview window and save the results using the Export button.
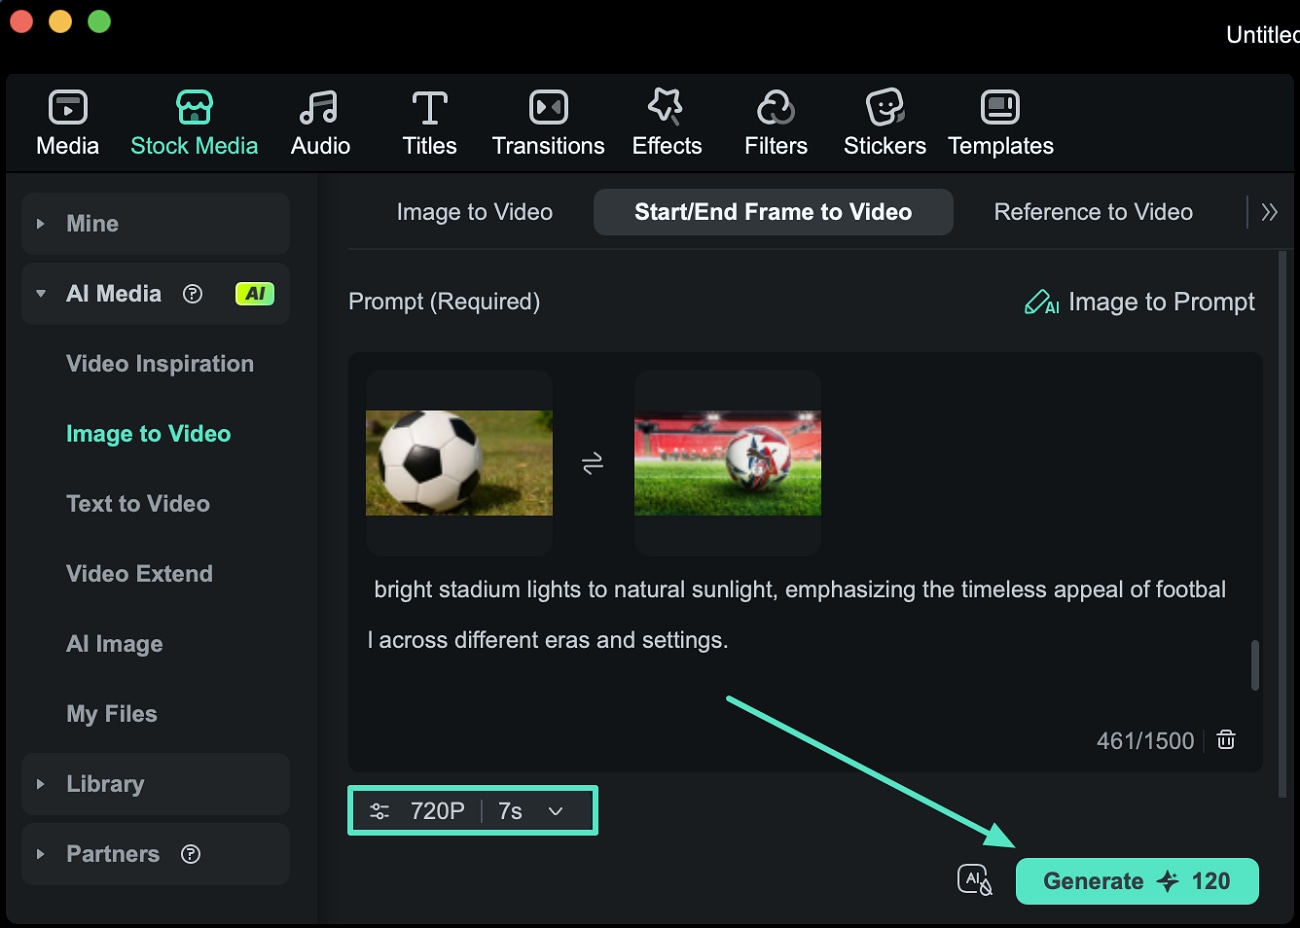
For Start/End Frame to Video
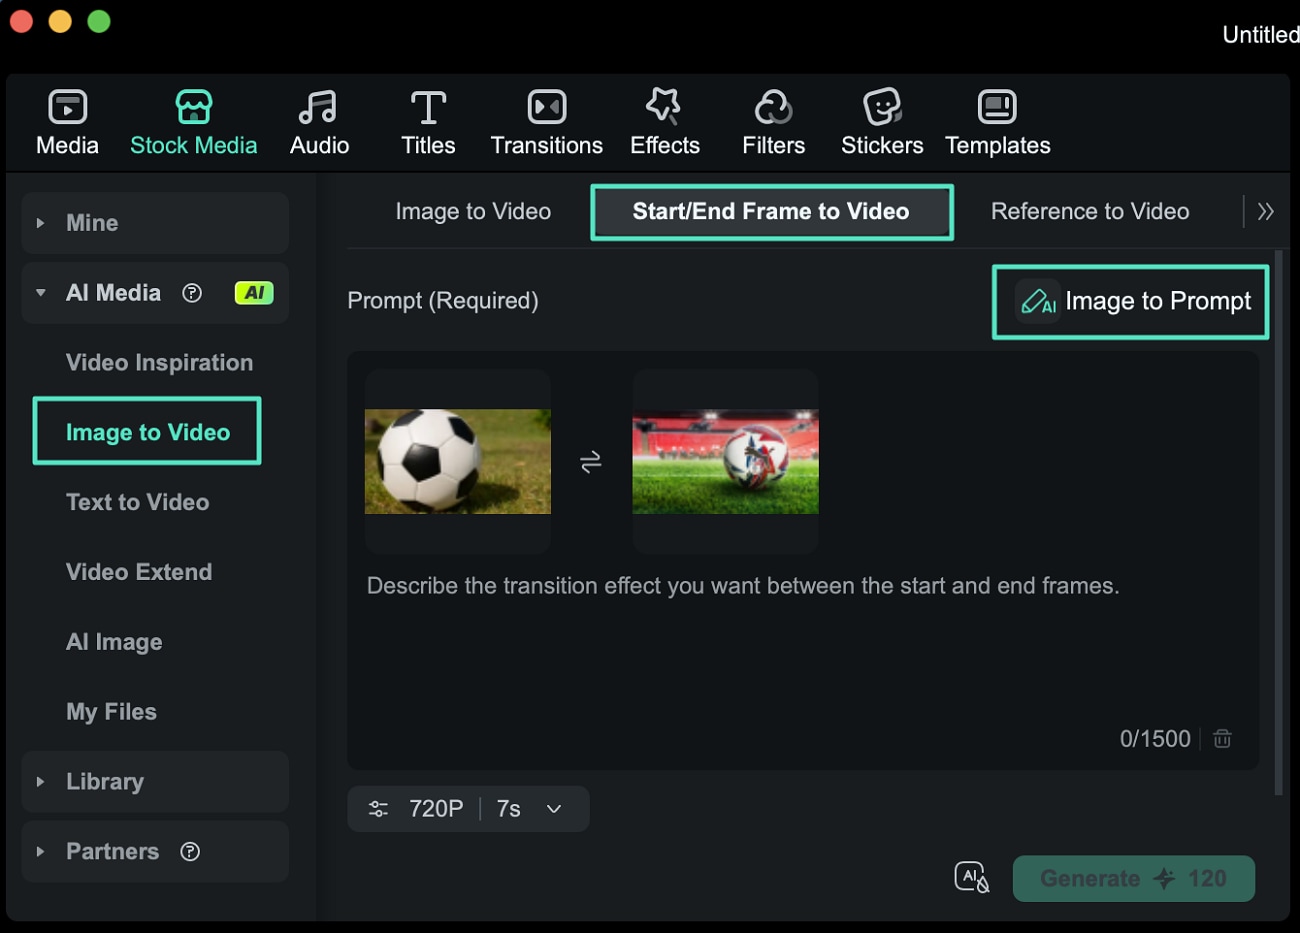
Step 1. Upload Start and End Frames and Generate Prompt
Import the start frame and end frame using the available upload options within the Start/End Frame to Video option. Then select Image to Prompt so the AI can analyze the frames and produce a suitable prompt.
Step 2. Review the Prompt and Generate Video
After the prompt appears, review it and adjust the video settings, such as resolution and duration. Click Generate to start producing the video.
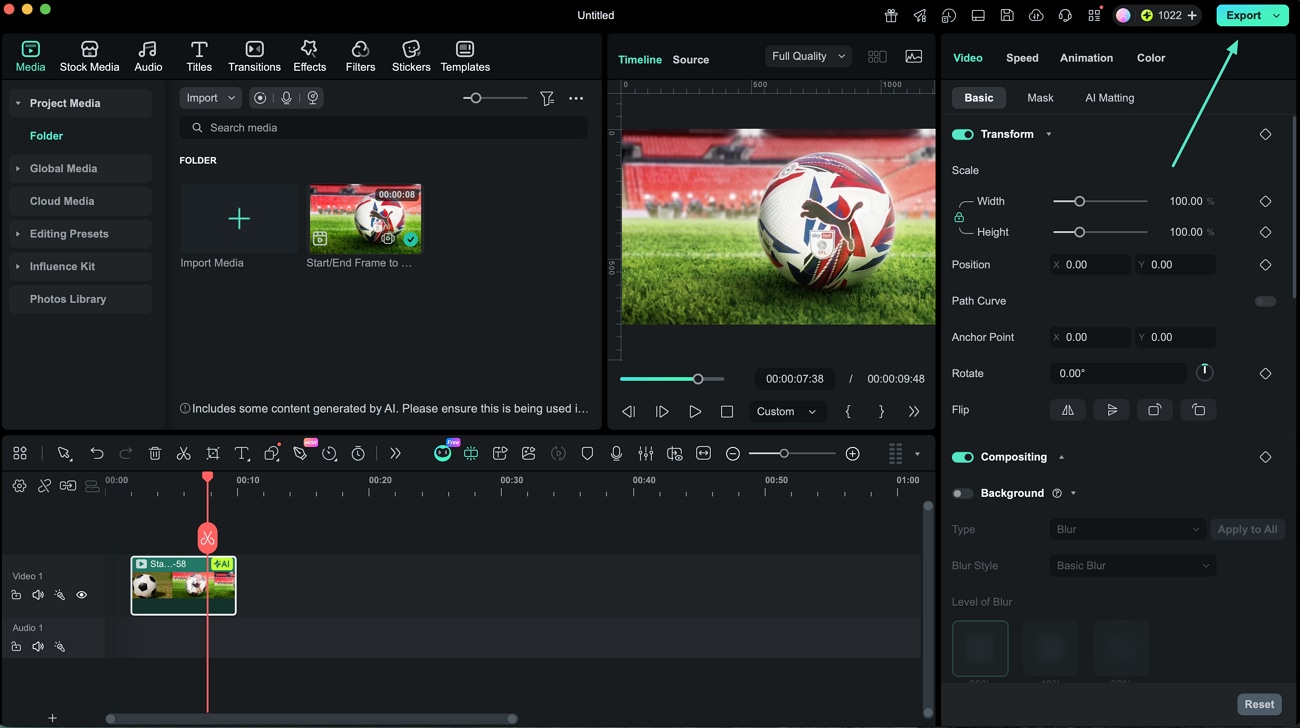
Step 3. Preview and Export the Video
When the video is ready, preview the result. If everything looks good, click Export to save the generated video to your Mac.
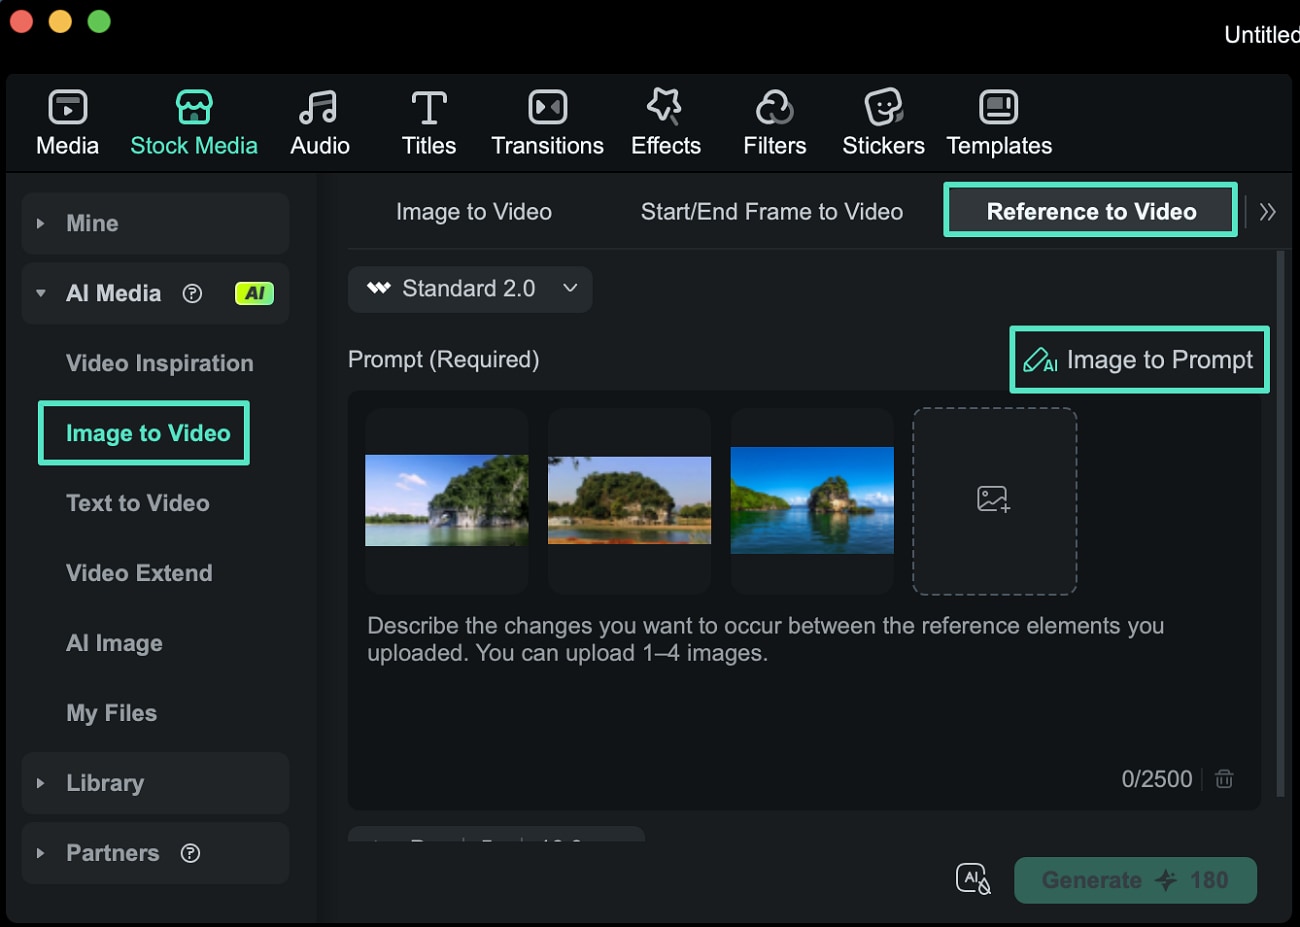
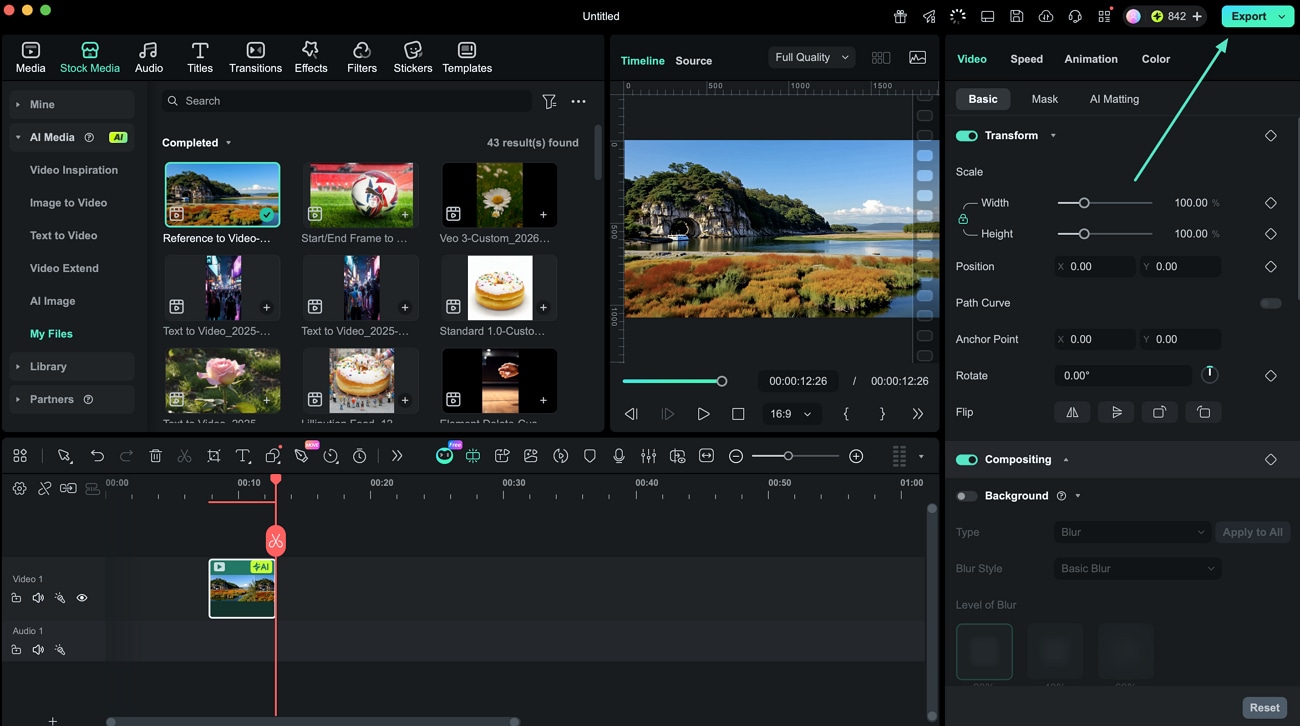
For Reference to the Video
Step 1. Import Reference Images and Use Image to Prompt
Select the Reference to Video feature and upload multiple reference images. Next, click Image to Prompt so the system can analyze the visuals and generate a prompt.
Step 2. Adjust Settings and Start Generation
After the prompt is generated, preview and modify it if necessary. Then set the video quality, duration, and aspect ratio before clicking Generate.
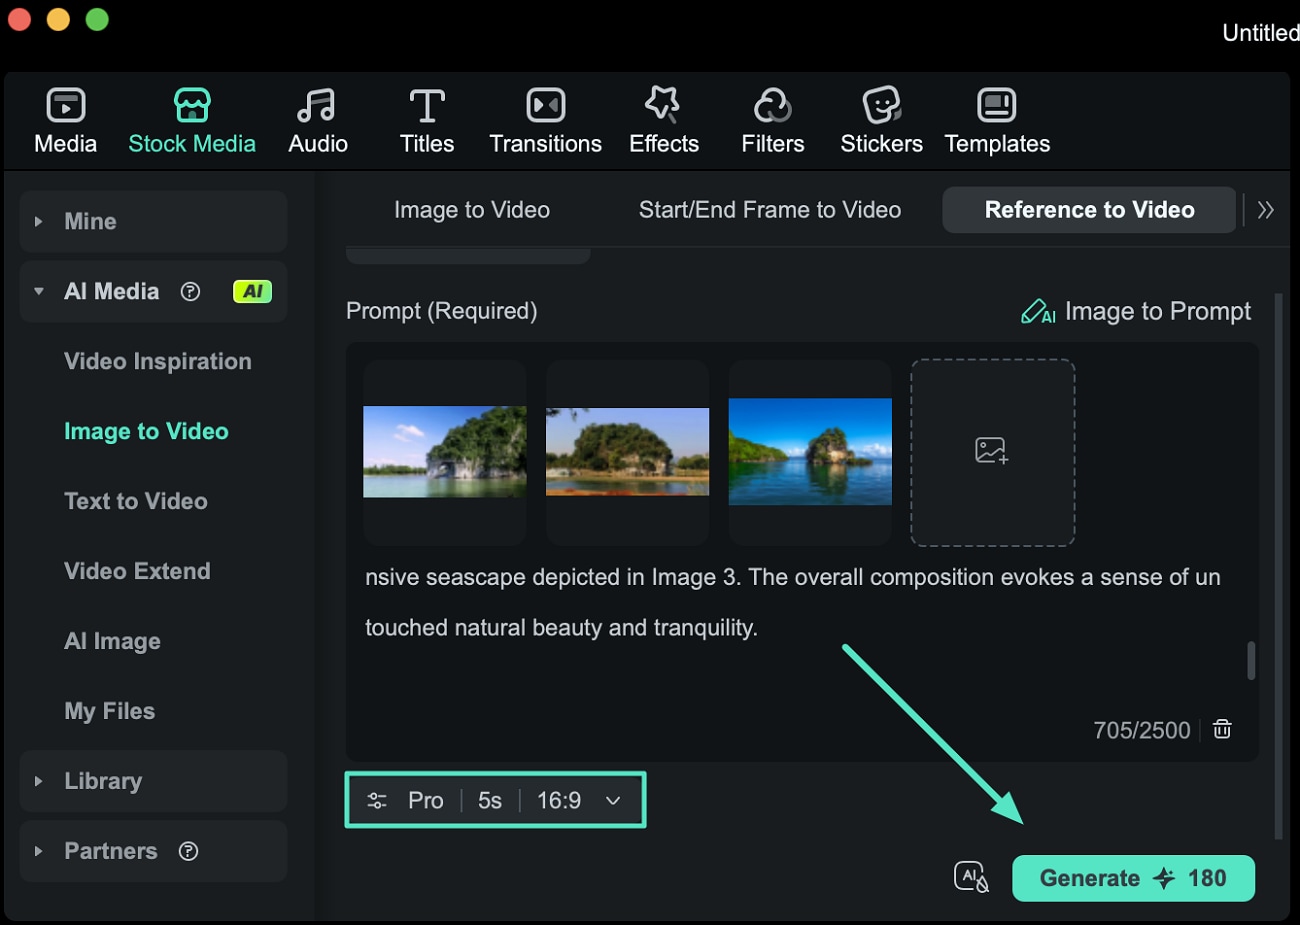
Step 3. Review and Save the Video
Once the AI finishes generating the video, check the results in the preview window. Finally, click Export to download and save the completed video to your device.
Related Posts
Featured Articles
5 Creative Tools to Convert Audio Files Into Stunning Videos
Find the best audio-to-video converter for your creative projects. Check out our guide to explore top-rated tools and quickly transform audio files into stunning visuals!
How to Extract Audio from Videos Using VLC in Simple Steps
Want to know how to extract audio from videos on VLC? Check our step-by-step guide to use VLC extracts audio from videos on Windows and Mac.
How to Choose Best Audio Formats
Here you will learn about some of the most common sound file format types, which among them could be the best audio format according to your requirements.
Recommended User Guide
Video Stabilization for Mac
Learn how to stabilize your video with Filmora for Mac.
AI Smart Masking for Mac
Masking is a feature used in professional video editing, and being a professional video editor, Wondershare Filmora offers it.
Super Slow Motion with Optical Flow for Mac
Slo-mo has always been in trend, and now, with Filmora's upgrade, you can make your videos super slow to match the trends.
