


 100% Security Verified | No Subscription Required | No Malware


 ChatGPT
 Perplexity
 Gemini
 Claude
 Grok
Grok
Unless you have a professional shooting setting with a gimbal or at least a tripod, your recordings will have some shakiness or other unwanted movement to them, no matter what you do. You can’t go around it when shooting with a handheld camera.
You can, however, remove it in post-processing if you have the right video editor.
Adobe Premiere Pro’s warp stabilizer is a powerful feature that lets you improve your recordings by eliminating unwanted movements and turning your content from amateurish-looking clips into professional videos.
Learn how to find the warp stabilizer in Premiere Pro and put it to good use.
In this article
What is the warp stabilizer?
Let’s start with the basics and learn precisely what warp stabilizer is in Premiere Pro. In a nutshell, it’s an effect designed to assess your videos and counteract any unwanted movement that might be present in them.
Of course, there isn’t just one movement type that could affect the quality of your videos. While shooting, your camera might’ve been moving in a straight line from side to side. It could’ve been moving up and down, rotating along the XY axis, or even zooming in and panning out.
Fortunately, the Premiere warp stabilizer was designed to smooth it all out. It can stabilize footage by adjusting each frame’s position, scale, perspective, and rotation, helping you get clean, smooth videos without breaking a sweat.
Basic features of warp stabilizer
Warp stabilizer in Premiere Pro is a powerful little tool with extensive capabilities. You can easily customize its settings to ensure your videos come out just right.
Here’s a brief overview of its basic features.
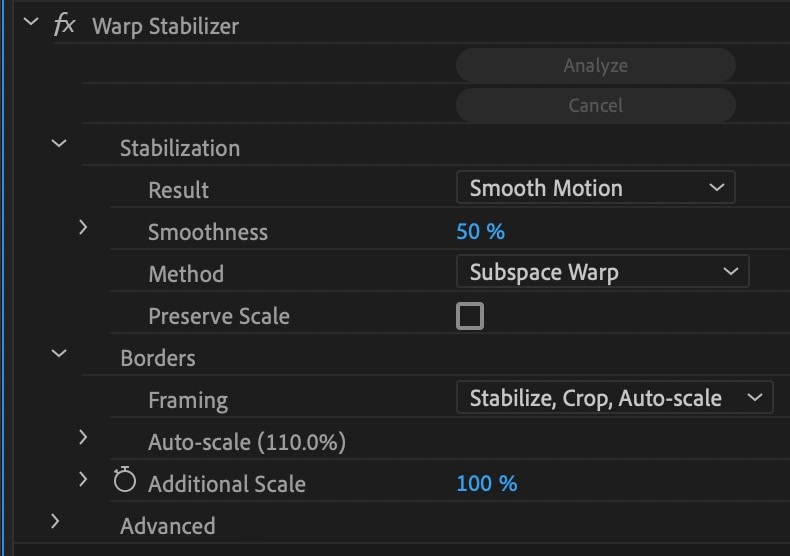
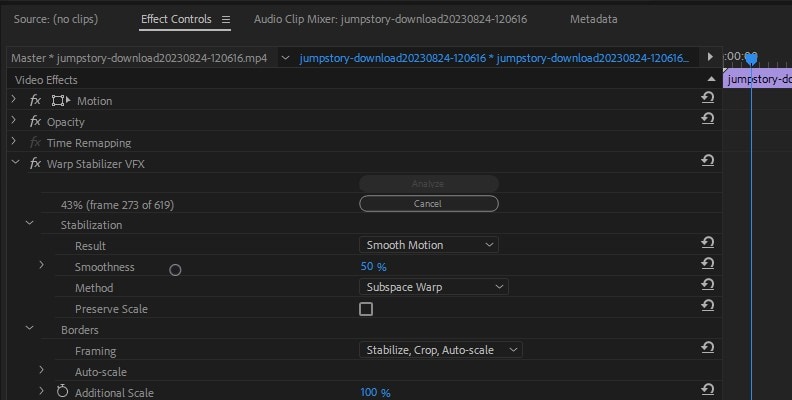
Results
Offers two types of adjustments. Choosing Smooth Motion (selected by default) will retain the unwanted movement but make it look smoother. Choosing No Motion will minimize or eliminate unwanted movement, depending on the condition of the original footage.
Smoothness
Adjusts how much your footage will be stabilized. Setting lower values will keep the footage as close to the original condition as possible. Setting higher values will minimize the shakiness and unwanted movement as much as possible. If you want to set values higher than 100, you will need to crop your video.
Method
Method lets you adjust the type of motion you want to minimize. Your options include Position, Position, Scale and Rotation, Perspective, and Subspace Warp, which is set by default.
The Preserve scale is another basic feature you can enable with the Adobe Premiere Pro warp stabilizer. If you check the box by it, the overall scale of your video will remain unchanged.
You may also like: How to Stabilize Shaky Videos with Premiere Elements
Advanced settings in warp stabilizer
Considering that it’s Adobe we’re talking about – the basic features don’t even begin to cover the full capabilities of the Premiere Pro solution. Some of the more advanced features you could benefit from are outlined below.
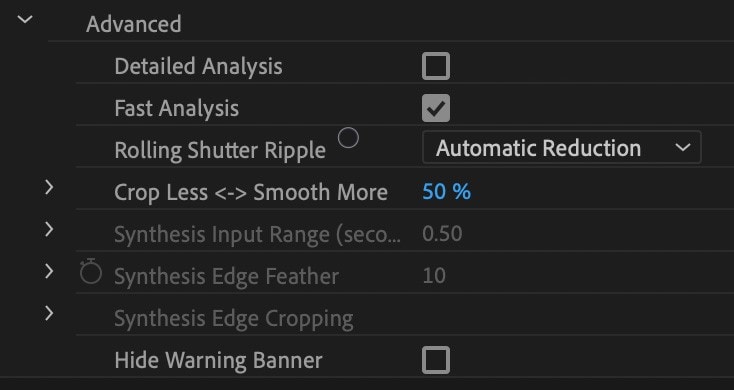
Detailed analysis
With detailed analysis enabled, the warp stabilizer tries to identify as many elements that can be tracked as possible. While relatively slow, detailed analysis helps improve the overall video stabilization and provides higher-quality results.
Fast analysis
Enabled by default, the fast analysis quickly analyzes your footage but doesn’t automatically eliminate unwanted movement.
Rolling shutter ripple
With the Automatic Reduction enabled, the rolling shutter ripple eliminates unwanted rippling of your stabilized footage. Enabling Enhanced Reduction will help minimize extensive rippling.
Crop less - Smooth more
With crop less - smooth more, you can adjust how much of your footage will be cropped during stabilization. At lower values, you’ll minimize how much your videos are cropped, but the unwanted motion will only be smoothed over. At higher values, more of your video will be cropped, but the unwanted motion will be minimized.
How to use the warp stabilizer in Premiere Pro
The exact process of stabilizing your footage depends on the warp stabilizer Premiere Pro settings you enable/disable. However, the overall workflow is easy enough to follow.
Here’s how to use warp stabilizer in Premiere Pro:
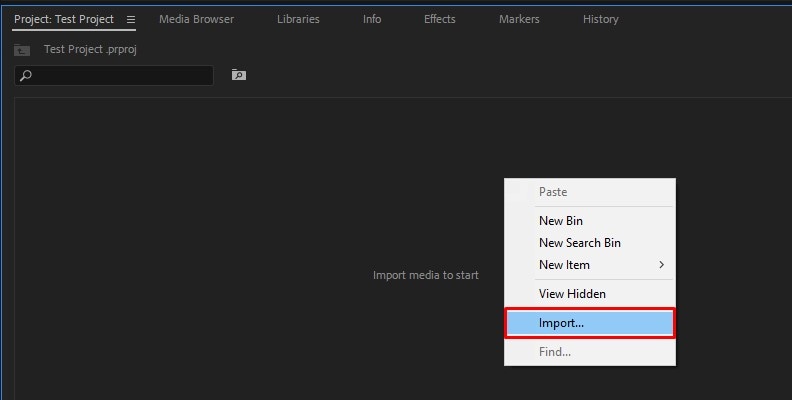
Step 1: Launch Premiere Pro and select the Project tab;
Step 2: Right-click on the area where it says “Import media to start”, select Import, and upload your shaky video;
Step 3: Drag the video to the timeline and adjust the sequence as needed;
Step 4: Click the Premiere Pro menu and go to the Effects;
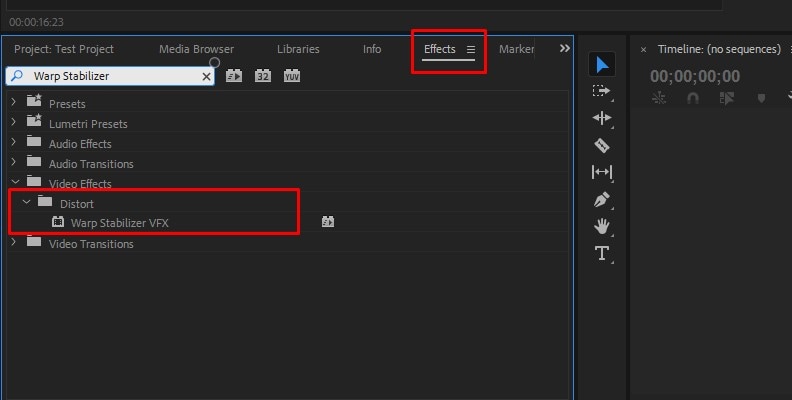
Step 5: Scroll down to Video Effects and go to Distort > Warp Stabilizer VFX (or simply use the search bar and look up Warp Stabilizer);
Step 6: Drag the Warp Stabilizer VFX to your video;
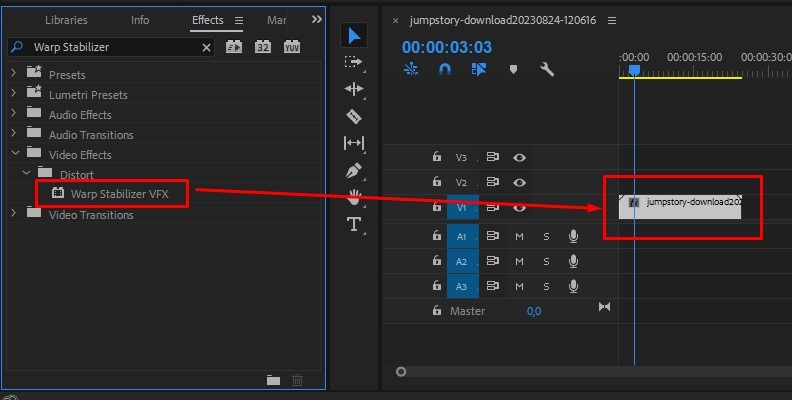
Step 7: Premiere Pro will immediately start analyzing your video and automatically improving motion;
Step 8: Go to the Effect Controls panel and expand the Warp Stabilizer to adjust its settings.
Depending on the condition of your footage, you might have to play around with the settings a bit until you get the desired results.
The limits of the Adobe Premiere Pro warp stabilizer
Although the warp stabilizer in Premiere Pro is powerful, it does have some limitations.
The most common issue involves the rippling effect that can distort your image after stabilization. If you try to over-stabilize your footage, you’ll likely notice warping and rippling that can make your videos look unappealing.
Of course, whether you’ll experience any rippling depends heavily on the original footage and how much unwanted movement there was.
Another problem with over-stabilizing your videos is that you can experience much slower performance. Your video playback could lag, and your computer resources can quickly become overwhelmed.
Tips for getting the most out of warp stabilizer
Despite its limitations, the warp stabilizer remains an excellent solution for removing camera movements and shaking. However, there are some things you’ll want to keep in mind if you want to get the most out of this feature:
- Familiarize yourself with the tool – learning how to use warp stabilizer and Premiere Pro can be tricky. Make sure to take some time to familiarize yourself with the tool before you start using it for important projects;
- Be mindful of the order of effects – warp stabilization might not work during the later post-processing stages once you’ve already added other effects like the Lumetri Color Effect. Even if it does work, it would be much slower. To get the most out of stabilization, make sure to apply the warp effect before any other;
- Avoid over-stabilization – as mentioned, you could encounter issues with rippling or warping with over-stabilization. As a rule, it’s better to have some unwanted motion in your footage if it helps to retain image quality.
Moreover, having relatively stable footage from the get-go is always best. If possible, try to minimize camera movement during shooting.
After all, while the warp stabilizer is convenient, it’s not all-powerful. It might not be able to help you get the clear, smooth footage you’re after if you weren’t mindful during shooting.
A better alternative to warp stabilizer – Wondershare Filmora
Adobe Premiere Pro can be a fine solution for stabilizing videos, but it’s not designed for everyone. There are two significant drawbacks that dictate its usability – it has a steep learning curve, and it’s highly resource-intensive.
If you’re a newcomer to video stabilization or video editing in general, and if you use a less powerful computer, you’ll be in for a tough time.
A solution that’s much more lightweight and user-friendly is Wondershare Filmora.
Technically designed for professional use, it’s an intuitive yet powerful video editor that’s only bound by the limits of your imagination.
With an exceptional stabilizer that minimizes unwanted camera motion and annoying warping post-stabilization, it ensures high-quality videos you can be proud to post on any platform.
How to stabilize videos with Filmora
Filmora makes video stabilization a breeze that can be completed in just a few steps:
Step 1: Launch Filmora and click the Login button to sign in to your Wondershare account;
Step 2: Select New Project and go to File > Import Media to upload your video;
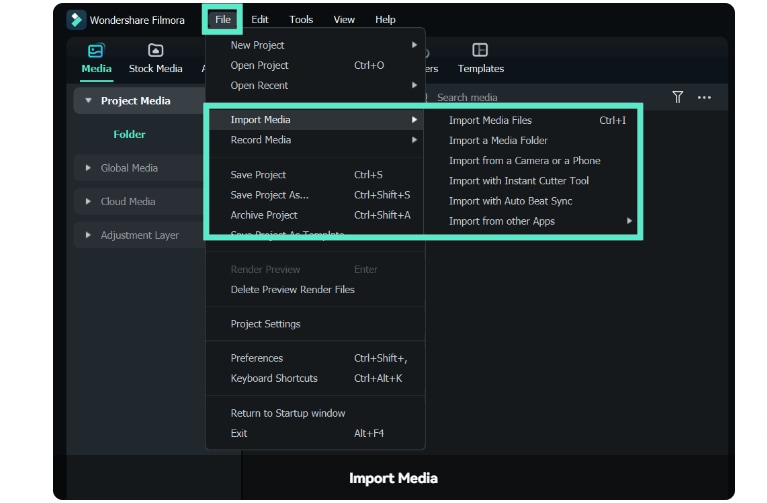
Step 3: Drag and drop your video to the timeline;
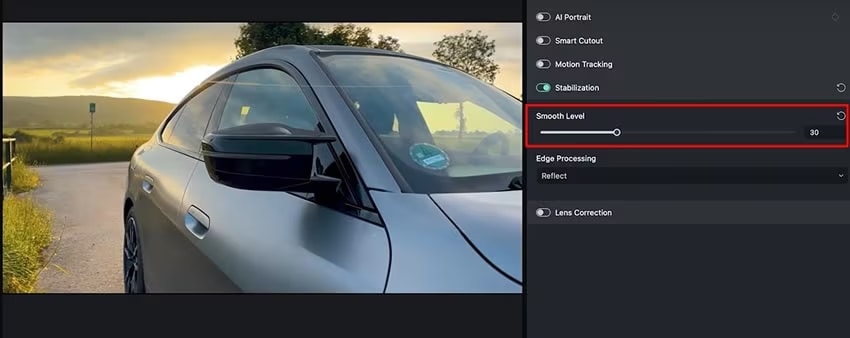
Step 4: Select the video in the timeline and go to Video > AI Tools > Stabilization;

Step 5: Drag the slider under Smooth Level to adjust video stabilization;
Step 6: Adjust video edges by selecting Edge Processing and choosing Extend, Reflect, None, or Tile.
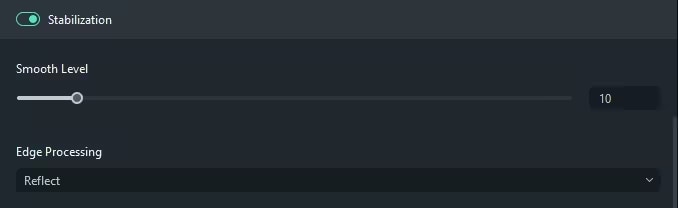
Preview the video in the player. If you’re unsatisfied, click the Revert icon by Smooth Level or Edge Processing to restore them to their default settings and try again. When you’re happy with the results, save your video, upload it to a platform like Vimeo or TikTok, or keep exploring additional Filmora features and editing your content.
Additional features to enhance your content
Wondershare Filmora is a comprehensive video editor that gives you access to some powerful tools and features. Some useful tools that can enhance your content once you’ve stabilized your videos include:
- Motion tracking – select an element (or multiple elements) in your video that you want to track, then add text, stickers, images, and more to follow it around;
- Speed ramping – change video and audio speed for parts of your video or the entire video at once;
- Masking – create a default or custom shape over an element to make parts of your video transparent and hidden from view;
- Auto enhance – adjust video brightness and sharpness with a single click;
- Creative assets – use some of the thousands of available video and audio assets, such as images, stickers, music, and more, to enhance your content.
Whether recording or editing, Wondershare Filmora is designed to help you create content that draws attention.
Conclusion
Camera movement can often make your videos seem amateurish unless you use it for dramatic effect. If you can’t retake your videos and minimize camera movement with tripods or gimbals, you can rely on tools like Adobe Premiere Pro and Wondershare Filmora to stabilize your videos in post-processing.
