- Premiere Tutorial
How to Reverse/Rewind Clips in Adobe Premiere Pro
May 12, 2025• Proven solutions
It has become a recent trend that people want to watch their videos playing in reverse mode and for that reason they keep looking for some cool video editing software.
Adobe Premiere Pro is a powerful video editing and production software with loads of exciting tools which help you edit the recorded clips the way you want.
Many people find it difficult to operate at first and are often seen asking how to reverse/rewind clips in Adobe Premiere Pro?
Here is a simple step by step guide that will help you get the answer of this frequently asked answer.
You may also like:How to Crop Videos in Adobe Premiere Pro >>
How to Create Freeze Frame in Adobe Premiere Pro 2017 >>
Adobe Premiere Pro is difficult to operate for some people. It has a complex user interface and also the trial period is very short. That is why many people do not opt for Adobe Premiere Pro.
How to reverse/rewind clips in Adobe Premiere Pro Step by Step
- Launch Adobe Premiere Pro and click Import. Select the video clip that you want to edit.
- Right-click on the Clip's name in the Project Section of the Adobe Premiere Pro.
- Select Speed/Duration from the menu that opens from right-clicking on the Clip's name.

- Check the box right next to Reverse Speed from the dialogue box that opens.
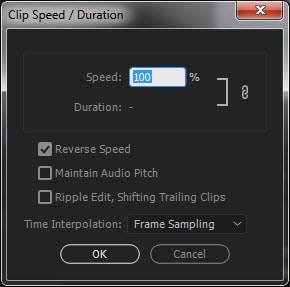
- Click the OK button to reverse the clip.
- Drag the clip from the Project section onto the timeline.
- Click the Play button to watch the reversed clip.
Here is a video tutorial on how to reverse video in Adobe Premiere Pro
Alternative Way to Rewind/Reverse Video Clip
Are you looking for some easy ways to rewind or reverse your videos? Well! You can use Filmora to complete this task as quickly as possible.
Filmora is known for having user-friendly tools and features to edit videos. Therefore, rewinding a video is not a big deal for Fimora editors.
All you need to do is to follow these step by step instructions on how to rewind/reverse clip in Filmora:
Step 1: Import Your Video Clip in Filmora
First, install and run Filmora on your Mac or Windows.
Then, click on the “Movie Clapperboard” icon to import your video clip.
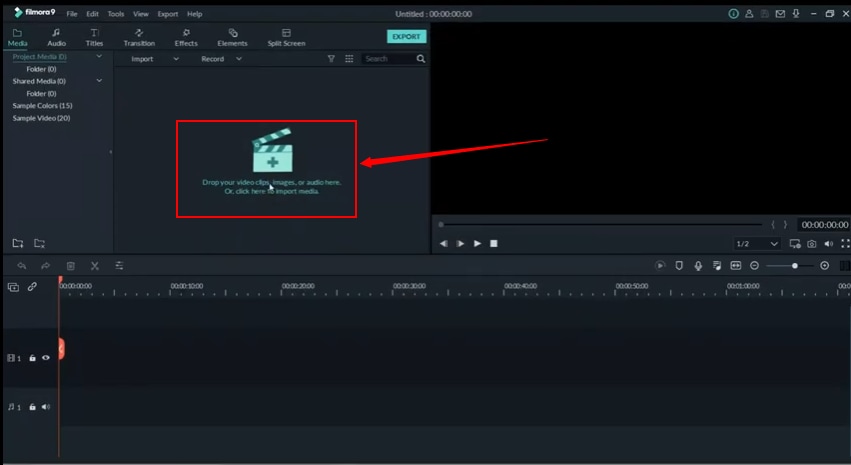
Step 2: Drag Your Video Clip to Filmora Timeline
Use your mouse to drag the video clip to the timeline.
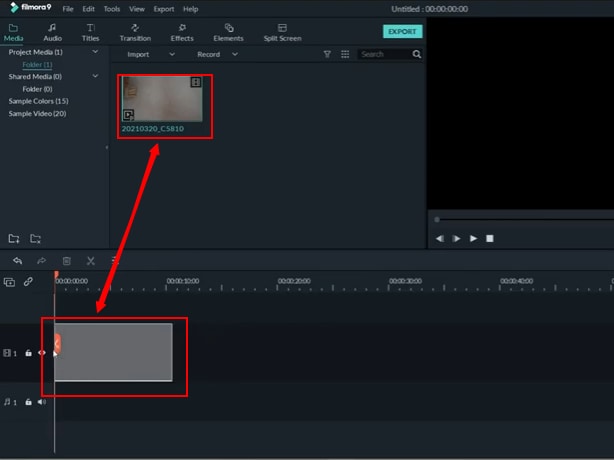
Place your cursor on the clip and click the right mouse button to see different options.
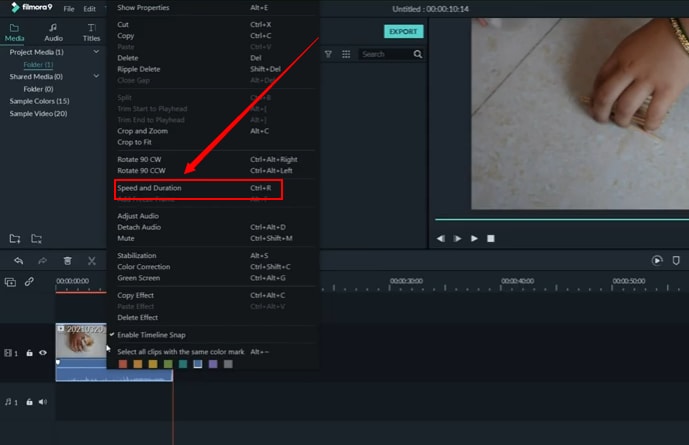
Step 3: Select Speed and Duration
From there, select “Speed and Duration.”
A new window will appear with “Custom Speed” settings. And the “Reverse Speed” option will be unchecked.
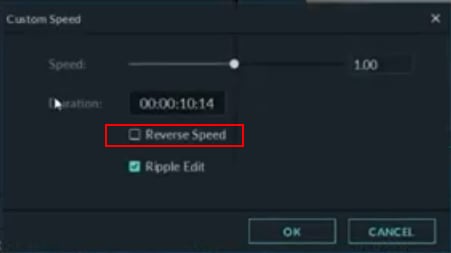
So, make sure to check on the “Reverse Speed” option and click on the “OK” button.
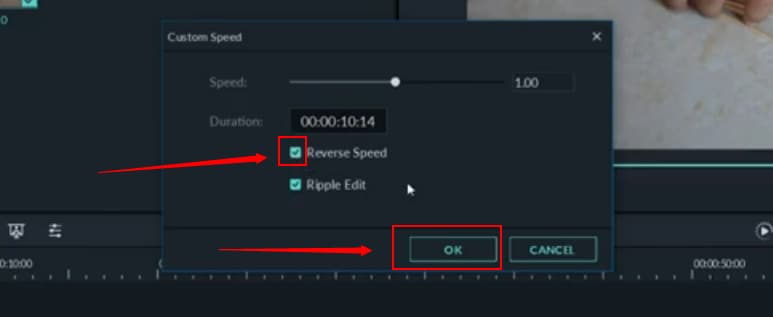
Now, play the video on the preview screen, and it will be played in the reverse direction.
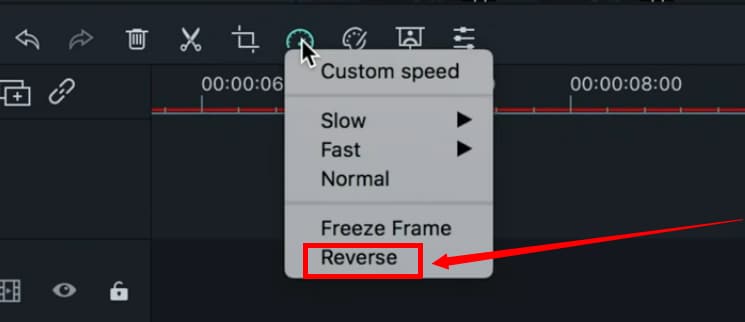
And if you’re looking for a more specific and faster way to rewind the video. Click on the “Speedo Meter” icon on the timeline.

Then, choose the “Reverse” option.
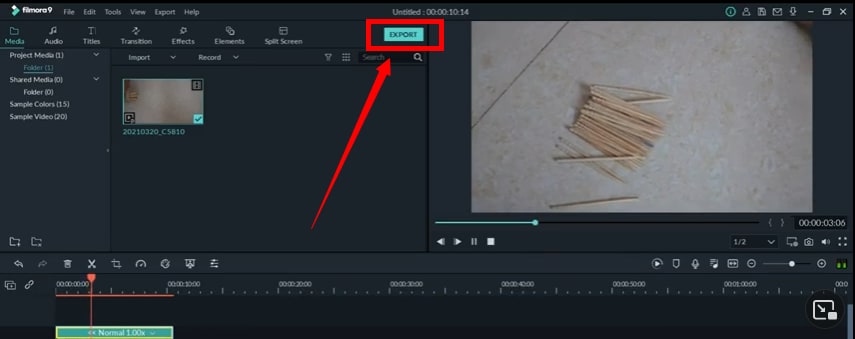
Step 4: Export Your Reversed Video Clip
When you’re done editing your video in reverse, click on the “Export” button to save the clip on your computer.
That’s all, folks!
Reversing a video clip in Filmora doesn’t take more than a minute. You can try all the steps mentioned above on how to rewind/reverse a clip in Filmora and get your video exported within a blink of your eye.
Conclusion
See this is as simple as that. But this can be very complicated for those people who like simple user interface and do not want to get into something that is difficult to operate. That is why most of the people start looking for alternatives.
Adobe Premiere Pro CS6 is a kind of video editing software which can work natively and directly with the latest mobile.
by Benjamin Arango Jun 19, 2025 17:14 PM


