- Premiere Tutorial
- Powerful AI for effortless content creation.
- Offer popular templates and royalty-free creative resources.
- Cross-platform functionality for editing everywhere.
Premiere Pro Transitions: List of 10 Best Transition Plugins

Jan 06, 2026• Proven solutions
 TL;DR:
Adobe Premiere Pro relies on third-party plugins like Coremelt and FilmImpact to expand its transition options, requiring users to manually import these files and drag them from the Effects panel directly onto timeline clips.
● Transitions must be dropped specifically at the start, end, or overlapping intersections of video clips, with the default playback duration adjusted by manually dragging the left and right edges of the effect.
● Plugin capacities range from small specialized packs like the 5 free Glitch & Distortion presets to large libraries like Video Hive which contains over 100 customizable effects.
● Wondershare Filmora serves as an easier alternative for beginners on mobile or desktop systems running 64-bit Windows 7 or macOS 10.14 and later, offering a comprehensive built-in transition library that bypasses external plugin installation entirely.
Ask AI for a summary
 ChatGPT
 Perplexity
 Gemini
 Claude
 Grok
Grok
There is no doubt to say that Premiere Pro is leading the market these days with its feature rich platform and interactive user interface. This production and editing software tool contains amazing video transition effects.
If you want to spend some time to develop classic professional looking movies at home then Premiere Pro transition can help you with great results.
The article below contains complete details about the 10 best Premiere Pro transitions you can use, and how to apply transitions to video in Premiere Pro. Keep reading to get best assistance.
- Part 1: 10 Best Premiere Pro Transition to Download
- Part 2: How to use transitions in Premiere Pro
- Bonus Part. Add Transitions With The Best Video Editor

You may also like: How to Add Text and Title in Adobe Premiere Pro
Part 1: 10 Best Premiere Pro Transition to Download
Although, Premiere Pro contains so many transition effects in its library but still if you need more transitions. Adobe Premiere Pro allows so many transitions to work effectively on its platform. Some of the best free ones are discussed as below:
1. FilmImpact
FilmImpact.net contains 4 transitions in its downloadable free pack whereas 6 demos are available with its paid version. Although, most of the Premiere Pro users love to create excellent effects with stock transitions like Film Dissolve etc. but still if you need something more intricate and eye-catching then these 4 free transitions from FilmImpact.net are useful for you. This plugin helps users to find best solution within their host application so it is good to apply this attractive effect in your videos.

2. Coremelt
The great news for crazy video makers is that Coremelt Free contains 44 transition effects for Premiere Pro users. Some of the most common are: Filmic transitions, light effects, instant montage presets and 10 text presets. This wide set of transitions can make your dreams come true within very less time on your favorite editing tool itself.

3. Motion Array
It possesses so many interactive tools for editing photos and videos instantly. The wide range of transition effects available on Motion Array allows users to develop their customized videos with ease. You can simply drag and drop transitions from this plugin and see amazing results on your clips.

4. Orange83 Smooth Transition
Just like its name, it includes 10 presets to use including smooth slide, spin, wipe, whipe and zoom. You can drag them to your videos that you want to edit. You can also edit these transitions to make it better and fit your videos well.
5. Transition Designer Free Wipe
This Premiere pro transitions are some common transition styles you can use. However, it may make your videos look excellent if you can use the best Premiere Pro transitions properly. Just import the plug ins to start adding transitions.
6. Glitch & Distortion Presets for Premiere Pro
These are 5 free glitch and distortion preset for Premiere. You just need to drag and drop the transition onto clips to create the effects. Its compatibility is 100%, so you don't need to worry about the premiere effects. It is completely free to use.
7. Travel Film Transition Pack
This pack includes 4 versions of the travel film transitions to use, including Luma Fade, Quick Zoom w/ Motion Blur, Smooth Spin W/ Motion Blur and Smooth Warp Transition. You can use it to make transitions better.
8. Video Hive
It has more than 100 Premiere Pro transitions to use. They are 100% ready to use. After importing, you can also easily edit them, like chaning color, size and font. If you like it, just have a try.

9. Smooth Spin Blur Rotation Transition
This Premiere Pro transition is offered by Justin Odisho. He is a YouTuber with huge fans, so the quality of this transition is high. If you want to edit your YouTube video or vlog, this spin transition is a surefire as it's interesting and fun to use.

10. Slice Transitions
This slice transition is in simple and clean style. It is full HD with high quality effects. Basically, you just need to drag and drop to your video to start adding it in Premiere Pro. Besides, you can preview it easily to see if you like it or not.

Part 2: How to use transitions in Premiere Pro
Now, is there any Premiere transition you like? If you have picked one, now let's to add it to Premiere Pro. Here are few easy to follow steps for your Premiere Pro transition effects.
Step 1: Go to Effects panel
Go to Premiere Pro interface and select Effects panel from available options. Now from the available transition folders, pick the one that suits your project editing needs. The types of numbers of transitions available in effects panel will depend upon the version of Premiere Pro that you have installed in your system. Some of the most common transition effects are listed below:
- Zoom: Zoom transition helps to work on a selected potion of screen and it brings scene in or out in a selected proportion from whole screen.
- Slide: In this sliding motion type transition effect, one scene floats over another.
- Wipe: This one is quite interesting where one shot complete replaces the selected another shot while travelling from one portion of the frame to another.
- Iris: The iris transition effect is a newer one where an artificial effect is created to reflect the actual opening and closing motion of camera iris during shooting.
- 3D Motion: Such type of transition effects tries to manipulate selected clips in the space. For instance, if you apply flip over transition in this 3D motion category then one clip will simply flip over screen in such a manner that secondary clip below it gets revealed in appealing manner.
- Dissolve: In this type of transition effect, one scene completely melds into another scene. You can describe such type of blends with terms like fade out and fade in from or to a bank image.
Effects folders usually contain stylistically similar kind of transitions, but the result different appearances are on screen.

Step 2: Add transition to Premiere Pro
Now click on your desired transition and hold for a while; drag it on the video that you want to edit in the clip panel. Drop your selected transition in the specified position of the video clip bar. These transitions can be easily placed at starting position of lip, between overlapping portion of video clips as well as at end of the clip.

Step 3: Make adjustment
Now click on the left and right edges of transition and then drag them to make extended or shortened as per need. Note that, every transition use to have default time length so you can adjust their positions accordingly.

Check this video tutorial to know more details:
Bonus Part. Add Transitions With The Best Video Editor
If you are a makeup artist with little knowledge of video editing, you might need a tool to add different compelling elements without Premiere Pro transition plugins. Wondershare Filmora is one such tool that offers various transitions to apply to your videos from your PC as well as your phone.


Adding Transitions Across Filmora Desktop
Filmora offers an extensive library of transition assets, divided into categories, to apply to videos. This efficient tool allows you to add multiple transitions at different points in your video. Read the steps provided next to learn how to add transitions without Premiere Pro plugins using Filmora:
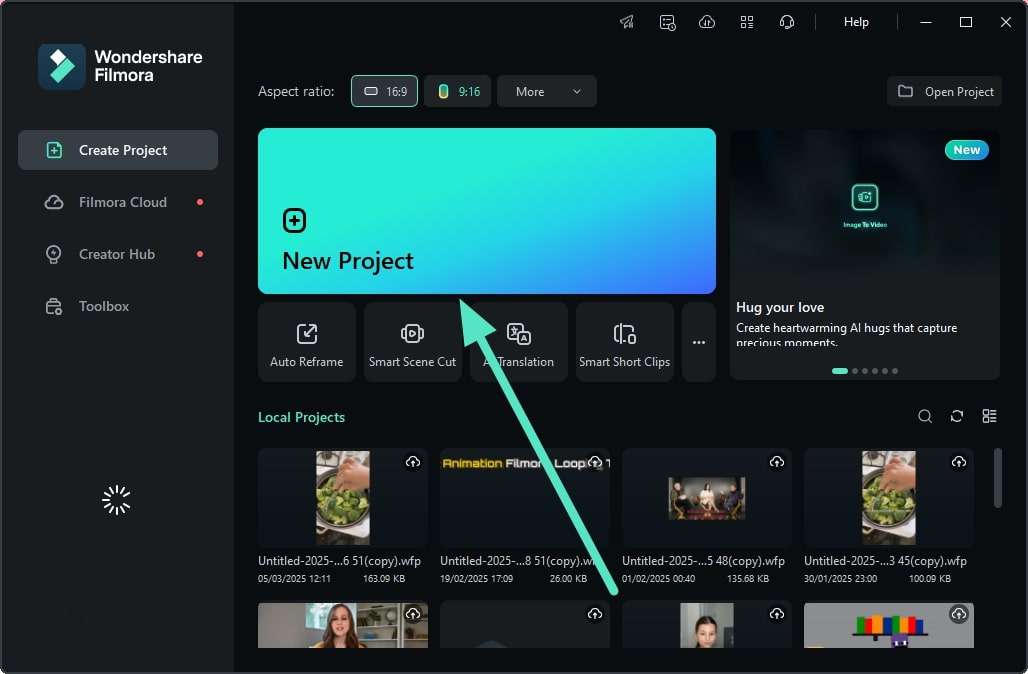
Step 1. Initiate The Process by Adding Video to Filmora
Once you have launched Filmora, click on the “New Project” tab and import your video to the editing timeline.
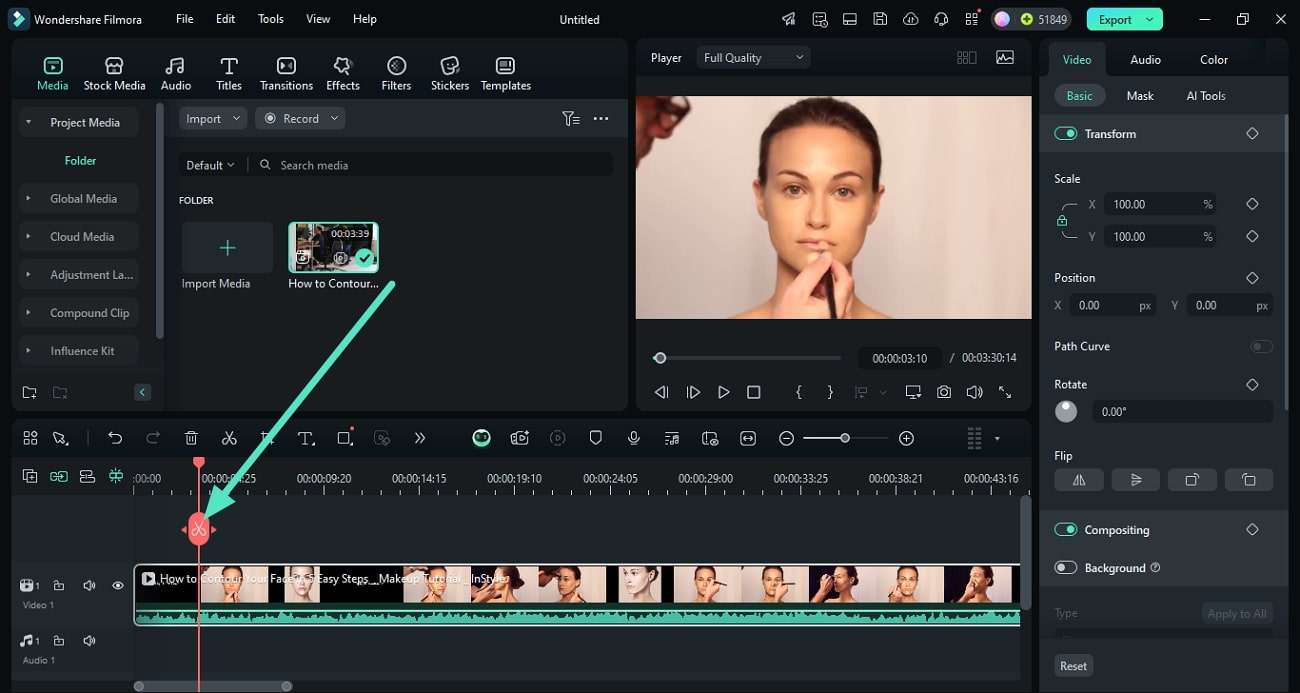
Step 2. Split Video For Creating Sections
After the video is imported, head to the track and place the playhead where the scene is changing. Hit the small “Scissor” on the playhead to split the video.
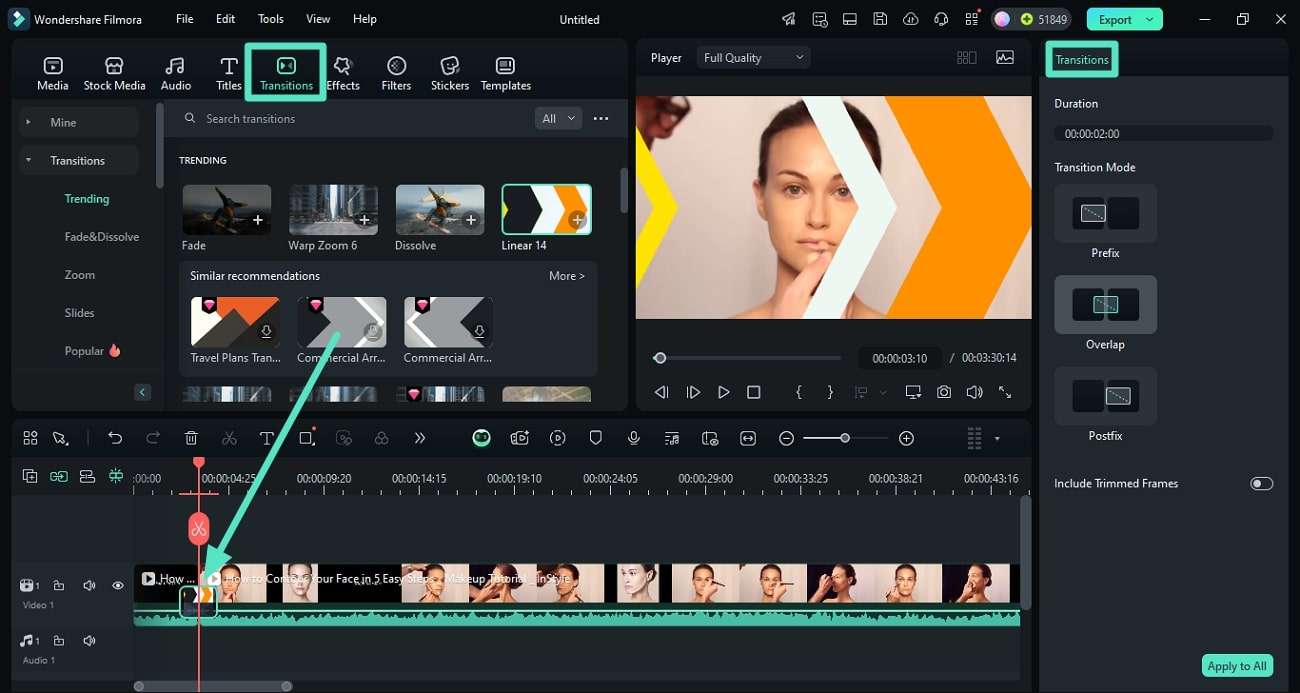
Step 3. Add Transitions Between the Scenes
Head to the menu bar, select the “Transitions” section to expand the library, and apply the most appropriate option between scenes. Access the “Transition” panel on the right and select the right mode and duration.
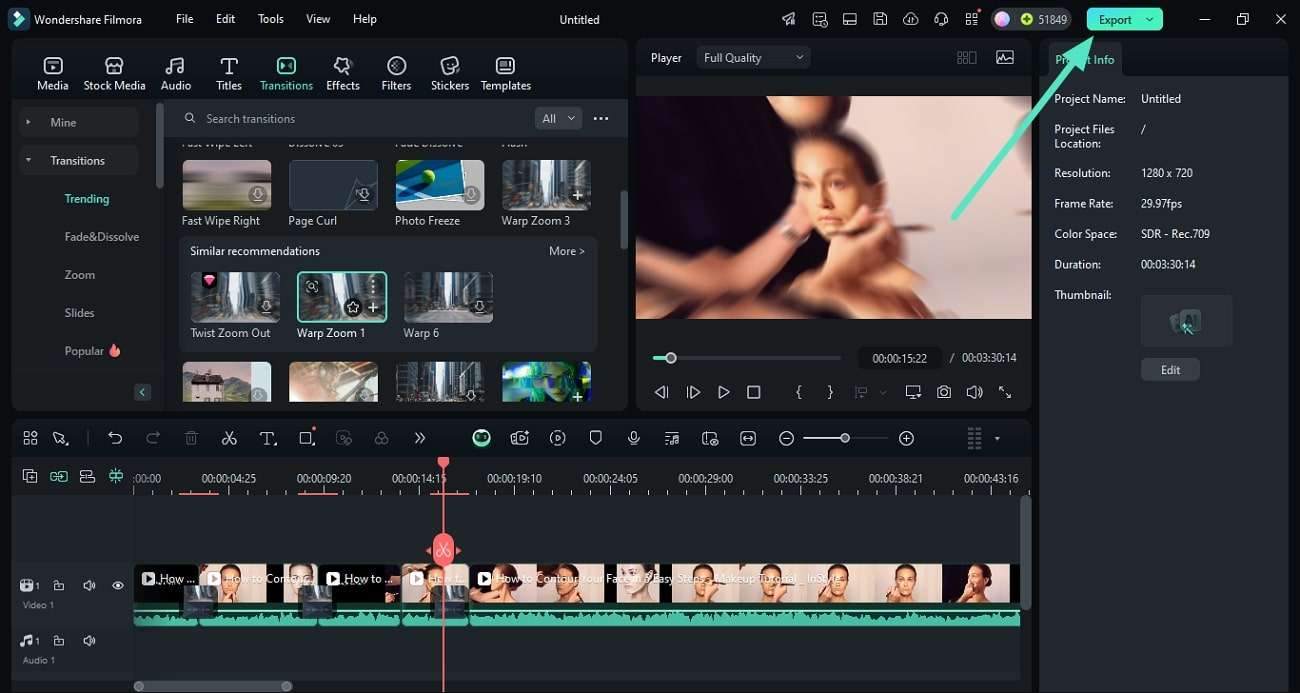
Step 4. Insert Multiple Transitions and Export
To add unique transitions at different points of the video, you need to follow the same process. Once done, hit the “Export” button to save it to your device.

 secure download
 Using the Filmora App for Transitions
You can use the Filmora App [iOS/Android] conveniently to add dynamic transitions to your videos right from your smartphone. The application allows you to add various transitions at different parts of the video without Premiere Pro plugins. Learn how to add them to your videos from your phone using the guide provided next:
Step 1. Start by Launching the App and Importing the Video
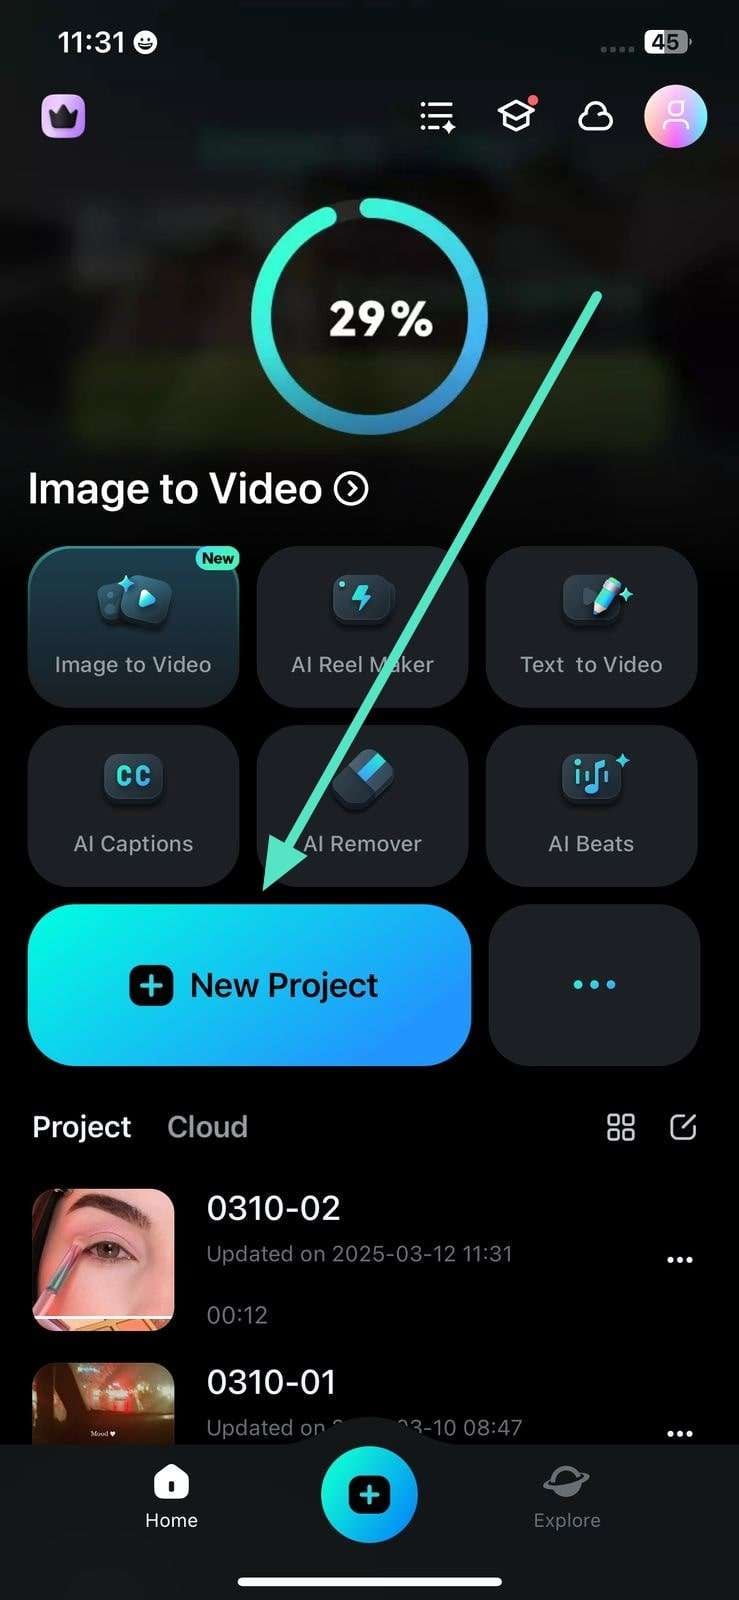
To begin the process, launch the app and import the video for which you want to add transitions after creating a “New Project.”
Step 2. Split Video into Sections Within App
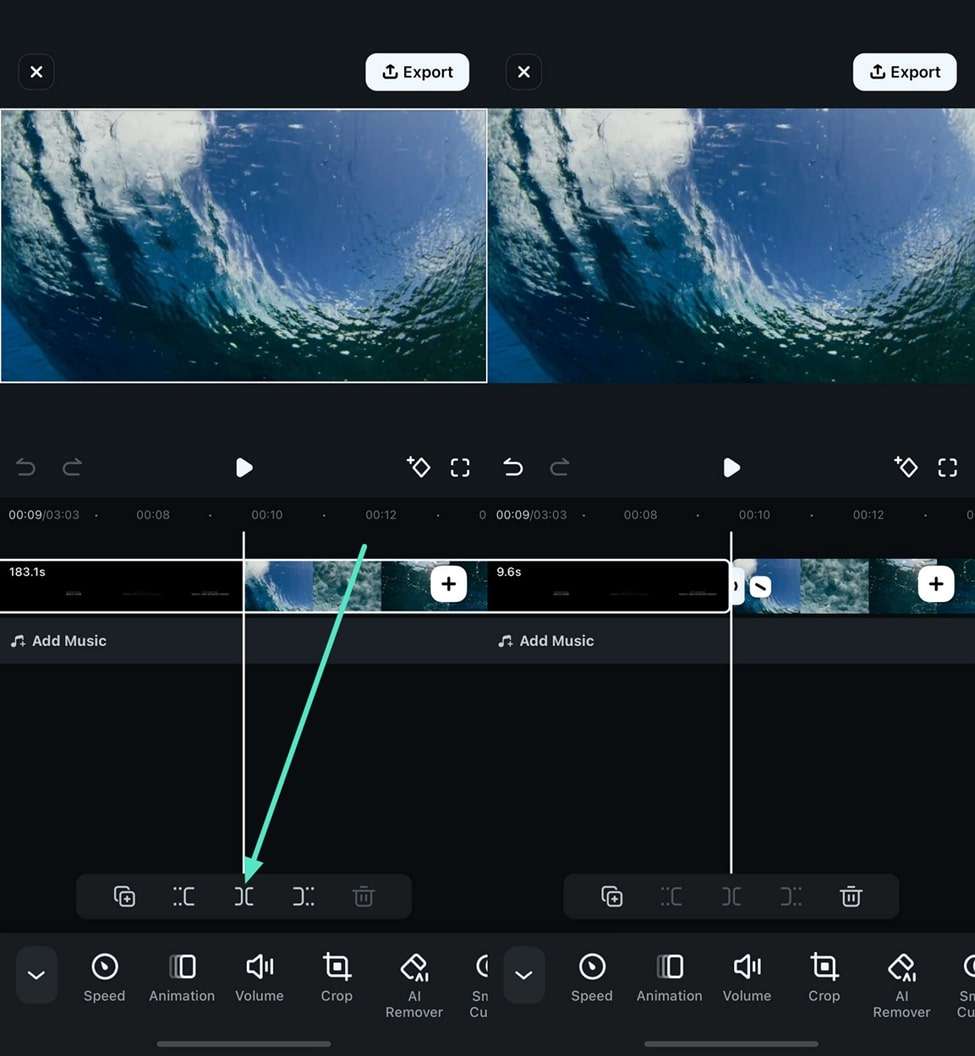
Tap on the video track and place the playhead where you want to insert the transition. Now, locate the “Split” icon below the track and tap to split the scene.
Step 3. Apply Transitions Between Clips
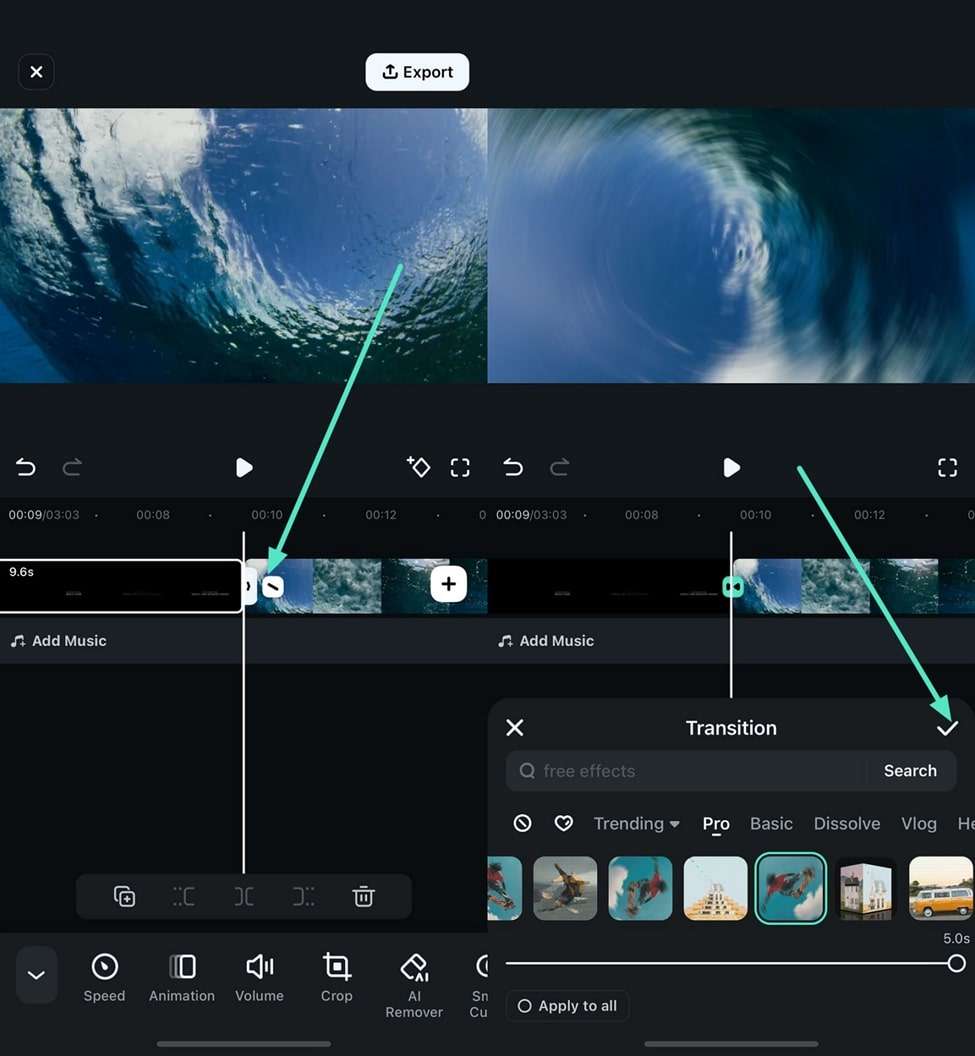
After splitting the video, tap on the small icon between the clips to enable the transitions library. Now scroll through it to choose your desired one and apply it by tapping on it.
Step 4. Add Various Transitions and Save
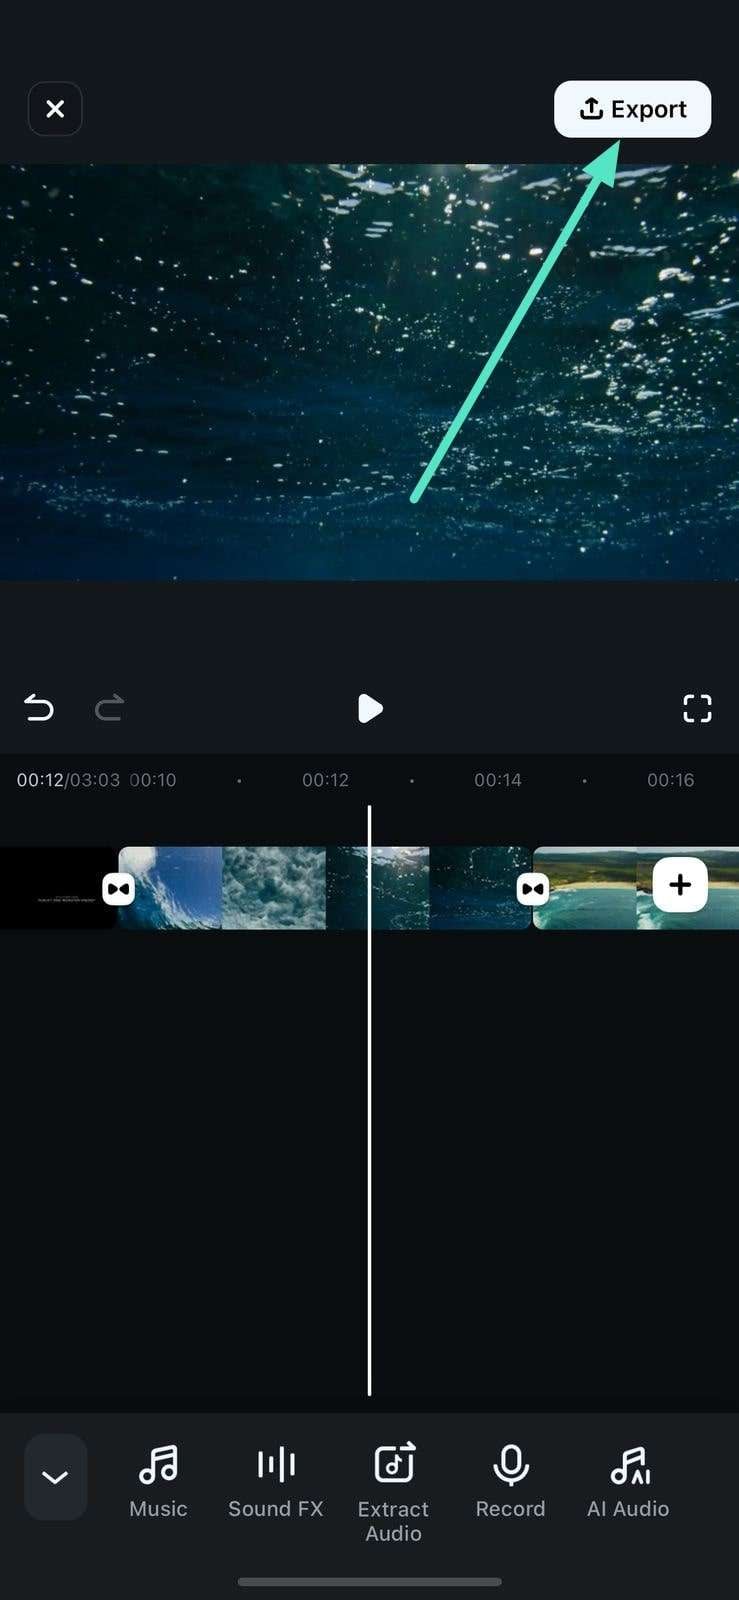
Apply different transitions by repeating the process, and once you are done, tap on the “Export” button to save the video.
Filmora for Mobile Filmora for Mobile Filmora for Mobile Filmora for Mobile Filmora for Mobile
Edit Videos on Your Mobile Phone with 1-Click!
- • Powerful Brand New AI Features.
- • User-friendly video editing for beginners.
- • Full-featured video editing for professional.


Filmora vs. Premiere Pro: Transitions & Workflow Comparison
| Feature | Filmora | Premiere Pro |
| Ease of Use | User-friendly, easy editing. | Feature-rich, professional tool. |
| Transition Library | Extensive built-in, diverse options. | Library & external plugins. |
| Application Workflow | Simple steps, mobile support. | Effects panel, drag/drop, adjust. |
| Transition Customization | Adjust mode, duration, properties. | Extend/shorten, position adjustment. |
Conclusion
If you are tired of using Adobe Premiere, why not choose Wondershare Filmora? It is a professional video editing software that can power up your story. It is easy to use compared with Premiere. You will have more control over video transitions. Auto color correction and automatic audio sync can help you save a lot of time. So, if you want to experience a new way to edit video, just download Wondershare Filmora now!
Elevate your videos! Learn how to create dynamic freeze frames in Adobe Premiere Pro with 4 powerful, step-by-step methods. Master inserting frame holds, exporting still images, and advanced time remapping for stunning stop-motion effects. Plus, get expert troubleshooting tips for common issues like 'frame hold not working'.
by Benjamin Arango Jul 17, 2026 15:26 PM
We are going to show you how to crop a video in Premiere Pro in 7 steps with detailed video and images. You will realize it is so easy to crop video in Adobe Premiere 2019. In the end, a much easier w
by Benjamin Arango Jul 17, 2026 15:26 PM
Benjamin Arango
staff Editor
