
 100% Security Verified | No Subscription Required | No Malware


 ChatGPT
 Perplexity
 Gemini
 Claude
 Grok
Grok
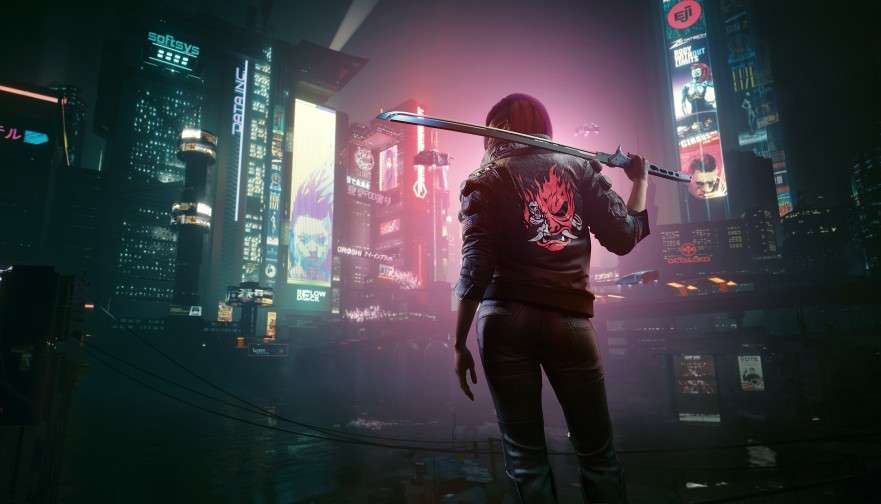
Cyberpunk 2077 is a first-person shooter RPG set in a fictional future where humans started to augment their bodies with tech upgrades. You can see people with digital eyes, metal hands, and various other implants. Because of these implants, everything in that world glitches from time to time, and that’s why this game popularized the glitch transition effect.
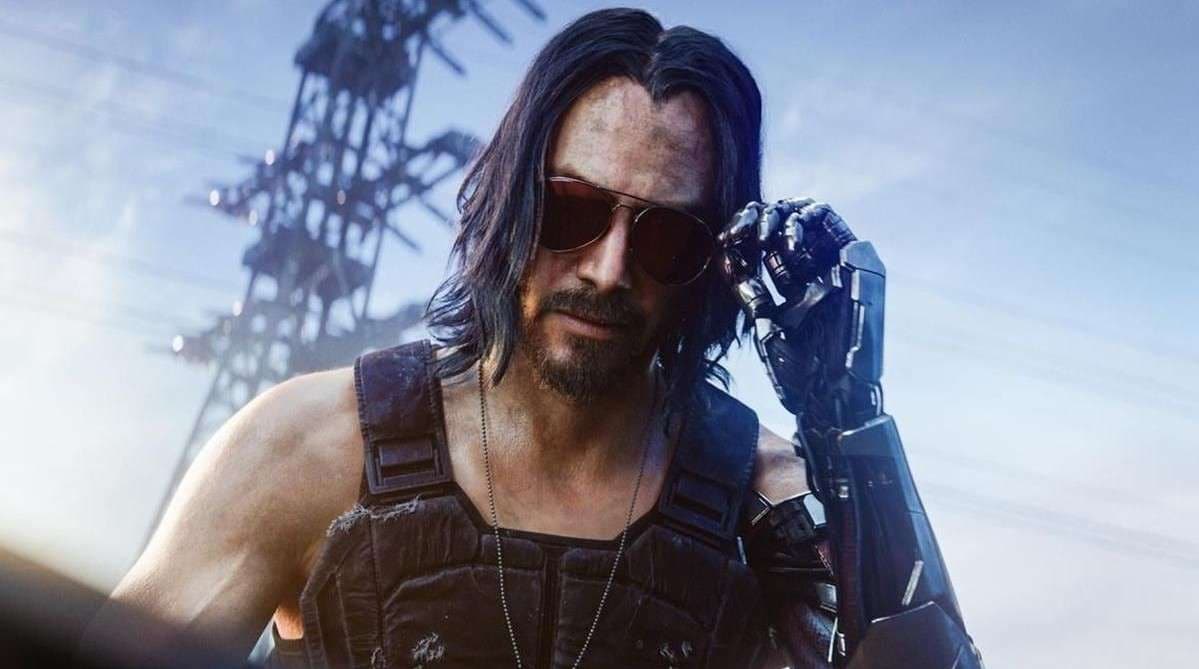
The game itself is very popular be cause the famous Keanu Reeves plays a character called Johnny Silverhand, whose conscience is transplanted into the player’s mind. He appears and talks to the player, but nobody else can see him. And, in the Phantom Liberty expansion, you also have the famous Idris Alba playing a sleeper agent called Solomon Reed.
All this, paired with an excellent story, excellent visuals, and fluid gameplay, made Cyberpunk 2077 one of the most popular games of all time, but it wasn’t always like this. It actually had a rather rocky beginning.
In this article
A Brief Cyberpunk 2077 Story - The Downs and Ups
Keanu Reeves presented this game to a wide audience at the 2019 E3 gaming conference, and it was breathtaking. Fast forward one year later, and in December 2020, Cyberpunk 2077 hit the shelves worldwide. But there was a problem. The game just didn’t work properly.
On PCs, players experienced constant frame-rate drops and game-breaking bugs, the game was not at all well optimized for new-gen consoles, and if you bought the game for an old-gen console, like the PS4 or Xbox One, the game just didn’t work at all. You could load it up and try to play it, but it was unplayable.
This was a fiasco, to say the least. The game was removed from the PlayStation Store, and the company that developed it, CD Projekt RED, started losing money fast, but that’s where this story starts to turn. They sat down and, within a year, fixed the game so that it is now a flawless experience on any device. They also released the story expansion, which, as many players put it, features one of the best action sequences in gaming history.
Now that we covered a bit about the game, it’s time to move on to the meat of the article, which is the glitch transition effect. Here’s how to use it in Premiere Pro.
How to Add the Glitch Transition in Premiere Pro
If you want to mimic the Cyberpunk universe in your video editing journey, you simply have to consider the glitch transition effect. Adding it to your videos is not hard, and one of the most popular software choices for video editing is Premiere Pro, a legacy product developed by Adobe.
Premiere Pro is a powerful video editing tool used by professional video editors. It has a steep learning curve, but adding basic transitions is not that complicated. When it comes to glitch transition, however, it might be a little complicated. Take a look at our tutorial.
Step 1: Add two videos or photos to the timeline and place them one after the other.
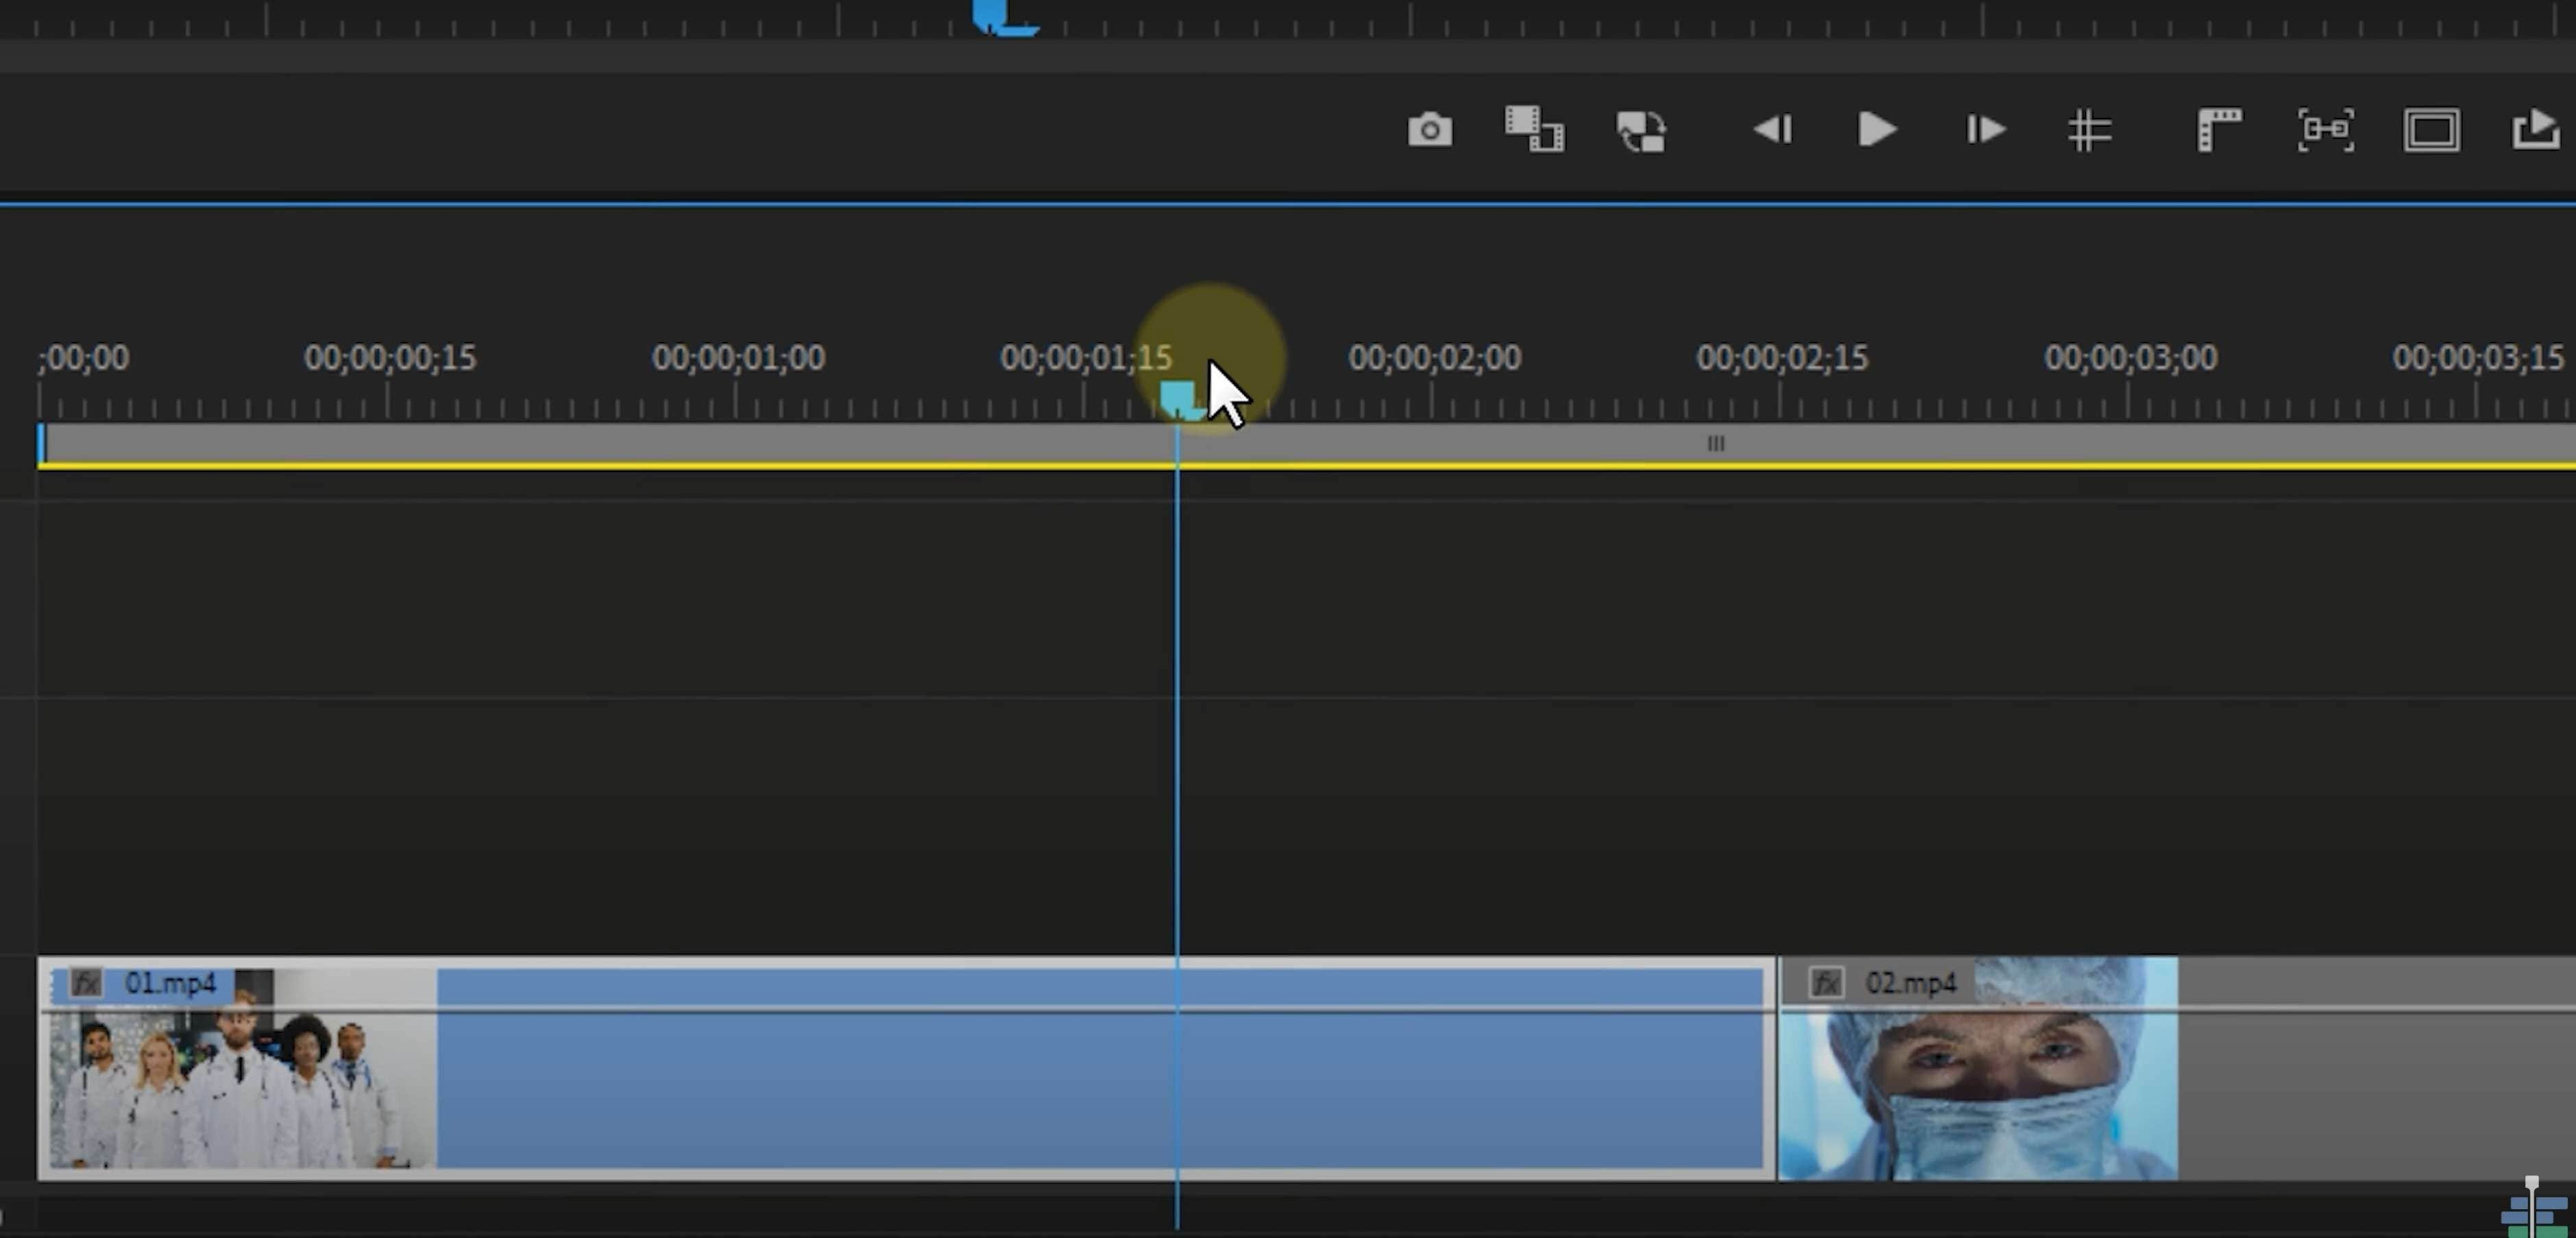
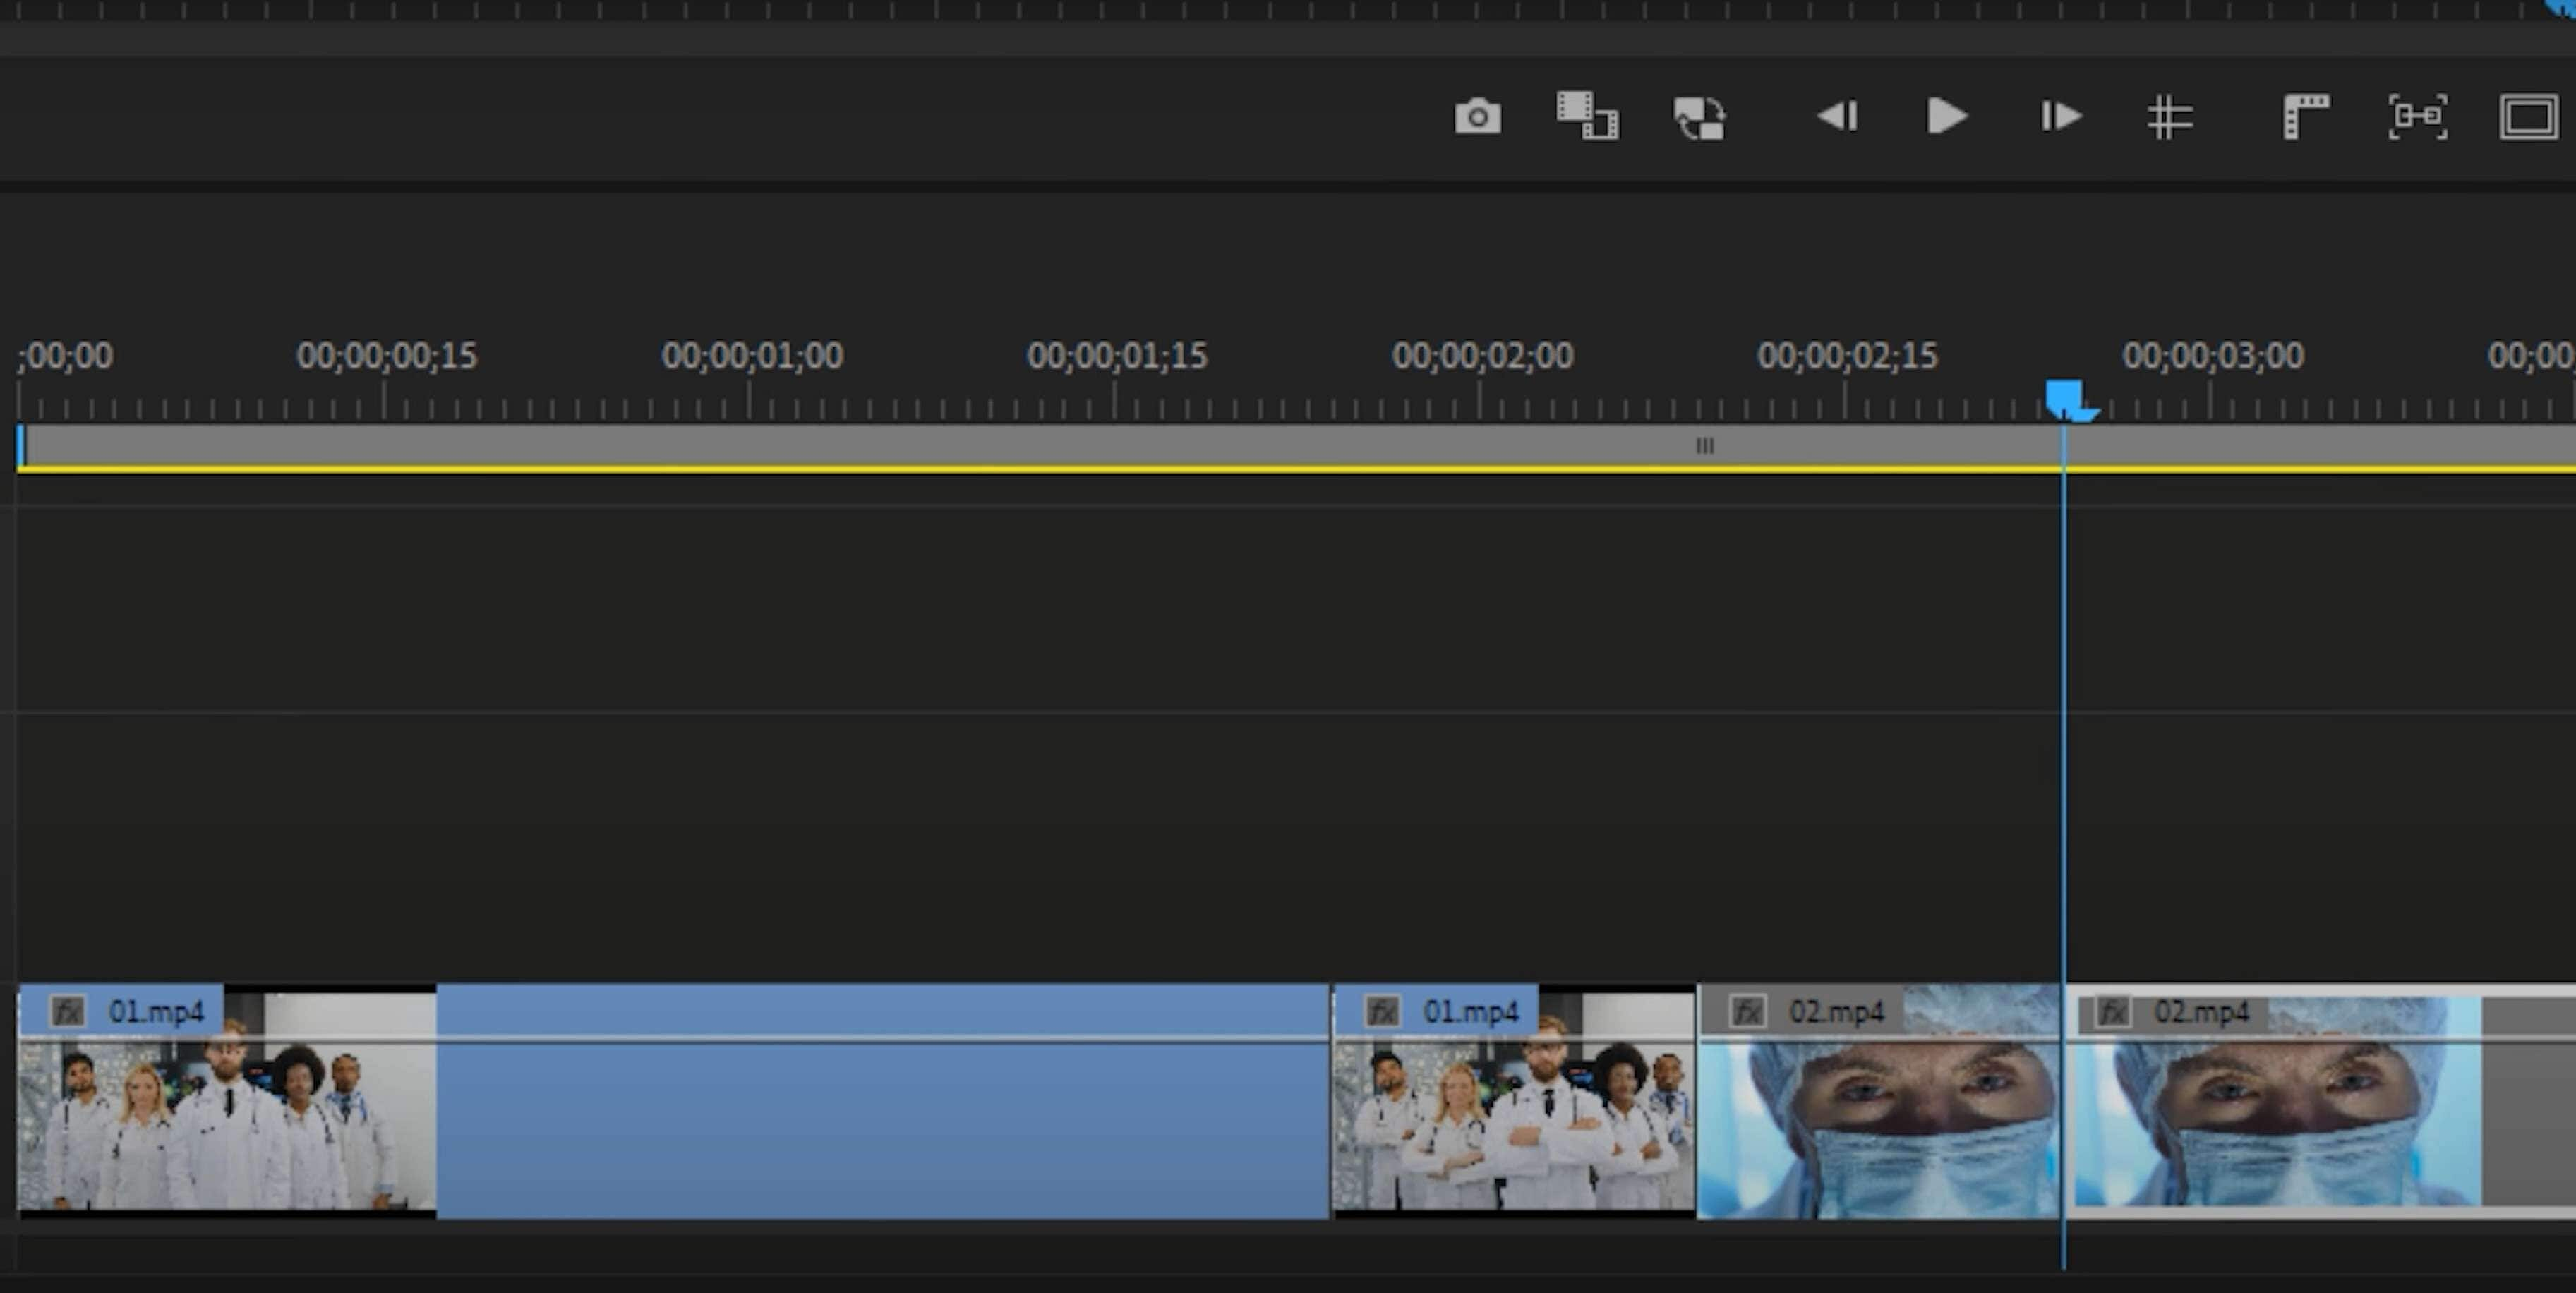
Step 2: From the point in the timeline where you want to transition between two scenes, go 15 frames to the left and make a cut on the first video, then go 15 frames to the right and make a cut on the second video. It should look like this.
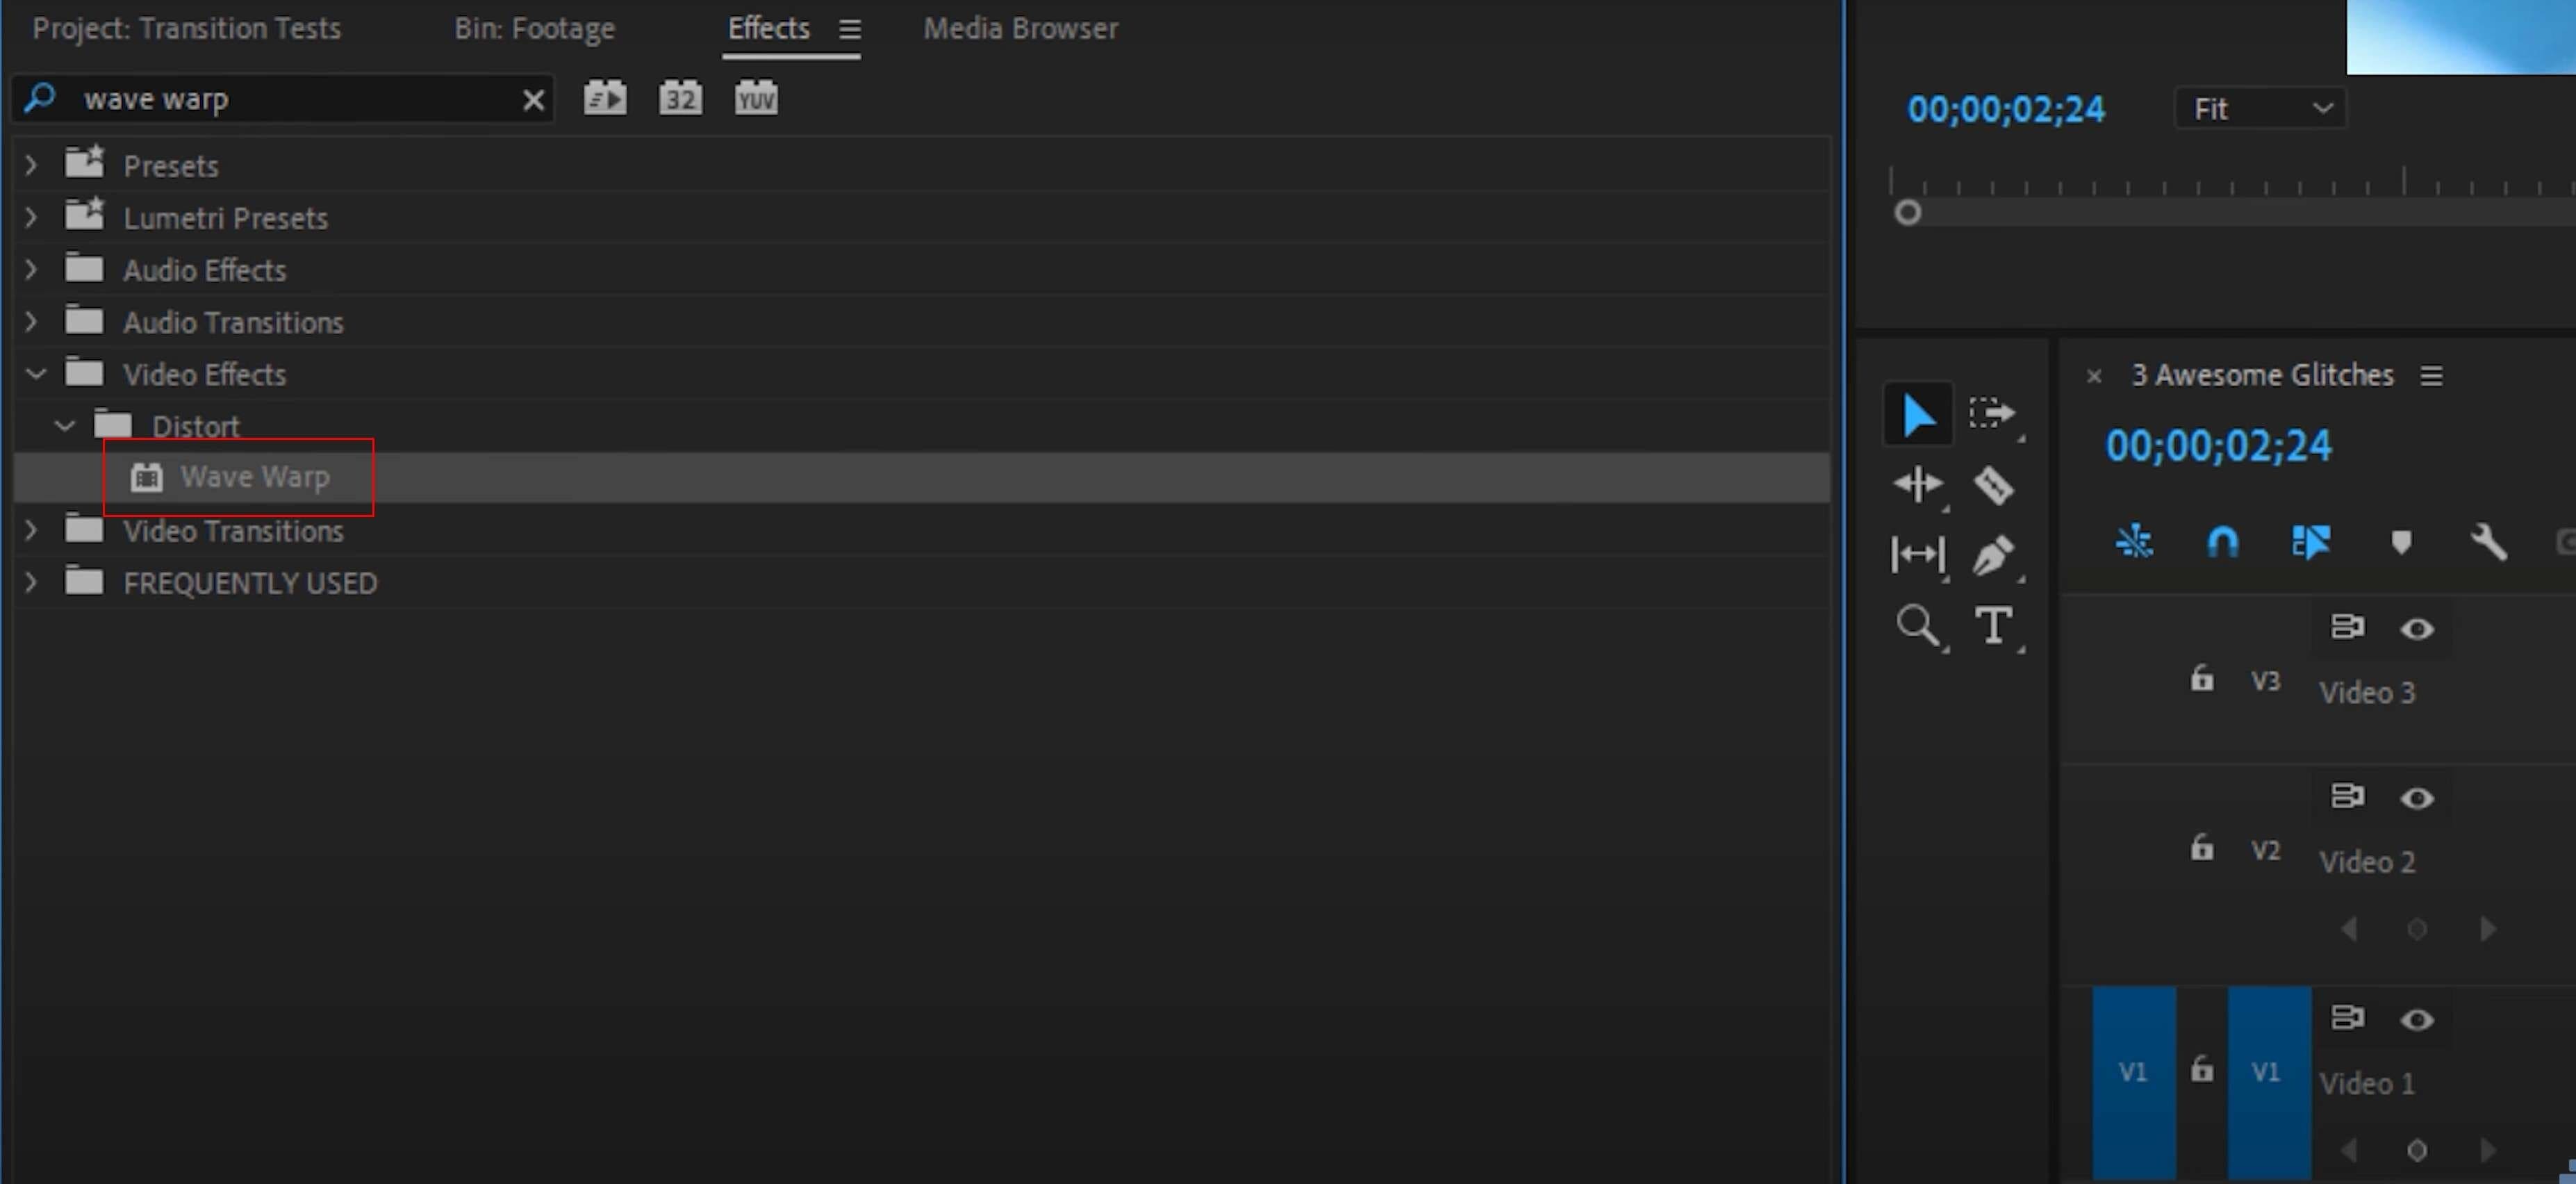
Step 3: In the effects panel, find the Wave Warp transition effect. Click on it and drag it over both 15-frame clips that we created in the previous step.
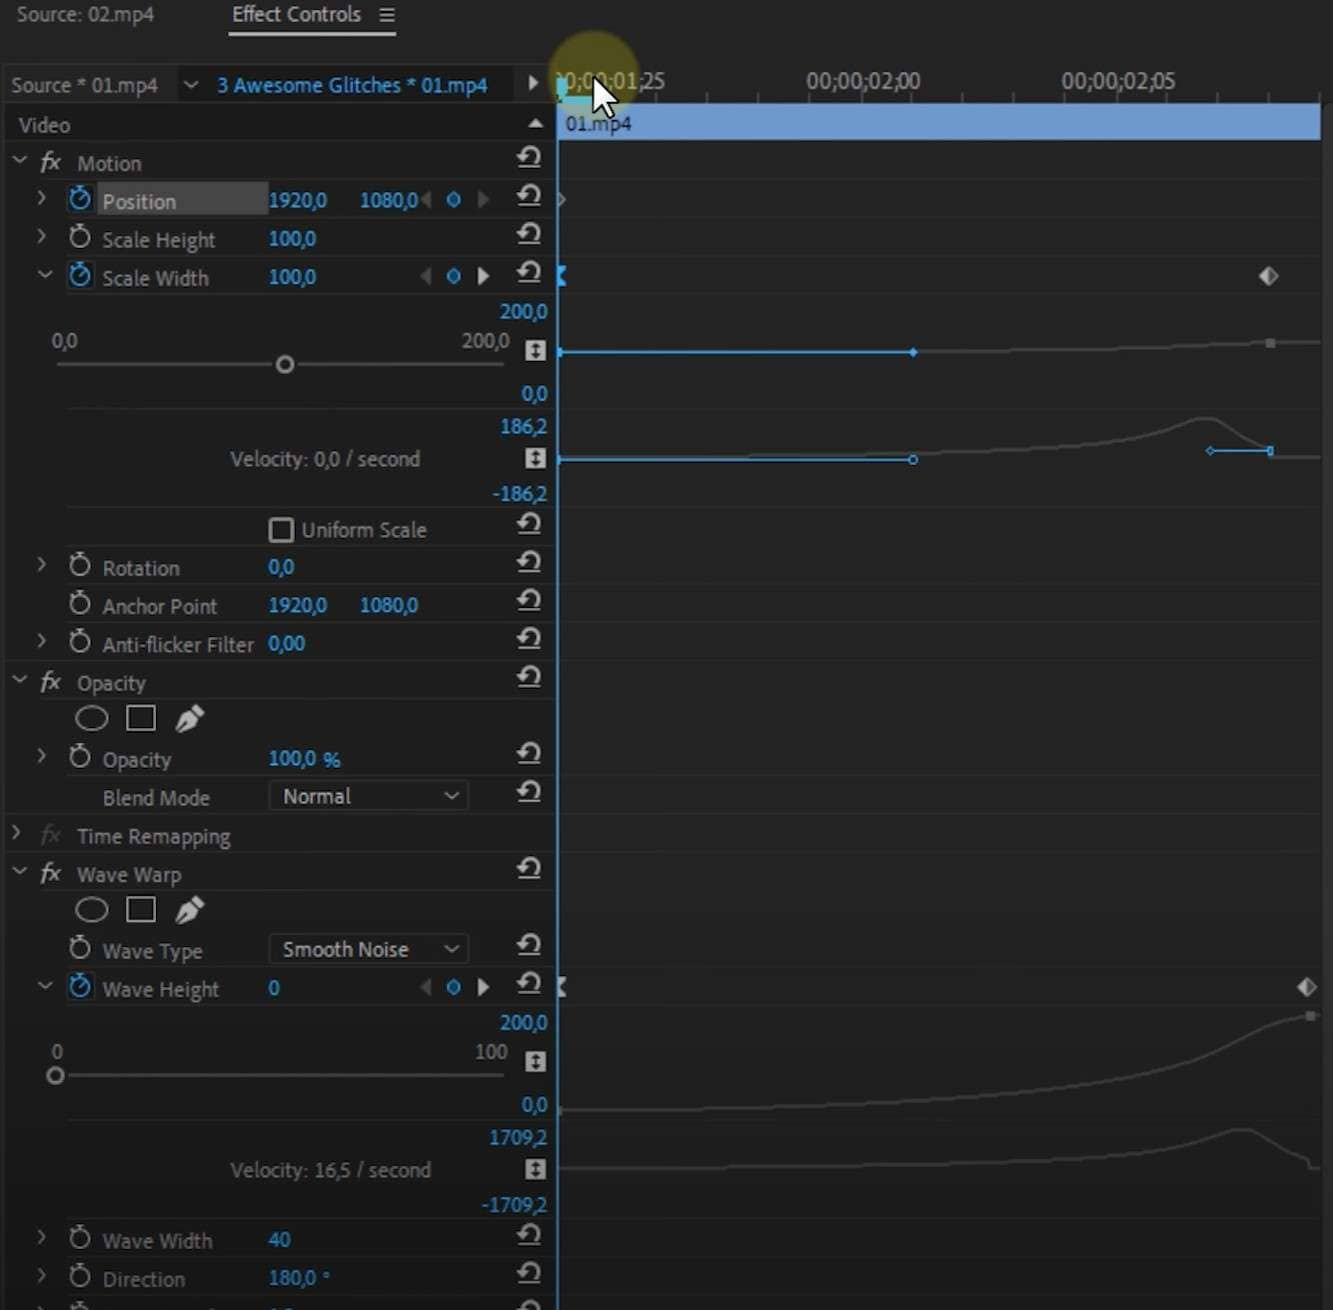
Step 4: Take your first 15-frame clip and edit the effect parameters so that they match the values in the screenshot below. These are the values for the first frame:
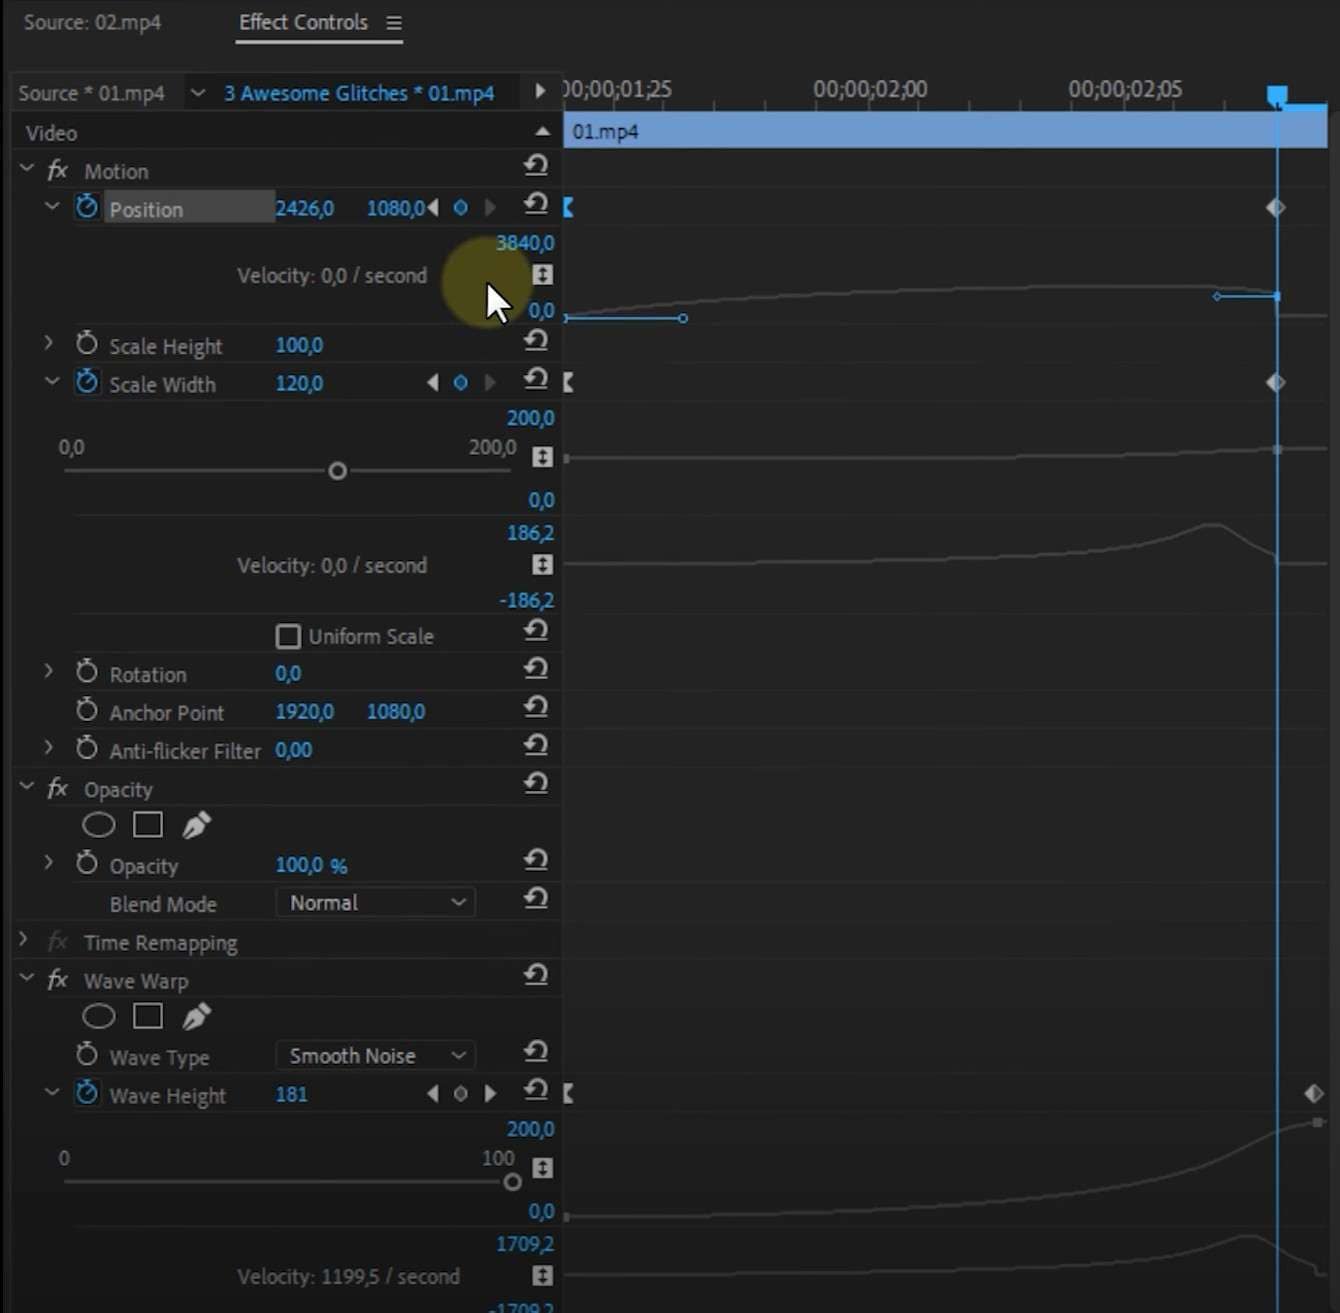
These are the values for the last frame:
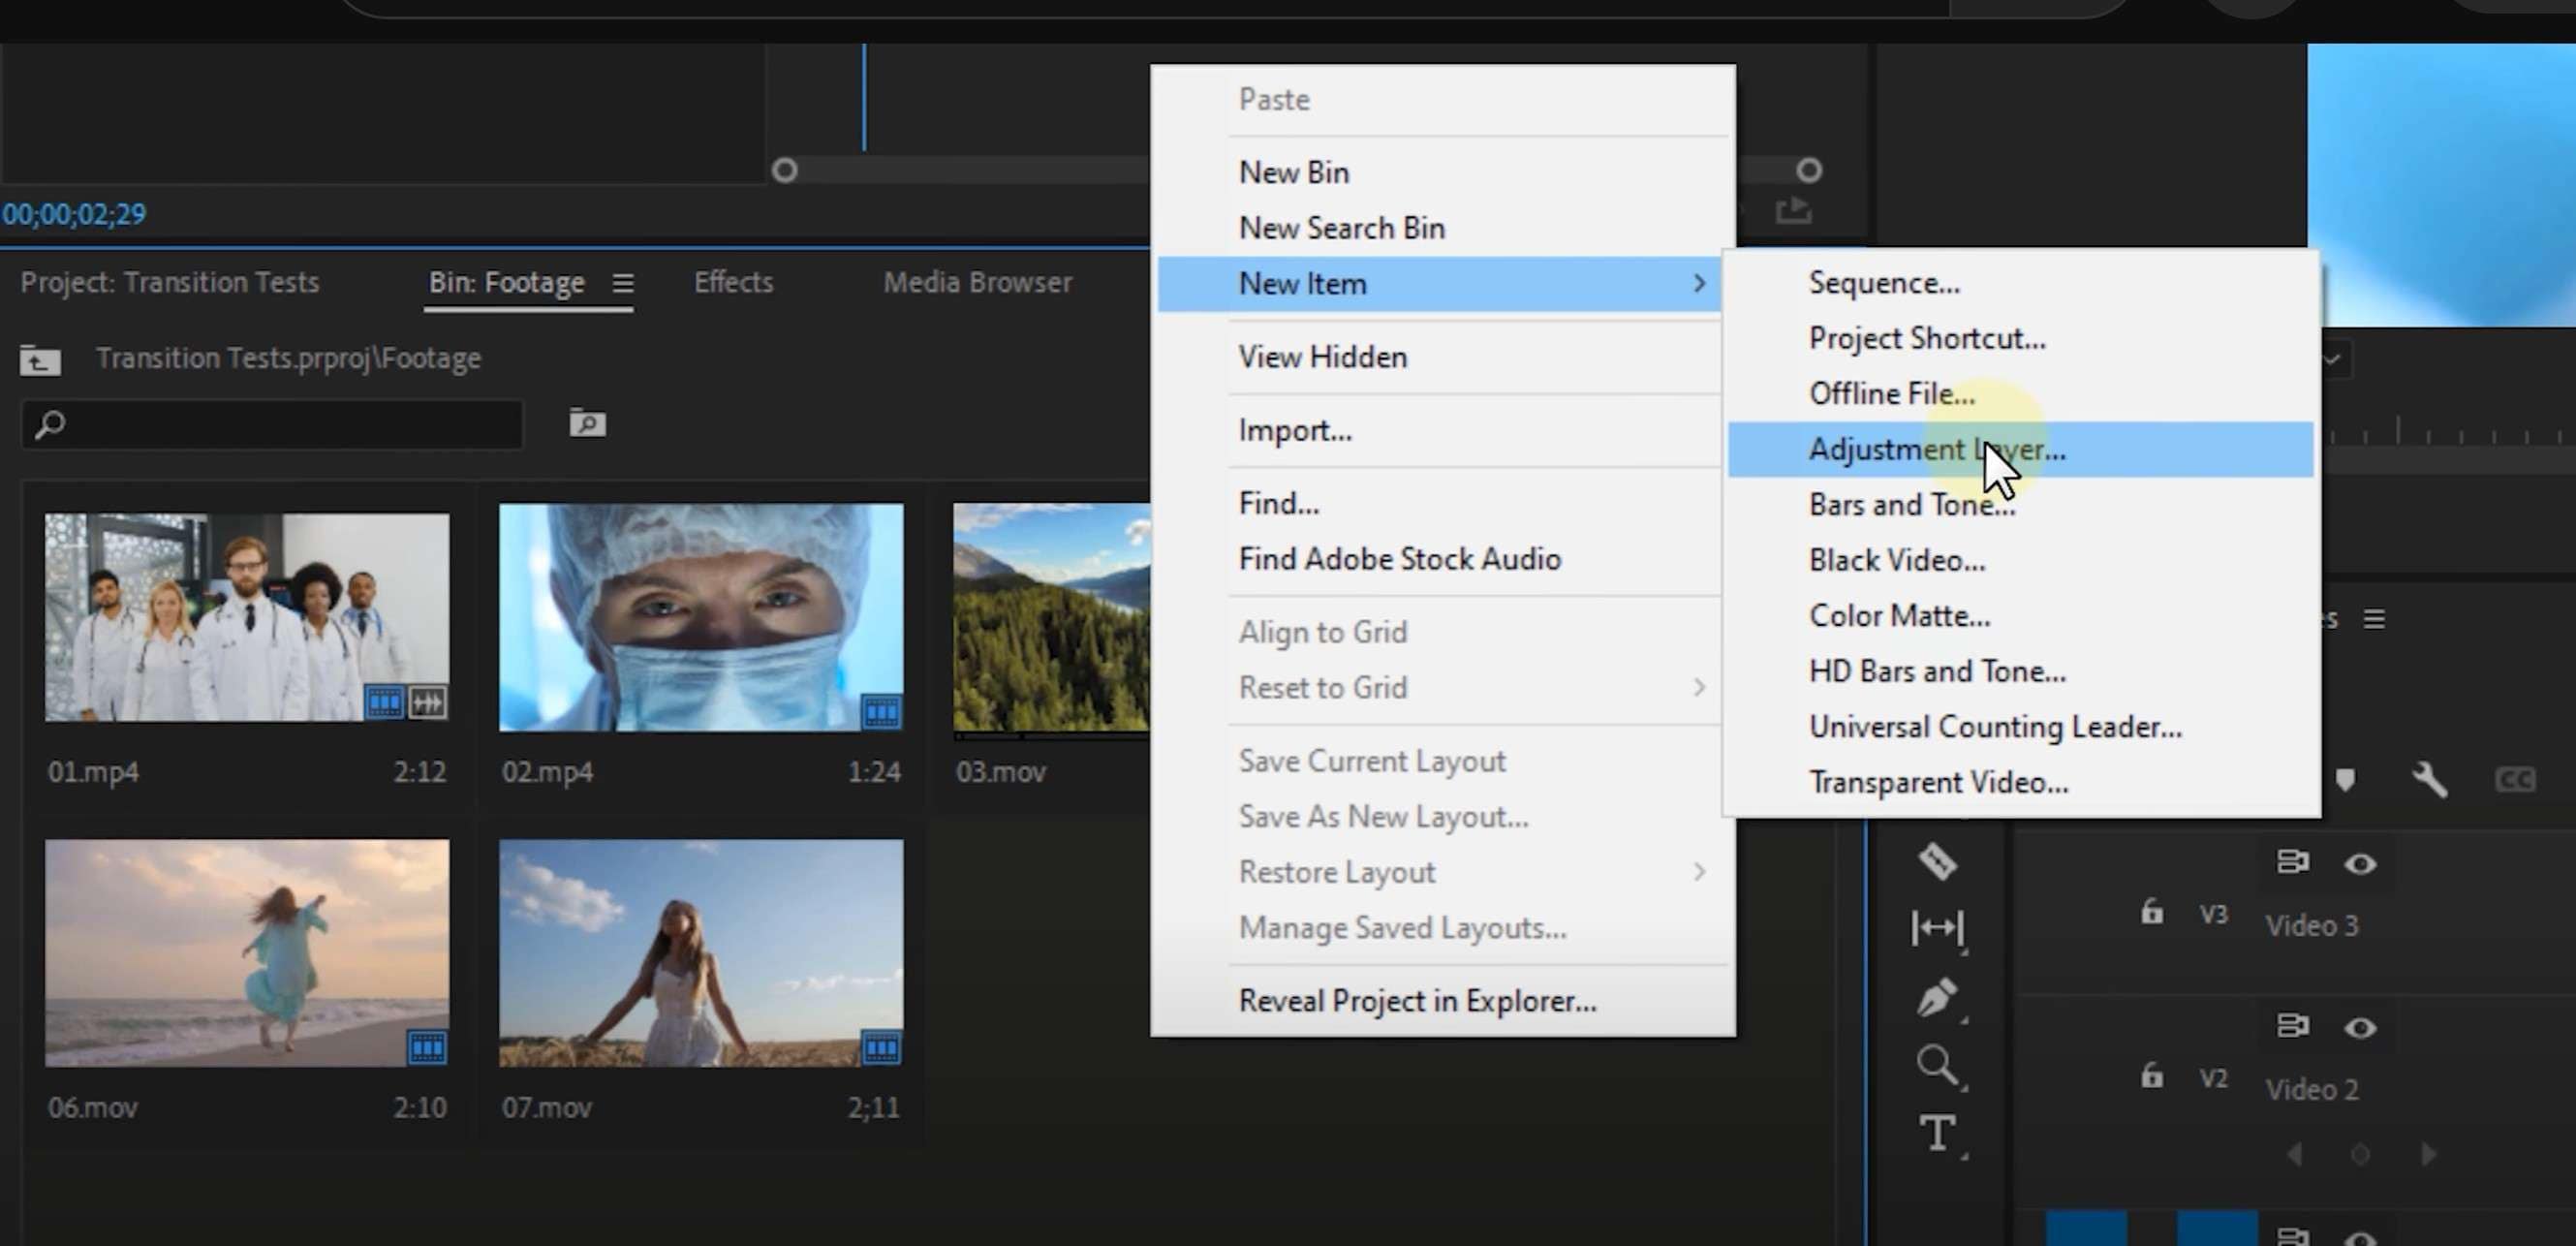
Step 5: Now, right-click at a black spot in the Footage Bin, and go to New Item > Adjustment layer. You will see it get created.
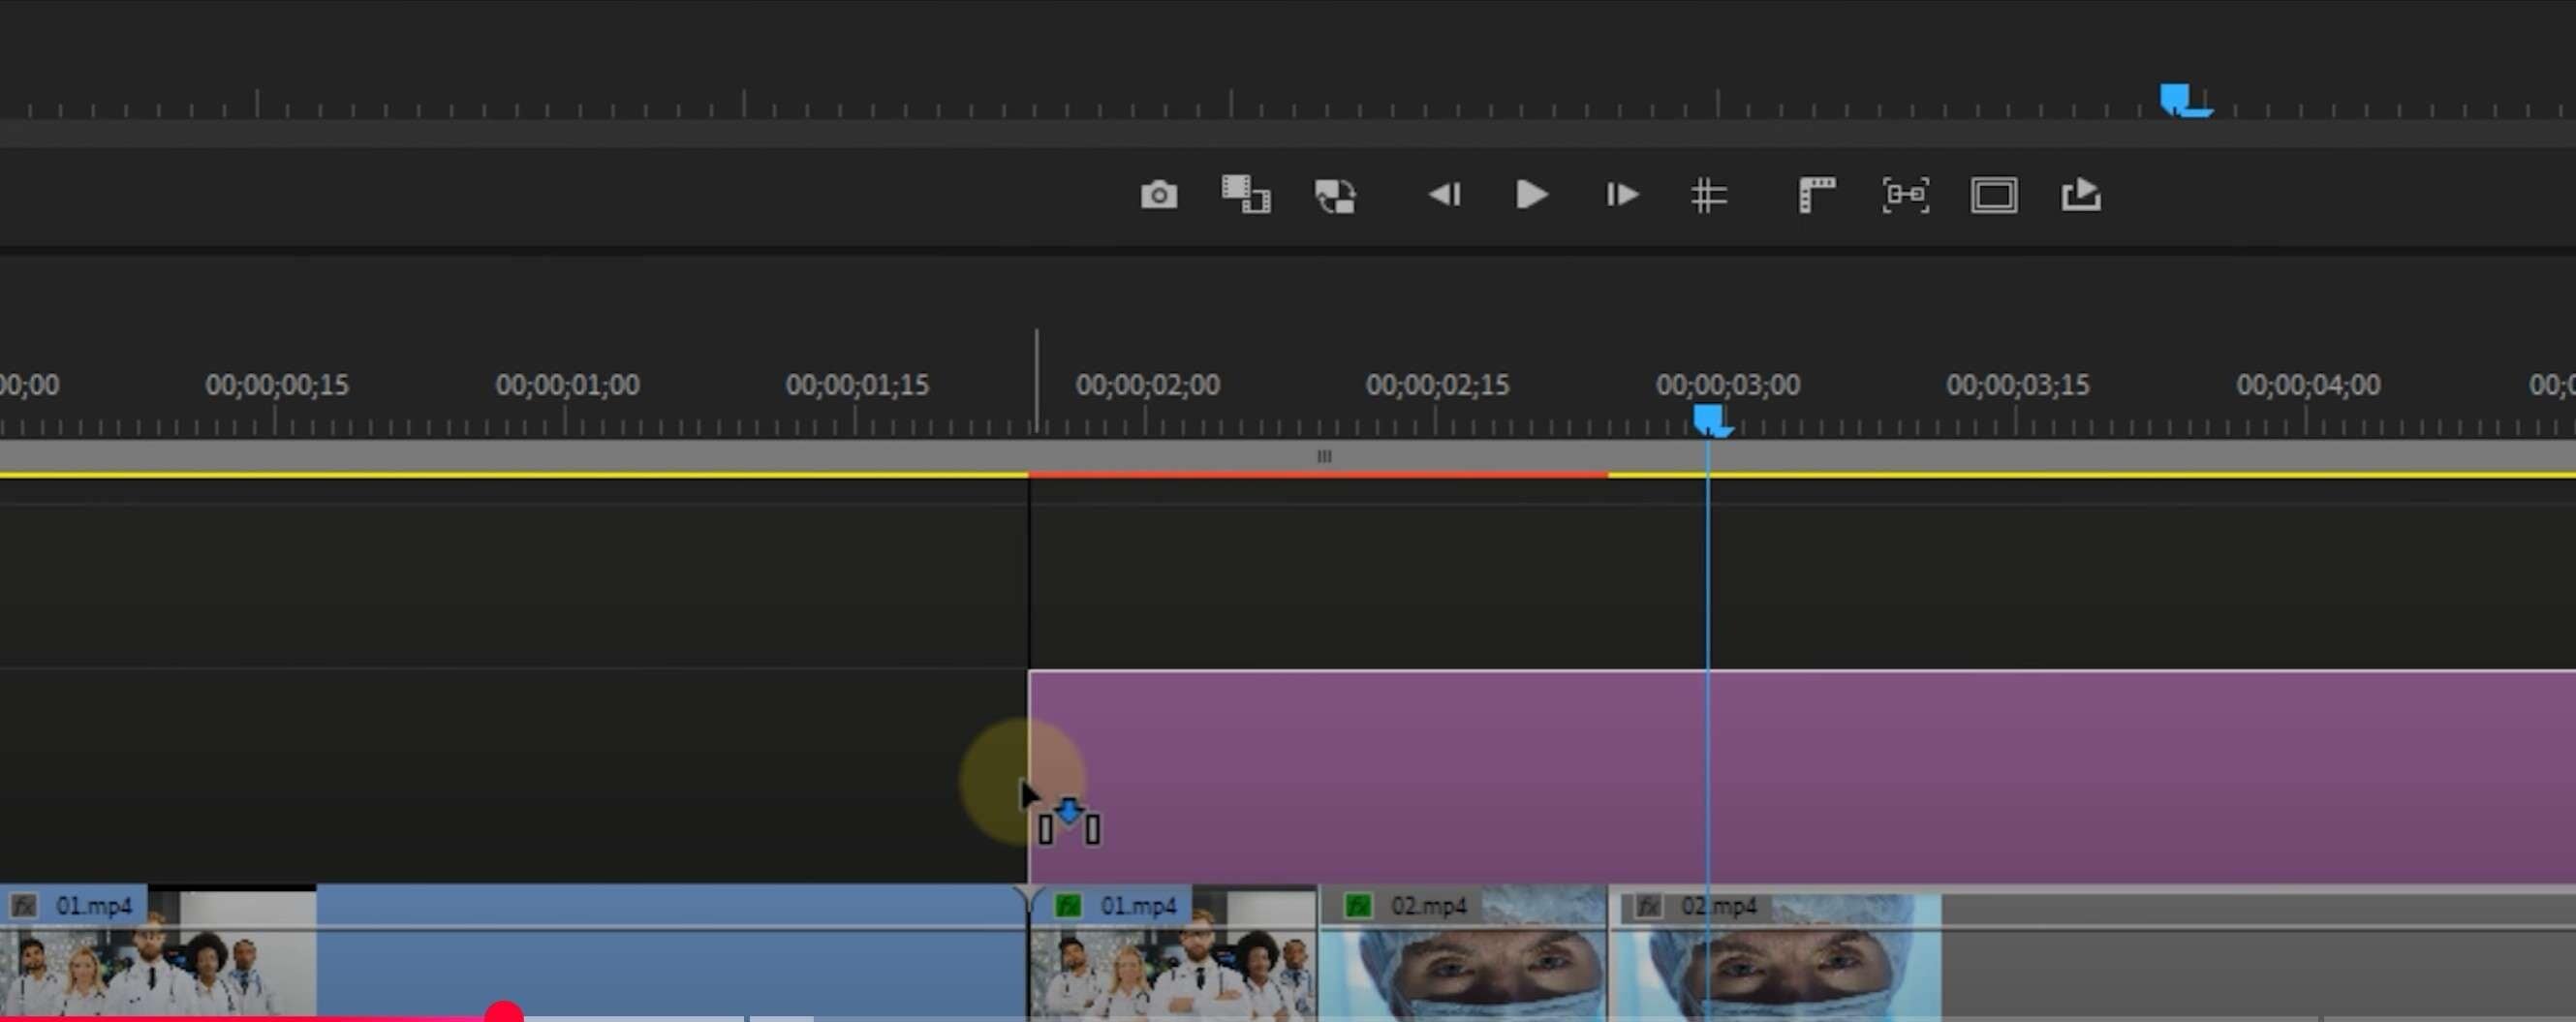
Step 6: Drag the adjustment layer over the two 15-frame clips where you added the Wave Warp transition.
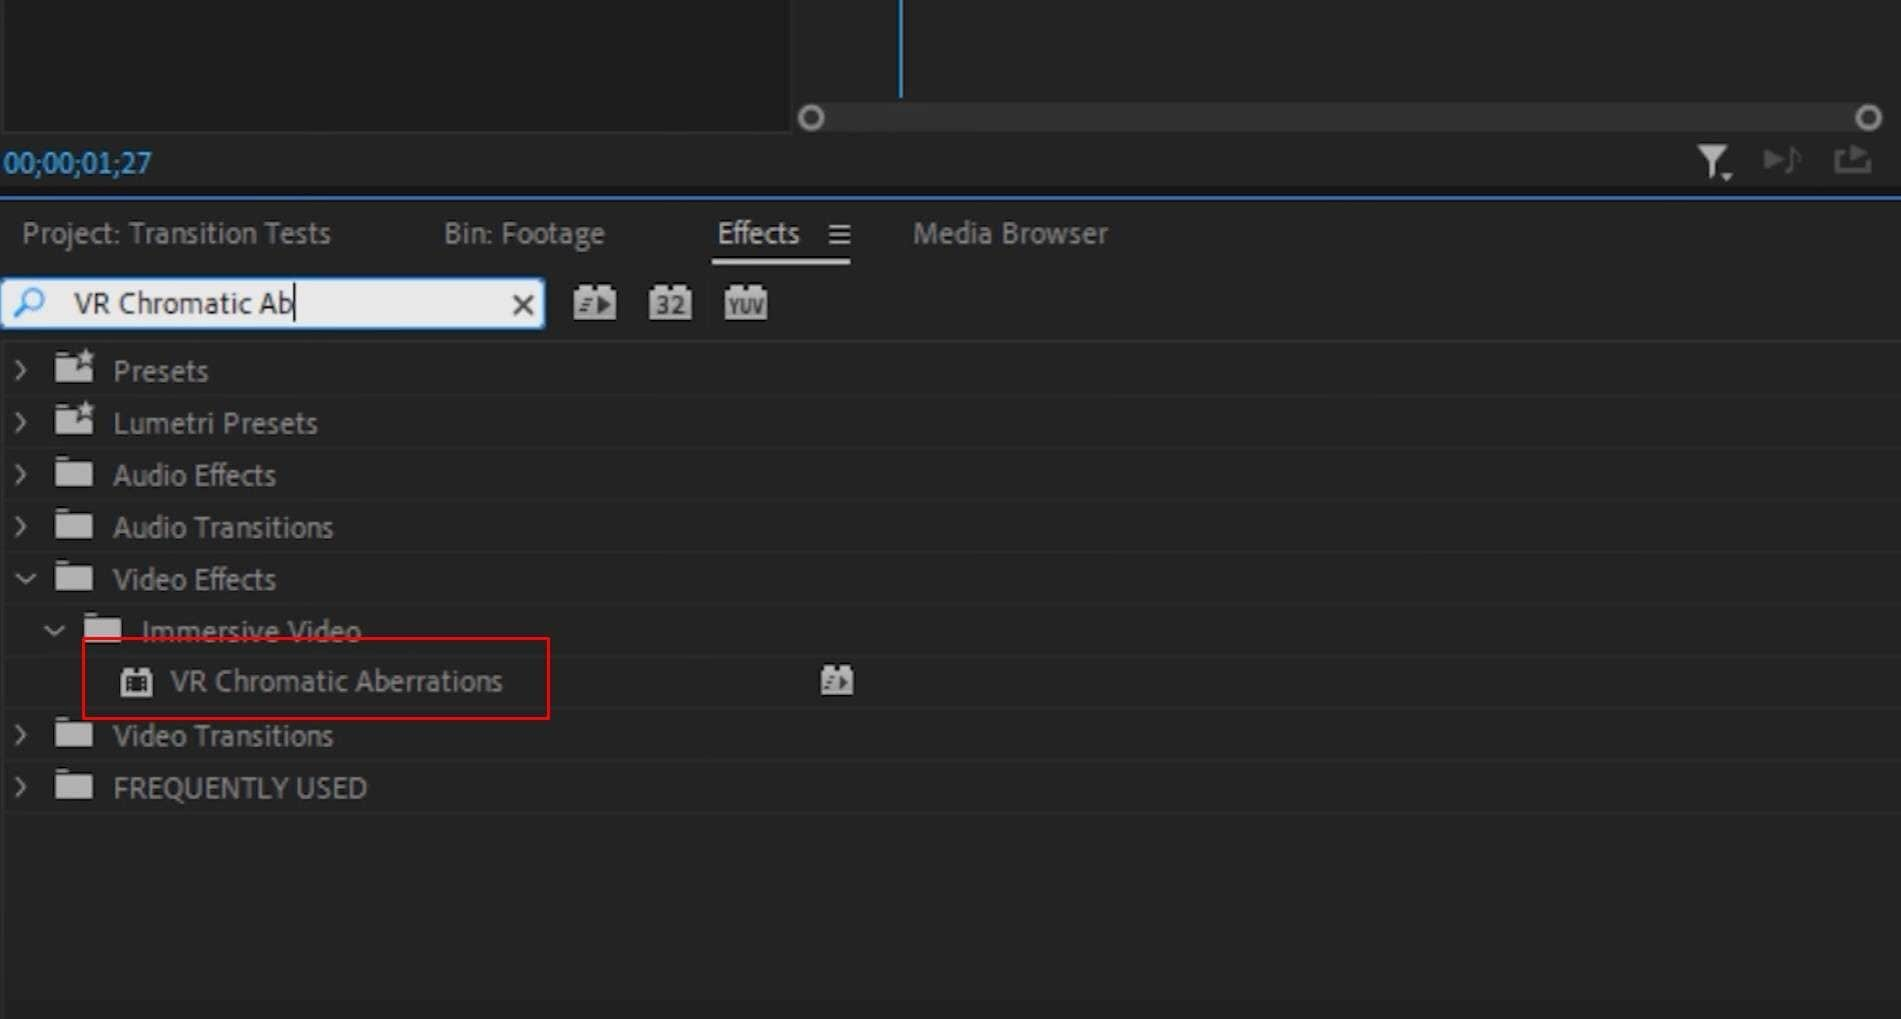
Step 7: Now, look for the VR Chromatic Aberrations effect and drag it over the adjustment layer.
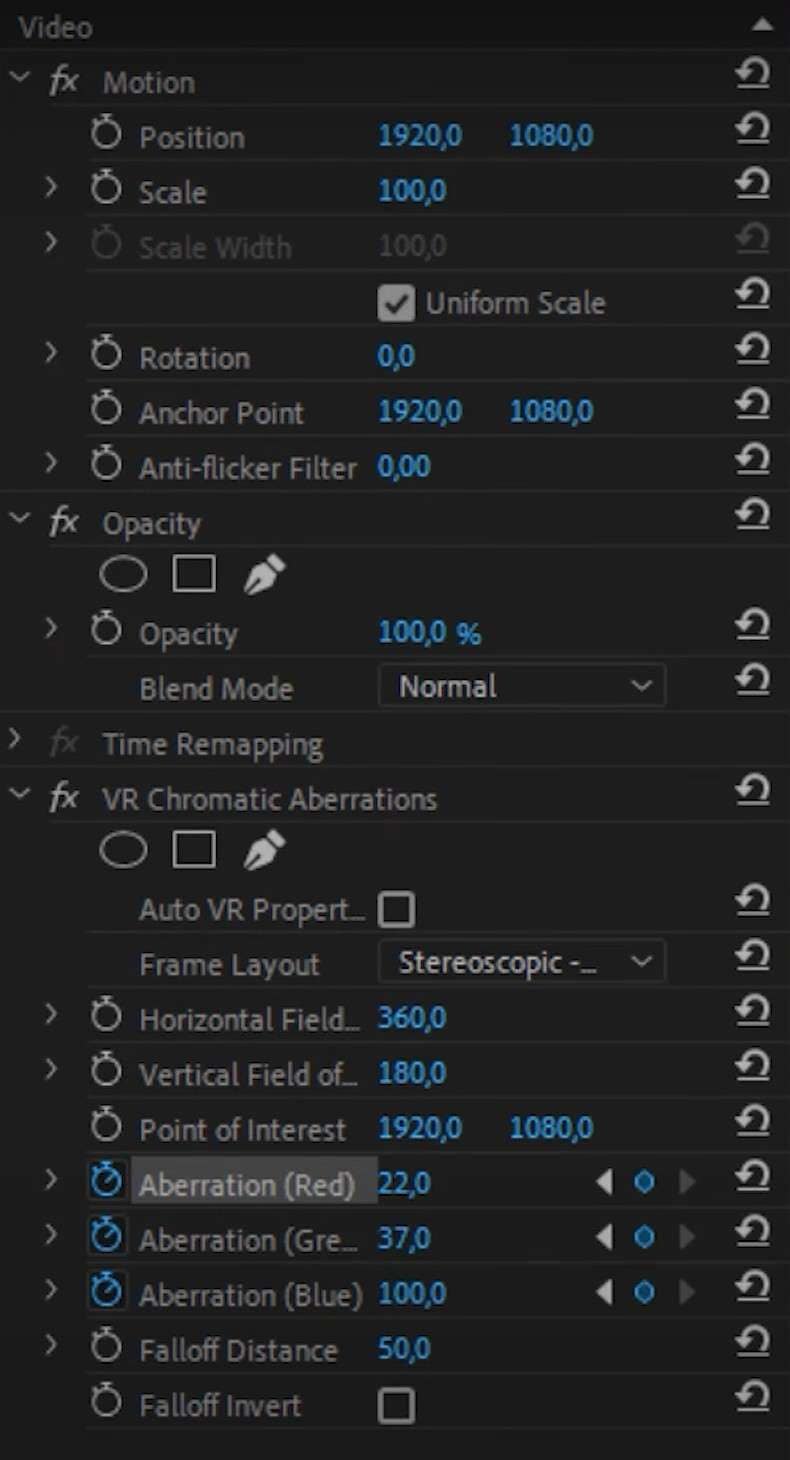
Step 8: Now, it’s time to edit the effect added to the adjustment layer. Adjust the values, but this time, you will have three tasks. First, you need to adjust the values for the first frame of the effect. Mimic everything you see in the screenshot below.
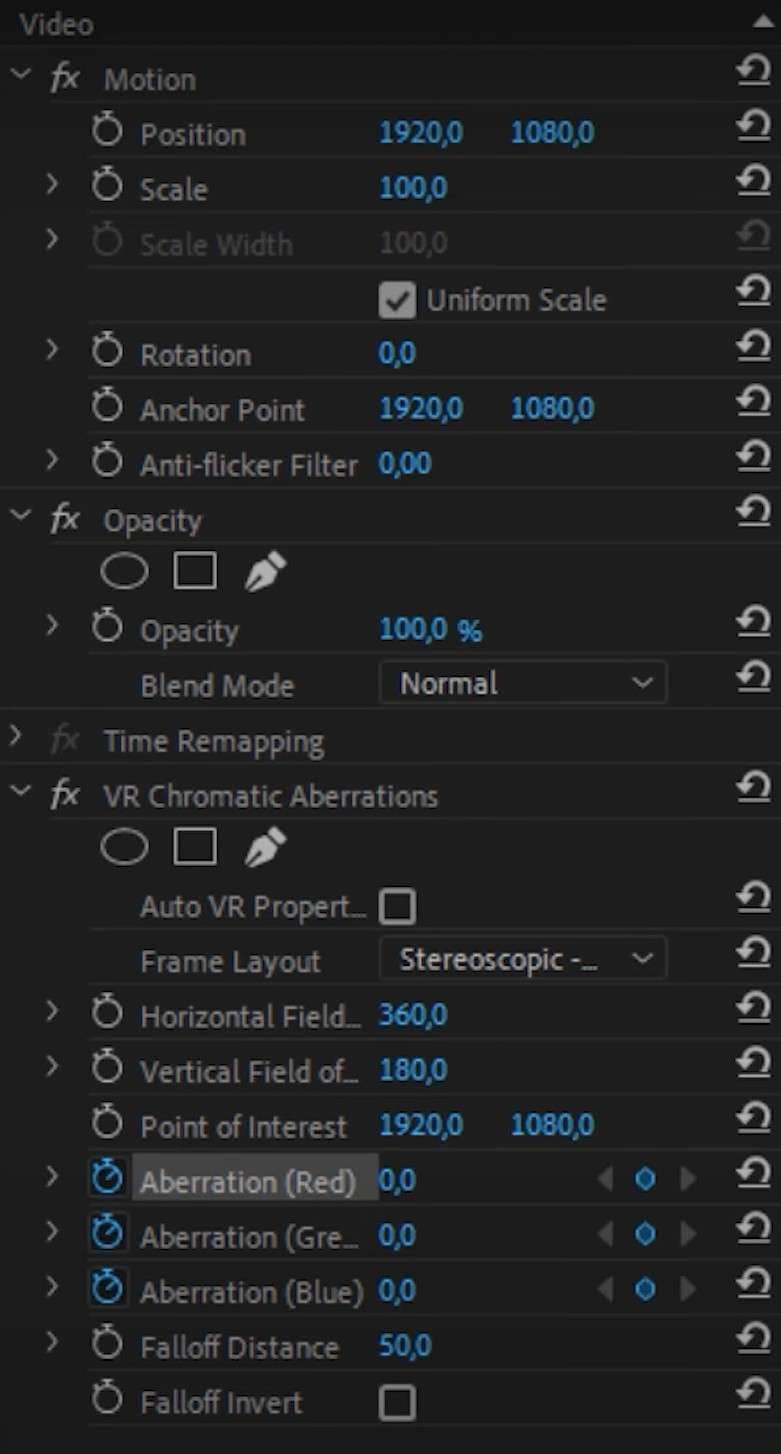
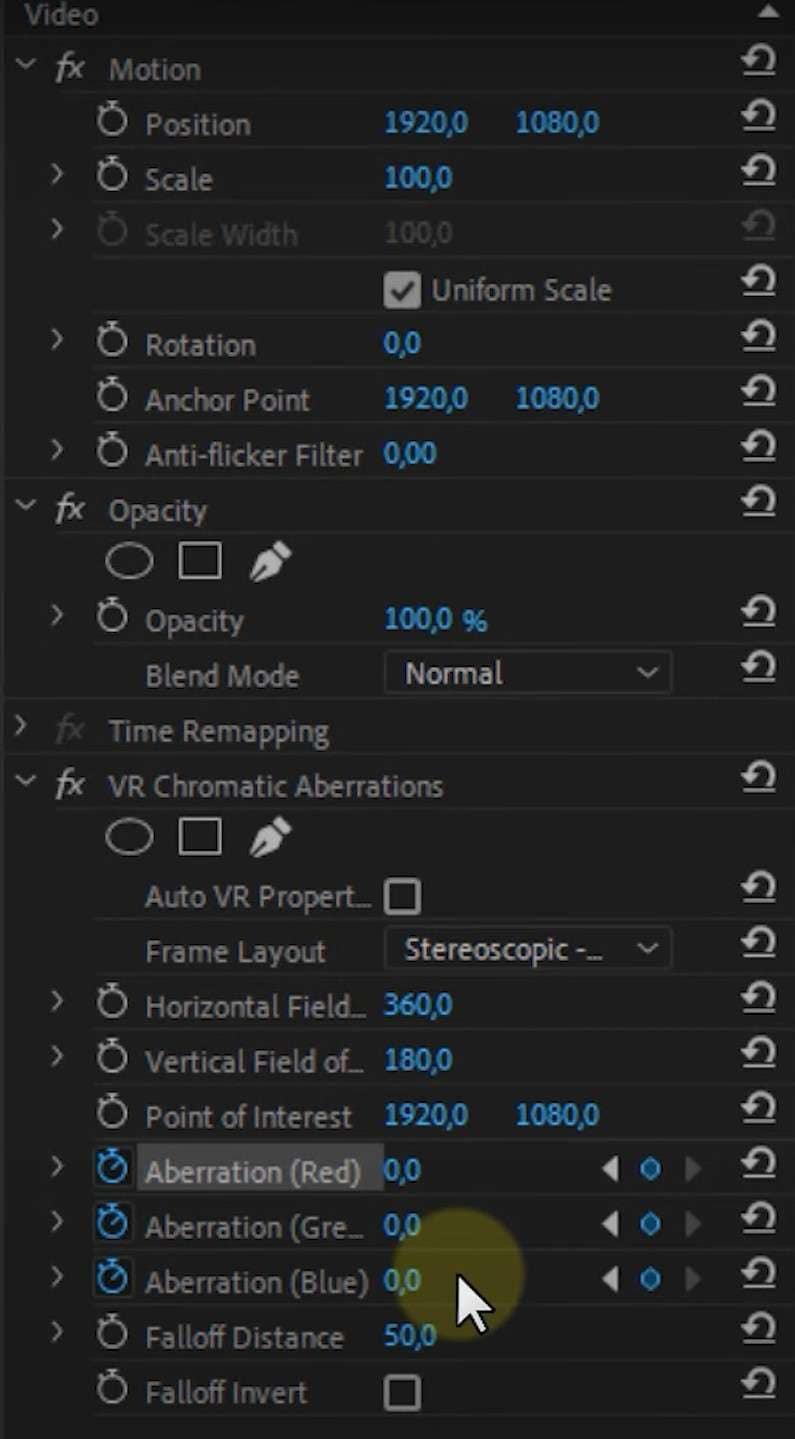
For the middle of the effect, where the transition actually happens, the values should look like this.
For the final frame of the effect, you need to copy these values.
Phew! That was not that easy, right? Cyberpunk is all about speed and efficiency. Although Premiere Pro is generally very efficient, adding the Cyberpunk glitch effect is a little too complicated, especially for someone who is new to video editing.
That’s why we have prepared an alternative. At this point in the text, we would like to introduce you to Filmroa, which is an intuitive video editing tool that makes adding the glitch transition very easy. Check it out.
How to Add the Glitch Transition in Filmora
 secure download

Filmora is designed to have almost all the same features as Premiere Pro and other similar tools, but the focus is on being intuitive for users. When you open Filmora, even if you have never done any form of video editing, you will somehow find your way around it and utilize its features to create what you want.
We can illustrate this by showing how to apply the glitch transition in Filmora.
Step 1: Download Filmora and install it on your computer.
secure download
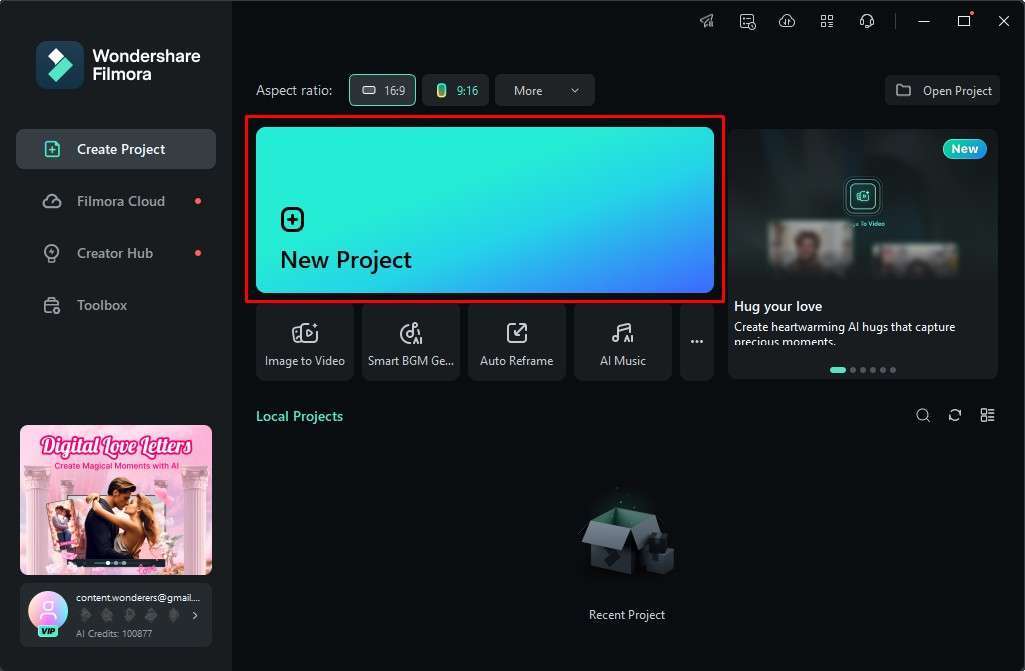
Step 2: Open Filmora and click on New Project.
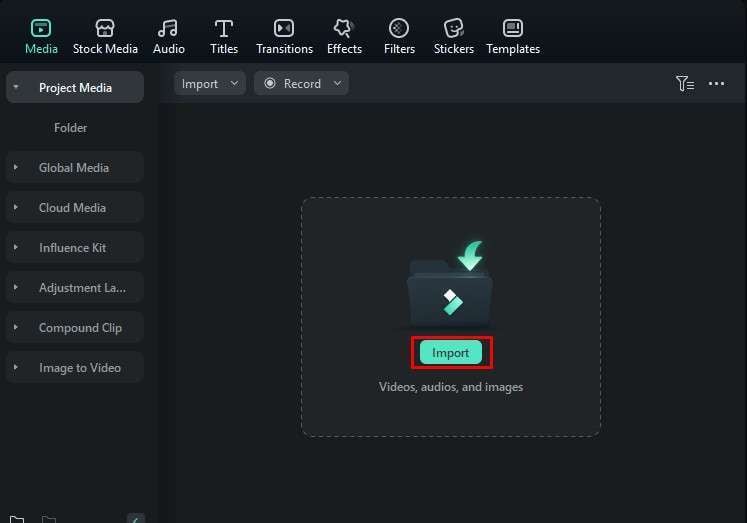
Step 3: Click on Import and add two or more files. You can choose to import images or videos. We’ll add two videos.
Step 4: Drag the files to the timeline, one after the other.

Step 5: In the Transitions tab, search for “glitch” in the search bar and pick a transition effect that you like. We went with Glitch Blocks. Then, simply drag the effect between the two files in the timeline, like in the screenshot below. You can also adjust the duration and properties of the glitch transition on the right.
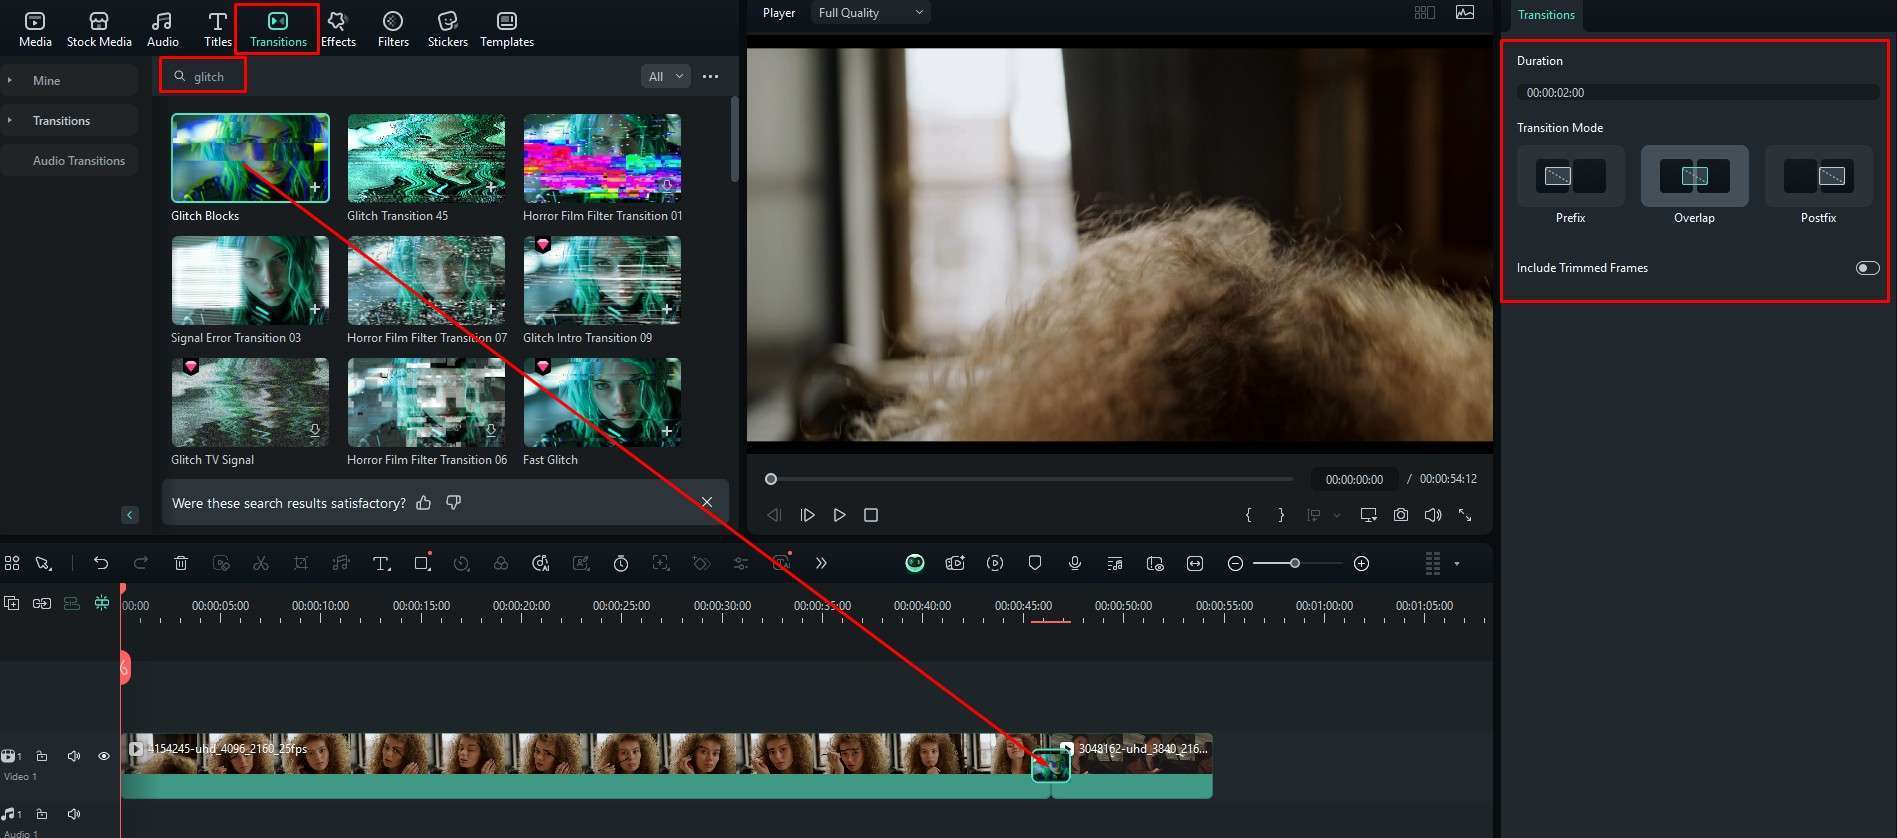
Step 6: Review the result in the player.

Do you see how easy this is? In comparison to Premiere Pro, this is much, much easier. You don’t have to add values and experiment. You can just pick from several presets that work right away. Sure, you can tweak the duration of the effect and adjust a few other parameters, but you also don’t have to, as everything is perfectly set up.
This is how everything works in Filmora. You look around the interface, find something you need, use the search function to narrow your search, and then drag and drop your chosen transition or effect to the timeline.
But there is more that Filmora has to offer. We are, of course, talking about Filmora’s excellent AI features. Read on to find out more.
Try Some of Filmora’s Premium AI Features to Make Cool Videos
Wondershare is a growing software company that releases excellent digital tools in many different spheres of the online realm. Filmora might just be one of their best products, and the creative AI features they put into it are a testament to that fact. Let’s talk about three interesting AI features and see how they work.
Powerful AI video editor for all creators

Image to Video
Filmora’s AI Image to Video feature allows users to bring images to life. Here’s how it works.
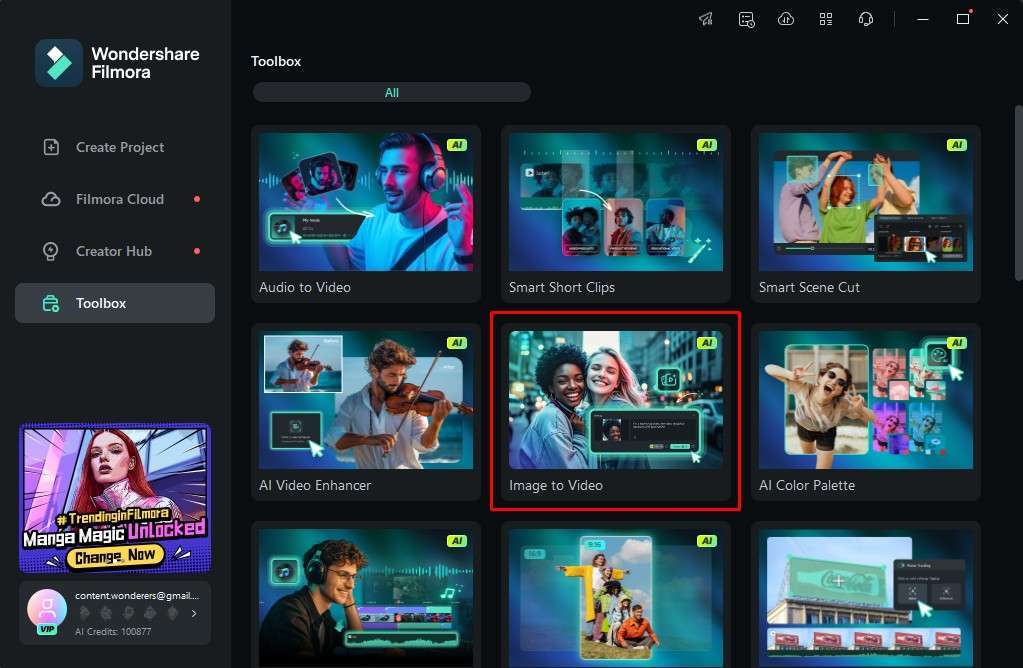
Step 1: When you open Filmora, check the Toolbox section of the Welcome screen and then search for and click on Image to Video.
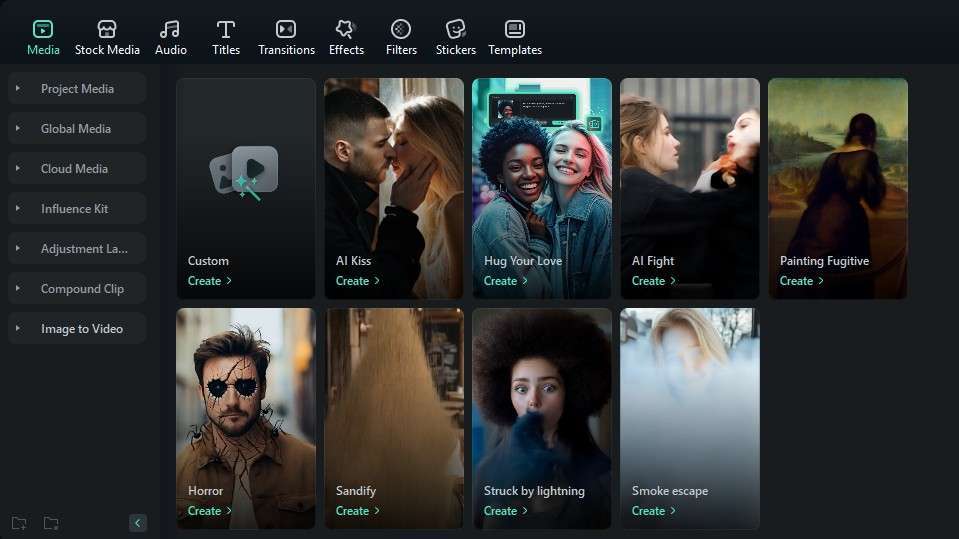
Step 2: Filmora will now offer several presets for you to choose from. You can create something custom, but we want to make two Cyberpunk 2077 characters, Judy Alvarez and Panam Palmer, to hug. That’s why we’ll use the Hug Your Love preset.
Step 3: Click at the designated box to add images.
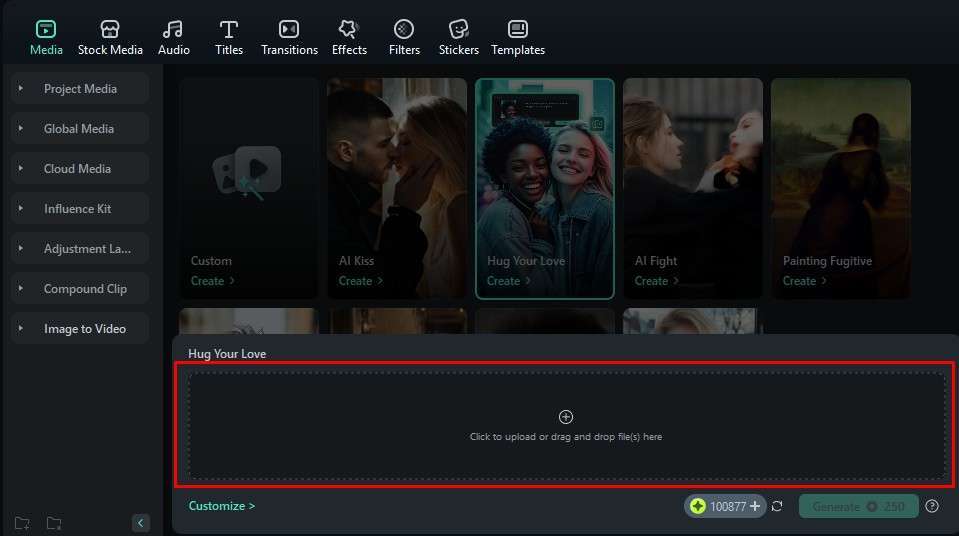
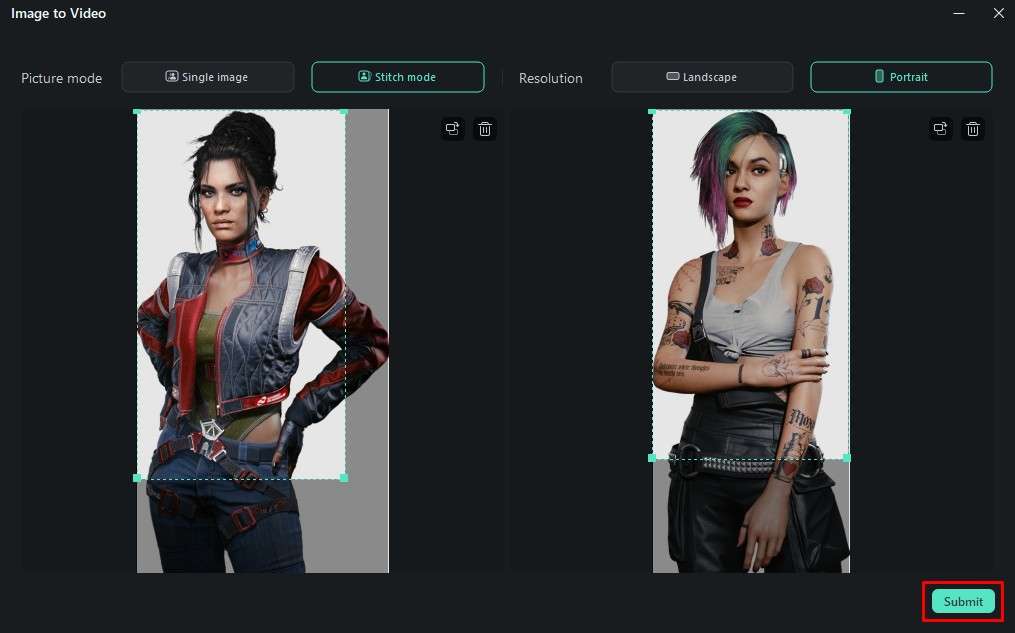
Step 4: Set up the AI feature to your liking. We will select Stitch mode, add two images, and adjust their size. When you are done, click on Submit.
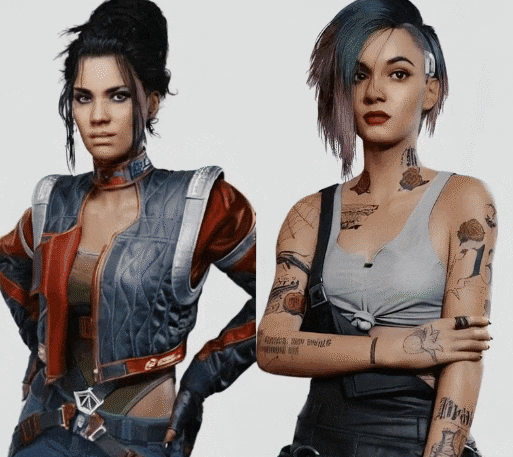
Step 5: Now, simply click on Generate and give the AI some time to work its magic.
You will be astonished by the results.
AI Face Mosaic
Blurred faces are very common in the world of Cyberpunk 2077. Some people have implants that scrabble their faces when recorded by a camera. You can mimic this in Filmora and here’s how.
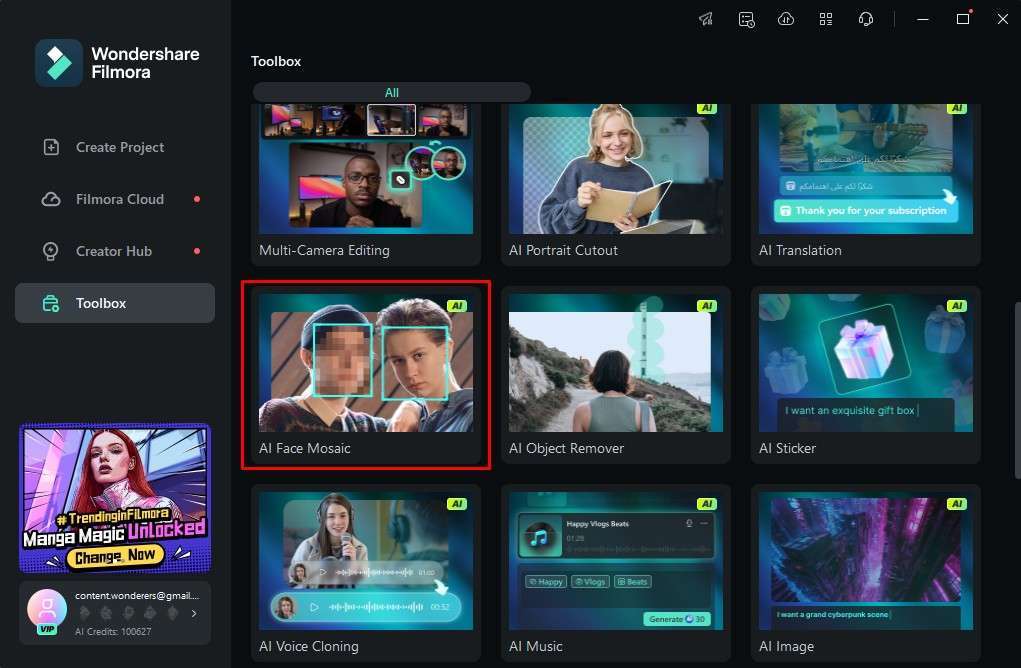
Step 1: From the aforementioned Toolbox section, find the AI Face Mosaic feature. Then proceed to upload a video or image where you want to blur faces.
Step 2: Immediately after, Filmora will create a new project, and you will be able to select the type of face mosaic you want on the left, you will notice that the AI detected all the faces in the footage, and you can select which one gets blurred, and you can also adjust the strength effect to your liking.
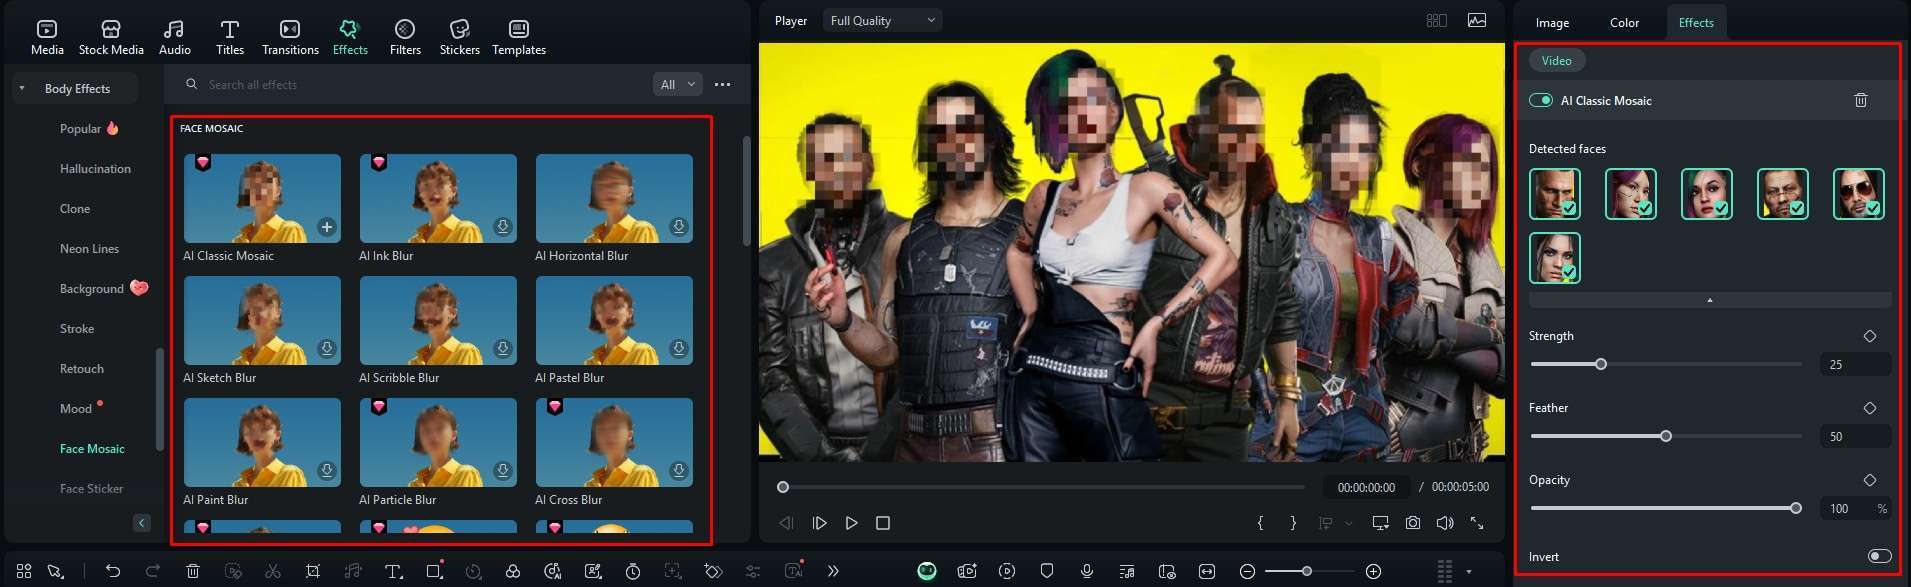
The result is instant, as you can see.
AI Text to Video
This is also a common theme in Cyberpunk. You say things, and the technology around you reacts. That’s what you can do with Filmora.
Step 1: Again, from the Toolbox, find the AI Text to Video feature.
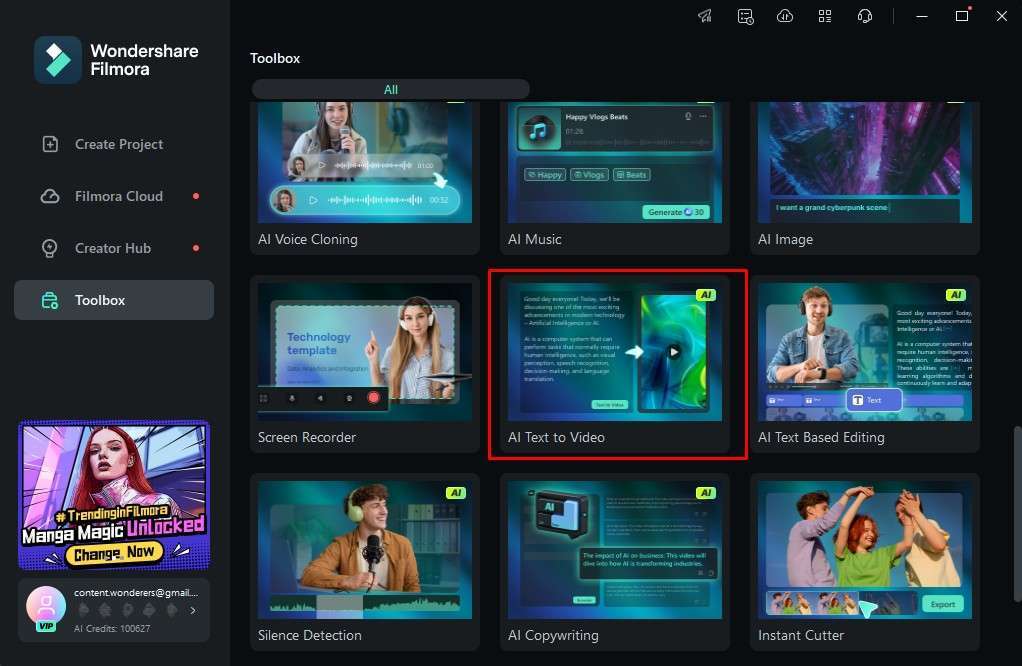
Step 2: Now, simply describe what you want to see in the video and click on Text to Video. Filmroa will do all the work for you.
You can then explore the newly created project and tweak it to your liking.
Conclusion
If you want to add glitch transitions that actually resemble the aesthetic you can find in Cyberpunk 2077, you have to go with Filmora. The Premiere Pro version of the improvised glitch transition effect just won’t cut it. In Filmora, you have several glitch transition options, and you are sure to find something that suits your taste.
