

How to Make Image Transparent in 4 Ways [PNG and GIF Included]

Jul 14, 2025• Proven solutions
If you’re designing something or merging an image onto your video, an unwanted background on the image can be the biggest pet peeves. While tempting so it might be attempting to make the image transparent without the right tools can be an annoying and time-wasting task. Fortunately, you won’t have to worry as we’ll go through the process to make image transparent by utilizing the powerful alpha channel manipulation features of Wondershare Filmora. And we’ll also learn two other straightforward methods to get a transparent background by removing the existing background of the image.
- Part 1: All About Alpha Channel
- Part 2: Make Image Transparent Using Wondershare Filmora Video Editor
- Part 3: Make Images Transparent Using Wondershare Filmora on Mobile Phone
- Part 4: Make Image Transparent Using Canva
- Part 5: Make Image Transparent Using PowerPoint
Part 1: All About Alpha Channel
Before showing you the methods to make image transparent, let me tell you what alpha channel is first.
Alpha channel defines the color component defining the color values for pixels in an image when blended with other images. That represents the degree of transparency or opacity of an image. The alpha channel permits for transparency in a picture and is used to determine areas of the image, like to preserve saved selection or outline the transparency.
The most common image format supporting the alpha channel is PNG, in which not only each pixel has a color value but also a numerical transparency value that determines how pixels will be placed over another pixel. For example, a pixel with an alpha channel value of 100 percent is entirely opaque while the transparency increases as we move downwards to zero percent value, where the pixel is completely transparent.
Part 2: Make Image Transparent Using Wondershare Filmora Video Editor
Filmora offers numerous professional photo and video editing tools and features. Its green screen feature can make an image transparent quickly and easily. Filmora is the best tool with an intuitive interface and powerful editing engine. And it has more than 300 video and sound effects which can help you polish your image and video.
Let’s see how to make image transparent using Wondershare Filmora:
- Download and install Wondershare Filmora on your computer. It is available for both Windows and Mac.


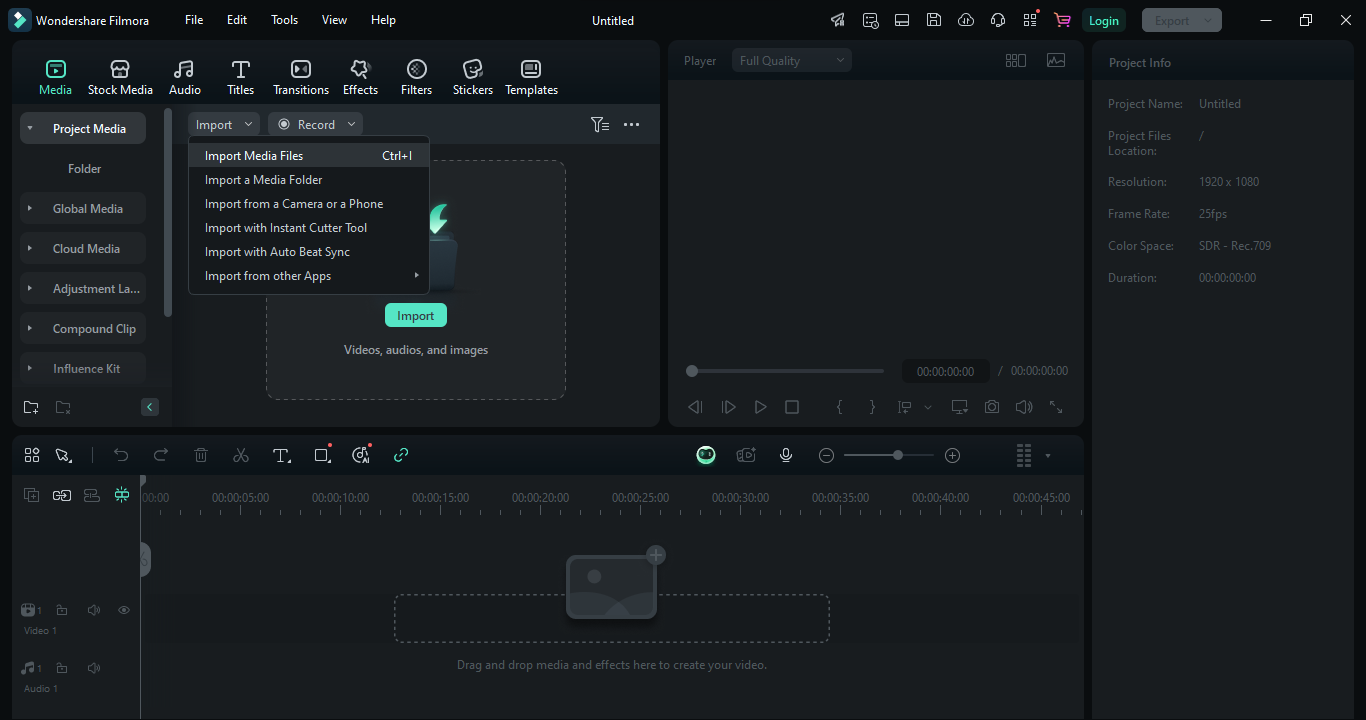
- Launch Wondershare Filmora and click on New Project from the home window. Go to Import > Import Media Files to add your image to the media library.
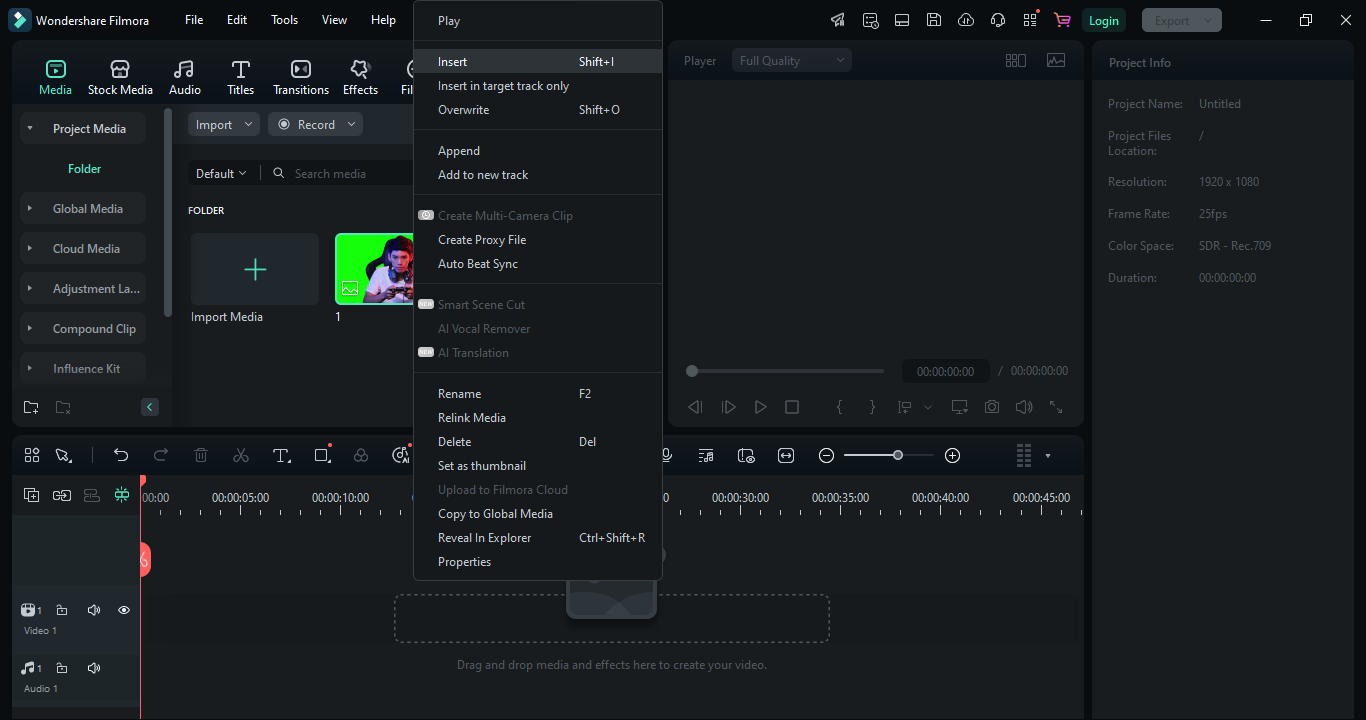
- Drag and drop the imported image onto the timeline. Alternatively, right-click the image and select the Insert option.
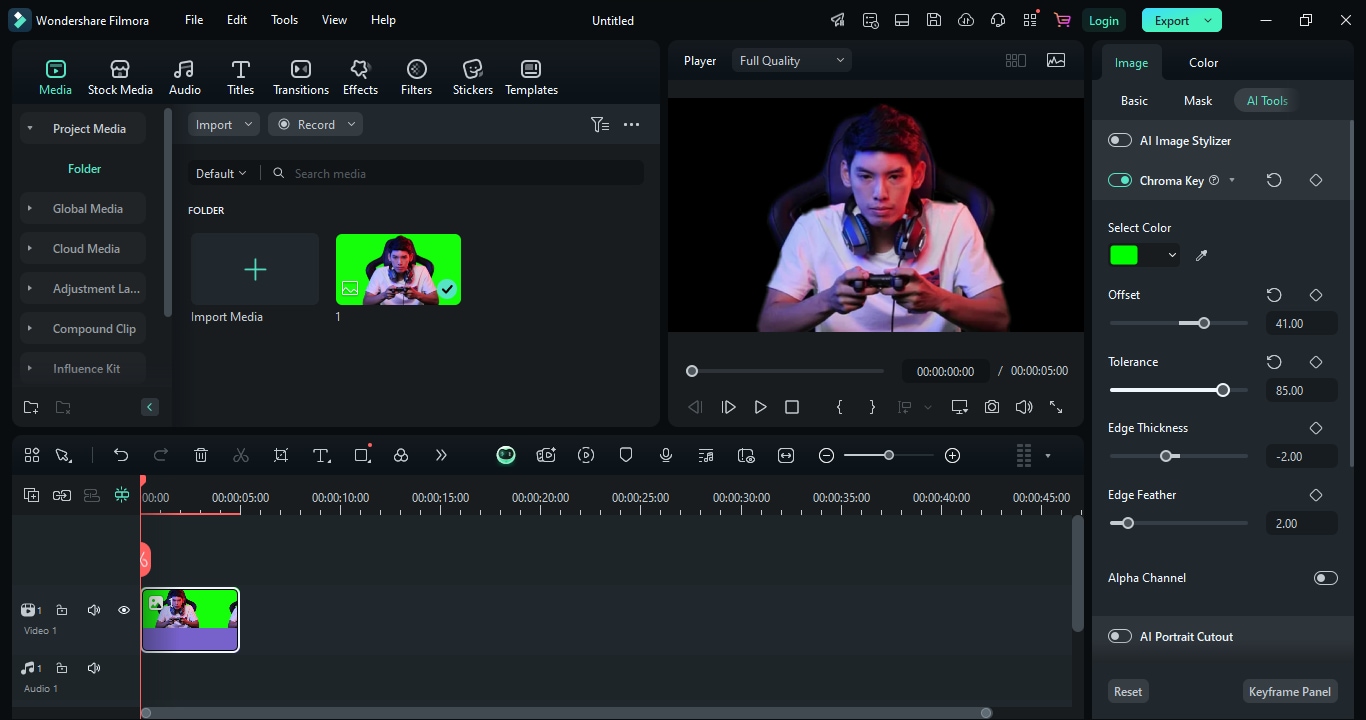
- Enable Chroma Key to remove the background.
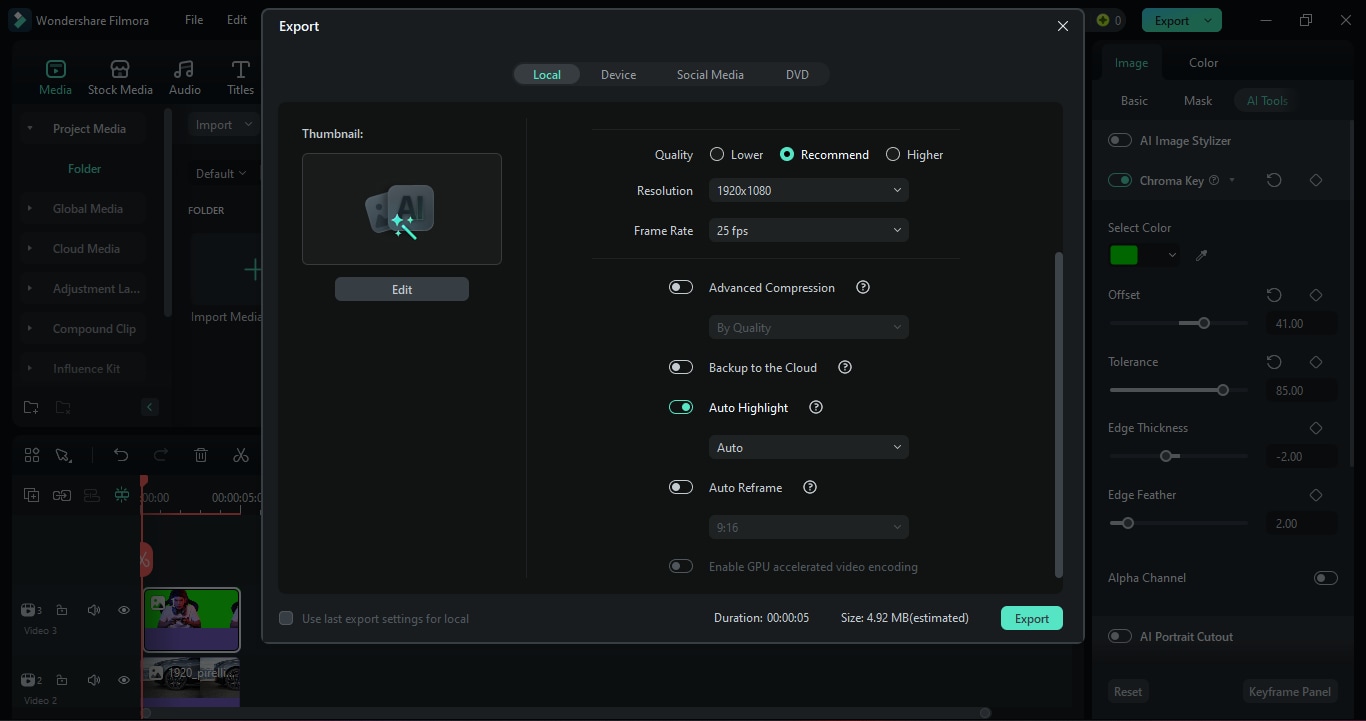
- Double-click the thumbnail in the timeline to open the settings panel.
- Go to AI Tools tab and find the Chroma Key option.
- Toggle it on, and the image background will become transparent.

By default, green is selected as the background color. You can change it by clicking the Color Picker and selecting the area you want to make transparent.
- Fine-tune the transparency settings if needed. Adjust Offset, Tolerance, Edge Thickness, and Edge Feather to perfect the transparency.
- Overlay the transparent image onto your video. Click OK to save the settings, then drag the transparent image onto your video track.
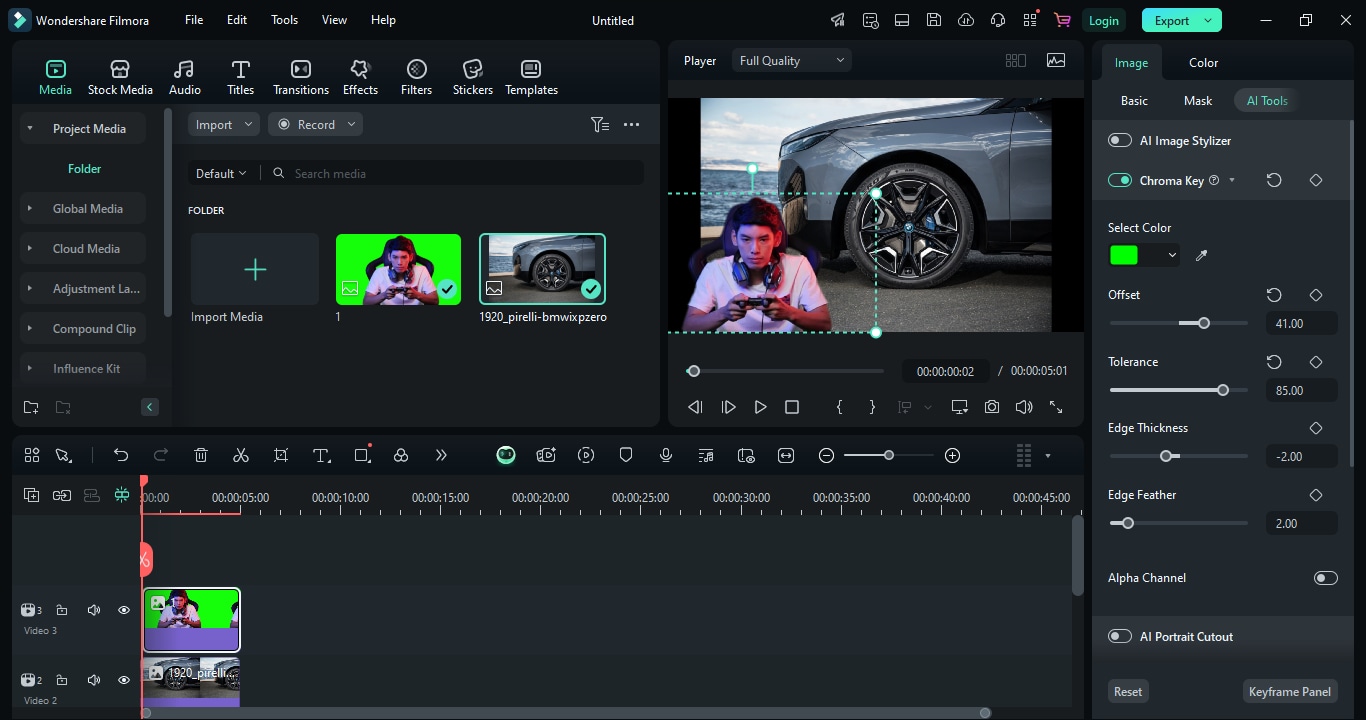
- Export the final video. Click Export to save your video with the transparent image overlay.
Part 3: Make Images Transparent Using Wondershare Filmora on Mobile Phone
Wondershare Filmora Mobile version also offers a seamless way to remove backgrounds and create transparent images using its Chroma Key (Green Screen) feature.
Steps to make an image transparent using Wondershare Filmora on mobile:
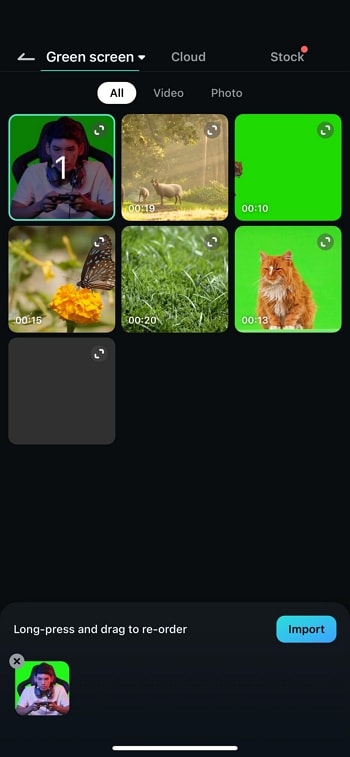
- Open Filmora Mobile and tap New Project to start.

- Select the image you want to make transparent from your phone's gallery and tap Import to load it.
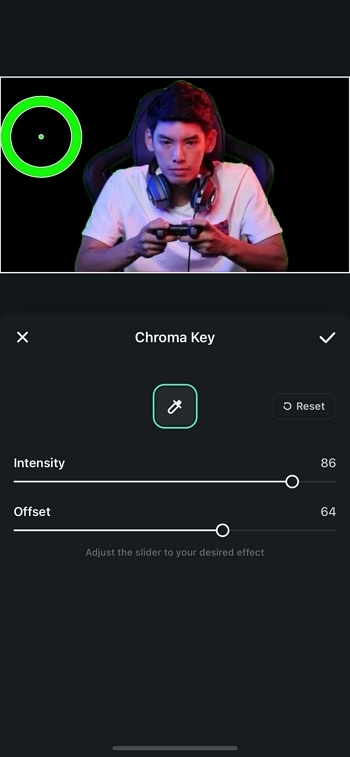
- Tap Trim from the toolbar and select Smart Cutout.

- In the Smart Cutout menu, find and tap Chroma Key. In the preview window, use the Color Picker to select the green background. Filmora will instantly remove the selected color, making the image transparent. Adjust the Strength and Shadow sliders for precise background removal. Once satisfied, tap the Checkmark to apply.
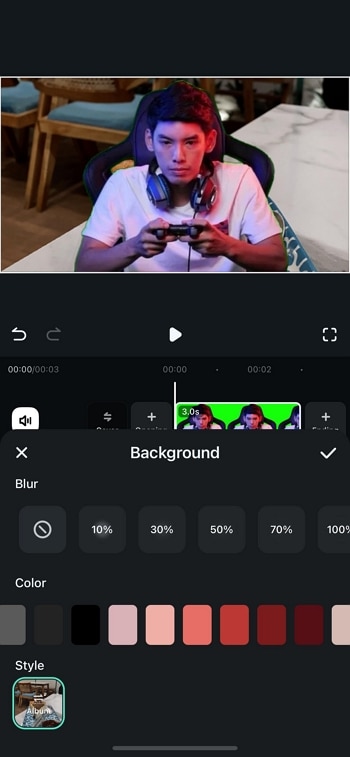
- Tap Background from the toolbar to replace the removed background with a custom color, image, or video.
Part 4: Make Image Transparent Using Canva
You can also make an image transparent using the Canva online. Though the portable transparency maker has some limitations and can only work with PNG image format while also you won’t have the privilege of changing the selection of which part of the image get transparent. It’s a free and quick solution if you want a transparent background for your image and urgently get a browser-based background transparent solution. To make an image transparent using the Canva online tool, follow the steps below.
- Click here >> Canva to open the site on the new tab.

- Click on Upload Image or drag & drop onto the page.
- As soon as you upload your image onto the platform, you get a transparent PNG output. You can edit the PNG transparent file or if you are already satistied with the result, you can directly download the file.
Part 5: Make Image Transparent Using PowerPoint
You cannot image PowerPoint can also be used to make image transparent, right? This removes whatever is behind the image, like another picture or text, and blends it seamlessly with your slide background.
Steps to make image transparent using PowerPoint:
- Open the PowerPoint presentation with the image you want to make transparent and go to the slide with the image.
- Tap on the image to select it. When you choose the picture, a new tab will be added to the PowerPoint tab menu

- Head over to the Picture Tools Format or Picture Format in Mac and choose the Remove Background option.
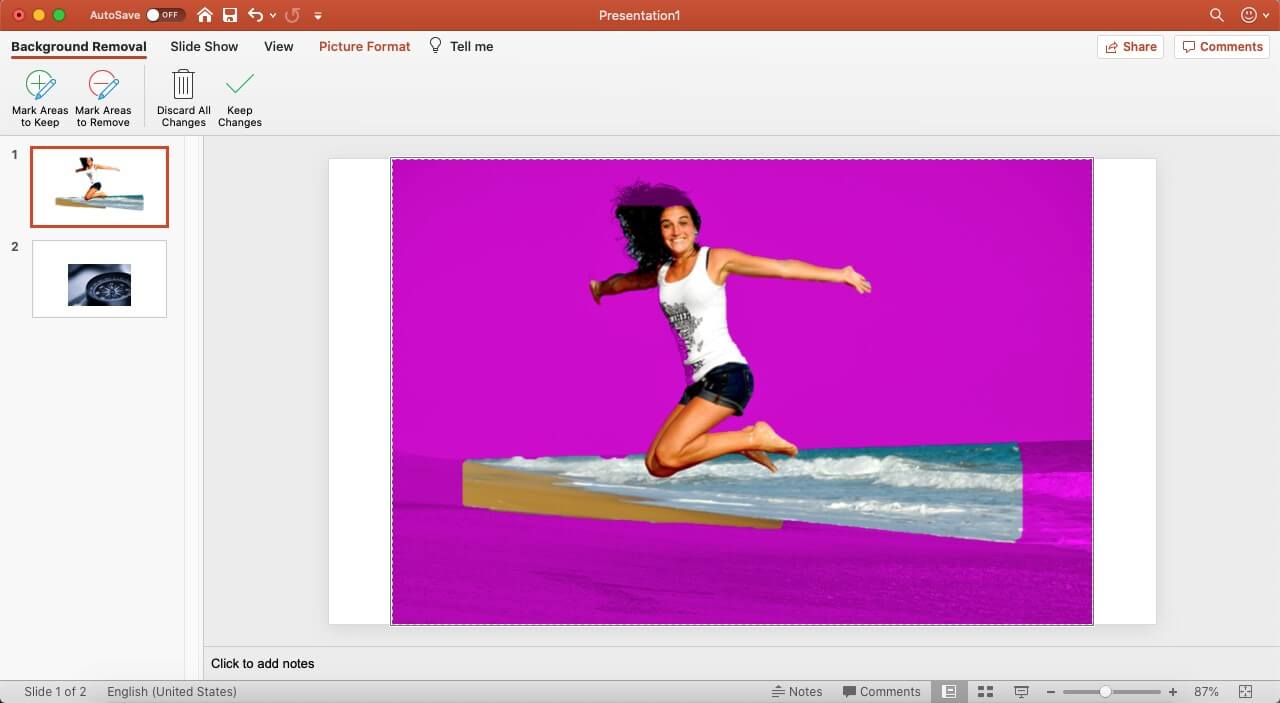
- PowerPoint will color the background as pink and would prompt you to include or exclude the parts that you want to set as background.
- You can customize which areas are to be kept and which are made transparent with the Mark Areas to Keep or Mark Areas to Remove to designate the parts of the picture to remain in the photo or be deleted.

- Press the Keep Changes button to apply the edits. You get your transparent background image.

Conclusion
We’ve gone through three different tools and methods for you to make image transparent. They may help you edit your image and play with your editing expertise. You can choose the way you like.
Read More to Get: Top Video Background Removers to Remove Video Background
In this article, I will show you 4 ways to make a logo transparent easily and for free.
by Benjamin Arango Jul 14, 2025 14:51 PM
Benjamin Arango
staff Editor
