Struggling with sideways or upside-down videos? This step-by-step guide will show you exactly how to rotate videos using Handbrake - the free, open-source tool that works seamlessly on Windows, Mac and Linux. While many video editors like Filmora require paid subscriptions for basic rotation features, Handbrake lets you quickly fix misaligned footage in any orientation with just a few clicks. Perfect for correcting smartphone recordings, action cam clips, or accidental vertical videos, our visual guide makes video rotation accessible even for complete beginners.
Step-by-step on how to rotate videos using Handbrake
When you import a video into the Handbrake software, it will by default be in a "landscape" orientation, with the long edge of the video oriented horizontally. If you want to rotate the video 90 degrees counterclockwise so that it appears "vertical," or if you want to rotate it 180 degrees so that it is upside down, you can do so by following these two steps:
Step 1: Open the Handbrake software and import your video.
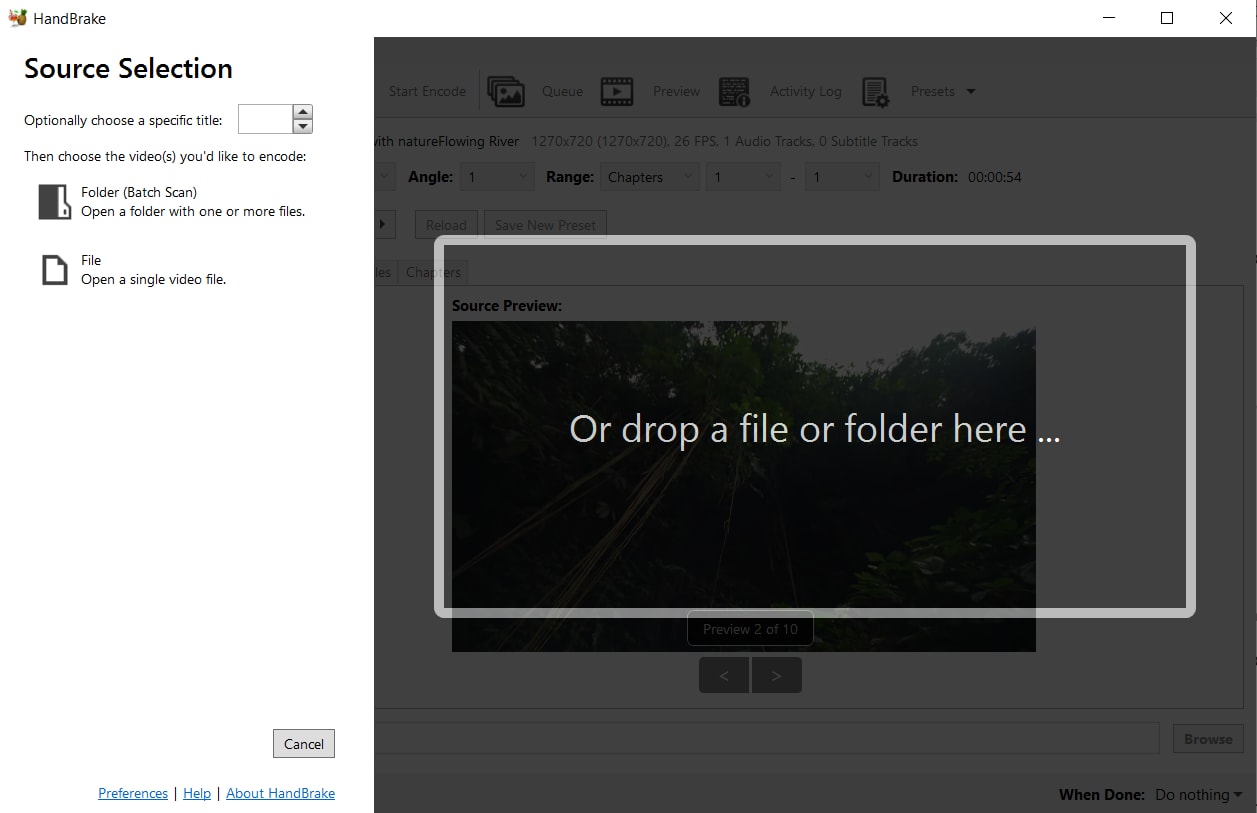
Step 2: Click on the "Dimensions" tab at the top of the Handbrake window.

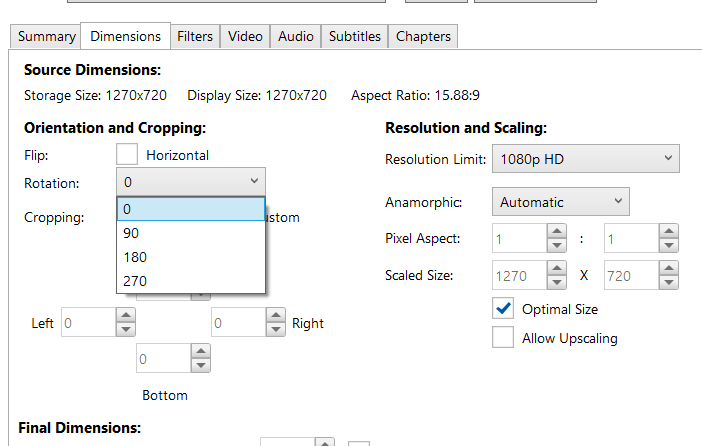
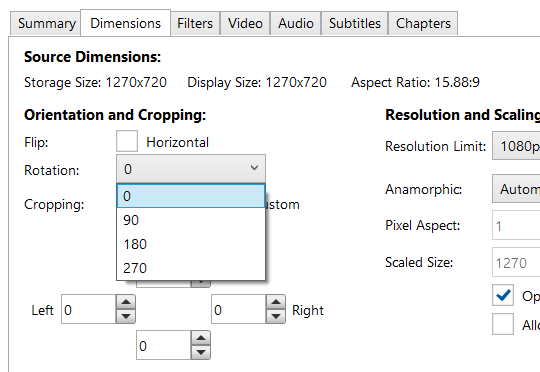
Step 3: Under the "Orientation and Cropping" section, click on one of the options in the "Rotate" menu.
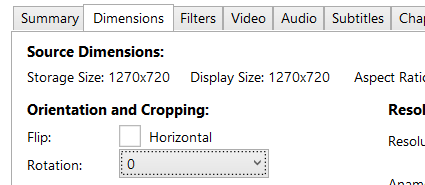
Step 4: If you want to rotate a video 90 degrees counterclockwise, select "90 Degrees CW (Counter-Clockwise)." If you want to rotate the video 180 degrees so that it is upside down, select "180 Degrees."
Step 5: Click on the "Preview" button at the bottom of the Handbrake window to see a preview of how your rotated video will look. When you are satisfied with the rotation, click on the "Start Encode" button to begin the encoding process.
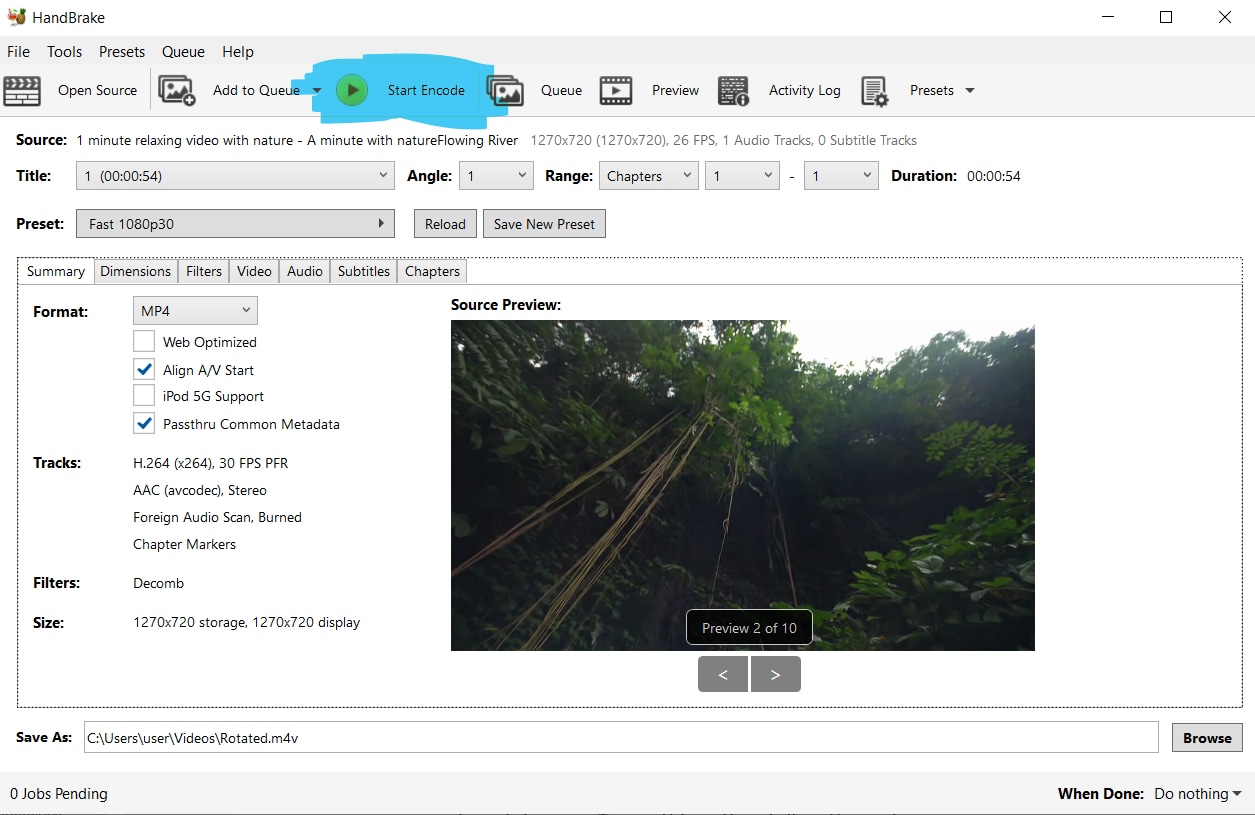
The Handbrake software also offers a "Flip" option which you can do after rotating it, which allows you to slip the video after rotating it. To use this option, follow these steps:
Under the "Orientation and Cropping" section, Go to Rotation and choose the degrees that best is best for your rotation requirements.
Click on "Flip" to flip your video horizontally.
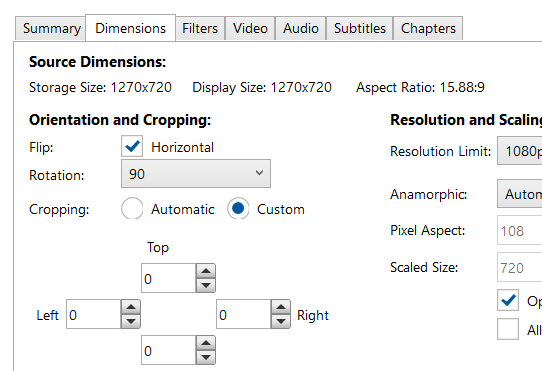
Click on the "Preview" button at the bottom of the Handbrake window to see a preview of how your rotated video will look. When you are satisfied with the rotation, click on the "Start Encode" button to begin the encoding process.
Both of these methods for rotating videos are easy to use and produce good results. Experiment with them to see which method works best for you.
An Easy Way to Rotate Videos Using Filmora
Moreover, instead of using Handbrake, you can use Filmora Video Editor instead. Filmora is a video editor that is very easy to use. It has a variety of features, including the ability to rotate videos. You can download Filmora from the Filmora website. The website has links to the download page for each of the supported platforms.
For Win 7 or later (64-bit)
For macOS 10.14 or later
Step-by-Step on how to rotate videos in Filmora
In order for you to rotate videos in Filmora, follow these simple steps:
Step 1: Import the video that you want to rotate into Filmora.
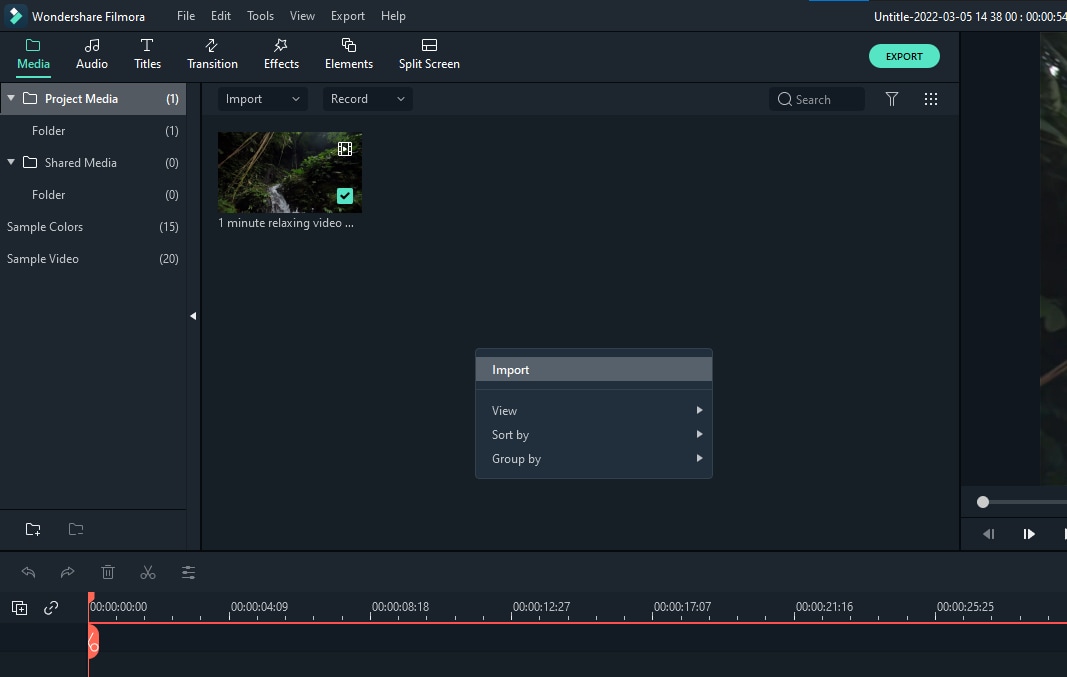
Step 2: Click on the "Edit" tab at the top of the video timeline.
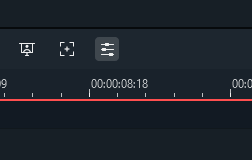
Step 3: Click on the "Rotate" button in the "Transform" section of the toolbar.
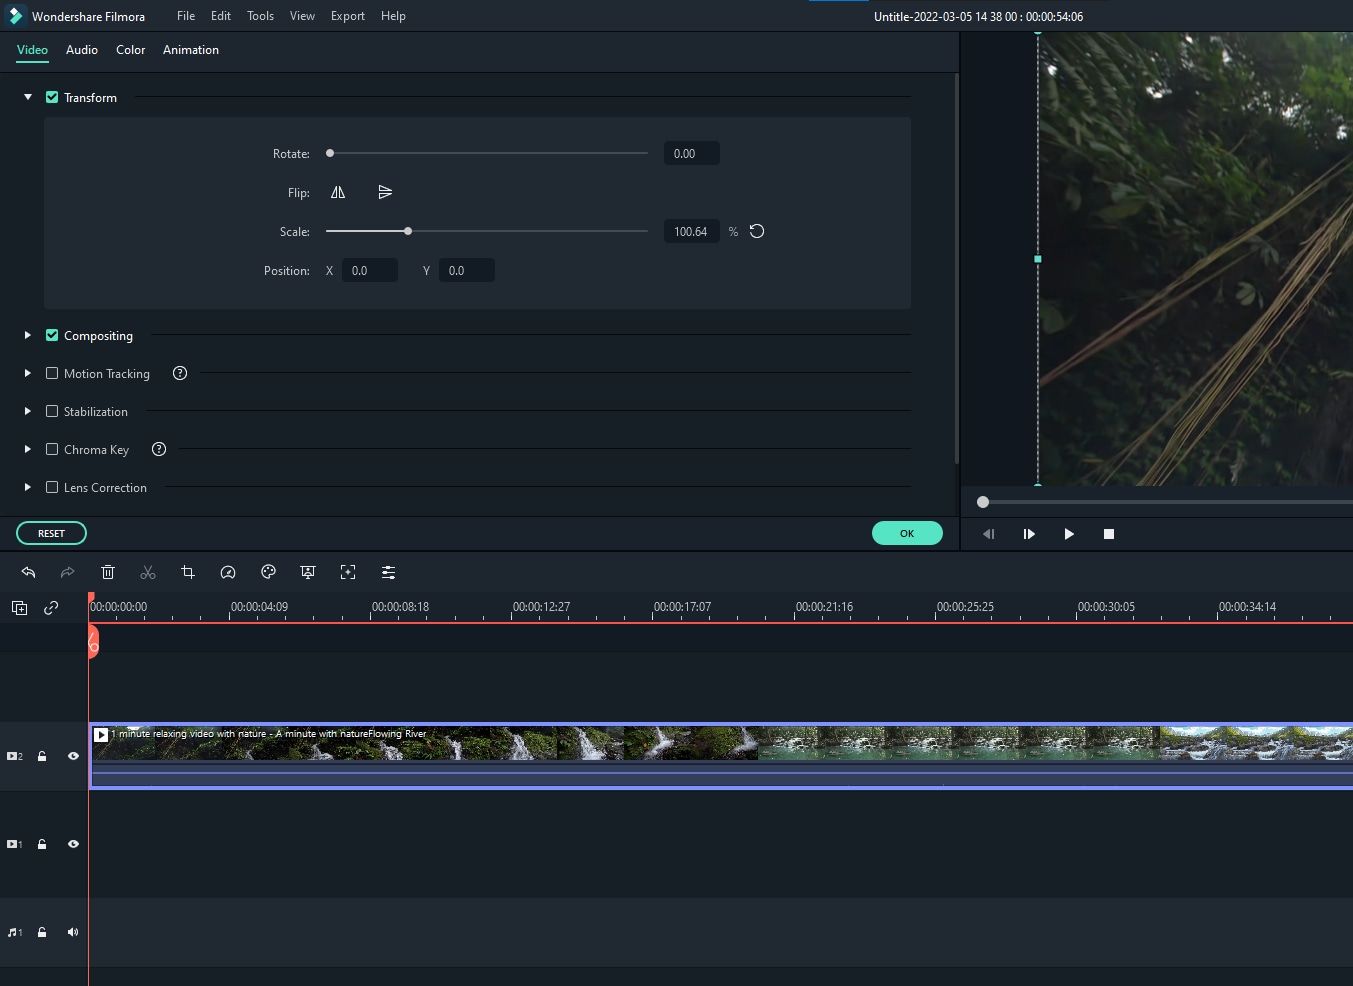
Step 4: Select the rotation angle that you want to rotate the video in the "Rotate" menu.

Step 5: Click on the "Preview" button at the bottom of the Filmora window to see a preview of how your rotated video will look. When you are satisfied with the rotation, click on the "OK" button to apply the rotation.
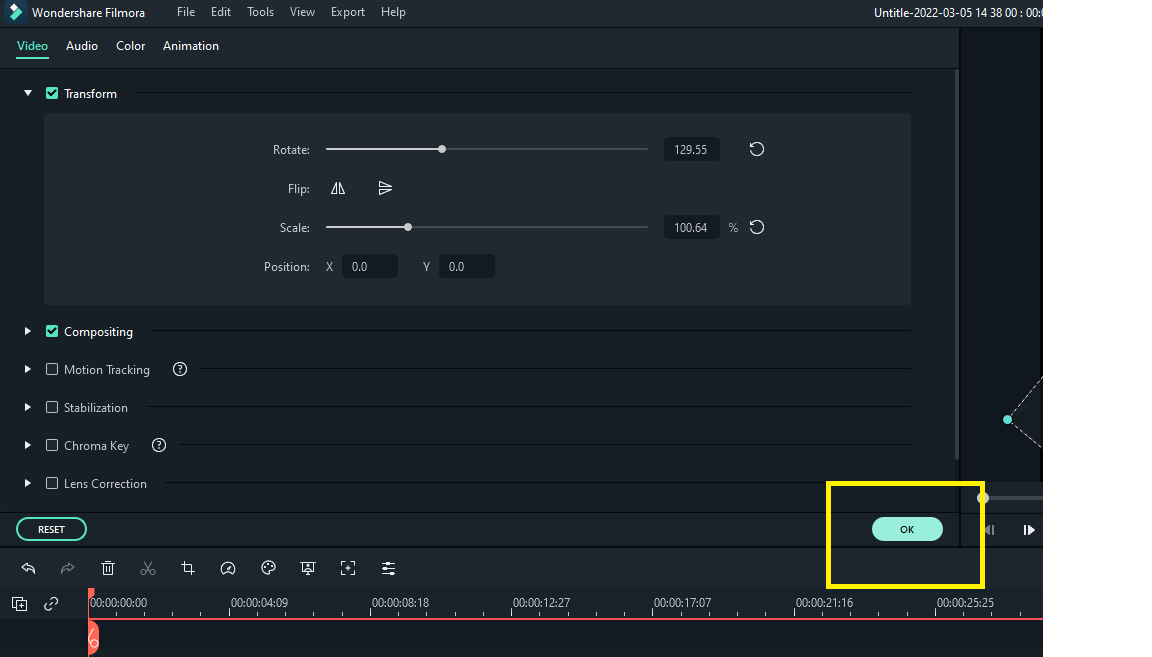
As you can see, rotating videos is a very easy process in both Handbrake and Filmora. Both Handbrake and Filmora offer simple methods for rotating videos. In Handbrake, you can rotate the video 90 degrees counterclockwise or 180 degrees.
In Filmora, you can rotate the video by any number of degrees in either direction. Experiment with these methods to see which one works best for you. Additionally, Filmora offers a number of other features, such as the ability to add text and transitions, that you may find useful.


 100% Security Verified | No Subscription Required | No Malware

