Transcript
In this video, we will teach you how to create the retro intro in Wondershare Filmora.
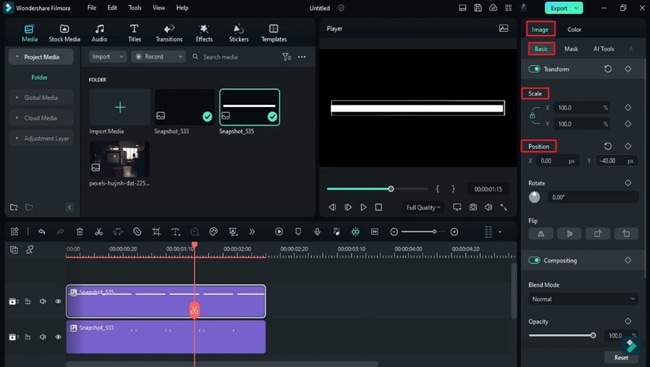
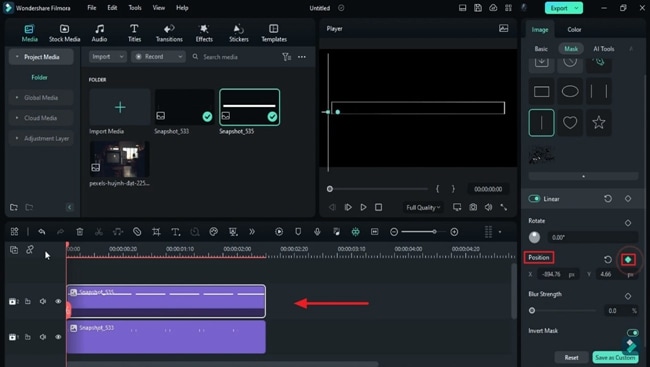
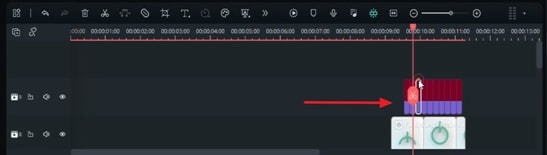
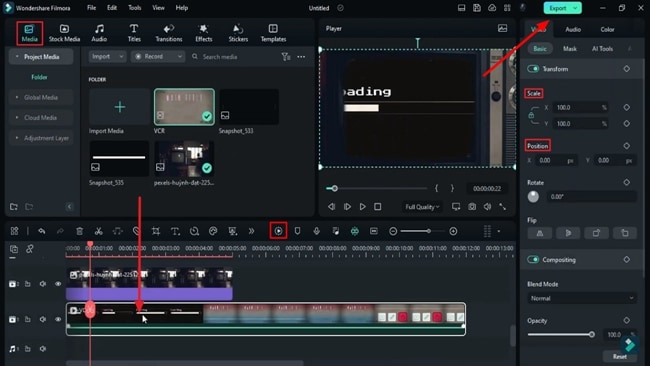
First, let's create a loading bar. Here, we need snapshots of a line and square. Drop them on different tracks and keep them both 10 seconds and 10 frames long. Next, put the line in the square, select the square, unlock the "Scale," and change Y to 81.1. Stop at the start "Position," select "Single Line Mask," click "Invert Mask," and slide to the left side of the bar. Here, turn on the "Position" keyframe, then go 15 frames further. Bring the mask to the right, then go about 10 frames forward and move the mask to the right further. Stop 2 frames before the end and drag the mask to the end.
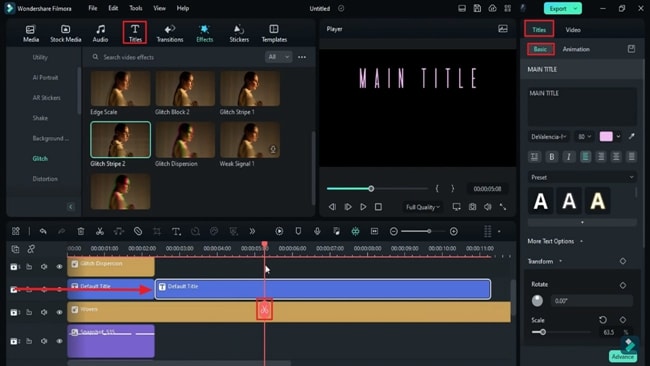
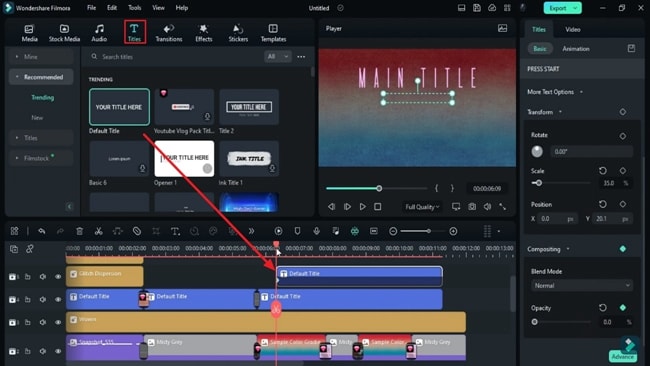
Next, drop a "Default Title" on track 3, split it at 2 seconds and 10th frame. Select the first part, enter Loading, change the font to "Press Start 2P," font size to 40, and adjust the "Position." Shift the "Default Title" to track 4.
Search for the "Woven" effect under the "Effect" tab and drop it on track 3. Stretch it for 12 seconds. Now, go to the "Effects," find the "Glitch Dispersion" effect, and drag it to track 5. Match to loading text duration, and then apply "Glitch Strip 2" on track 6. Change "Frequency" to 0.1, "Amount" to 0.2, and "Strength" to 0.1. Then, extend the second "Default Title" to 11 seconds and the 10th frame. Enter your word, change the font to "Dave Valencia," select a light pink color, and adjust its "Position."
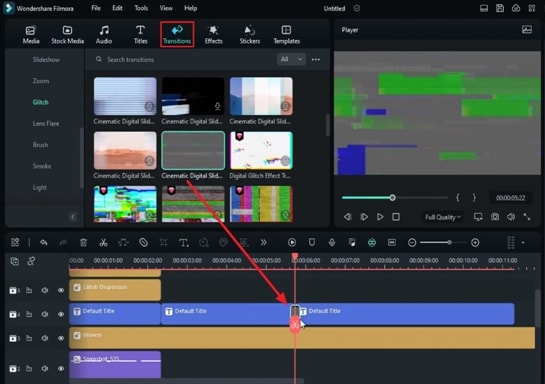
Split the title at 5 seconds and 22 frames. Go to the "Transitions" and apply the "Glitch" transition on the split part. Make the transition 6 frames long, then apply the "Glitch Countdown" transition between loading and the main title. Keep it 10 frames long.
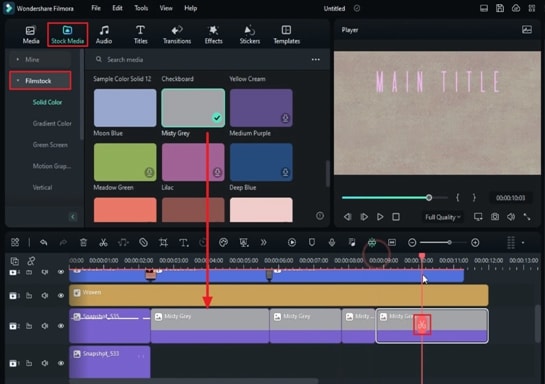
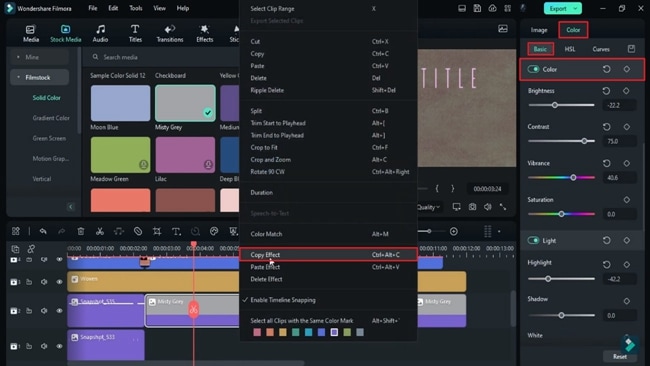
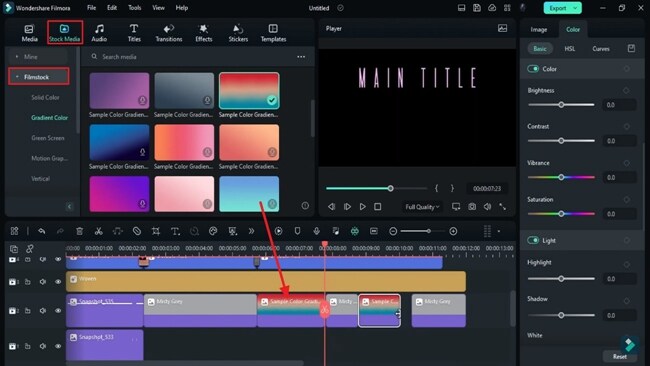
Find “Misty Gray” color in “Filmstock” media, and drop it on track 2. Stretch it till 12 seconds, then split it at 5 seconds and 22 frames, at 7 seconds and 24 frames, at 8 seconds and 24 frames, and at 10 seconds and 10 frames. Now, delete these two parts. Select "Gray" color, go to the "Color," do some color adjustments to make it more retro, then copy the effect and paste it on further gray parts.
Go to "Gradient Color," choose one color, and insert it in the gap of track 2. Also, do some "Color" adjustments to give it a Fade effect. Then, choose different "Glitch" Transitions on every intersection point and keep the duration between 6 frames and 10 frames.
Next, drop the "Default Title" at 6 seconds and 9th frame on track 5. Enter the word "Press Start," and change the font to "Press Start 2P," size to 28. Adjust its "Position," turn on the "Opacity" keyframe, and set "Opacity" to 0. Again, set "Opacity" to 100 after 10 frames. Add a blank keyframe in 2 frames, and set "Opacity" to 0 in 10 frames. Repeat the same process till the 9-second and 15th frames.
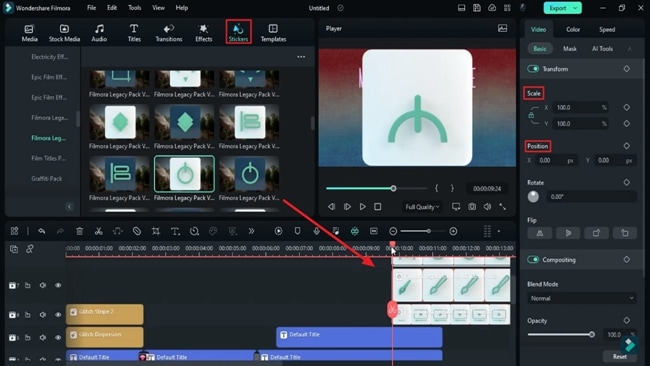
Then, go to the "Sticker," and under "Filmora Legacy Pack," you will find these awesome animated icons. Drop 3 icons on the timeline at the playhead "Position," change "Scale" to 40 for all 3 icons, and adjust their "Positions." Move them to 9 seconds and extend the duration. Then, go to the "Sample color" in the "Solid Color" section, drop solid 8 colors on track 9, and keep it for 5 frames.
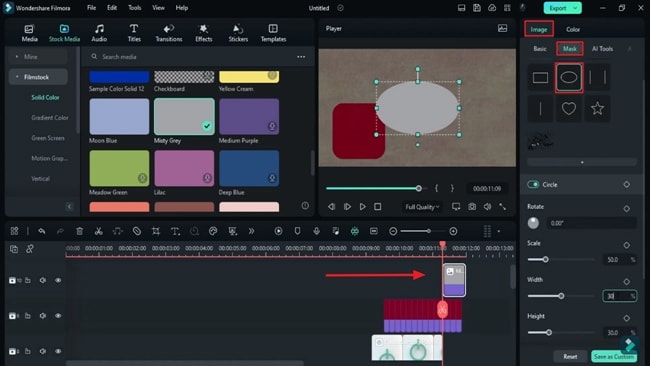
Select rectangle "Mask," change "Width" to 35 and "Height" to 35. Place it on the first icon, and change "Radius" to 21. Go to "Basic," and now you can check which "Blending Mode" looks good and apply it. Reduce "Scale" a bit and adjust "Position," copy and paste it further on the same track till the end. Select colors one by one, and change "Position" randomly on other icons. Now, at 10 seconds, apply the gray color on track 10 and keep it till 12 seconds. Copy a few red colors and paste them further.
Now, shrink the gray color to 11 seconds, and on the 9th frame, select "Circle Mask," change "Width" and "Height" to 50, and "Scale" to 200, and click "Invert Mask." Then, extend icon duration, select gray color, set "Scale" to 53.9 in 10 frames forward, then go 5 frames forward and set circle on middle icon and reduce "Scale" to 1.
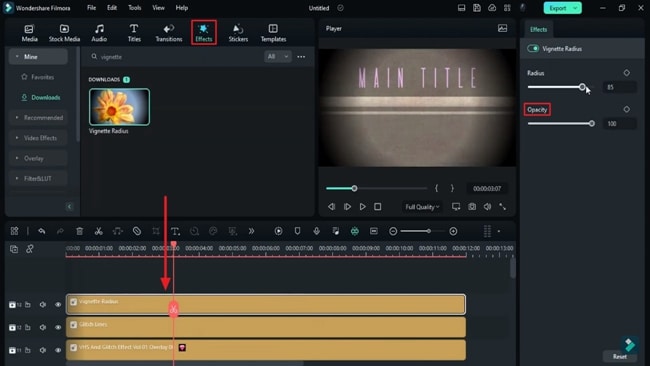
Go to the "Effect," search for "VHS," and apply the "VHS and Glitch" effect on track 11 to 12 seconds. Then apply "Glitch Lines" on track 12 to 12 seconds. Search for "Vignette" and apply for it. Change "Radius" to 100 and "Opacity" to 54, now export it at a higher rate.
Delete all the files from the timeline and import the clip that we have created. Drop the old TV image on track 2, increase its "Scale," and set "Position."
Then, go to the "Mask," select “Pen Tool,” and create a mask around the screen. Drop the main clip to track 1, adjust its "Scale," unlock "Scale," and increase Y "Scale" to fit it into the screen. Increase the old TV image duration to 12 seconds. Now, render it to see the final preview.
Guide on How to Create Retro Intro Effect using Filmora
What you need to prepare:
- A computer (Windows or macOS)
- Your video materials.
- Filmora video editor
Import the Required Media and Drop it to Timeline
First, you must create a "New Project" after initiating Wondershare Filmora. Upon reaching its main interface, go to the "Media" tab in the top toolbar and import the necessary files. To create this effect, you’ll need two snapshots: one of a line and the other of a square.
The shape can vary according to your preference. Download and import a vintage TV PNG image. Now, drag and drop the snapshots to timeline tracks accordingly. Increase the duration of both tracks but keep them equal so that you can see both shapes and snapshots on one screen.
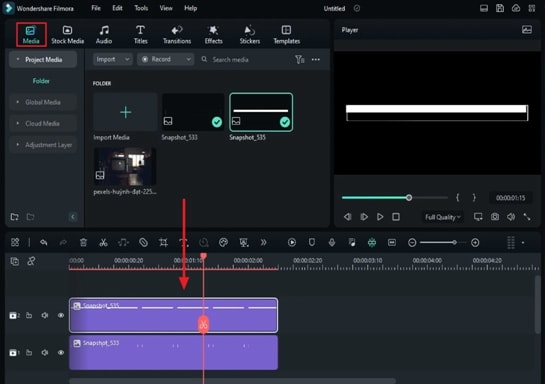
Click on the snapshot in the second track, and from the right side of the screen, go to the "Image" tab. Under the "Basic" category, adjust its "Scale" and "Position" and unlock the "Scale." Repeat the same process for the other track to help align both snapshots perfectly.
Apply Linear Mask
Because we're making this intro retro for a video, it requires motion. For this purpose, place the playhead at the start of your second track and proceed toward the "Mask" category under the "Image" tab. From there, select and place the “Linear” mask on snapshots and enable "Invert Mask" from the options below.
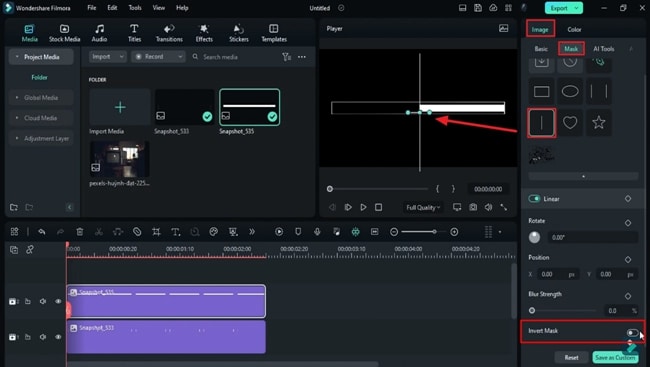
Slide the linear mask on the left side of the screen and turn on the "Position" keyframe from the same panel on the right. Go to the timeline bar, place the playhead a few frames further from the starting point, and, at the same time, slide the linear mask slightly to the right, which needs to be continued till the end.
Add a “Loading” Text
You might have seen that videos with retro intros mostly start with a "Loading" text. Here, we're going to add that in our intro. Following that, go to the "Titles" tab in the custom toolbar and find "Default Title." Click the "Default Title" and bring it to a different track in the timeline. Increase its duration and split it from the part where its duration matches the other two tracks.
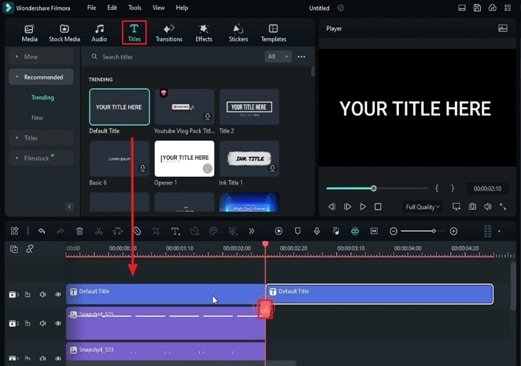
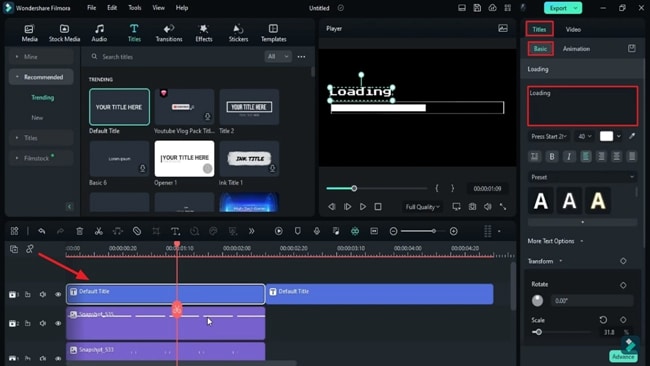
Click the first split clip and go to the "Titles" tab on the right-side panel. Under the "Basic" category, write "Loading" in the text box and select the font style and size according to your preference. Afterward, go to the preview screen and set this text in a suitable position.
Import Effect to Tracks
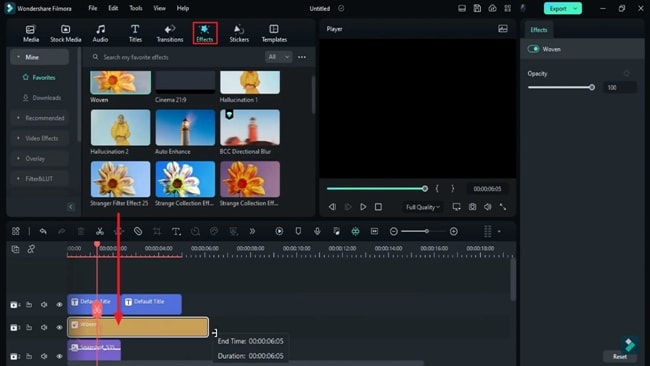
Shift this recently edited "Loading" text to another track above and go to the "Effects" tab in the custom toolbar. On the left side, you'll see many effect categories; find and drop a suitable effect on the timeline track and increase its duration by dragging the playhead.
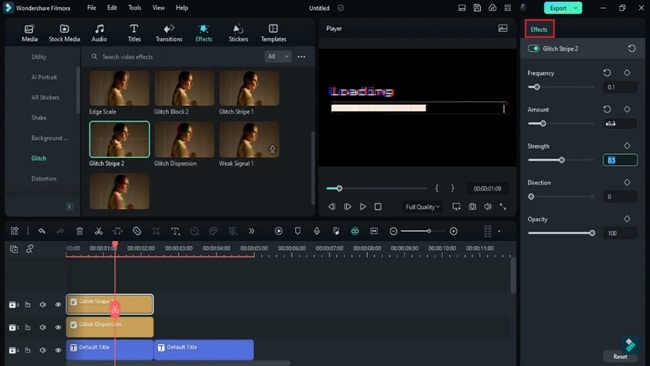
Similarly, drop some more glitch effects from the "Effects" tab on different timeline tracks. Enhance the glitch of these effects by navigating towards the "Effects" tab on the right-side panel.
Add the Main Intro Text
It is time to add and edit the main intro text of the video. Go to track where you shifted the second clip and increase its duration. Select it and add the text similar to the one you added for the other split clip. After adding your text, place the playhead further and split the second split clip further.
Apply Glitch Transitions
After splitting the second split clip, go to the "Transitions" tab on the custom toolbar. Then, under the "Glitch" category, download any transition you like and bring it to the track where your split clips are. Drop this transition between the split clips and keep its duration short. Similarly, apply another glitch transition between other split clips and adjust its duration accordingly.
Look For Solid Color
To make your effect more retro, go to the "Stock Media" tab at the top toolbar. Under its "Filmstock" category, you'll find many colors to enhance the Retro theme. Choose a color and drop it on the timeline track and increase its duration, and split it into small parts. Delete some split parts in between and do further color enhancements for its first split clip.
Right-click on it, choose "Copy Effect," and select "Paste Effect" on other split parts. This way, all split parts will have similar color enhancements.
Add Color Gradients
Following a similar process, go to "Gradient Color" and choose a color. Add this color between the empty spaces of recently added color’s split parts. Make some color adjustments for these gradient colors to give them a faded outlook. Drop glitch transitions between the points of intersection of these colors. However, the duration of these transitions should be brief.
Include Secondary Text To Video
Add a "Default Title" in one of the glitch effects tracks and adjust its duration to some timeframes to further reveal the main text. Add your desired text and maintain the text elements, i.e., font style, color, and size. You can also adjust other elements like "Opacity" and "Blending Mode" for this text.
Add Animated Icons
Go to "Stickers" at the top of the custom toolbar and download your desired icons. Add them one by one in the timeline tracks and adjust the duration of these icons per your video's length and preference.
Create Colored Masks for these Icons
Go to the "Solid Color" section, choose a color that aligns with your icon, and drop it to the timeline track. Proceed to "Mask," choose a shape as per your icons, and add it to the track above the icons. While you keep its duration short, adjust the ratio of this mask, its “Height” and “Width” according to icon size.
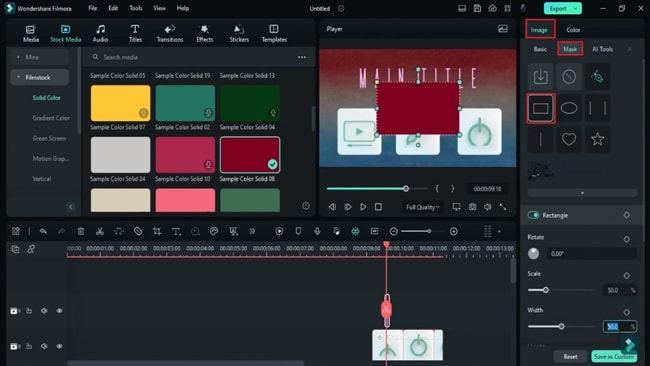
Similarly, to blend these colors, adjust its "Opacity" and "Blending Mode." Duplicate this masking effect further till the duration of all icons. Select these duplicated parts and adjust their "Position" further. This way, the color will reflect on all icons.
Apply Mask to the Overall Video
For adding an entire mask, go to "Solid Colors" and add a grey color to track above the masked icons and duplicate some of the colored masked icons to paste further. Keep the duration of track the recent track short and at the end of the Video. Then go to "Mask," select the appropriate mask, and change its "Width," "Height," and "Scale" to fit the whole screen.
Apply Final Effects to the Overall Video
Go to "Effects," search for relevant effects, and apply them on the above tracks. Afterward, increase their duration and adjust other elements like "Opacity." The time duration of these three tracks must cover the duration of all tracks in the timeline. Now, "Export" this video and delete all the media from the timeline panel.
Final Editing & Exporting
Import the exported file in Filmora and drop the old TV PNG image into the timeline track. Go to the "Mask" and draw a mask around the TV screen with the help of the “Pen Tool.”
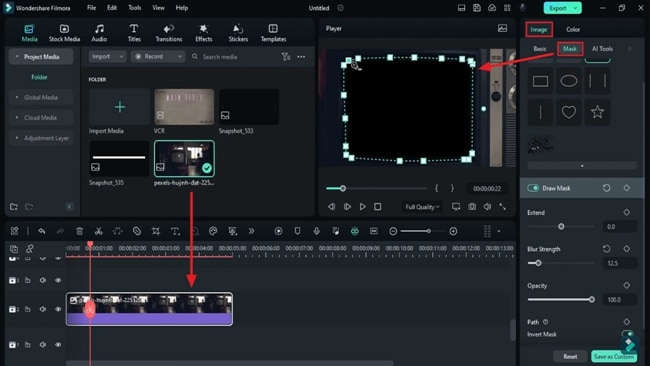
Drop your imported clip to the timeline and adjust its "Scale" and "Position" according to the TV's screen. From the timeline panel, equalize the duration of both tracks and click the "Render Preview" button on the timeline toolbar. If the results are eye-catching and accurate, click "Export" for the final Video.
Now that you have gone through the steps of this video, you can make your videos creative immediately. You can experiment with multiple other effects in Wondershare Filmora along with the Retro Intro effect. The platform leaves no chance to enhance your content, be it audio or video.


