Transcript
In this video, we will show you how to create this switch world effect in Wondershare Filmora. To shoot this video, you need to use green screen cloth and spread it on the floor under your workstation. Then, hold a camera in your hand and pretend like you are working on your laptop. Then, after finishing work, move towards the green screen and pretend like you are relaxing.
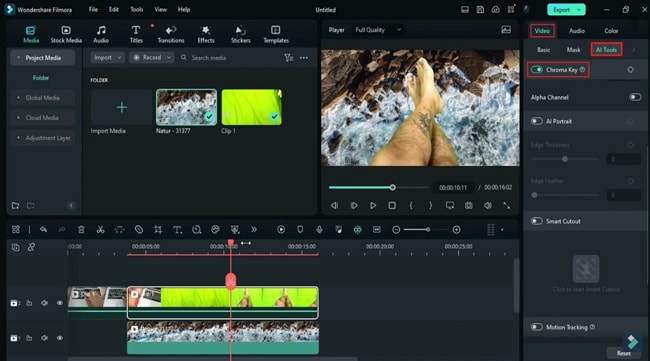
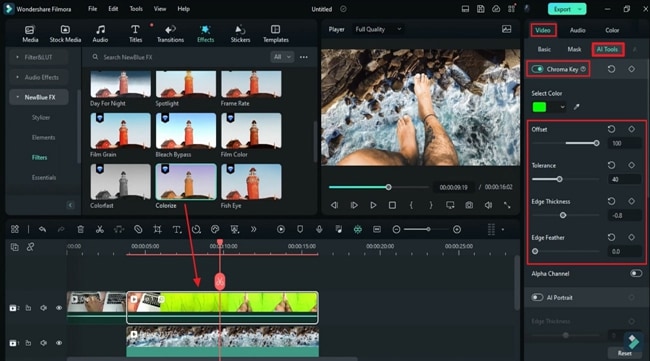
Now drop your clip on track 2. Split your clip right before the green screen shows up, then drop the short clip on track 1. Starting at the split clip, keep it as long as our main clip. Then select the split part, go to the "AI Tools," and turn on "Chroma Key."
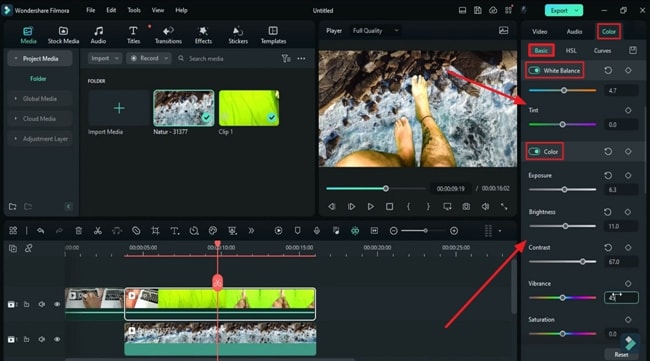
Now, you will start seeing the background video. When you move forward on the timeline, you will notice the legs have green reflections. To remove this green reflection, go to the "Color" select "Gravity" pretest, change "Temperature" to 4.7, "Exposure" to 6.3, "Brightness” to 11, "Contrast" to 67, "Vibrance" to 45, and "Saturation" to 25. Now you can see that the green color reflection is properly visible.
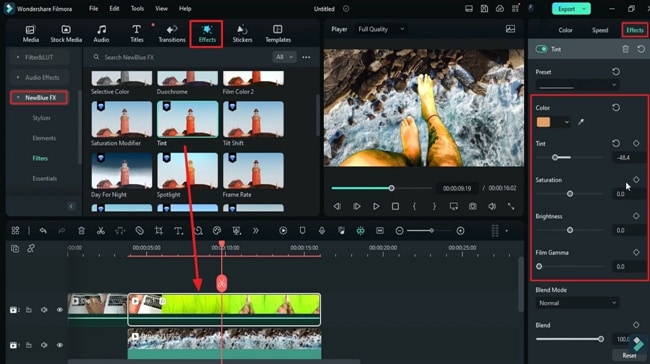
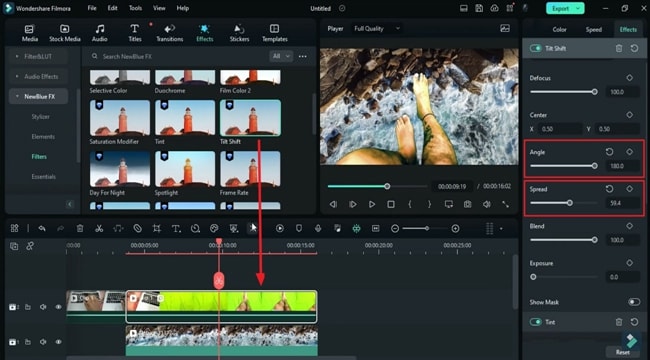
Go to the “Effects” and under “NewBlue FX," apply the "Tint" effect. Go to the "Effects" setting and change "Color” to the skin color. Set “Tint” at -48.4, “Saturation” to -25, and “Brightness” to -1.6. You can increase the film grain if required. Then apply the "Tilt-Shift" effect, change "Angle" to 180, and set "Spread" to 59.4.
Then apply the “Selective Color” effect. You can check these presets which fit best, or you can do settings manually. Change "First Color" to skin color, increase "Range" to 38.5, and "Soften" to 37. Now, apply the "Colorize" effect, change "Strength A" to 35, choose skin color, and set "Strength A" accordingly. "Strength B" to 100, "Smoothing" to 0, and "Saturation" to 49.2, and you will notice all green reflection is gone.
Now, go back to “Selective Color” and adjust “Range” and “Soften." Then go to the "Color" and make some final adjustments according to your clip. Then go to the "Chroma Key" and adjust "Tolerance," "Offset," "Edge Thickness," and feather to remove the black outline. You can use "Alpha Channel" to adjust; now, let's render it.
Again, make some adjustments to "Chroma Key" if required. Further, you can play with the colors to blend your footage with the background.
Tutorial on Creating Switch World Effect by Filmora
What you need to prepare:
- A computer (Windows or macOS)
- Your video materials.
- Filmora video editor
Import Clips and Match Their Duration
At first, make a video and shoot the required part on the green screen. Afterward, access Wondershare Filmora and start the new project. You’ll now enter into the tools editing interface. Here, import your media by simply dragging and dropping videos from your system to the media panel. Following this, choose the clip and drop it on the timeline panel on the required video track.
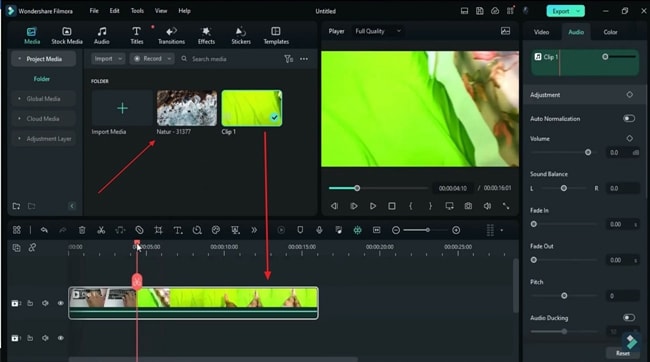
Next, select your video and split it into two clips by adjusting the playhead before the green screen. Now, select the background clip and place it below the already imported clip. Adjust its duration according to the original clip.

Enable Chroma Key to Use AI Tools
Move forward and select the already split green screen part of the video. Head to the settings panel, and under the "Video" tab, choose "AI Tools." Here, you will see the "Chroma Key" button. Enable it, and you will notice that the green screen has disappeared and your object has your desired background.
Make Necessary Color Adjustments to Blend Clips
Then, by moving the playhead, you might notice that your object has some reflection of the green screen. To remove this, select your video layer and enter the settings window. Continue into the "Color" tab, and select “Basic” to perform color adjustments manually or by choosing the already available preset. You can manually adjust the colors under the "White Balance" and "Color" sections by moving the sliders.
Drag and Drop Multiple Effects and Adjust Values
However, if you still want to make some adjustments to your footage, head to the "Effects" tab and drag and drop multiple effects on your video from “NewBlue FX” or any other effects options. Select each effect and head to the settings panel to adjust it. You can choose the “Effects” option and set the options of “Color,” “Tint,” “Saturation,” and “Brightness.” Moreover, you can also adjust “Film Gamma” if needed.
Now, apply some other effects on the video and adjust their “Angle” and “Spread” values accordingly. Eventually, you can automatically adjust colors by choosing a pre-defined "Preset" or set it through manual means. Drag and drop some other required effects, too, and set the values for them accordingly.
Make Some Final AI Adjustments and Render Preview
Finally, head to the “Video” tab and continue into the “AI Tools” section in the right-side panel. Under the “Chroma Key” section, adjust the values for “Offset,” “Tolerance,” “Edge Thickness,” and “Edge Feather.” After that, “Render Preview” your video and see the final results. If you want some further adjustments, you can do so by changing the "Chroma Key" values.
In the era of fast-growing technology, creativity has become rare. The right tool can save a lot of time and effort in engaging video creation. Creating switching worlds video effects is a unique and classical addition to any video. With the provided instructions, you have now learned to create world-switching tricks by using Wondershare Filmora.


Speak Your Mind