Transcript
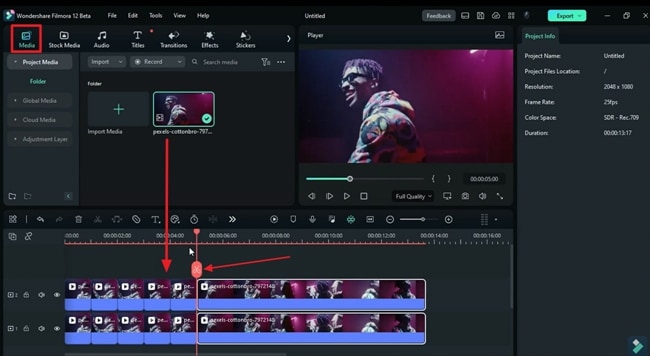
The first way to create the time lag effect is to drop the same footage on track 1 and track 2. Then split both on every second and stop splitting at a point where you want this effect to end. Now select the first split part of the track 1 clip and bring it to track 3. Make sure your playhead should be at the start of the footage.
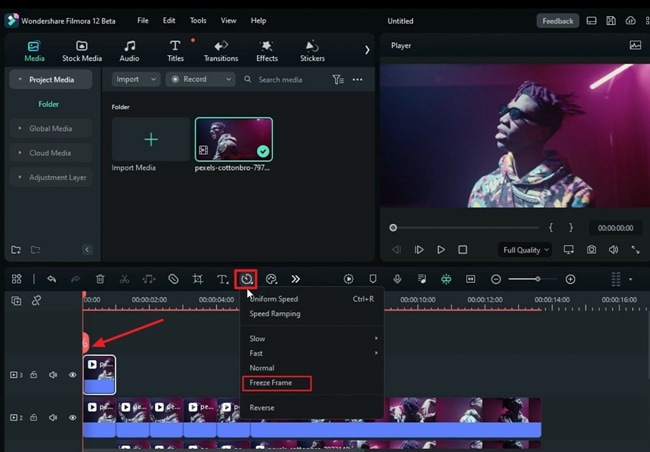
Then click on the “Stopwatch” icon and select “Freeze Frame.” Now, shrink the clip duration to one second and move it back to track 1. Do the same for the rest of the split parts on track 1. Next, go to the start point and select the first split part on track 2. Turn on the "Opacity" keyframe and reduce the "Opacity" to 0% at the starting point. Then, increase "Opacity" back to 100% at the end of the split part and repeat the same for the rest of the split parts of track 2.
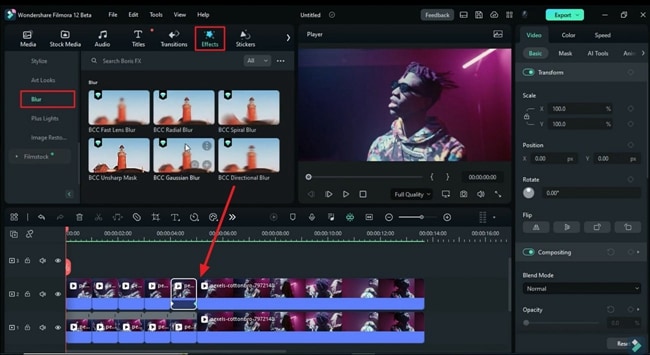
Now, let's see the final preview. Further, if you want to add variation to this effect. You can add a “Blur” effect to it. The best options are “Fast Lens Blur" and "Directional Blur."
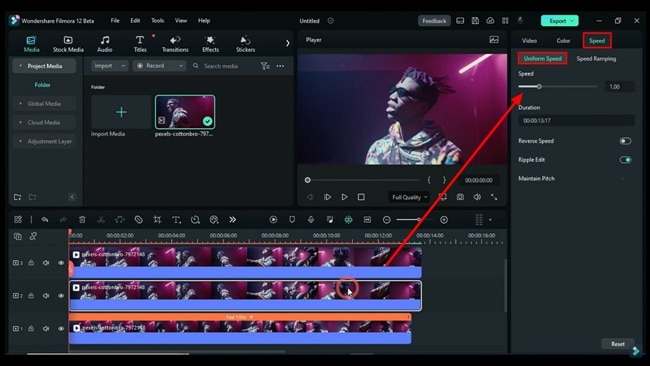
Now, moving to the second way to create a time lag effect in Filmora. Drop your same footage on three tracks. Select track 1 clip, go to the “Speed” and change “Speed” to 1.03x. Then select track 2 clip and change “Speed” to 1.05x. Go to the "Video" and change the "Opacity" level for the track 2 clip to 30 %. Then select track 3 clip and change "Opacity" to 75%. Now, if we play this clip, we'll see a different time lag effect. Go to the "Effects" and apply the "Fast Lens Blur" effect on track 2 and track 1 clip. Now, let's play it.
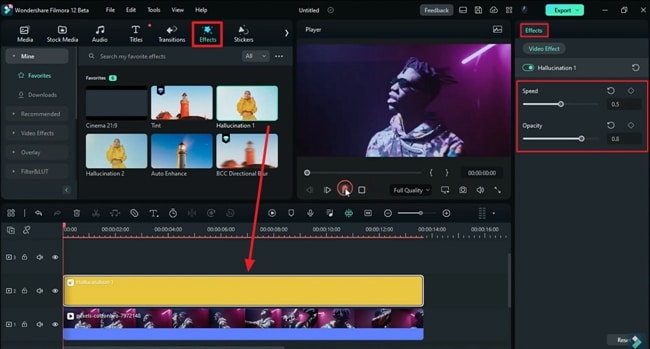
Now, moving to the third way to create a time lag effect. Just drop your footage on track 1. Then go to "Effects" and search for "Hallucination 1," and drop it on footage, and done, now let's play it. You control the speed and opacity of this effect by sliding “Speed” and “Opacity” towards the right and left.
Three Ways to Create Time Lag Effect in Filmora
What you need to prepare:
- A computer (Windows or macOS)
- Your video materials.
- Filmora video editor
Import Your Media and Split the Clips
To start the project in Filmora, hit the “New Project” icon on the main interface of Filmora. This will take you to the editing interface to create the time lag effect. After that, hit the "Media" tab and import your clips in the media panel. Select your clips, drag and drop them on the timeline panel. Now, split your clips by adjusting the playhead. After that, stop splitting the clip at the point where you want to stop the effect.
Add Freeze Frame to Your Clips
Select the first split part of the clip and place it on another required track. Afterward, place your playhead at the start and head to the timeline toolbar. Look for the “stopwatch” icon, select it, and choose “Freeze Frame” from the dropdown list. Next, shift this clip back to its original place. Repeat the same process for all the split parts of the clips.
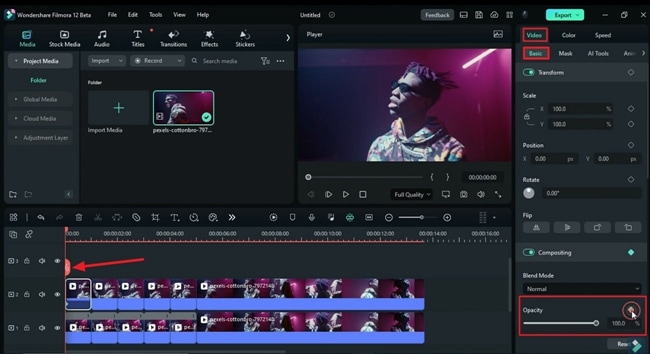
Select the clip and head to the “Video” settings in the right-side panel. Next, choose the “Basic” tab, scroll down, and find the “Opacity” option. Turn on the respective keyframe and adjust the “Opacity” percentage at the start and end of the video clip.
Insert Blur Effects to Your Clips
To add effects to your clips, select the “Effects” tab, and from the left-side panel, choose any “Blur” effect. On successfully selecting one effect, drag and drop the effects on your clips.
Set the Speed for the Required Clip
For the other way to add the time lag effect in Filmora, select the clip and head to the "Speed" tab in the right panel. As you navigate into the speed settings, choose the “Uniform Speed” section and increase the "Speed" as required. You can also increase the “Speed” for multiple tracks. Furthermore, adjust the "Opacity" level for this track from the "Video" settings under the "Basic" tab.
Third Way to Create Time Lag Effect
Another simple way to create the time lag effect is to navigate to the "Effects" tab and look for any effect that will create the time lag effect. Choose that effect and set its duration accordingly. Following this, if you observe that it needs any adjustment, go to the “Effects” settings from the right panel and adjust the “Speed” and “Opacity” levels under the “Video Effect” section.
Having the right tool is useless unless you don't know how to use it. In Wondershare Filmora, applying the effects on videos in different ways is the best thing so far. In this guide, you learned to create a time lag effect using three different methods.


