- Home
- DIY Special Effects
- Create Kinetice Typography Text Effect in Filmora
Transcript
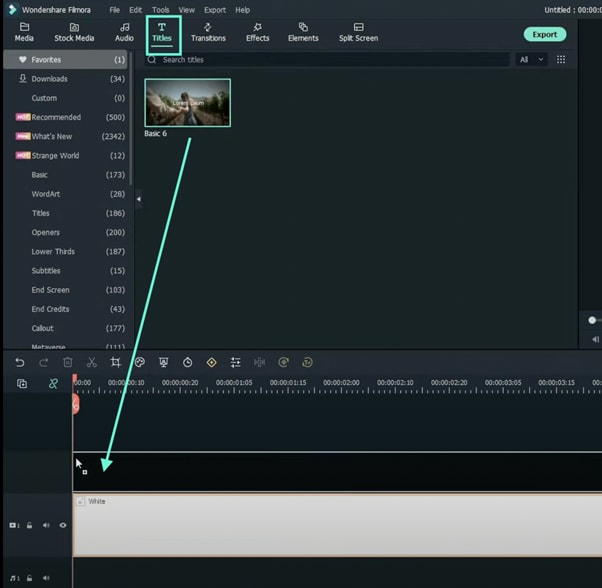
First, go to sample colours. Drag any colour to the timeline and go to the titles tab. Drag basic title to the timeline, right click to edit properties, open advanced panel, and change font colour.
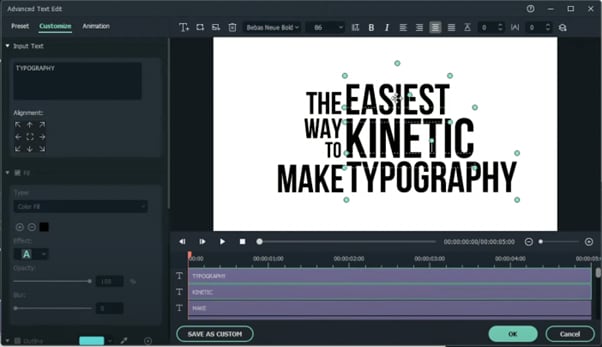
Type whatever you like, split all the words in the sentence and move them to random position. Adjust the text as you like.
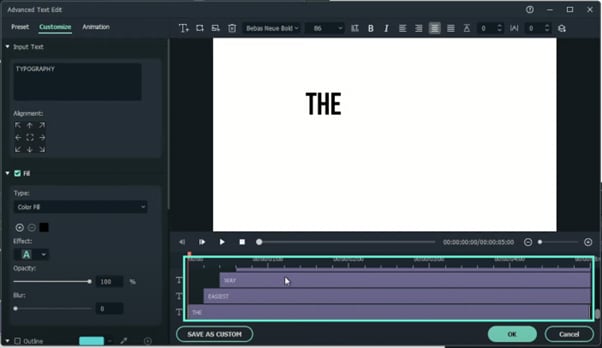
Go to text layers, select the second layer, move it five frames forward. Now do the same to the rest of the text layers.
Export the timeline, name it, and clear the timeline.
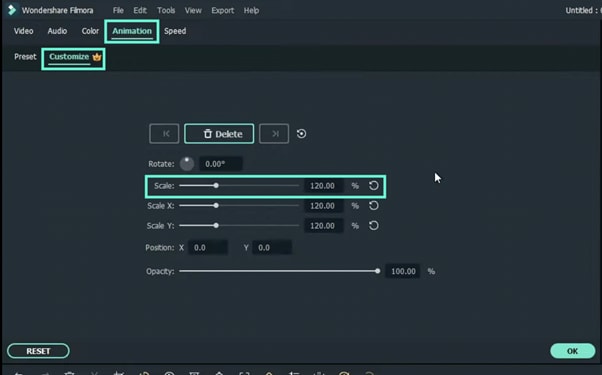
Import the text footage, drag it to the timeline, right click to edit properties, and click Animation. Customize change scale to 120.
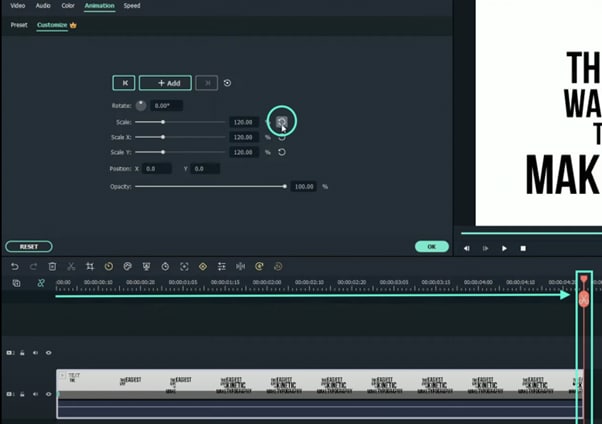
Now move the play head to the end, reset the scale, click ok. Now let's see the preview.
Kinetic Typography Text Effect 【EASY&FAST】
What you need to prepare:
- A computer (Windows or macOS)
- Your video materials.
- Filmora video editor
Go ahead and download the Filmora video editor before all else. The program will install and start automatically. Just hit “Download” and then “Install”.
Once the program starts, open a New Project. Then, go to “Sample Color” and drag any color you want to the Timeline.
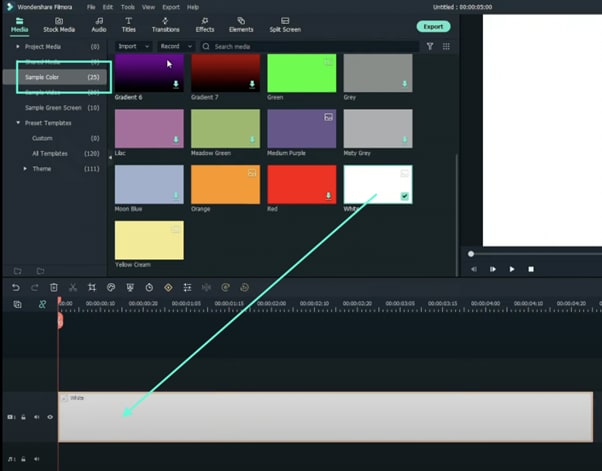
Now, head over to the “Titles” tab and drag the Basic Title to the Timeline. Place it above the Sample Color clip.
Right-click on the Title clip in the Timeline and select Edit Properties from the menu. From there, click on “ADVANCED” to open the advanced settings. Here, you can change the font, adjust the text size, and place your titles wherever you want on the screen.
Now, start with the second text layer from the bottom and move it 5 frames forward. Move each text layer above 5 layers forward from the previous layer. This will display each word a few milliseconds after the previous one.
When you’re done, click OK.
Export the Timeline to save your text animation as a new clip.
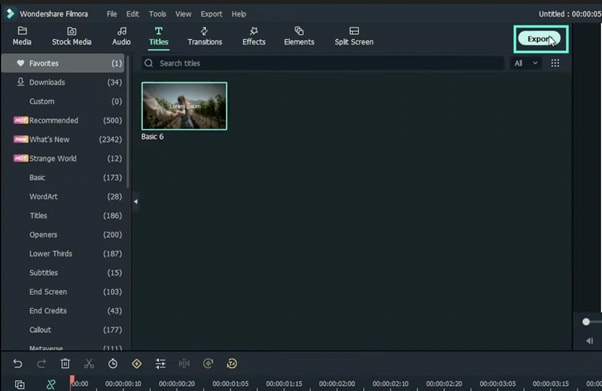
Now, delete all the clips from the Timeline and import the text video you just exported. Drag it to the Timeline.
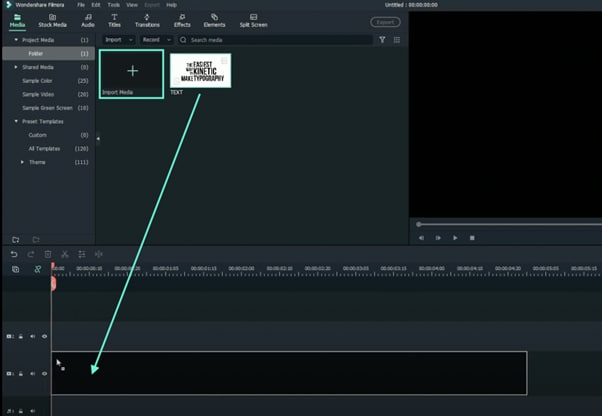
Right-click on the clip in the Timeline and go to Edit Properties.
Click on the Animation tab. Then, go to the Customize tab. Here, change the Scale setting to 120%.
Next, move the Playhead to the end of the clip in the timeline. Then, reset the Scale and click OK.
Watch the final preview. Then, Render and Export the video and you’re done. Congratulations.
What you've learned:
- How to create a kinetic movement effect on text in Filmora
- How to adjust the scale of a video in Filmora
- Adjust and manipulate text layers


