How to Create Text Crack Effect
Text effects are used in videos, especially text-oriented videos, to make the text more noticeable and relevant. A type of text effect, the text crack effect is primarily used in titles and headings to give them a unique and classy look. Filmora helps you in creating eye-catching text crack effects with a simple-to-follow process.
Tool
Assets
Transcript
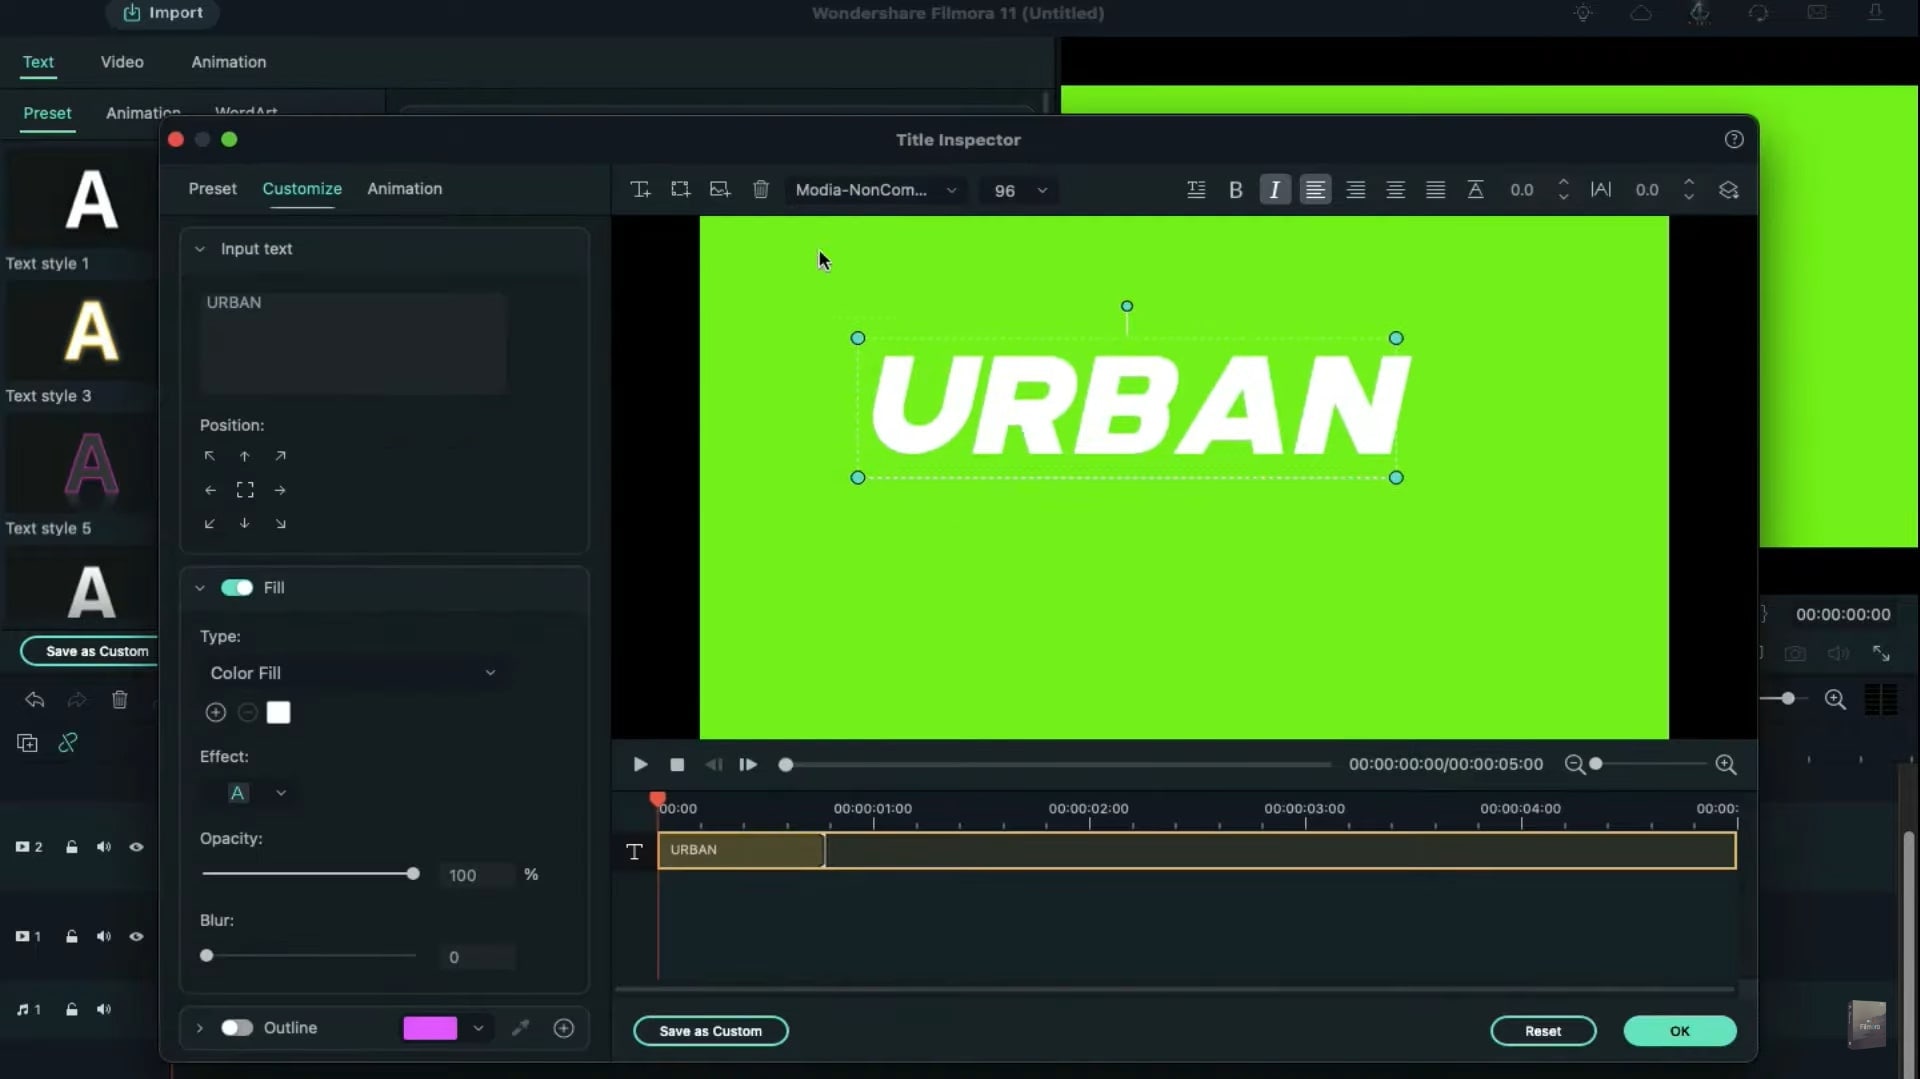
First, go to the Sample Color and drop the green color on the timeline. Then, drop the default title. Change the font to any bold font and change the font size to 96. Type your word and make it in italics.
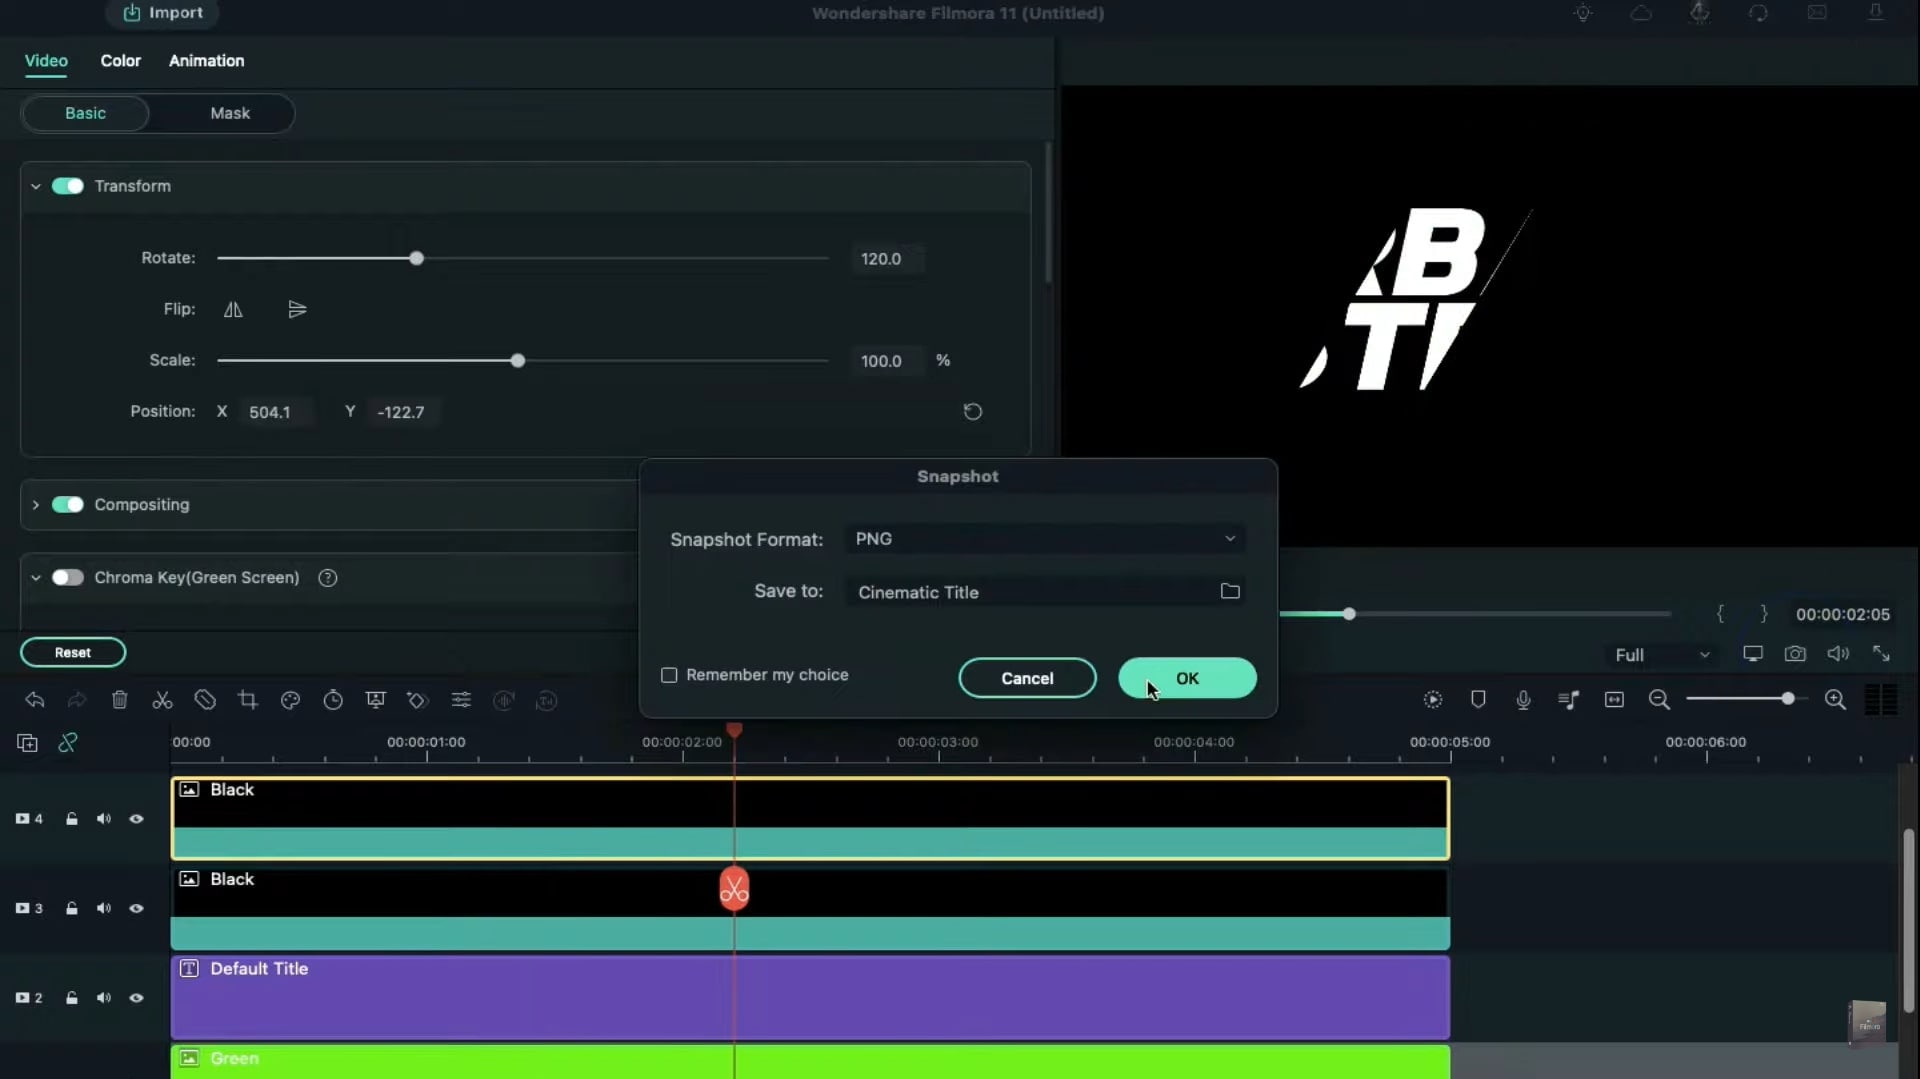
Click on Advanced, adjust the title's Position and add another text underneath and press ok. Drop the black color on the timeline. Go to the video and rotate it at 120 degrees. Move it to the left side of the title.
Drop another black color. Rotate it at 120 degrees and move it to the right like this. We'll use these black colors as a mask. Now use the green color as a tracker. Hide the green color track and take a snapshot. Unhide the green track.
Move the black color to the right until it covers the green gap. And move another black mask to the right side to reveal part of the green title. Hide the green track and take a snapshot.
Do the same with leftover snapshots. You can change the black color's Rotation to make an uneven slice effect.
Now, delete all these clips from the timeline. Drop the last two snapshots on the timeline and change the blending mode to screen.
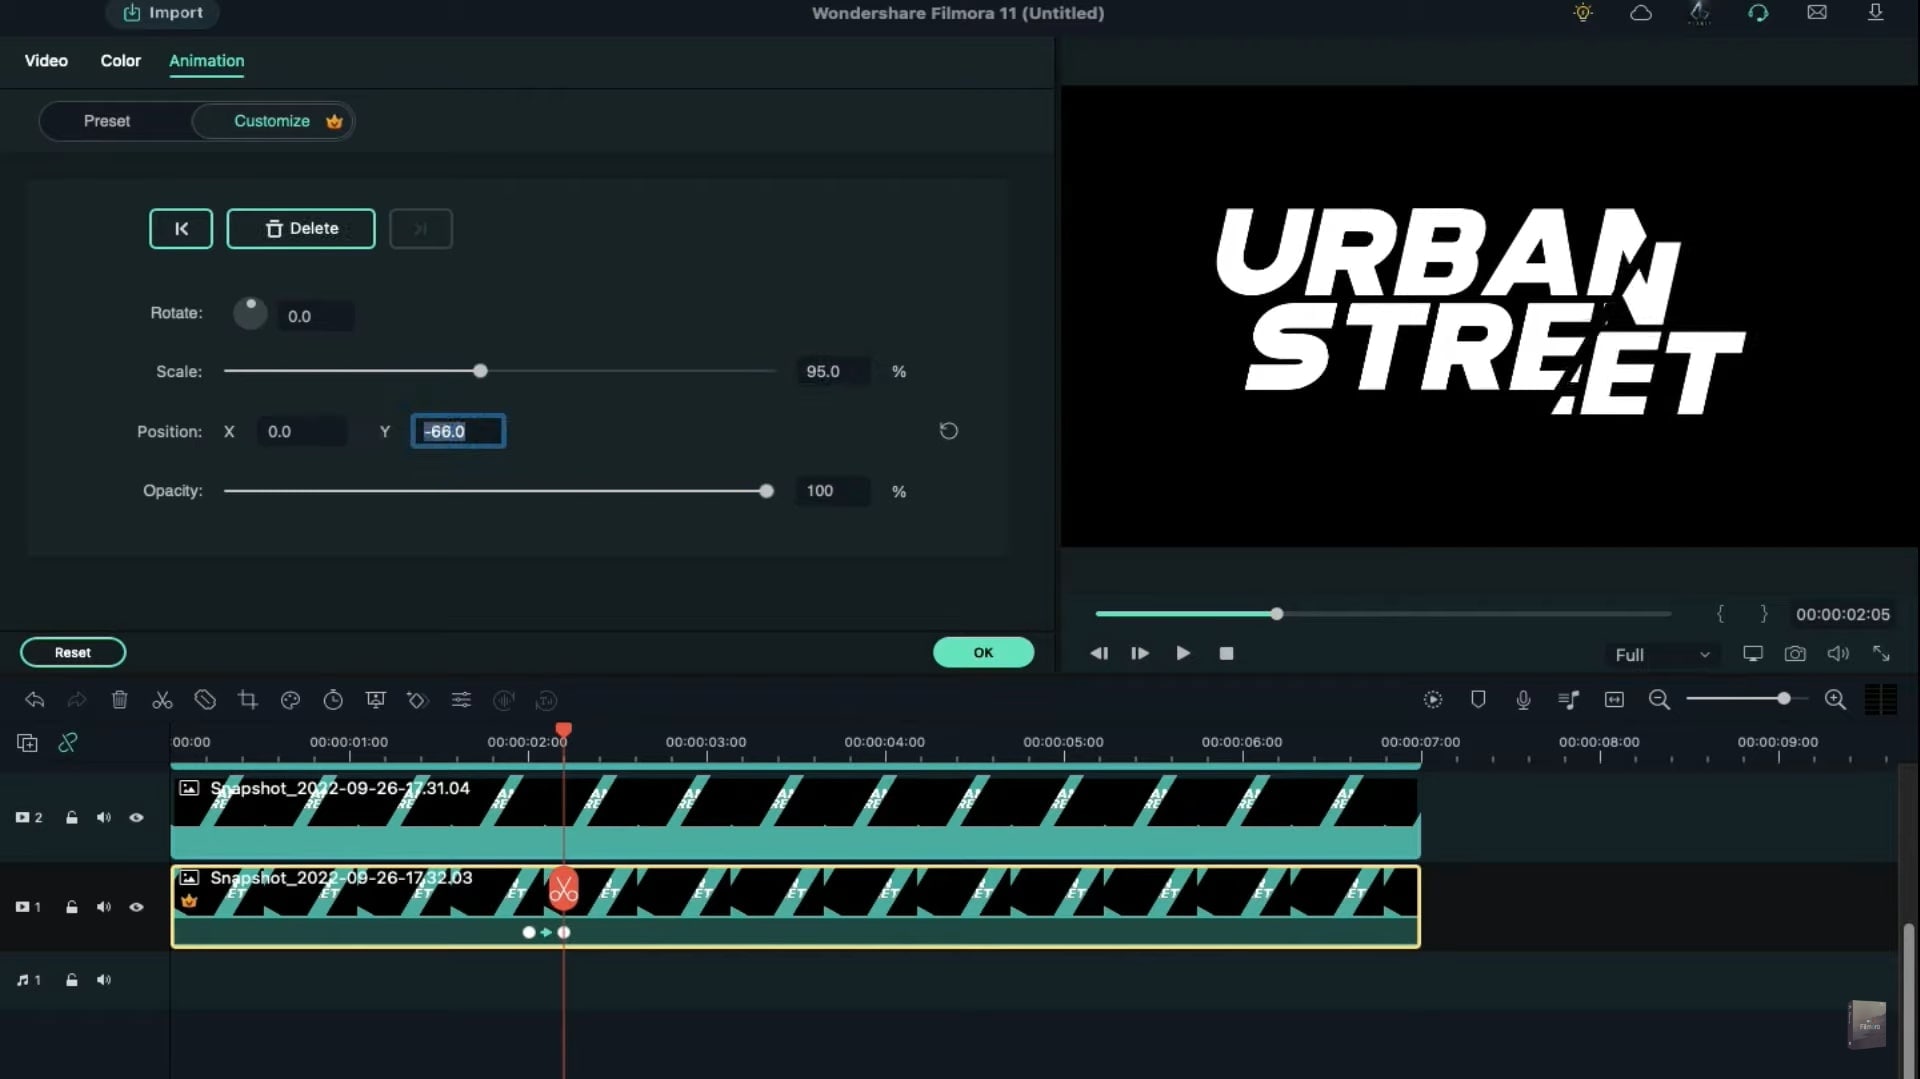
The next step is to make all snapshots 7 seconds long. In terms of track 1, we'll add a blank keyframe at 2 seconds and go 5 frames further. Here we need to change the scale to 95% and the Y-axis to -66.
Located at 4 seconds and 24th frames. Here we change the Rotation to -5 degrees and Y-axis to -177.
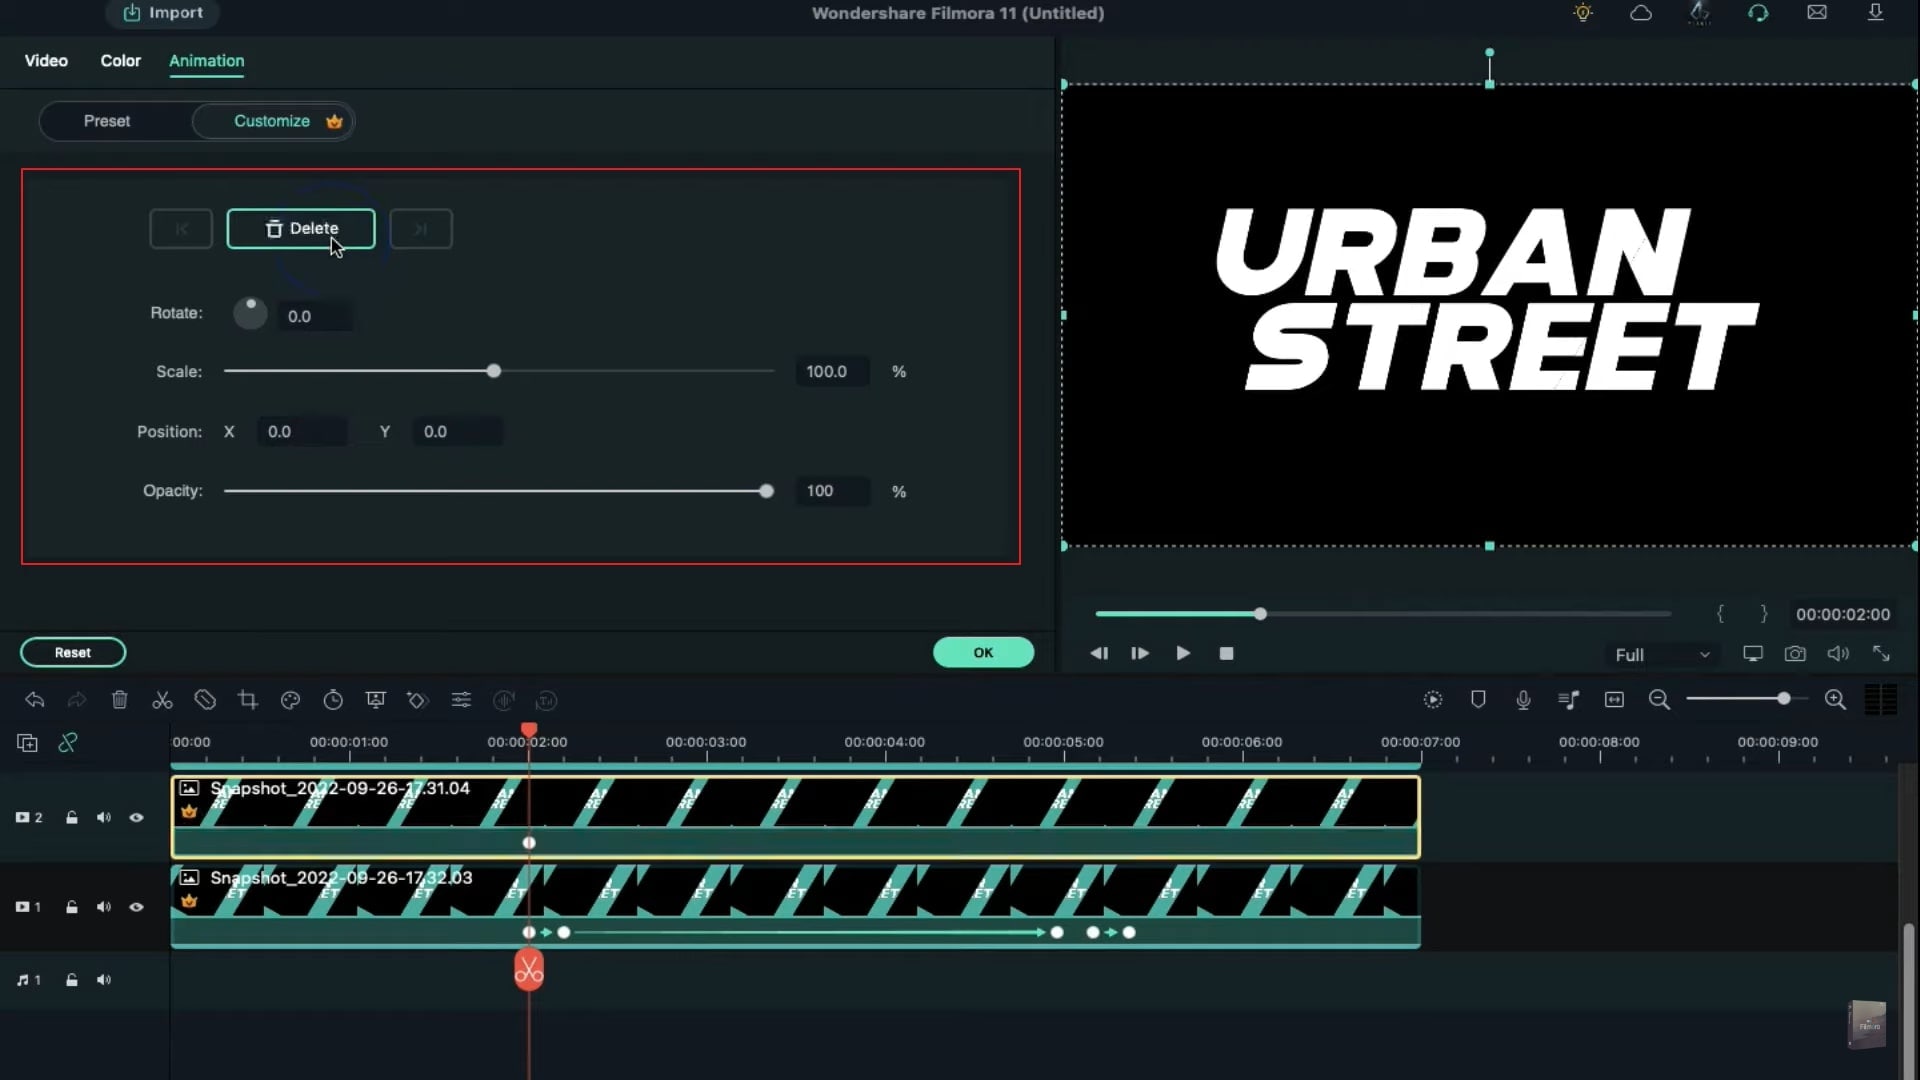
Next, the five frames further. Here, add a blank keyframe and then reset Rotation, Scale, and Position in five frames further.
Let's work on track 2. Add a block keyframe at 2 seconds. Then after five frames, change the scale to 105%. Located at 4 seconds and 24th frames, change the Y-axis to -31 and Rotation to 5 degrees. Then after five frames, add a blank keyframe. Then after five frames, reset the Rotation, Scale, and Position.
Once you're done with all the snapshots, make a one-track gap for each snapshot track. Drop the Vignette.png on track 2 at the two-second Position.
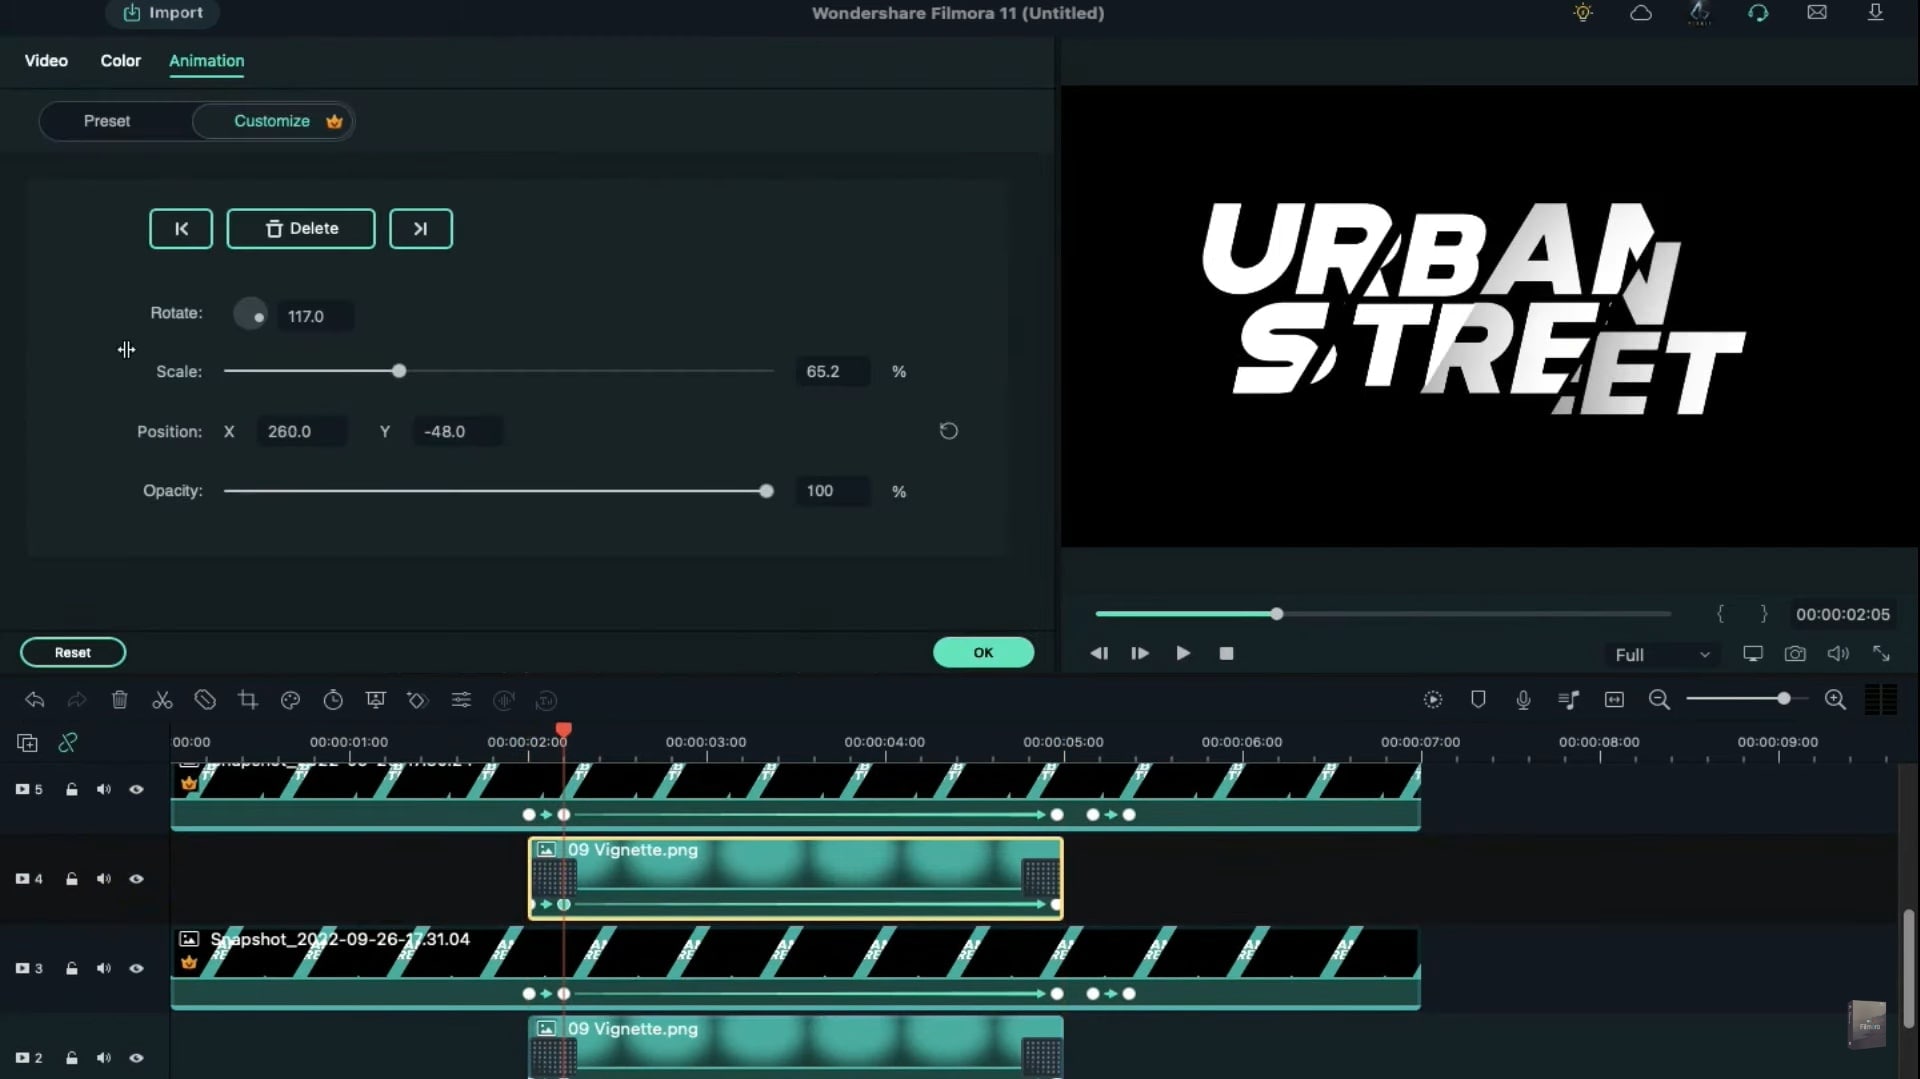
Under the Video tab, we change the Scale to 65 and adjust its Position to create a shadow effect. Go to 5 frames further. Here we rotate it and place it over the last snapshot to create a shadow. And at the starting point, reduce the opacity to 0%. Go further and adjust its Position.
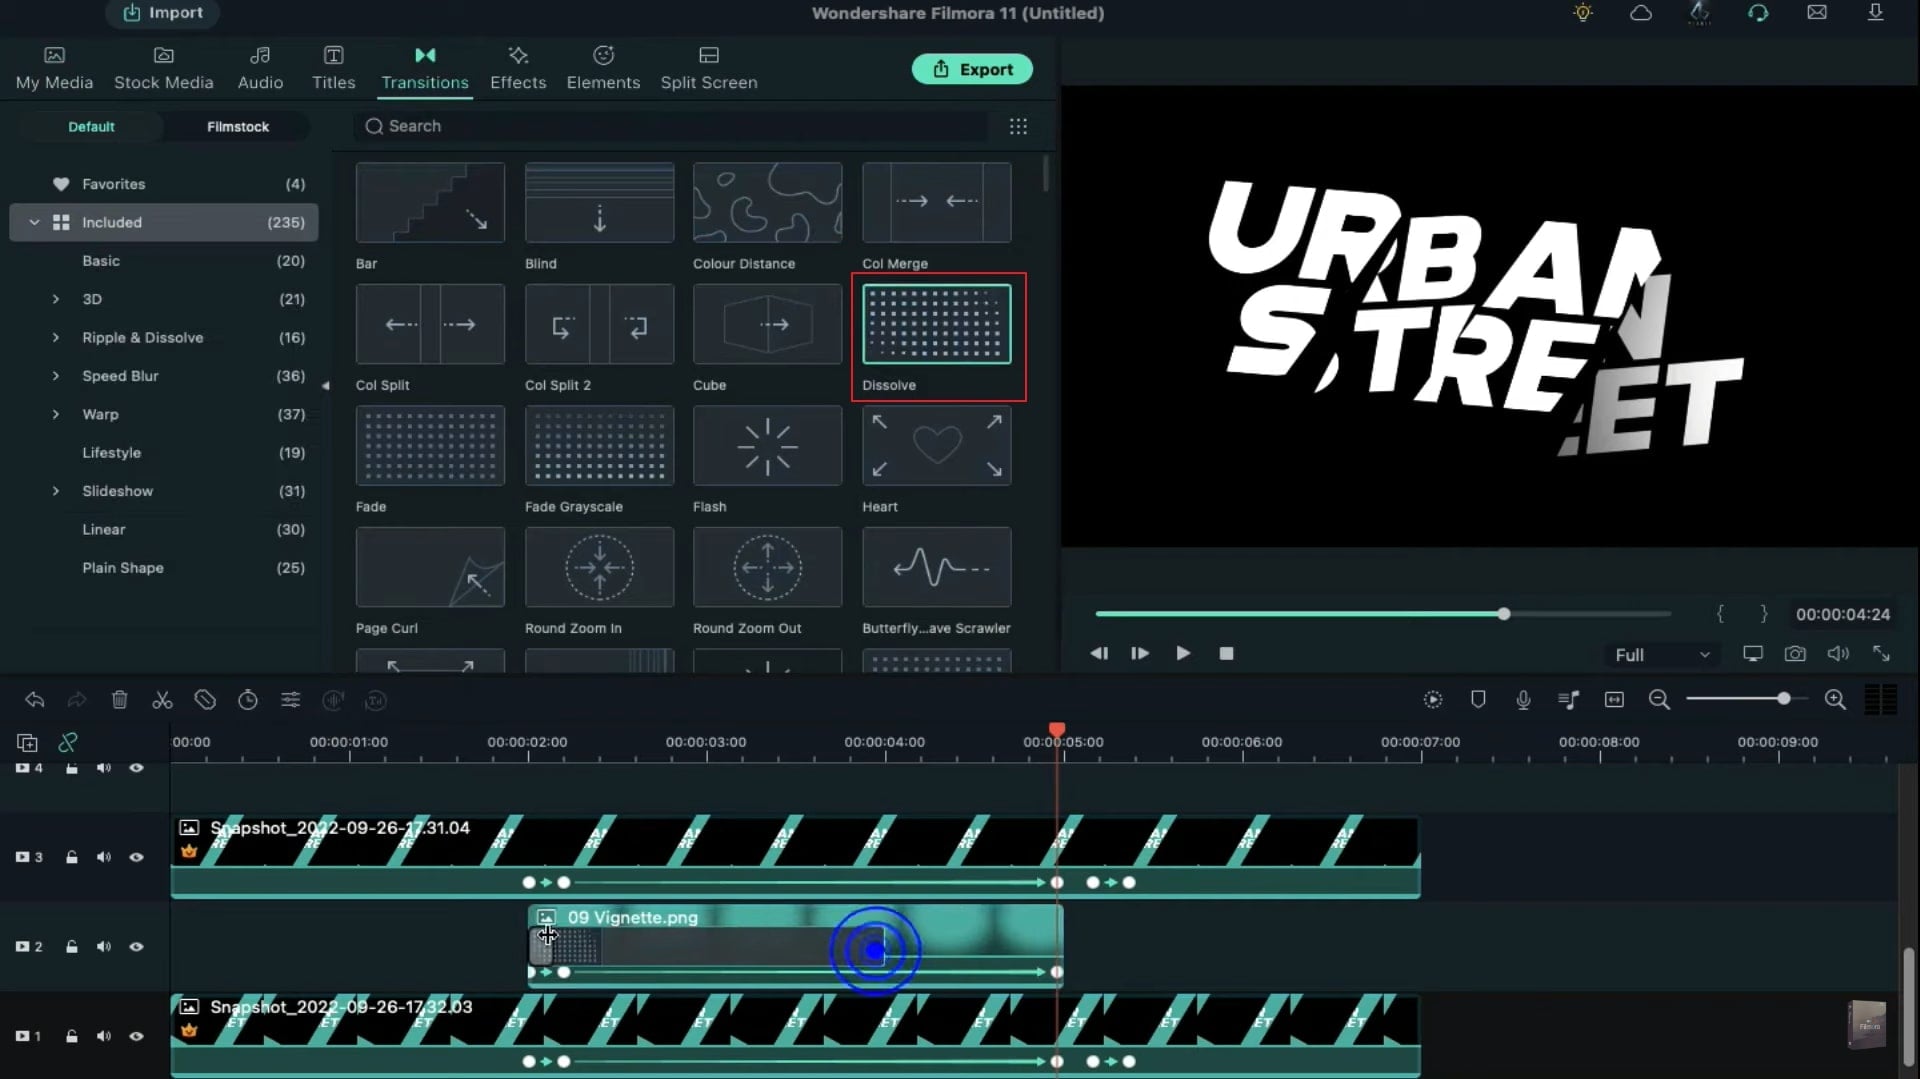
Go to the Transitions and apply a Dissolve transition on the Vignette clip at the starting and end point. Now, copy this Vignette clip and paste it on track 4 and align its Position on the track 3 snapshot.
To make it more effective, apply the Vignette clip on all the clips and align its Position as per your words. In the end, render it.
How to Create Text Crack Effect Video
What you need to prepare:
- A computer (Windows or macOS)
- Your video materials.
- A crack text video editor
To start creating a text crack effect, you first need to download and install Filmora on your system.

When this is opened, go to the Sample Color option and select the green color from it. Drop the green color on the timeline and click on Titles to select and drop the Default Title on the timeline. Change the font style to any bold font and font size to 96. After adding your text, make it Italic and click on Advanced. Here adjust the position of the Title, add another text underneath it, and press OK.
Select the black color from Sample Color and drop it on the timeline. Click on Video to rotate the black to 120° and move it to the left side of the Title. Add another black color, rotate it to 120°, and move it to cover the Title except for a small part. These black colors will be used as masks and green as trackers. Now hide the green color and take a snapshot. Unhide the green part and move the black colors to reveal another part of the green Title. Hide the green color again and take a snapshot. Do this until you have taken snapshots of the whole Title. This step is needed for creating split parts of the Title. You can use black color rotation to create uneven slice effects.
Delete all these clips from the timeline and drop the last two snapshots on the timeline and change the blending mode to Screen. Similarly, add all the remaining snapshots to the timeline. When done, make all the snapshots 7 seconds long. We'll start with track one, add a blank keyframe at 2 seconds, and go five frames further. Here, change the scale to 95% and Y-axis to -66. We change the rotation to -5° and Y-axis to -177 at 4 seconds and 24th frames. Move to 5 frames further and add a blank keyframe. After moving five frames more, reset the scale, rotation, and position.
Add a blank keyframe at 2 seconds when working on track two and move five frames further. There, change the scale to 105% and move to 4 seconds and 24th frames. Here, change the Y-axis to -31 and rotation to 5°. Move 5 frames further and add a blank keyframe. After the next 5 frames, reset the scale, rotation, and position. Do the same with the remaining Snapshots and get all cracked text clips.
Once you create cracked text clips, add one track gap with each snapshot track. Now select and drop Vignette.png from Shared Media and drop it on track two, a gap track, at a 2-second position. Open the video tab, change the scale to 65%, and adjust the position to create a shadow effect. Move to 5 frames ahead and rotate and place it on the last snapshot to create a shadow. On the starting point of Vignette.png, reduce its opacity to 0%. Select the Dissolve Transition from Transitions and add it to starting and ending positions of the Vignette clip. Copy the Vignette clip, paste it into each gap track, and align its position to respective snapshots.
To make your crack text effect even better, add the Vignette clip on all the clips and align it to a position respective to your text. Now render your video, and then you can preview the crack text effect on your chosen text.
Related Templates For You to Try


What you've learned:
- You can change any background in video with green screen.
- Use transitions in video to make it more smoothly.
- Filmora comes with many types of background, including social, busiess, sports and more.
