How to Start A Travel Vlog: 7 Easy Steps
Do you want to make travel vlogs but are unsure where to begin? Relax! Here is how to start a travel vlog in 7 easy steps.
Tool
Assets

How to Start A Travel Vlog: 7 Easy Steps
Traveling is fun, but the fun multiplies ten times more when you share your experiences with vlogs. And if you're also fascinated by travel vlogging but not sure what makes you a successful vlogger, then here's your chance to learn how to start a travel vlog in 7 easy steps.
Travel vlogging has transformed from a hobby into a legitimate career path, with successful creators earning substantial income while exploring the world. Whether you're wondering how to make a travel vlog that stands out or planning how to start a youtube travel channel from scratch, this comprehensive guide will equip you with professional strategies used by top travel content creators.
This article also includes some essential information regarding editing techniques, necessary equipment, and many more. So stick around till the end to get all the vital information you need to begin this fascinating voyage.
Choose Your Vlog Niche
You might have heard the term “niche” several times if you've been searching for vlogging tips. But if you're unknown to this word, consider niche as a particular segment of a market. In the case of travel vlogging, the niche could be anything from solo traveling to food traveling and covering theme parks to extraordinary destinations.
You must have been wondering that there are thousands of people traveling around the world every day. Most of them carry their equipment to record and share their experiences to become famous, but only a few earn the price.
Key Success Metrics for Travel Vlogs:
- Engagement Rate: 4-8% for established channels
- Average View Duration: 40-60% retention rate
- Subscriber Growth: 10-20% monthly growth in first year
- Revenue Streams: Multiple income sources within 18 months
Adventure Filming vs Travel Vlogging: Defining Your Approach
Adventure filming vs travel vlogging represents different content strategies:
Adventure Filming Focus:
- High-adrenaline activities and extreme sports
- Technical cinematography with specialized equipment
- Shorter, action-packed content (3-5 minutes)
- Target audience: thrill-seekers and adventure enthusiasts
Travel Vlogging Approach:
- Cultural immersion and storytelling
- Accessible equipment and techniques
- Longer-form content (8-15 minutes)
- Broader audience appeal with educational value
Hybrid Strategy (Recommended): Combine both approaches to maximize audience reach and content variety.
And once you've got your niche, start preparing for it. Look for the places which are mostly recognized for your niche. And make sure whatever you do, it should be in perfect harmony.
How to Start a YouTube Travel Channel - Strategic Launch {#youtube-strategy}
The next step is to set up your channel for your vlogs. To do that, you first need to think of a unique and attractive name. If you have come up with a name that is already taken, do not lose hope! Keep brainstorming until you find a cool, easy-to-remember, and unique name.
However, it is suggested that whatever the name you choose, it should match your niche and personality. The closer they match each other, the easier it gets for the people to search your videos. Remember, your vlog channel name is your identity, so choose it wisely because it's the gateway to your branding.
After deciding on the name, the second most important task is deciding where to share all your travel video so people can easily view them. The majority of vloggers prefer making a YouTube channel. Undoubtedly, YouTube is the most prominent platform for video content, as there are 122 million people who visit this website every day. But, there are also other video-sharing platforms like Facebook, Instagram, Twitch IRL, DailyMotion, and more. Lastly, add all the required details to your channel, including your profile picture, contact details, and description.
Channel Foundation (Week 1-2)
Channel Setup Checklist:
- Memorable channel name reflecting travel niche
- Professional channel art (2560x1440px)
- Compelling channel trailer (60-90 seconds)
- Consistent branding across all platforms
- Complete About section with keywords
Content Strategy Framework:
Content Pillars (25% each):
- Destination Guides: Comprehensive location overviews
- Travel Tips: Practical advice and life hacks
- Cultural Experiences: Local interactions and insights
- Personal Journey: Behind-scenes and growth stories
YouTube Algorithm Optimization
Title Formulas That Work:
- Curiosity Gap: "What They Don't Tell You About [Destination]"
- Problem/Solution: "How I Traveled [Country] for Under $50/day"
- Emotional Hook: "This [Experience] Changed My Life Forever"
- Listicle Format: "10 Hidden Gems in [Destination] Locals Don't Want You to Know"
Thumbnail Best Practices:
- High contrast colors: Orange, blue, red perform best
- Clear facial expressions: Emotions drive clicks
- Text overlay: Maximum 4 words, readable on mobile
- Consistent branding: Same style across all videos
Also, add your social media profile links to your channel to let people know how to reach you. Likewise, add your YouTube channel link to your social media platforms, especially Instagram, Twitter, and Facebook.
Get the Right Equipment for Vlogging
Since you're about to start a travel vlog, you should acquire equipment for capturing high-quality videos because nobody likes watching low-quality stuff, no matter how beautiful the place is. So does it mean you need to carry bags loaded with heavy equipment? Nope! That's the incorrect way of vlogging.
Did you know that most famous travel vloggers choose lightweight and small gears? It makes them move freely anywhere in the location without getting tired. Just imagine, you're next vlog is about beautiful mountain tops. So do you think that carrying a heavy camera, tripods, lights, and other gear would be possible?
Indeed, it will be frustrating, and you won't be able to complete the filming within your schedule. So don't fall for the fancy stuff that you see online! Here's a list of all the important equipment you need for vlogging:
Lightweight Camera
That's correct!
All you need is a lightweight camera that comes with image stabilization. It could be your mobile phone or a proper camera, like the Sony Cybershot.
Flexible Tripod
There's no need to buy giant tripods as they are challenging to carry around. Instead, you should get a small, easy, and flexible Gorillapod to attach your camera.
External Mic
Many external microphones are available that capture high-quality sounds at affordable prices. For instance, Lavaliere microphones are inconspicuous and small compared to other brands.
Action Camera
Lastly, you need a brilliant action camera to record all the actions you are also involved in. For example, if you're surveying the areas via bicycle, you can attach the camera to your hat, capturing all the moments and actions.
The GoPro is one of the best action cams on the market. And the best part is that you can even mount them on your ankles, arms, or anywhere that captures excellent movements and actions.
Pro Tip: Action cams are used for a specific scenario. It is suggested to use the main camera for better results and only use action cameras whenever required.
Create Your First Travel Vlog
Do not lose hope if results don't follow your expectations. Remember, practice makes everything perfect. So, step out and start recording your first travel film, and let your passion do the rest of the wonders.
Keep in mind that travel vlogs are meant to capture the entire world, so begin shooting from nearby or local sites. Likewise, if your hometown is a popular tourist spot, bingo! You can visit those places, such as a local restaurant, museum, or state park, and start filming. It doesn't matter if the scenarios are rusty, vintage, old, or new; if they meet your niche, your viewers will enjoy watching them.
However, it is great to plan things before hitting the record button. You can start your vlog by telling a story of the place you are capturing. During the video, you can narrate your feelings and information about that particular place. And end the video by sharing your experience.
Let your viewers listen to the sounds of water streams, the rustle of dry branches beneath your steps, and the chirping of beautiful birds. Let your viewers live the moment for real.
Pro Tip: Don't hesitate to do experiments. Even a short random video clip of 30-seconds can be turned into a successful YouTube #short.
Learn Video Editing
Making all your videos extremely user-friendly is an open secret to create engaging videos and become a successful travel vlogger. But this goal is unachievable without understanding the importance of video editing.
If you're serious about making a career in travel vlogging, you should know how to edit videos with the help of great video editing software. Once you've picked and installed the right editor, you can learn video editing by watching relevant tutorials on YouTube.
Similarly, adding music to your videos enhances the quality of your recording. All you need to do is search for royalty-free music or type “free video music download sites” on Google to see hundreds of platforms.
However, if you don't know how to edit videos using software, it would be difficult for you to add music, titles, or effects to your videos.
So, let's learn about the essential things you should know before selecting a video editor.
Figuring Out Your Story
You might have videos, which are recorded on different days and times. Therefore, you will need to arrange and rearrange those videos in a clean order so you can tell the story in one go. There would be multiple clips that require joining. And that can only be possible with the help of a video editor.
Once you have figured out which scenes to put in the beginning, during the video, and end, you can easily combine those clips. Or you can use the trimmer tool to cut a specific part of the video to place the scene at the start or wherever you think it will be suitable.
Start Editing Video with FIlmora
Filmora is a video editing tool developed by Wondershare. It allows you to edit films on Mac and Windows operating systems. It's a simple desktop video editor with several effects, transitions, templates, etc.
You can download FIlmora from its official website. The company offers a free trial and paid version of this tool. However, it is suggested that you buy the full version of Filmora to unlock all the features and export your videos without a watermark.
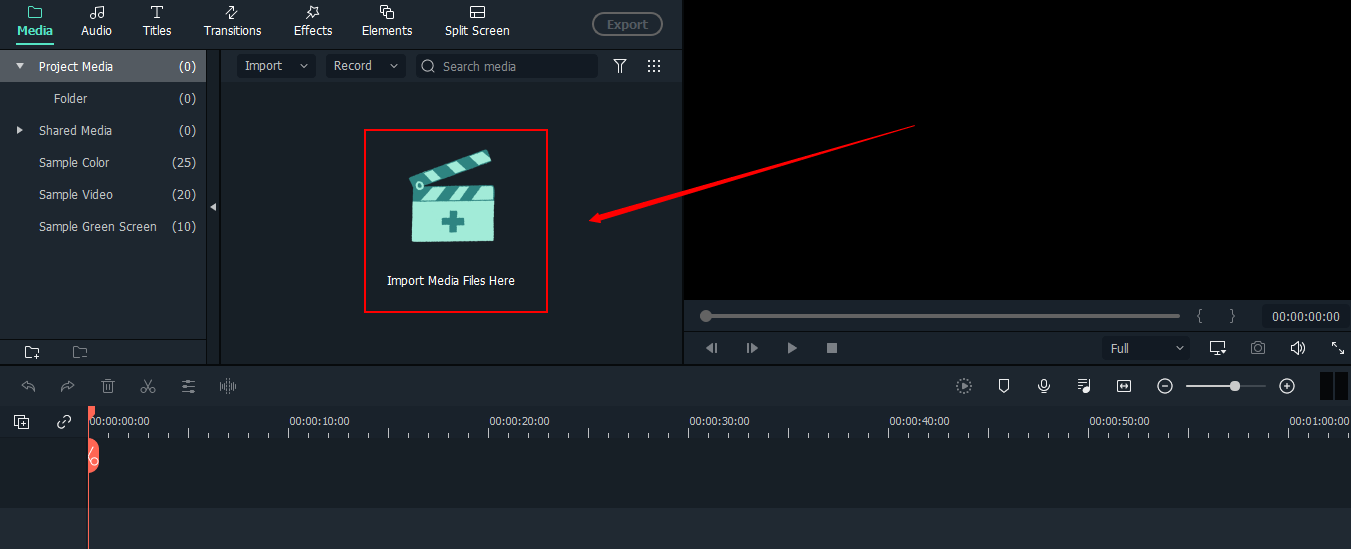
The tool is relatively straightforward, with all the essential options right before your eyes.
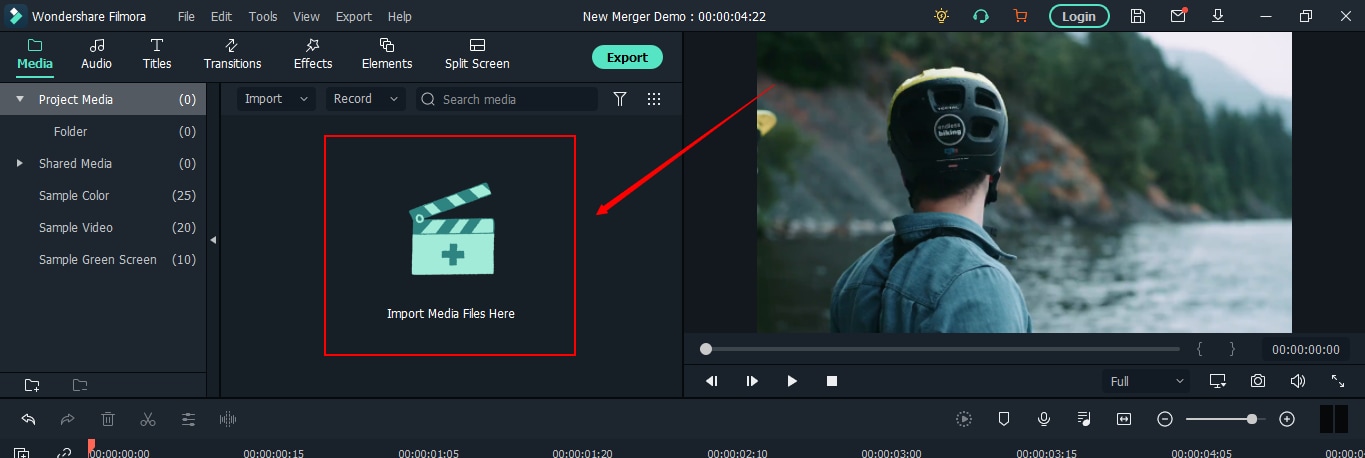
So, whether you want to import images, videos, or any other files, you just need to click this blue icon:
Likewise, you can explore the top menu to add presets, sample videos, sample music, transition, and effects.
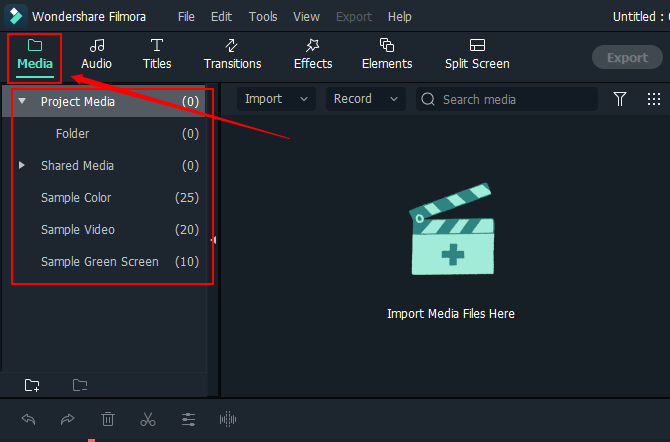
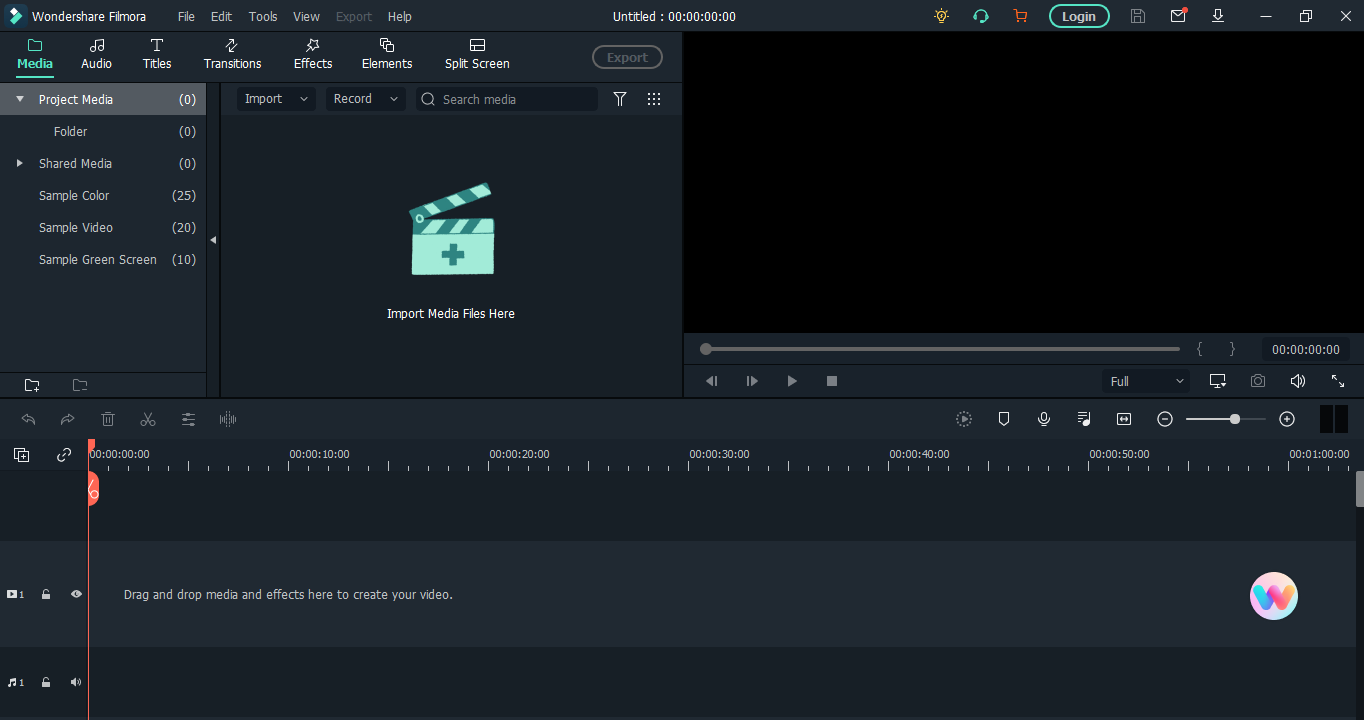
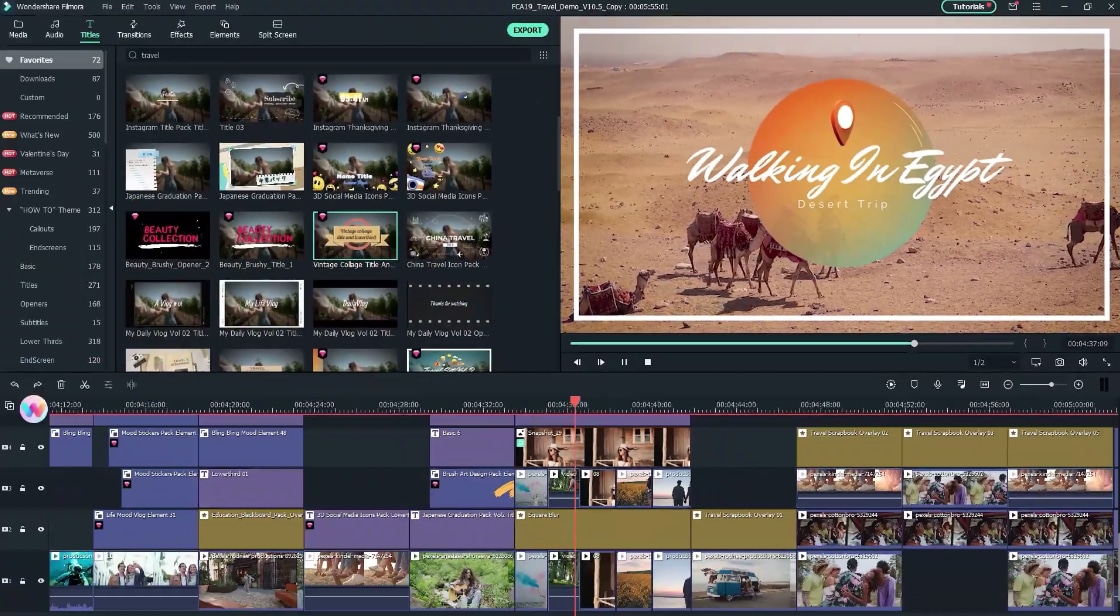
And here's the complete screenshot of the interface:
You can see that there are multiple tools on the timeline, and there are lots of easy options almost everywhere.
Breaking Down Your Shots
Not everything you shoot is essential to include in the video. It is wise to trim the video to eliminate unnecessary portions. So if there are moments in the video where you have just dragged the clip, or there's something out of context, make sure to trim down that part.
But the question is, why breaking down your shots appears to be helpful? The answer is the nick of time. Most viewers don't like watching a video without significant shots. And since the competition is high, viewers don't think twice about diverting their attention. So, in order to increase your viewership, you must ensure that your videos are entertaining and grab viewers' attention.
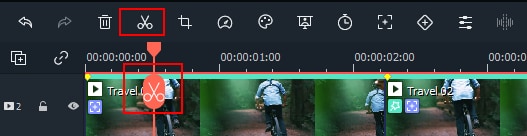
Trimming and joining videos is extremely simple if you're using Filmora. Assuming that you have imported a video on Filmora's timeline and want to cut the unnecessary part. You need to click on the “Scissors” icon from the timeline options and place the orange playhead anywhere on the specific part of the video and click to split the scene from the entire shot.
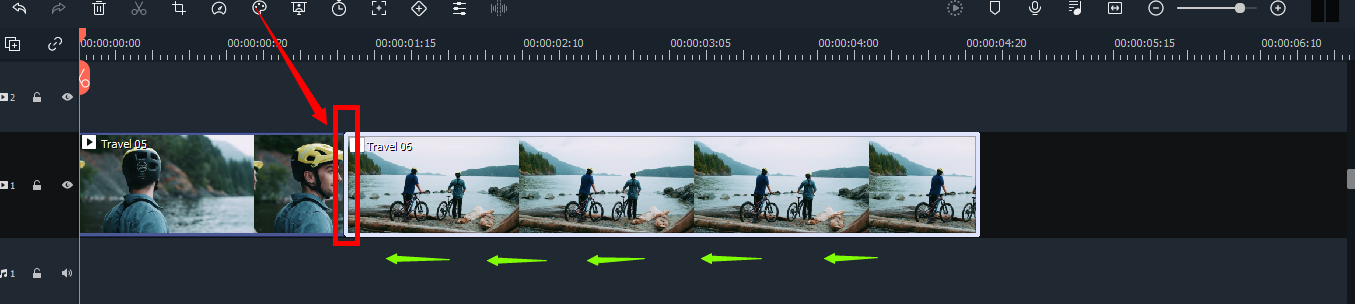
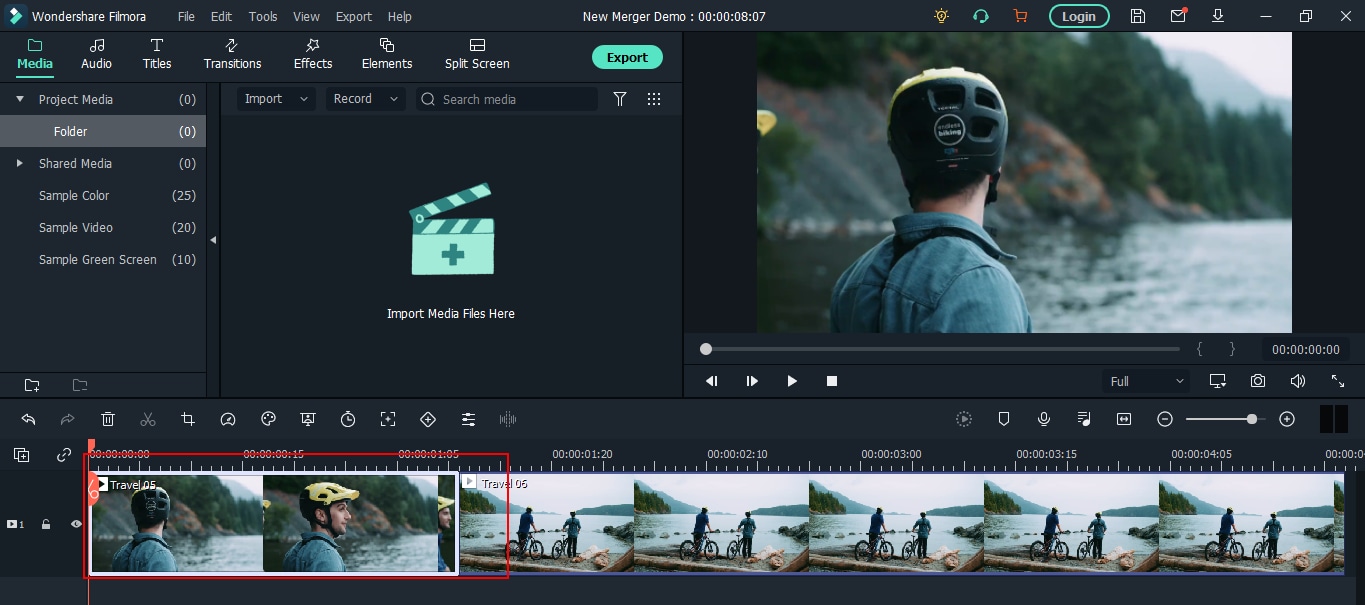
Now let's see how you can join the videos after breaking down the shots.
For example, you have trimmed two different clips and now want to combine them. You need to drag and reposition one clip with another with the help of your mouse, like this:
Adding Background Music
Undoubtedly, music adds life and meaning to videos. So, it is advised to add music to your film. However, you have to be very careful in selecting the music track. Never include music that will bore the audience and encourage them to take a good night's sleep rather than building their interest. So, add something that matches the story you're trying to convey in your travel vlog.
For example, if the video has a scenery shot, try adding a peaceful audio track. Likewise, if you're showing adventures, it is best to add music that increases the viewers' level of excitement.
Music plays an essential role in travel vlogging, so choose the most suitable background score. But the question is how to add music to videos?
It's simple with Filmora.
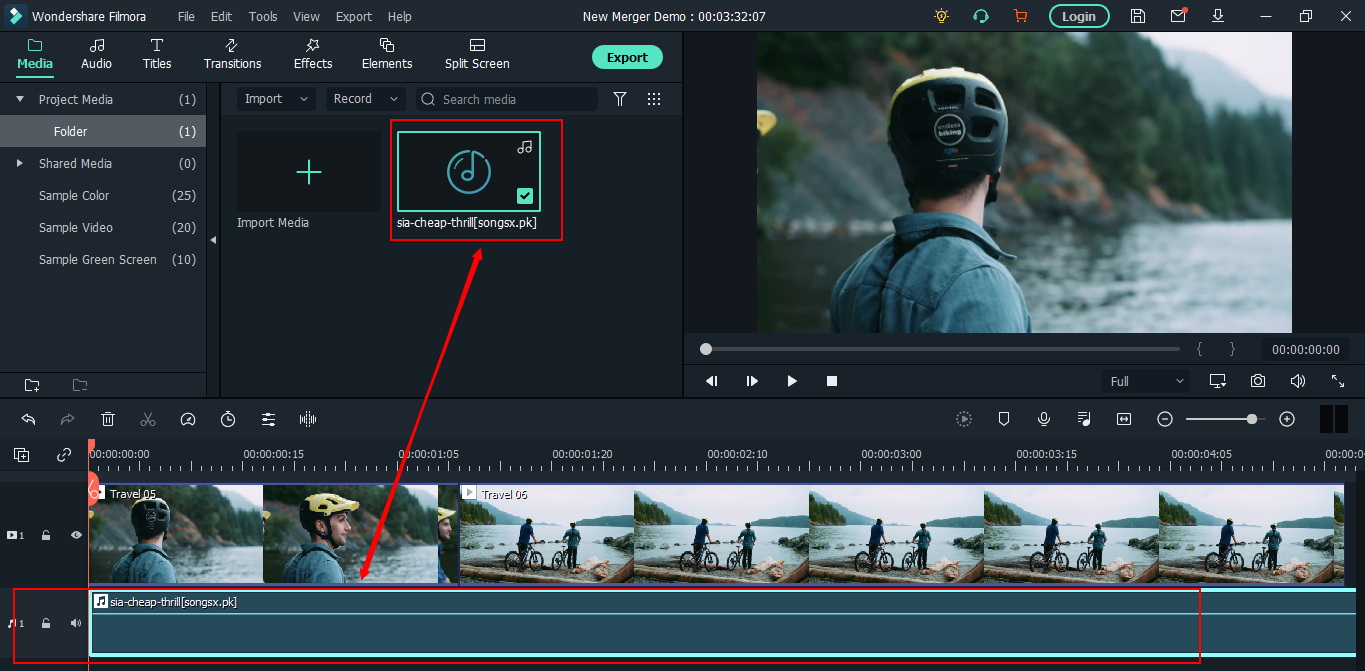
So, for instance, you have a video on Filmora's timeline and want to add audio files in the background. Simply click on the “Audio” option from the above menu to see the list of pre-downloaded music files in different genres.
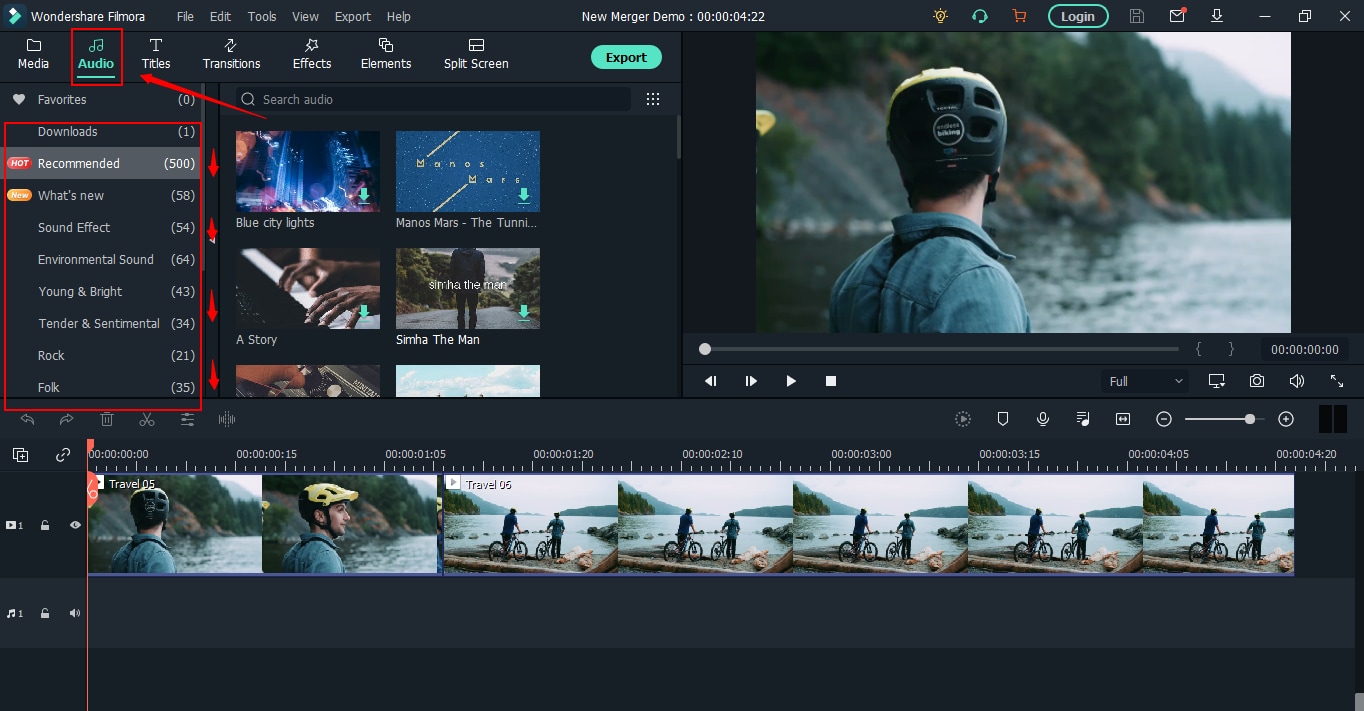
Click once on the music file to listen to it. And if you find it suitable, drag and drop the audio on the timeline under the video file.

And if you don't want to use the pre-downloaded audio, and want to add music from your PC, click on the import icon.
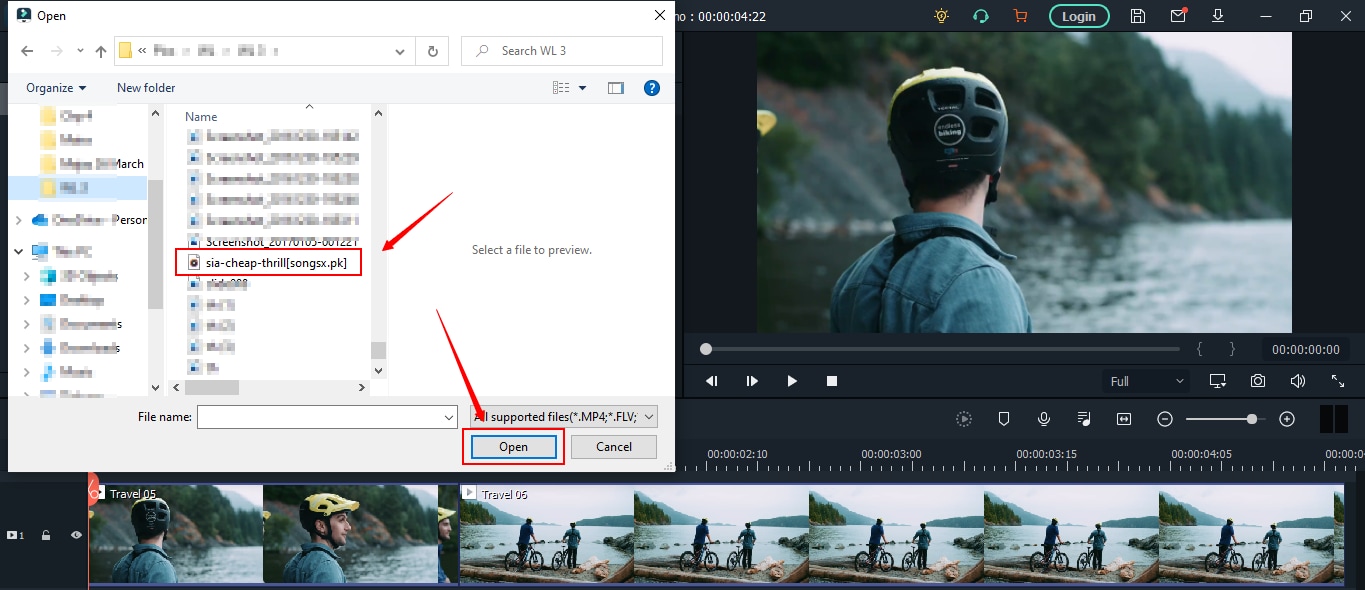
Go to your file location, click on the file, and click on the “Open” button.
As you can see, the file is imported into Filmora's media library.
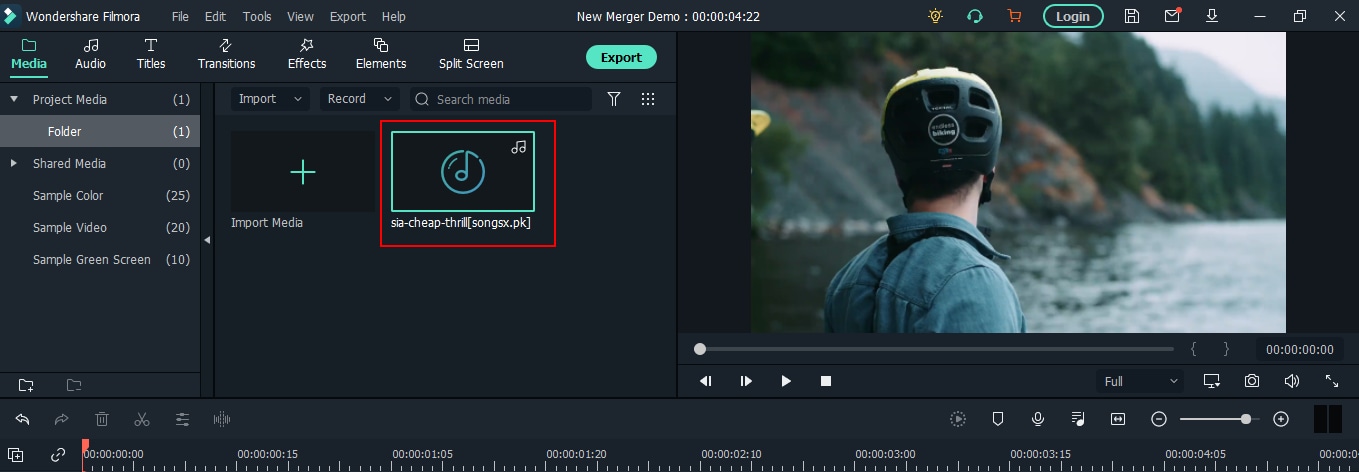
Then, drag and drop the music file under the video, as you have learned previously.
Adding Eye-Catching Intro
Remember that the first 10 seconds of your travel vlog are extremely important. In this short span, the viewer decides whether to watch the video or skip it. If the video isn't attractive to the audience in the first few seconds, you will lose viewers.
Therefore, think well about a mesmerizing and eye-catching introduction for your travel video. Or, add the most exciting part of the video in the beginning.
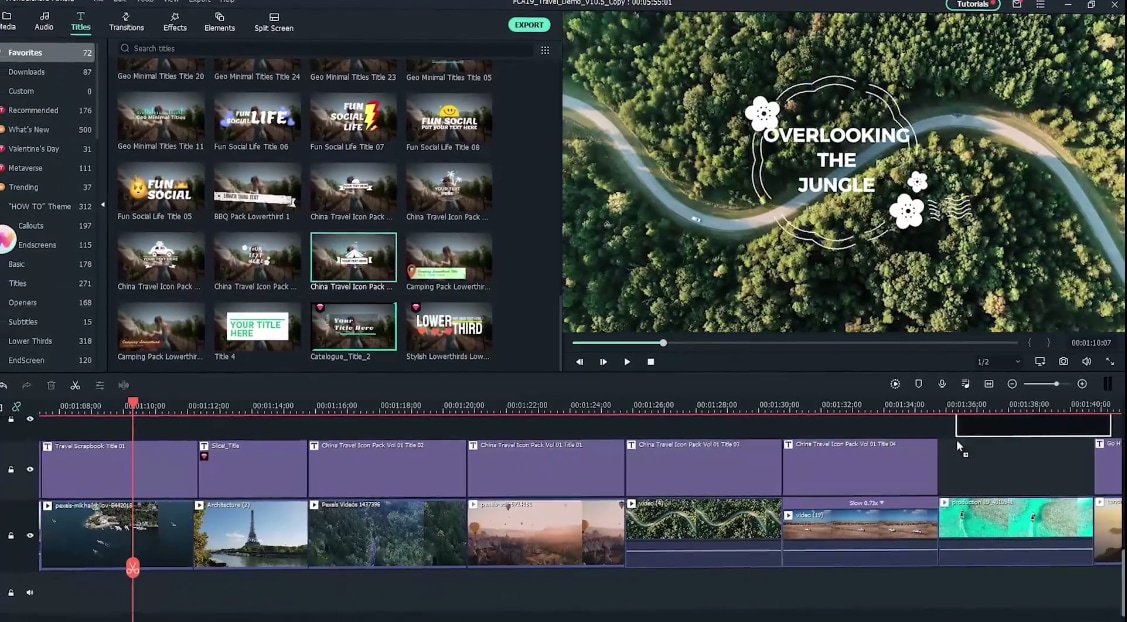
And if you wish to make the intro more attractive, add titles as well.
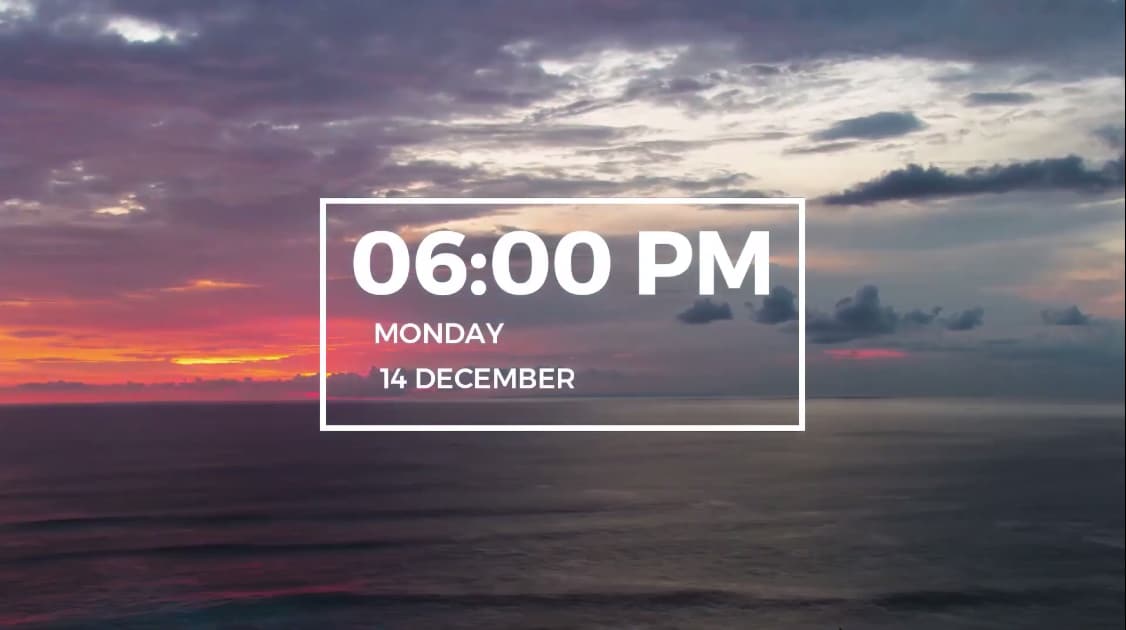
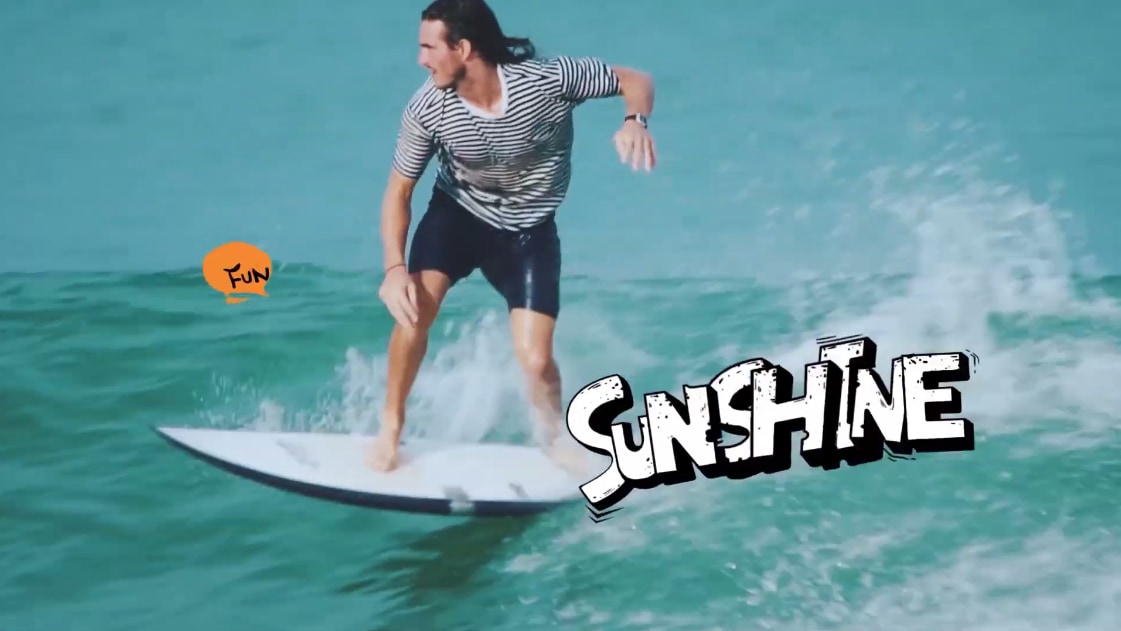
For example, you can see some intro screenshots of travel vlog intros and titles here.
Departure intros with titles:
Landscape intros with titles:

Daily information intros and titles:
Sightseeing intros and titles:
Pinpoint map intros and titles:
You can also add attractive titles at the beginning of your videos by clicking the “Titles” tab next to the “Audio” tab on the top menu. Then, pick a template and add it before the video.
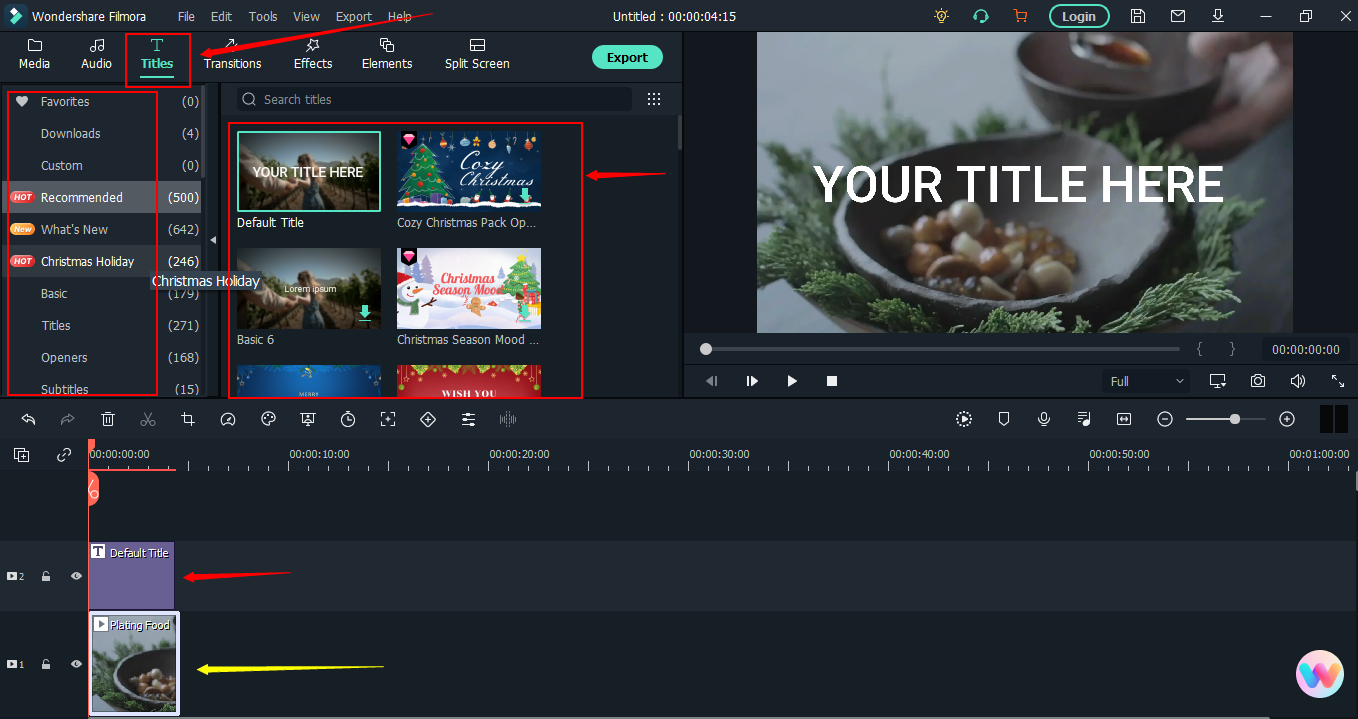
Contrarily, you can also change the text of the title by clicking on the text style that appears on the preview screen. Double-click on the title text and click on the “Preset” tab to choose the font. Then, click on the “Settings” tab to change the text's color, spacing, and other characteristics.

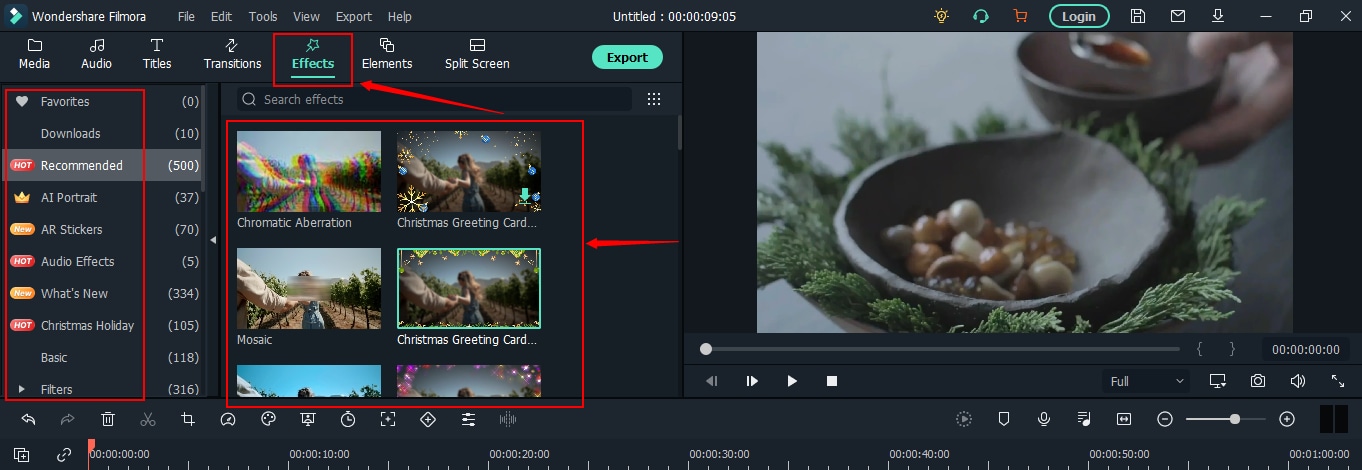
Adding Effects and Transitions
Transition and effects add flow and continuity to your video. These can be used to tell the viewers that a certain time has been passed. And that the current scene is about to end and the next one is just about to begin. With Filmora, you have plenty of effects and transitions options.
To add transitions, click on the “Transitions” tab and choose your transition. Then, drag and drop the transition on the particular part of the video to see the results.
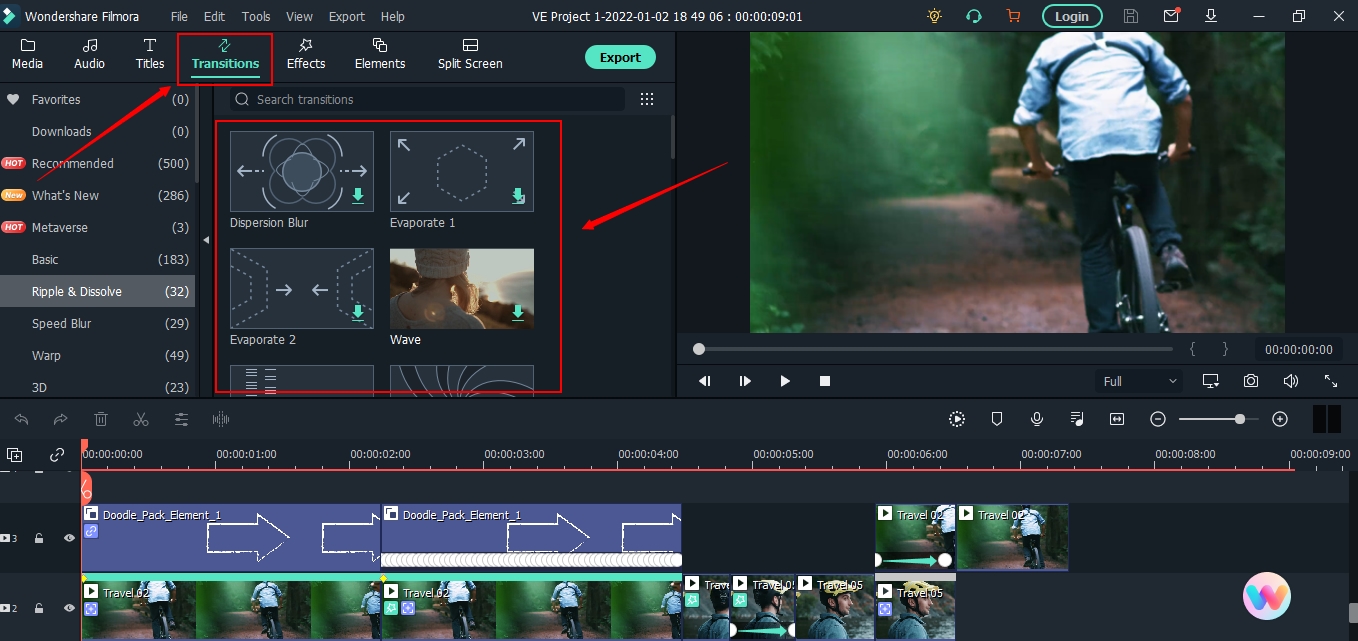
Similarly, to add effects, click on the “Effects” tab, select the effect of your choice, and drag and drop it on the video.
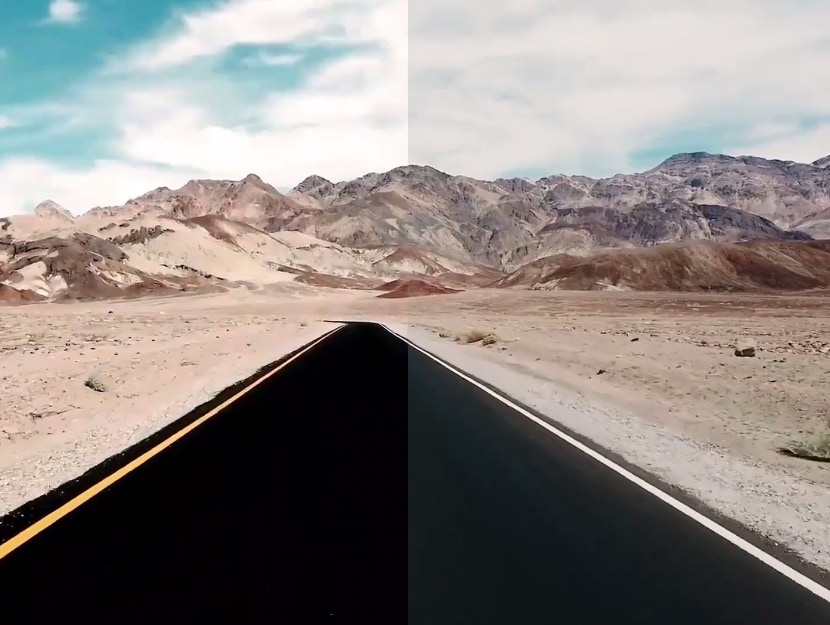
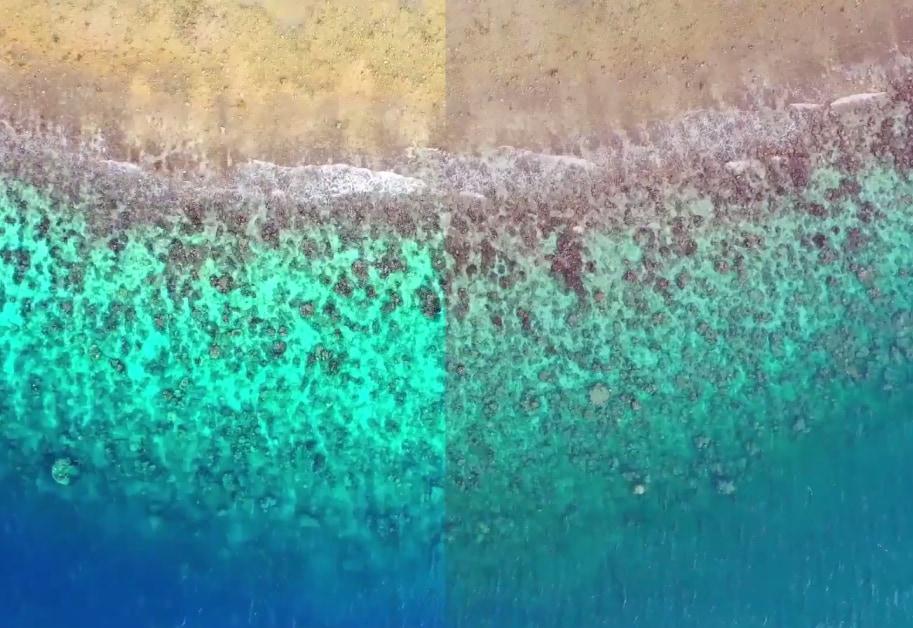
Color Grading Your Videos
If you want to improve the appearance of your video, then you need to pass your clip through the color grading process. Most people call it color correction. It can turn dull and low-light travel videos into bright films.
But that doesn't mean making videos brighter is the only reason for using grading. You can adjust the hue, saturation, etc., and apply color grading according to your own satisfaction.
However, as a beginner travel vlogger, it would be good enough if you color grade videos in such a way that all the objects are seen clearly by the viewers.
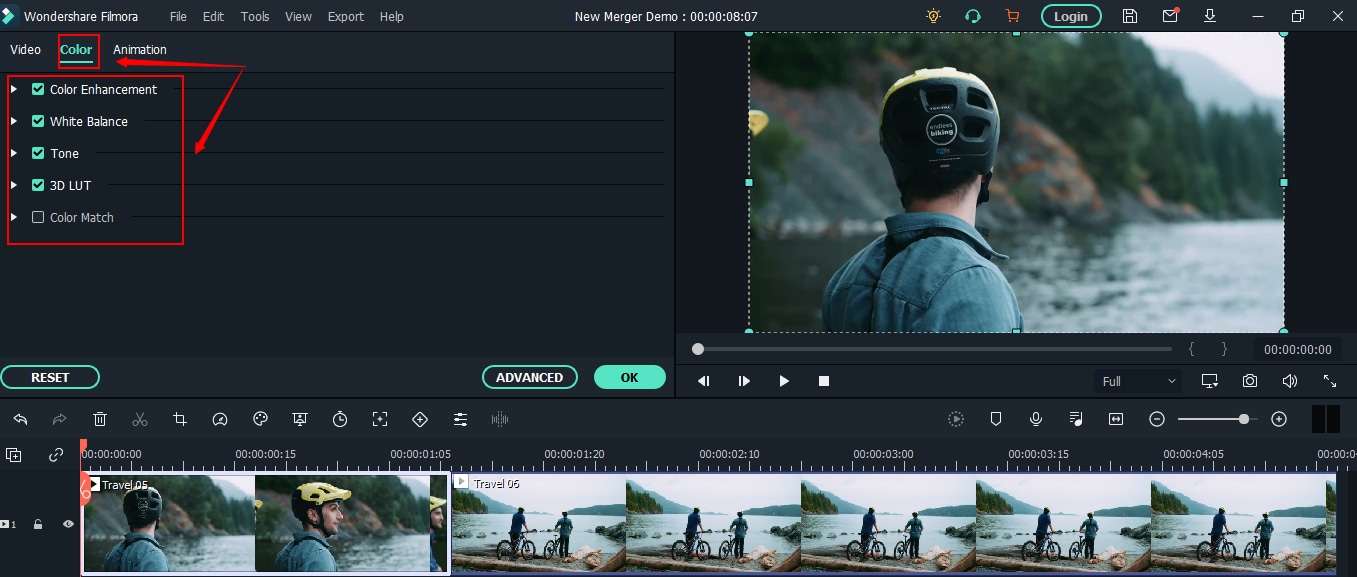
And guess what? When you have Filmora as a video editor, color grading becomes easy. How? Well! Click double-click on the video.
Choose “Color” from the options, and feel free to play with all the tools, such as white balance, tone, 3D LUT, and more.
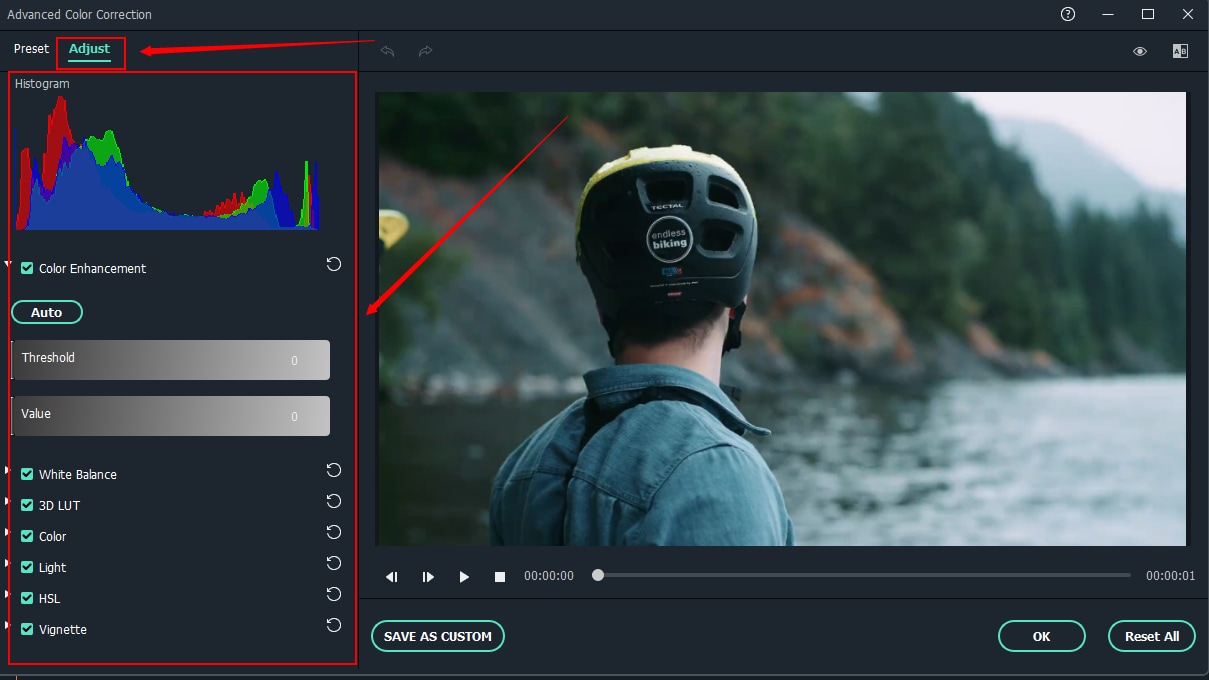
And if you want to see more advanced options, click on the “Color Palette” icon on the timeline, and select “Color Correction.”
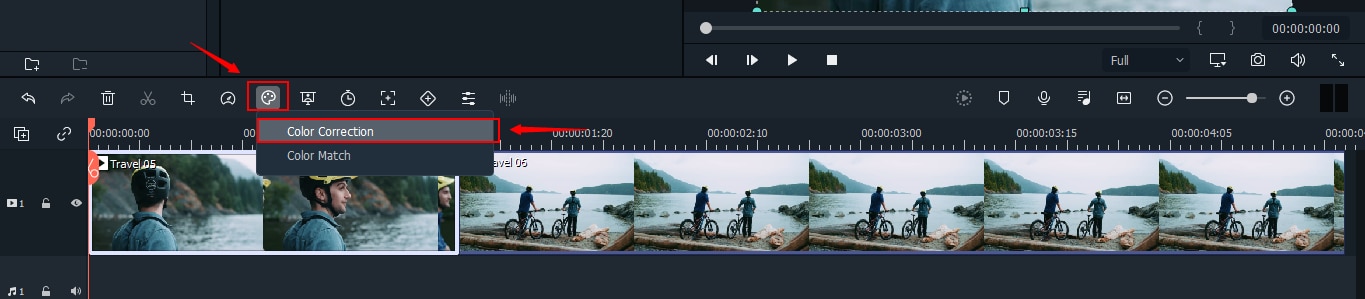
Then, click on the “Adjust” tab to see advanced color grading tools, such as threshold, value, HSL, light, Vignette, and more. Or, you can also add preset filters, such as B&W, to your travel video by clicking on the “Preset” tab.
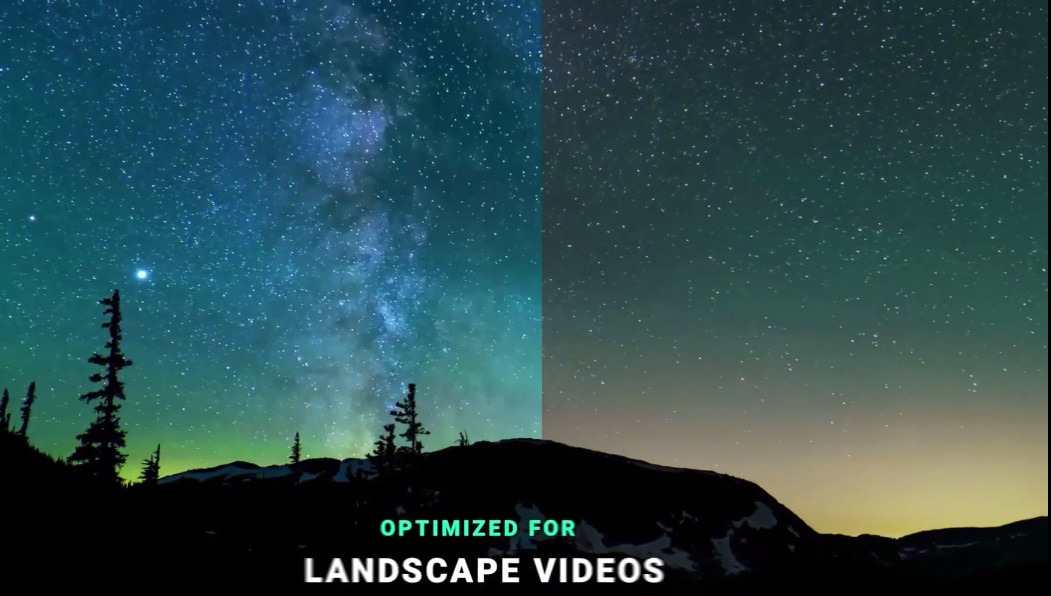
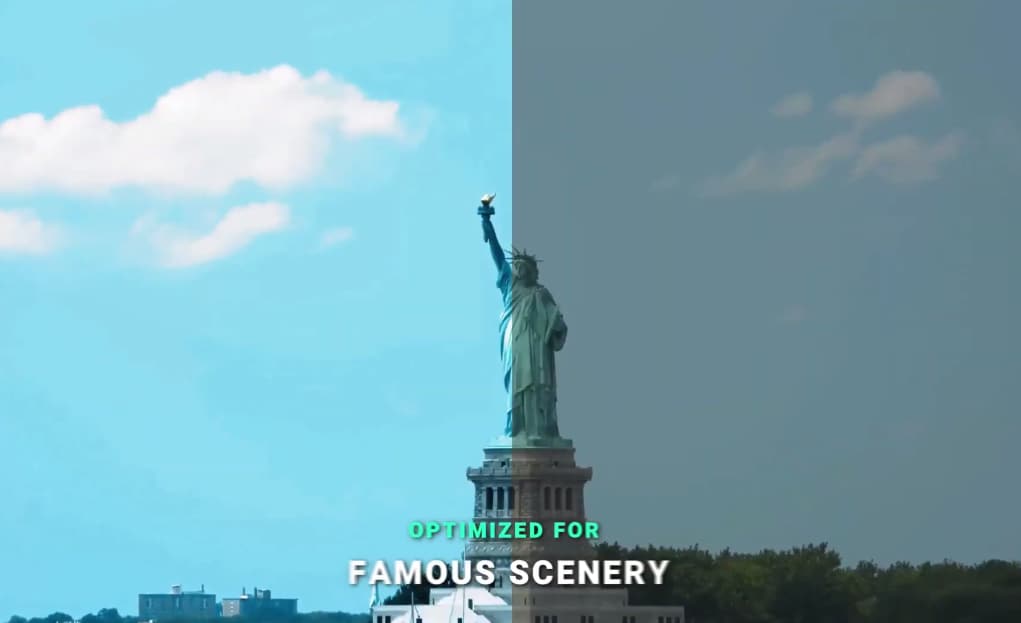
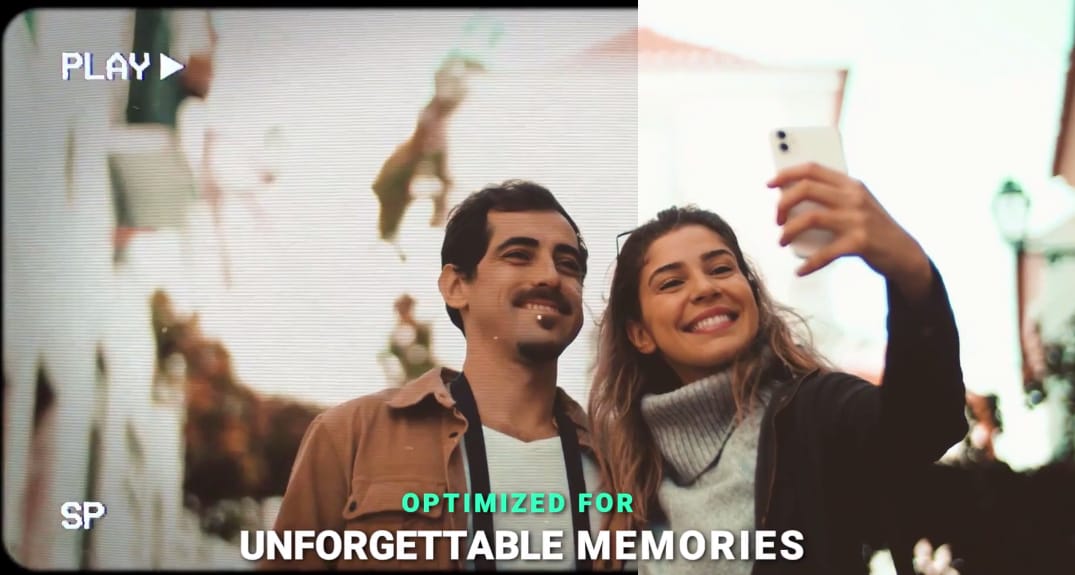
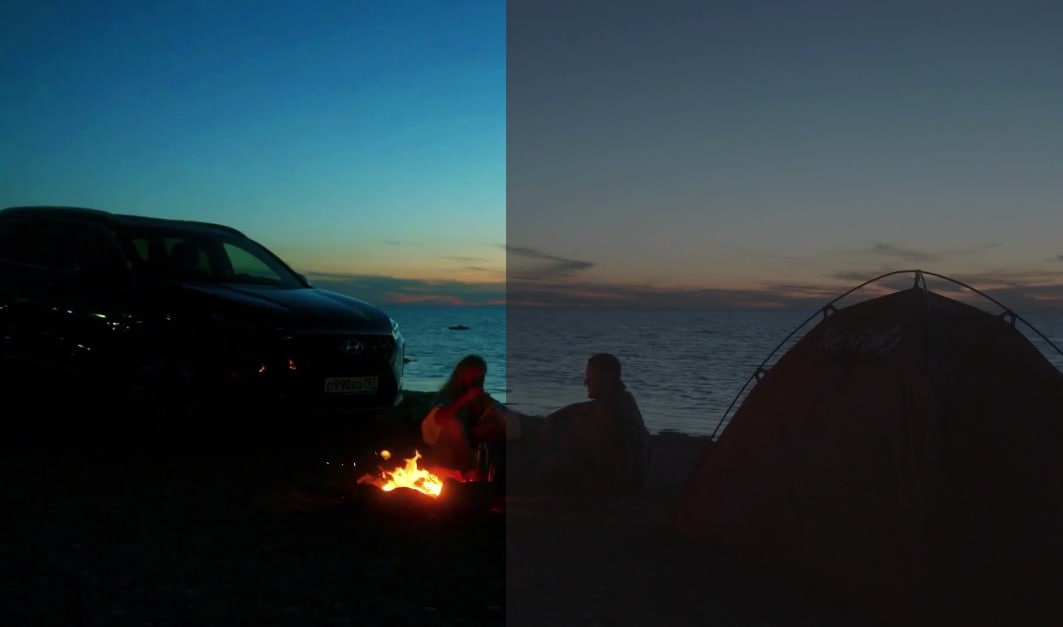
And if you're curious to know about the boons of using color grading in Fillmora, have a look at these color-graded videos before (on the left) and after (on the right) screenshots.


Upload Your Video to Your Video Channel
After completing the video editing process, upload the video to your channel. And as previously discussed, it could be any platform, like YouTube, Vimeo, etc.
Moreover, don't forget to set the video privacy to “Private” during the upload. It will allow you to do quick editing, create a thumbnail, or add the right keywords before your travel video is published. And if there's an option of schedule publishing, go for it if you have multiple videos ready in the pipeline. It will help your viewers know when the next part is coming up.
Promote Your Travel Vlog Video Content
First of all, use your social media to share your content. Tell your friends that you have made and uploaded a travel vlog. Then, share the link on your account, and allow your friends to share the post. You might find it a bit discouraging and tiring initially, but stay positive because everything will start working automatically after a few uploads.
Next, as soon as you gain many followers, start collaborating with others in a similar field. For instance, if your vlog is about mountain hiking, you can work with a hiking boot shop. Or, make the team with fellow vloggers and grow your network.
Another important promotion strategy is communication. Make sure to communicate with your fans and followers and reply to their comments. Remember, answering most of the questions in the comments is necessary for the success of a travel vlog. Also, give your 100% to be consistent and patient because great things take time. And soon, there will be a time when new audiences from every part of the world will follow you every day.
Common Mistakes Beginner Vloggers Make
So you know how you can start a blog by following the seven steps mentioned in the previous parts of this article. If you follow them correctly, success will soon become your fate. But, it is also true that beginner vloggers make serious mistakes. And without even realizing it, they keep repeating those faults and, unfortunately, cannot prove their mettle. So what are these mistakes? Let's take a look.
Mistake 1: Considering Vlog as Vacations
Making a traveling vlog is not an easy job, so don't act like you're on vacation whenever you're heading towards a new location in order to capture the video.
And if you think the audience won't know about your behavior, you're wrong. Your attitude will reflect in your videos, and you will start losing your viewership.
Mistake 2: Not Being Niche Specific
Every niche has a different audience, and it is humanly impossible to know the likes and dislikes of every vlog viewer on this planet. So don't waste your time experimenting in every niche you've heard of, especially when you understand pretty well about your segment.
Most travel vloggers try to get into every corner, and they end up making very few followers because their content confuses people.
Mistake 3: Absence
If you're lucky enough to hit thousands of views and several positive comments on your first travel vlog, try your best to release the next vlog within a few days. Many beginners are unable to set a timetable for uploading videos. And sadly, their absence makes people forget about them.
Mistake 4: Giving Insensitive Statements
The day you chose to become a travel vlogger was the day when you became a public figure. That means you are now a part of a community, and you could be the reason to inspire thousands of people. So, make sure that you don't express any feelings which can be hurtful to someone.
So watch your mouth and think before you ink because a lousy little joke or an insensitive statement can blow your followers away.
Mistake 5: Copying Someone Else's Work
There's a difference between getting inspired and copying someone's work to get equal attention and success. That's not how things work. Do not copy the content of your fellow travel vlogger. Yes! You can make them your inspiration but be yourself because that's one of the secret ingredients to success.
Mistake 6: Using Unprofessional Equipment and the Wrong Video Editor
Whether the equipment is new or used, expensive or affordable, it's invaluable if it doesn't make good quality videos. In the same way, newcomers think that using complex video editors will add good luck to their videos, which isn't true at all. Therefore, always try your best to work on simple and easy video editors with various fun options.


