

How to Make a Green Screen Video with Adobe Rush

Jan 06, 2026• Proven solutions
 TL;DR:
Since Adobe Rush lacks a native green screen feature and requires exporting projects to Adobe Premiere or Adobe After Effects, Wondershare Filmora is recommended as a direct alternative for applying chroma key effects.
● Successful chroma key application requires recording footage with minimal intricate details and ensuring actors do not wear clothing that matches the green or blue background.
● On Filmora for desktop, users must place the green screen footage on a track directly above the background video and fine-tune the transparent effect using Offset, Tolerance, Edge Thickness, and Edge Feather settings.
● Filmora for mobile enables background removal by accessing the Chroma Key tool through the Trim and Smart Cutout menus, requiring the use of a Color Picker and adjustment of Strength and Shadow sliders.
Ask AI for a summary
 ChatGPT
 Perplexity
 Gemini
 Claude
 Grok
Grok
Combining separate pieces of footage into a single video clip has been a highly complicated process in the past, used only by film industry professionals. Today, everyone can make a green-screen video from the comfort of their home in just a few minutes. Read on, if you would like to learn how you can enrich the videos you share on social media with the green screen effect.
Part 1: Making a Green Screen Video with Adobe Rush
Software like Adobe Premiere or Adobe After Effects enables their users to perform even the most complicated video editing tasks. Unfortunately, the same can't be said for the recently released Adobe Rush app, which lacks some basic video editing tools YouTubers frequently use in their videos. The green screen feature is also unavailable in Adobe Rush, and the only way to composite a video with this app is to open the project file in Adobe Premiere or Adobe After Effects.
What's more, the Adobe Rush costs $9.99 per month, which makes it a rather expensive option for social media video creators. Choosing the subscription model that includes Premiere Pro CC or opting for the Creative Cloud option is a much better solution than purchasing Adobe Rush as a single app. However, the software included in the Creative Cloud subscription model can be overwhelming for inexperienced video editors, which is why video editing software like Wondershare Filmora that lets you create green screen videos effortlessly is a much better choice.
Part 2: Using the Chroma Key Effect in Filmora
Wondershare Filmora enables you to make chroma key in a very easy and simple way. Check this video to get inspired:


How to Use Chroma Key Effect in Filmora [For Desktop]
Before you can start combining two separate clips, you must first make sure that the footage you're going to be using is properly captured. The actors in the video recorded in front of a green or blue screen shouldn't wear clothes that have the same color as the background, and you should try to avoid having too many details in the shot as this can complicate the process of creating the green screen effect.
Step 1: Importing Green Screen and Background media files
Import both the background and the overlaying clip into the software and place them on the timeline. The clip containing the footage recorded in front of a green screen should be on a track above the background video.

Step 2: Drag the clips into the timeline

You should place the green screen video over the timeline of the background video clip. The green screen video will be displayed in the Preview Panel, and if necessary, you can drag one of the handles located around the edges of the video to change its size or drag it to a different position within the Preview Panel.
Step 3: Applying Chroma Key effect
Afterward, you should make sure that the overlaying clip is selected and then click on the Edit or the Green Screen icon in the software's toolbar to gain access to the Chroma Key settings.
![]()
You can then select the color you'd like (usually the green or blue) to make transparent, fine-tune the Offset, Tolerance, Edge Thickness, and Edge Feather sliders to make the green screen effect more realistic.

You can see all the changes you make in the Preview Panel, and you can play the video if you would like to check how the resulting clip looks like. When ready, click on the OK button to confirm the changes and resume working on your project. You can click on the Export button if you want to share your green screen video on social media or save it to your computer.
How to Use Chroma Key Effect in Filmora [For Mobile]
Moving on to the mobile version, Filmora provides a convenient way to apply the Chroma Key effect. This allows users to edit videos on the go while maintaining essential features. Here’s how to use the Chroma Key effect in Filmora on mobile devices.
Step 1: Import your green screen footage
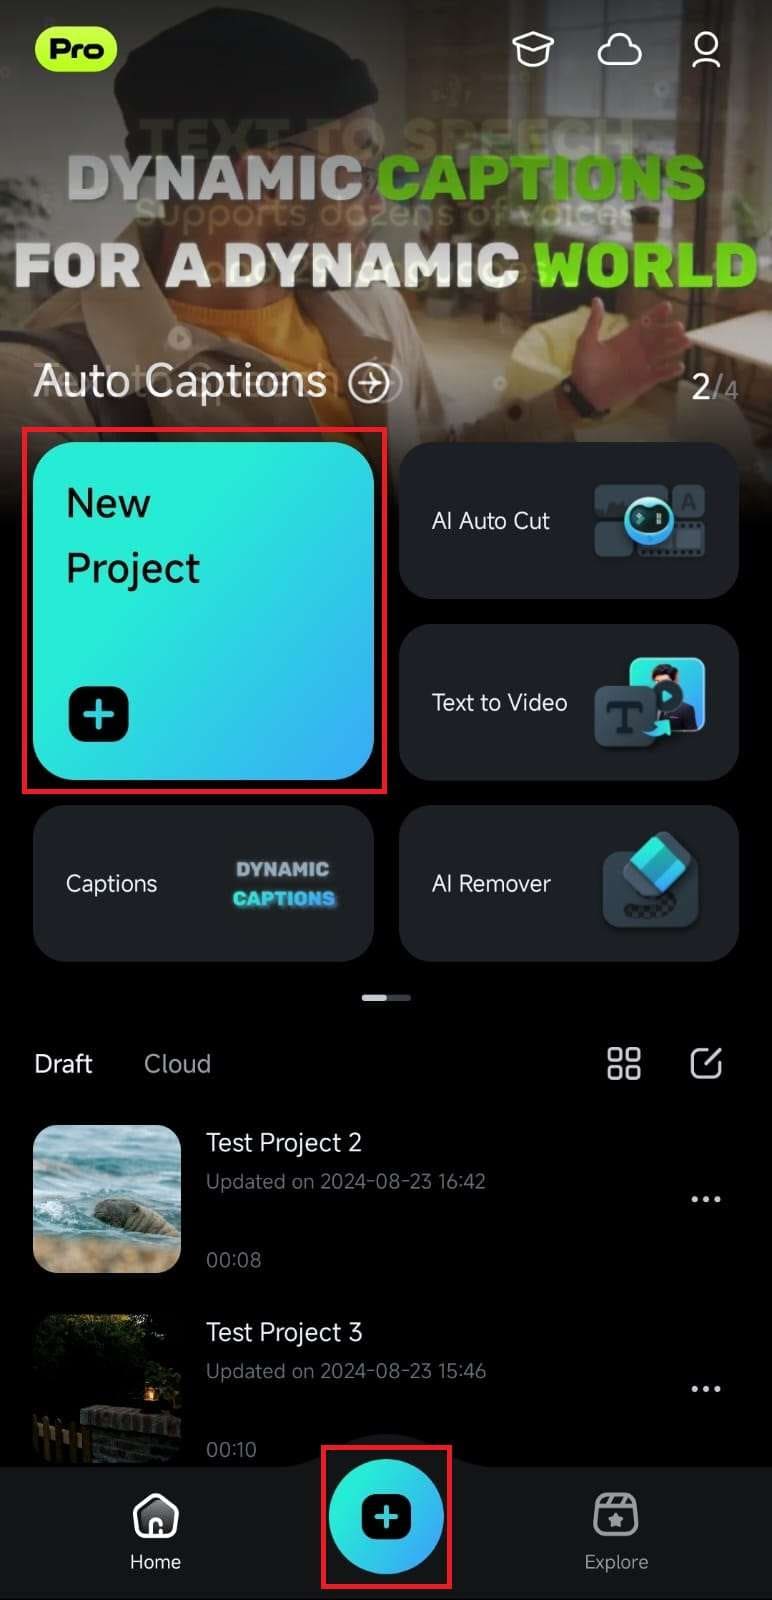
Open Filmora on your mobile device and tap "New Project" or hit the blue "+" icon.
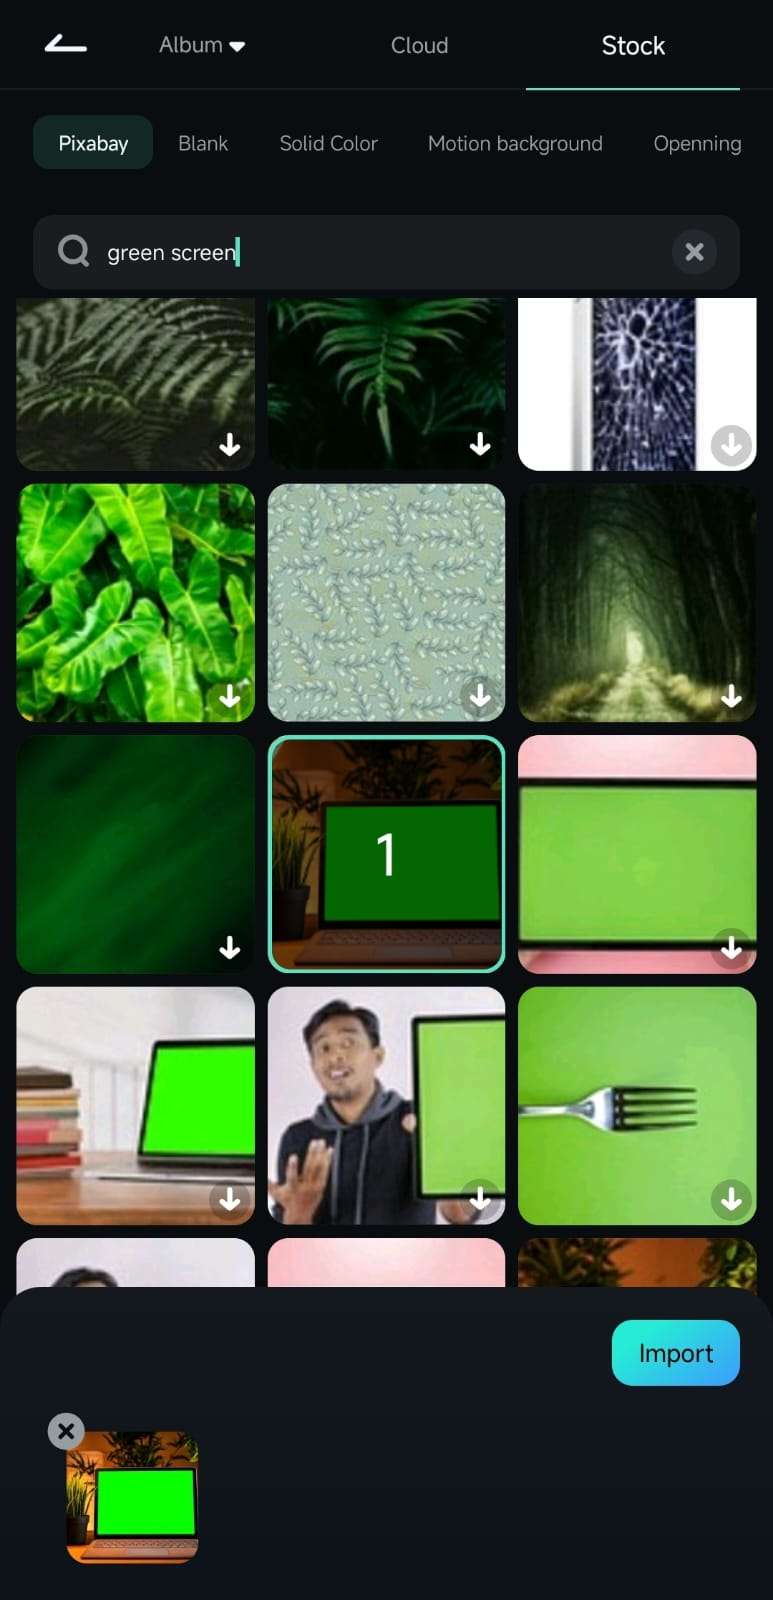
Select your green screen video from your phone's gallery or the Stock page, then tap "Import" to load it.
Step 2: Access the Chroma Key tool
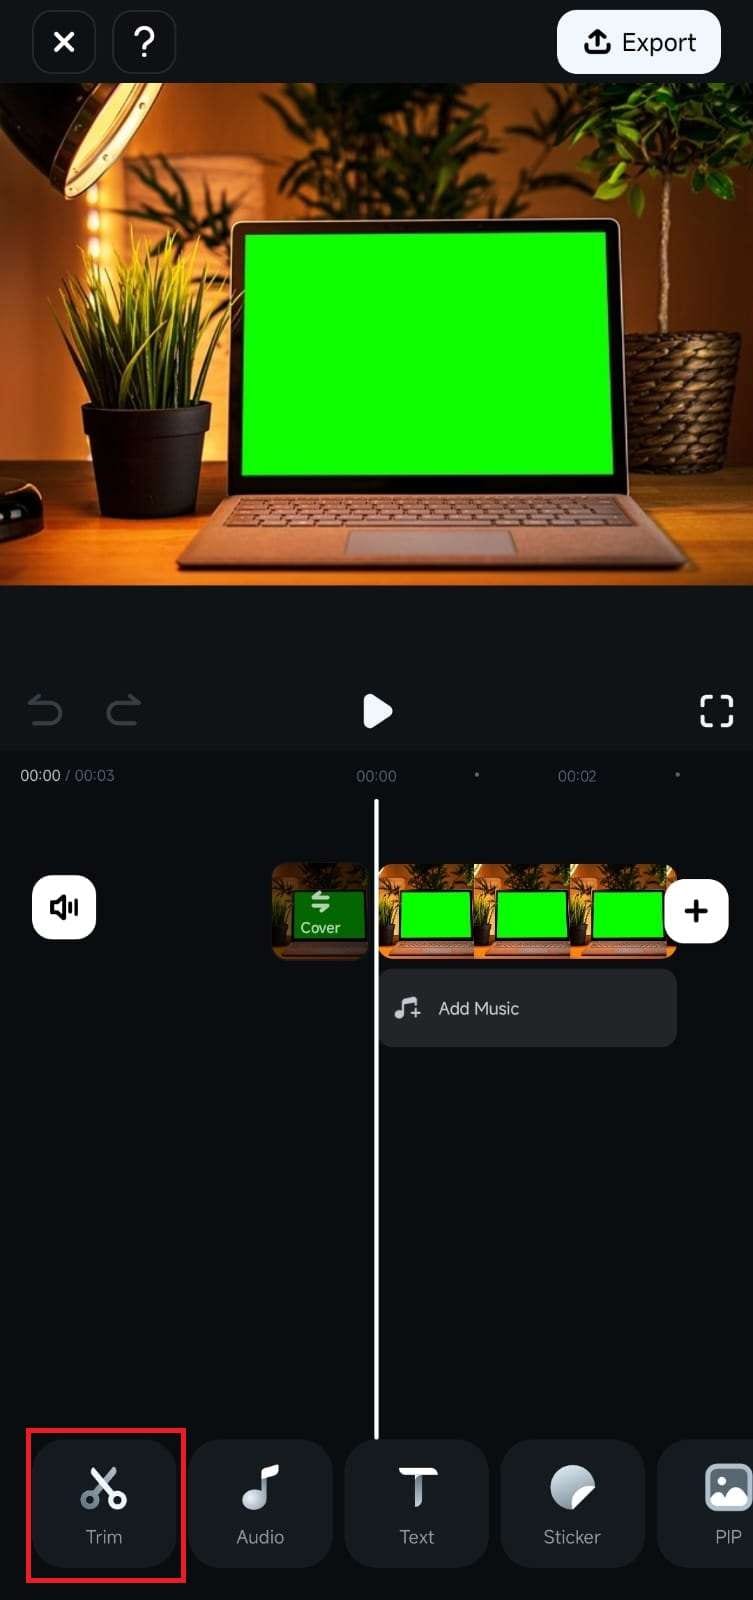
Tap "Trim" in the toolbar at the bottom to access editing tools.
Swipe the toolbar and select "Smart Cutout," then tap "Chroma Key" to open the feature.
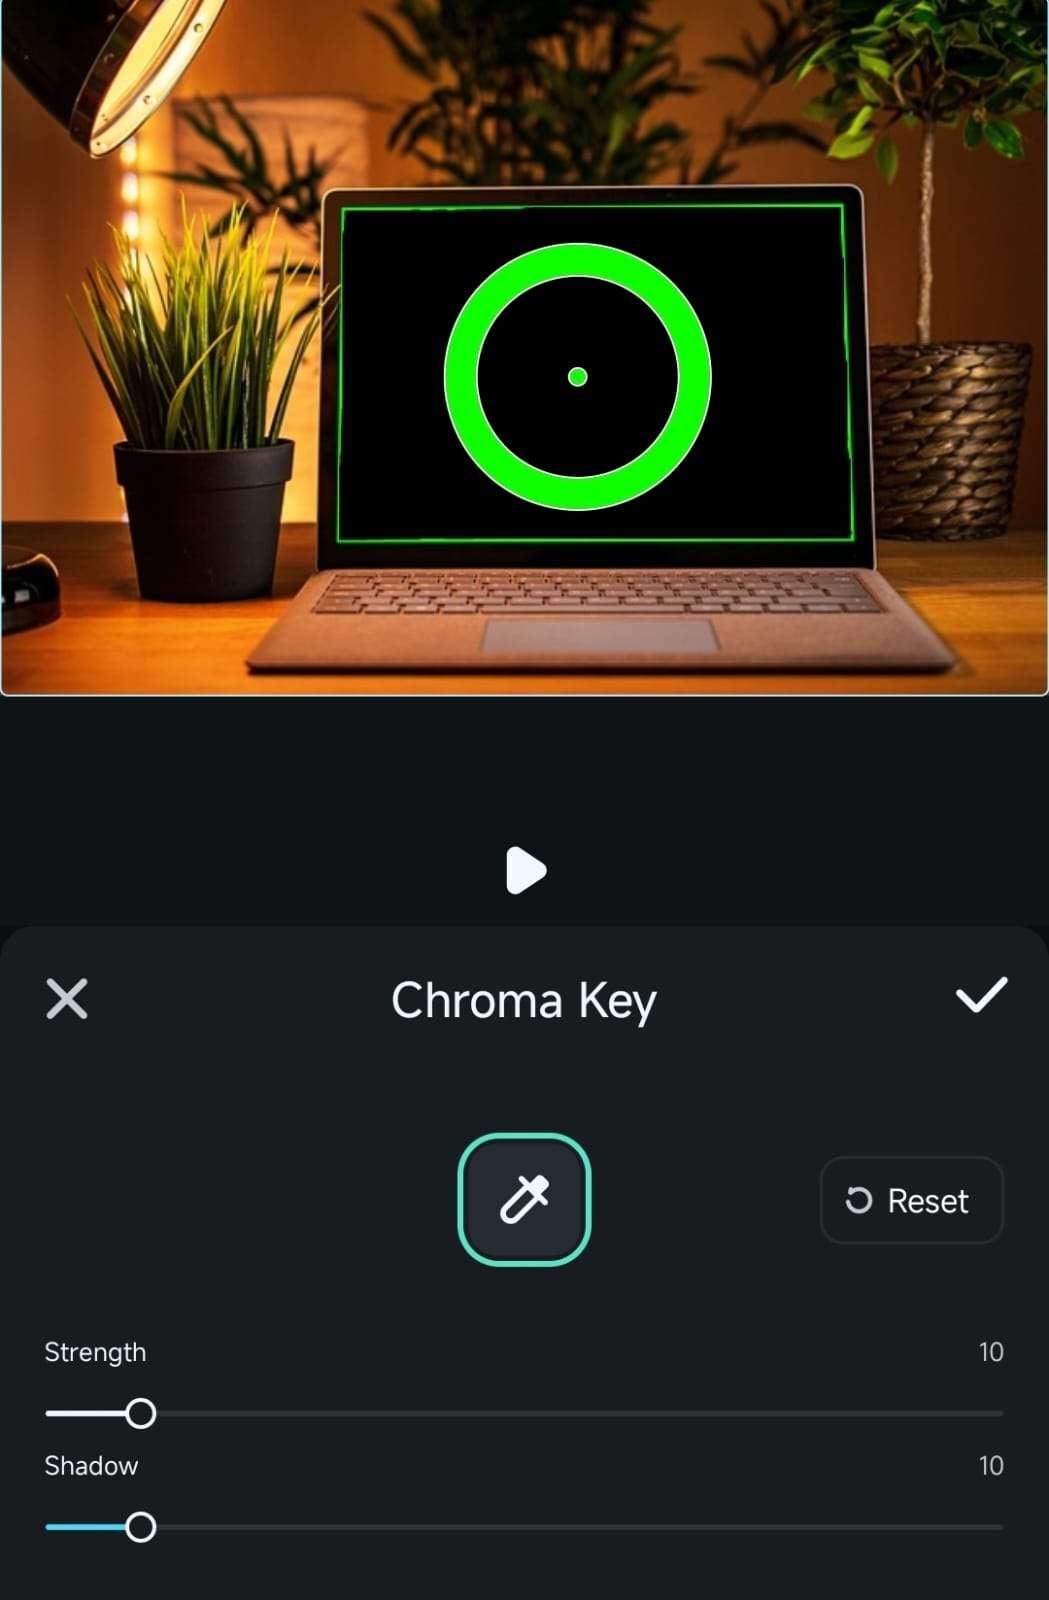
Step 3: Remove the background
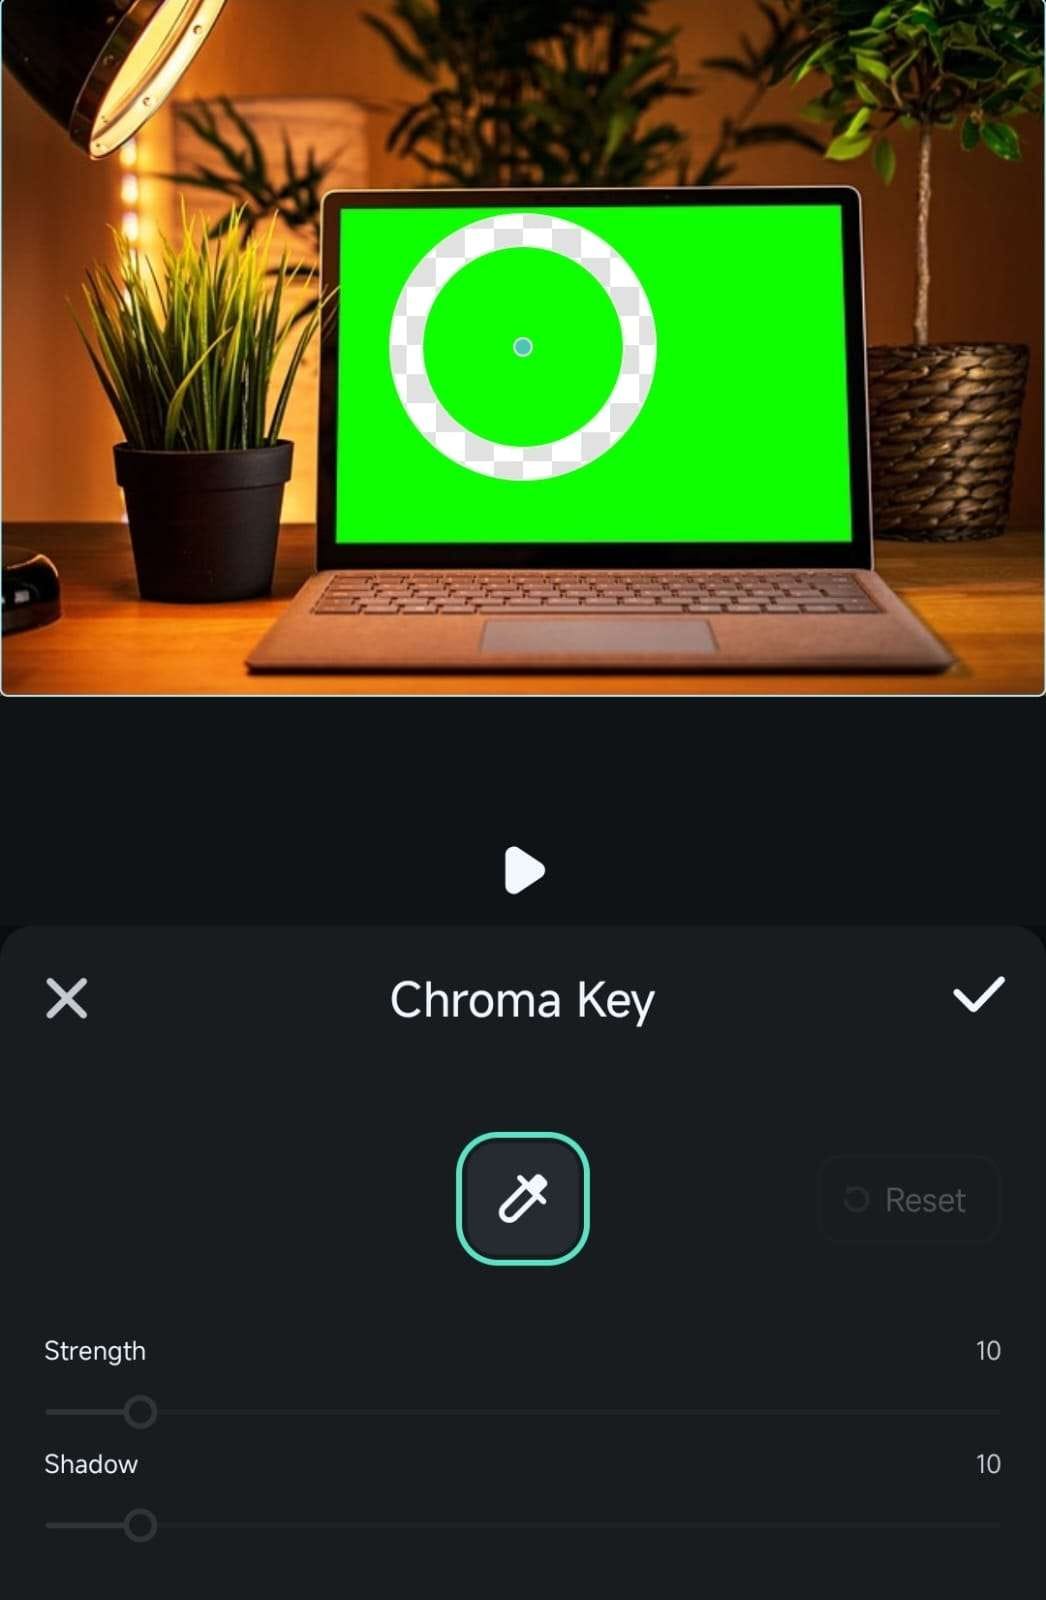
Use the Color Picker tool to select the green background on the video preview. Adjust the Strength and Shadow sliders to fine-tune the effect and ensure a clean removal.
Step 4: Apply the effect
Tap the Checkmark in the Chroma Key menu, then hit "Checkmark" again in the Smart Cutout menu to apply the background removal.
You may also like: >> Best Free Green Screen APPs
Conclusion
Using the Chroma Key effect in Filmora can help you make all types of videos that involve narration more interesting. In addition, you can record any action you want in front of a green screen and incorporate it into a separately recorded video. On the other hand, Adobe Rush doesn't offer the tools you're going to need to create a green screen video. That's why Filmora is a much better option than Adobe Rush if you want to composite two or more video clips into a single clip.
Master transitions in Adobe Rush with our simple, step-by-step guide. Learn how to add, adjust, and customize Premiere Rush transitions to make your videos seamless and professional.
by Liza Brown Jan 06, 2026 11:37 AM
Liza Brown
chief Editor
