Key Steps of This Video Tutorial To Follow
Guide to using Filmora AI Tools
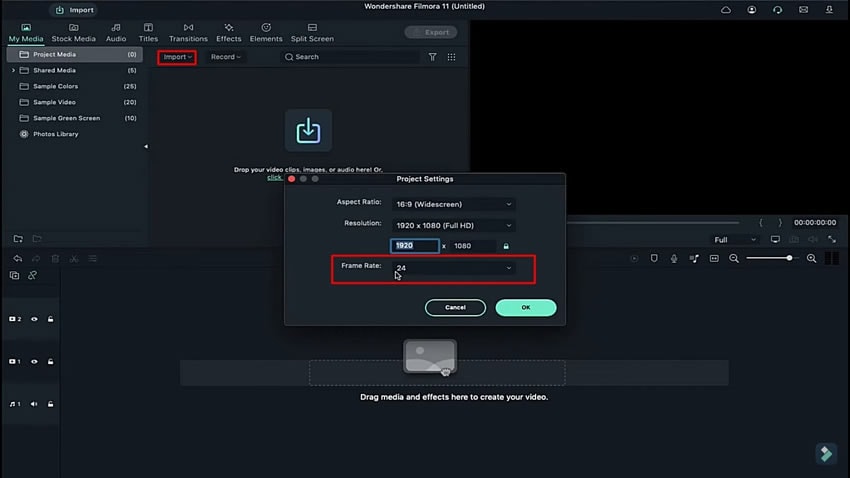
To add a dissolve effect to a logo, select the “File” tab from the top and direct into “Project Settings” from the drop-down menu. Adjust the “Frame Rate” at your required value on the pop-up window that opens. Now import your media content by clicking the “Import” button in the panel.
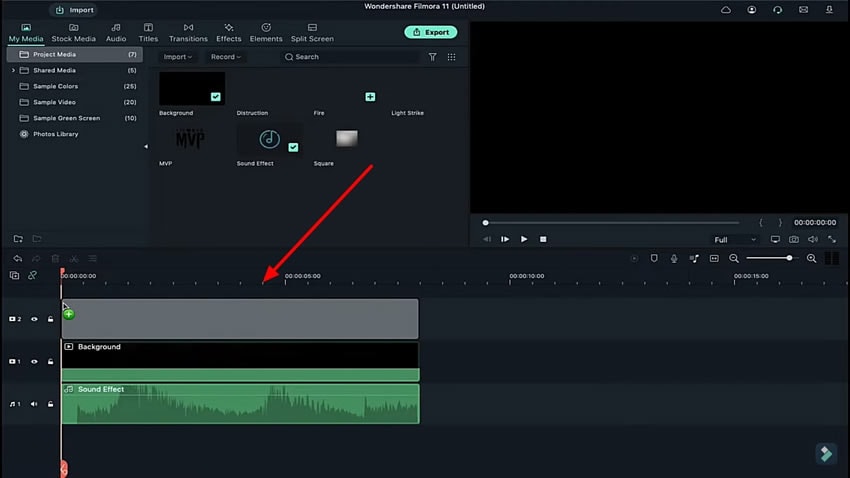
You need to import the sound clip on the audio track on the timeline. Following this, import the background-clip and the file containing the effect in this particular order on respective tracks.
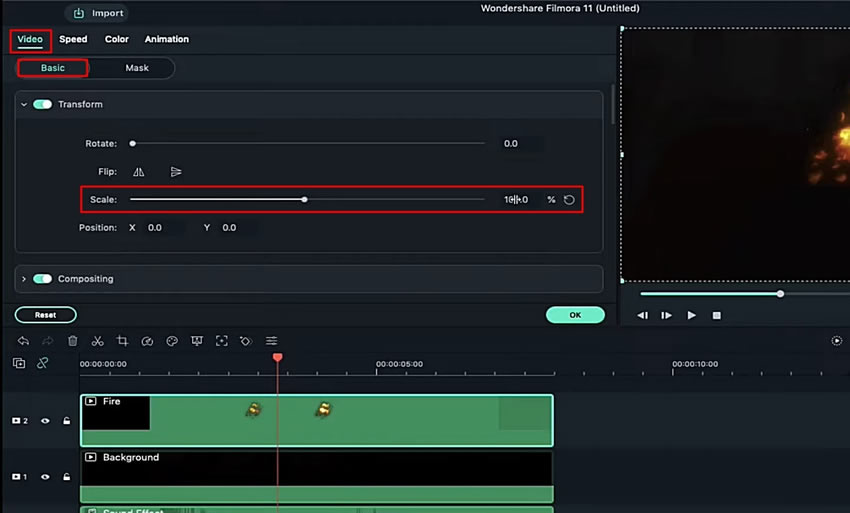
Double-click on the effect track to open its settings. Continue to the “Video” tab and look for the “Basic” section in the toolbar below. Change the value of the “Scale” in the provided settings according to your desire.
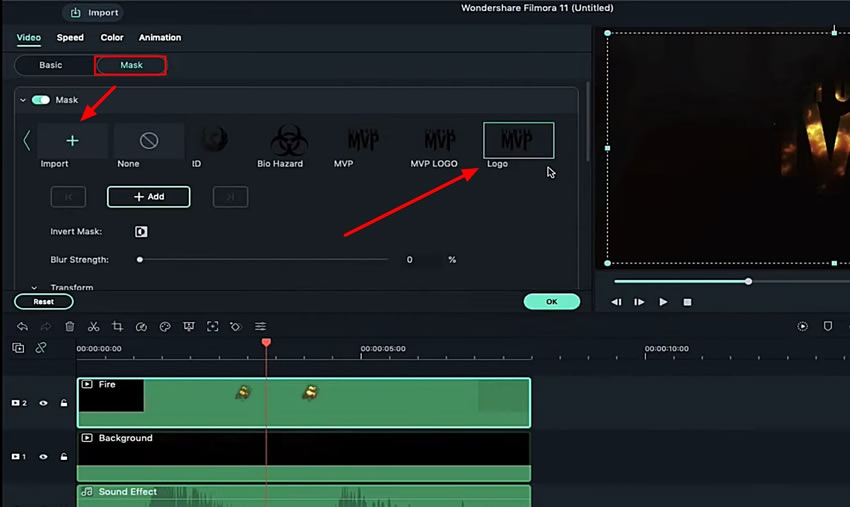
Enter the “Mask” tab from the same window and click the “Import” button to add your logo. Ensure it is in “PNG” format without any background to get better results. As you import your logo, give a name to it and press “OK” to save it in the “Mask” section.
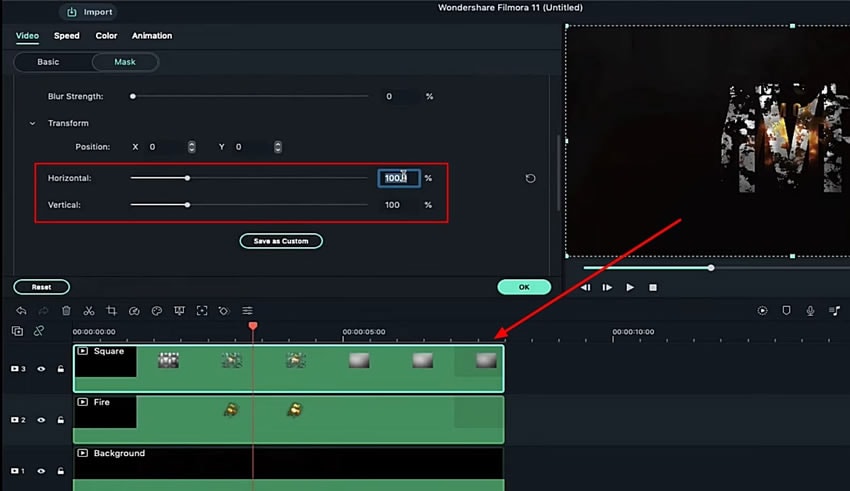
To transform your logo, you need to scroll down the section and change your "Horizontal" and "Vertical" positions accordingly.
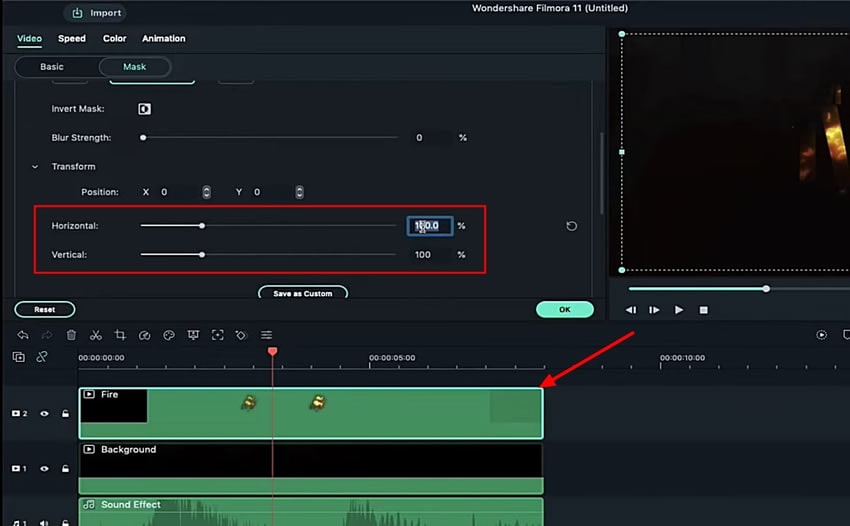
After saving the settings, lead back to the "Media" section and drag another clip effect on a track on your timeline. Continue to open its settings by double-clicking on it and leading into the "Mask" section. To change its settings and adjust the logo, scroll down and change the "Horizontal" and "Vertical" positions as done previously. This will give a logo intro that can be observed in the preview window.
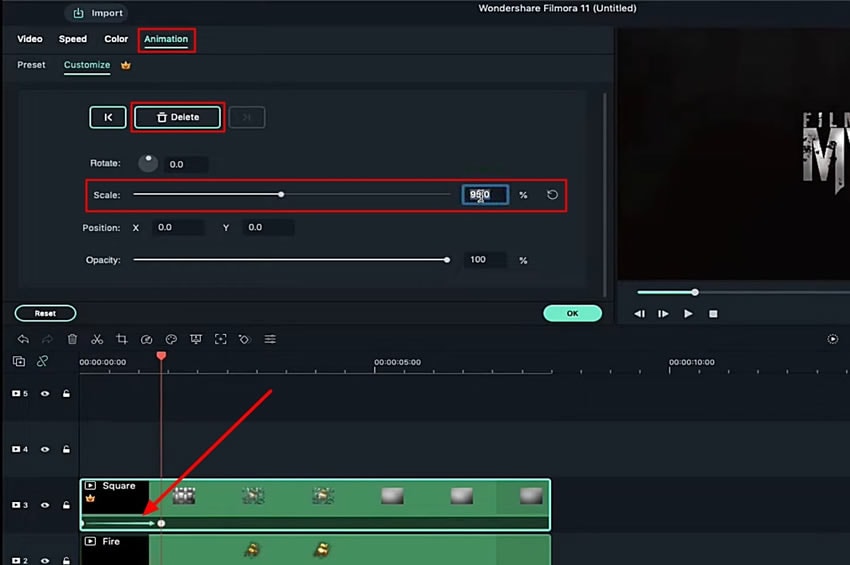
For inserting an animation on your logo, place the Playhead at the start of the timeline and open the “Settings” of a clip effect. Lead into the "Animation" tab and add a keyframe at the start of the clip. Add keyframes in the further clip and adjust its settings, such as the "Scale" value, accordingly.
To create a dissolved logo effect, it is advised to keep the "Scale" value between 90% and 105% to show an alternate increase and decrease in the overall effect. Keep in mind to add keyframes across every frame where you set the scale.
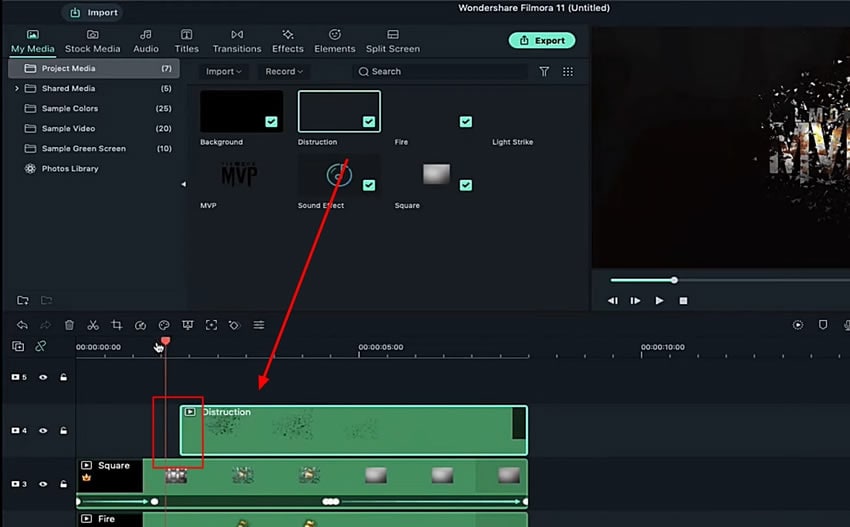
Add another clip onto the timeline as an effect for the Filmora logo. Upon adding the clip, trim the clip from the start and drag it to a middle point on the timeline.
Double-click on the recently imported clip and navigate to its "Animation" tab from the top. On opening the "Customize" section, move the playhead to the start of the clip and add a keyframe using the "Add" button on the settings panel.
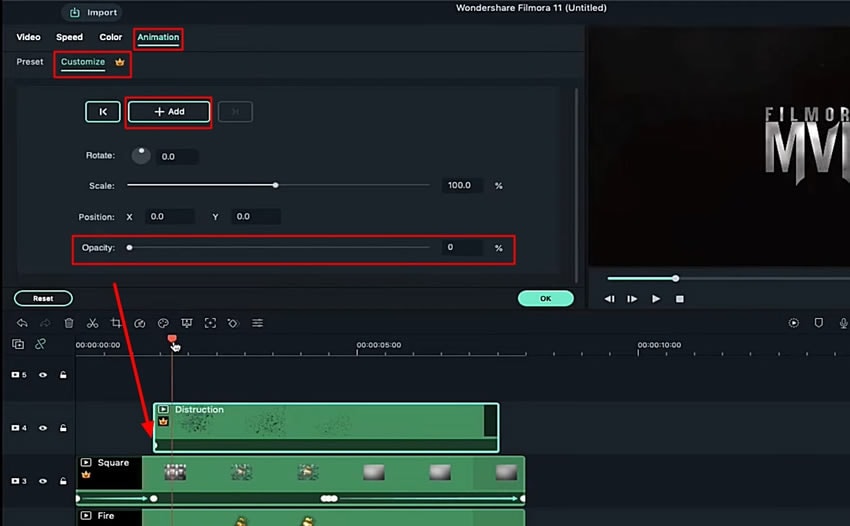
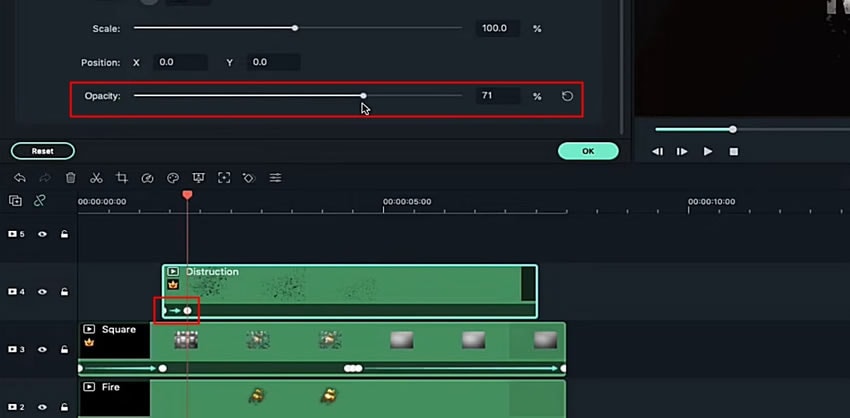
Keep the "Opacity" of this particular keyframe to a minimum. Move a few further and add another keyframe while setting the "Opacity" at a considerable point. Tap "OK" to save all settings for this particular effect.
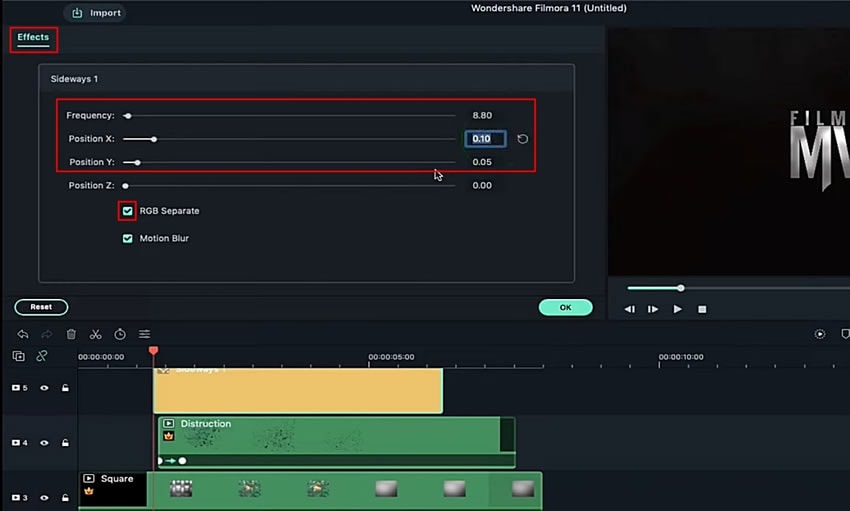
To add more effects to the logo, go to the “Effects” tab and select the effect of your choice. Drag and drop it on the timeline and double-click to open its settings. Change the “Frequency,” “Position X,” and “Position Y” accordingly. Now scroll down and uncheck the “RGB Separate” option.
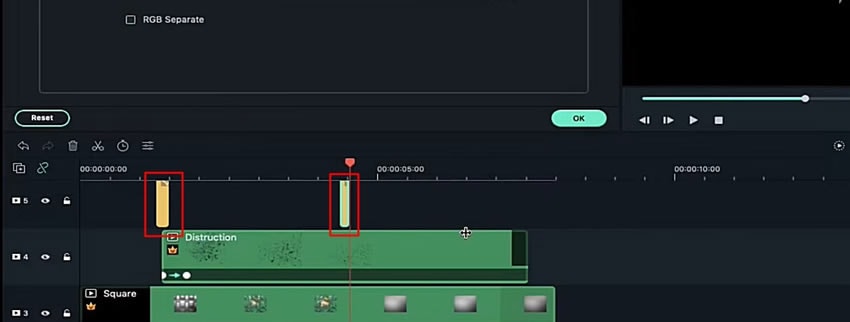
Keep the newly added effect for a few frames and select another effect to add to the timeline. Change the settings exactly like the first effect and trim it according to the duration of the previous one.
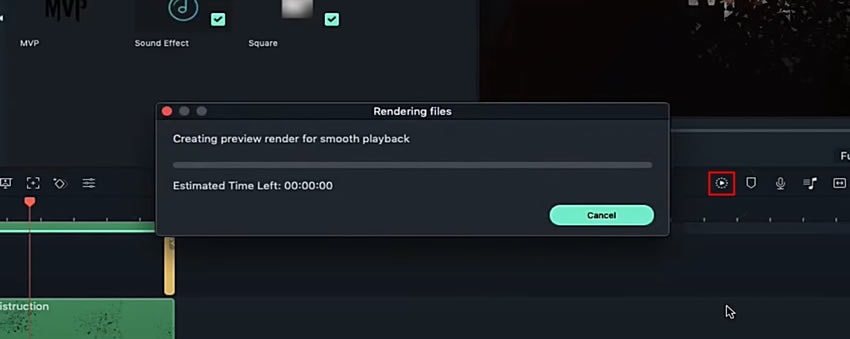
To end, adding and adjusting the dissolve effect on the logo include a lightning effect from the imported media. Adjust the settings by changing the value of "Scale" from the "Video" tab. Once the logo intro is ready, click the "Render Preview" button to finalize it and export the file for viewing the final results.
As we know, logos hold paramount importance in branding; an attractive logo is the biggest plus point for marketing. This guide provides step-by-step information to add a dissolve effect Filmora to our logo. Follow these steps and achieve your goal of adding a dissolve effect in the logo to make it more appealing.


