Key Steps of This Video Tutorial To Follow
Guide to using Filmora AI Tools
To start making your light sweep effect, let’s begin with adjusting the project resolution first. For this navigate the “File” tab from the top toolbar to open a drop-down menu. From there you need to select the “Project Settings” options which will give you access to multiple project customization settings. There, you can adjust the “Resolution” and “Frame Rate” according to your requirements.
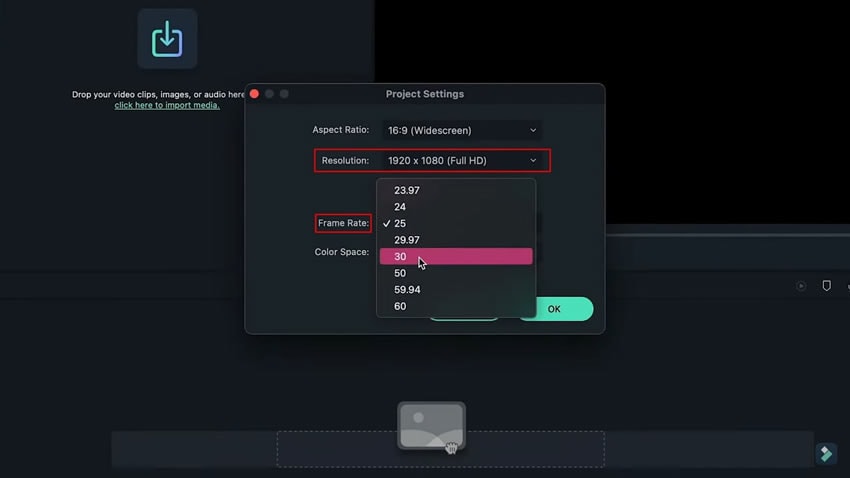
In this case we are keeping the “Full HD” quality with “60 FPS” frame rate. After adjusting the frame rate and resolution, you can begin with adding the titles in your video. For this, navigate to the “Title” tab from above to open different title options in the window pane on the left.
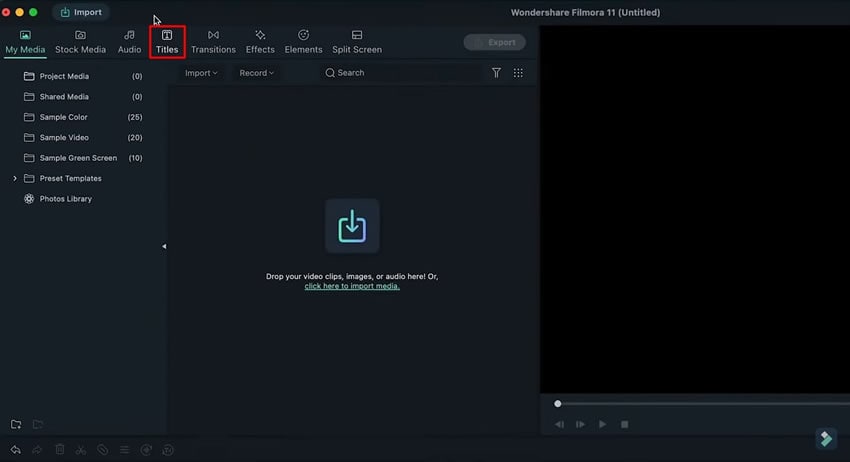
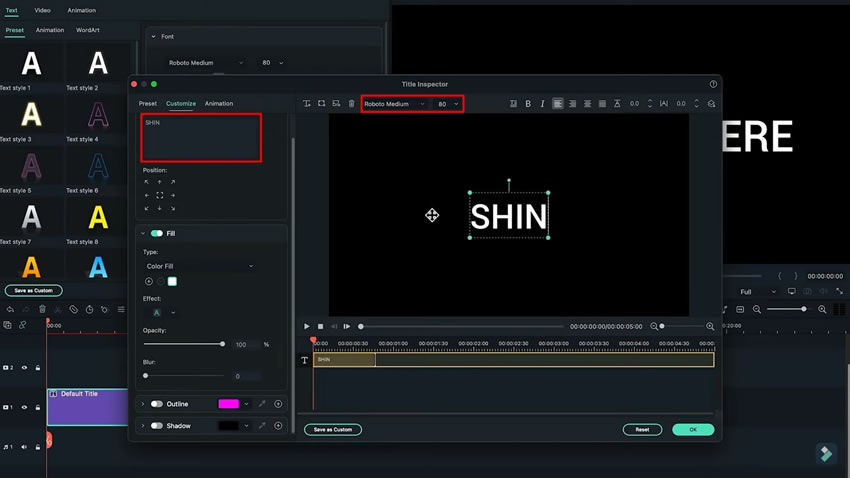
You can select your desired title and drop it in the main timeline. After this, double-click on it to access its customization settings. From there you can select the “Advanced” settings option for changing the features of the title. This includes the addition of text, change of size, font and color of the text.
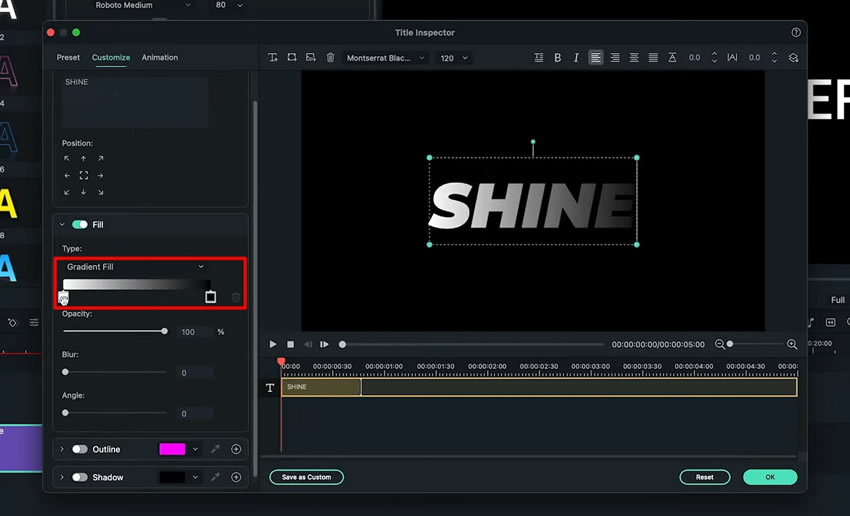
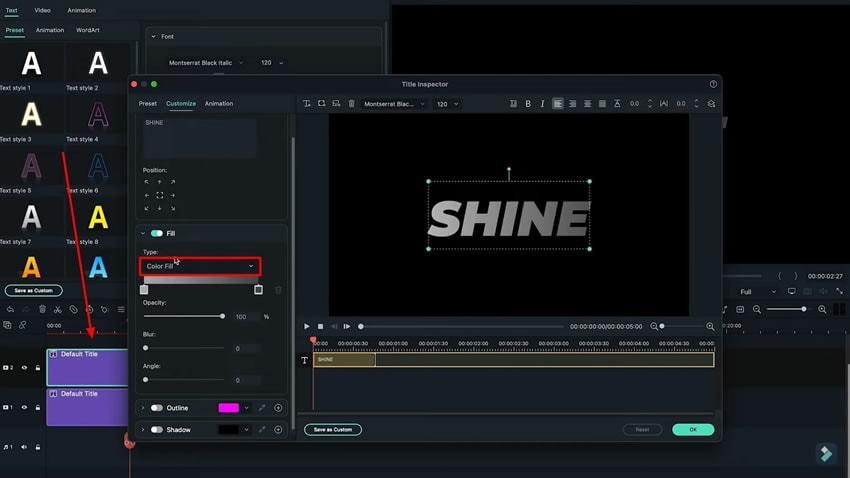
Following the basic changes in the title, continue to change the “Fill” type to “Gradient Fill.” Set the gradient color of the title according to your requirements and click “OK” to save all title customization settings.
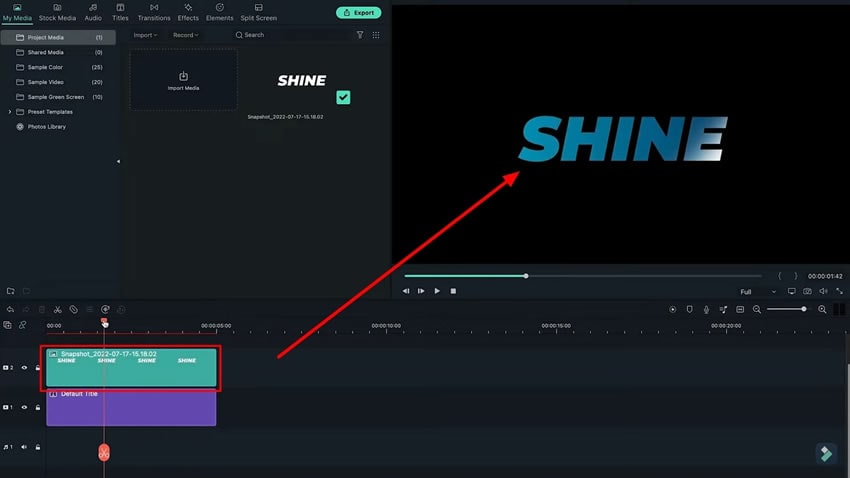
As you lead back to the main editing interface, right-click on the title to copy and paste it on another track. Double-click on the added title and access its “Advanced” customization settings. Change the color type to “Color Fill” which will convert the color of the title to white automatically.
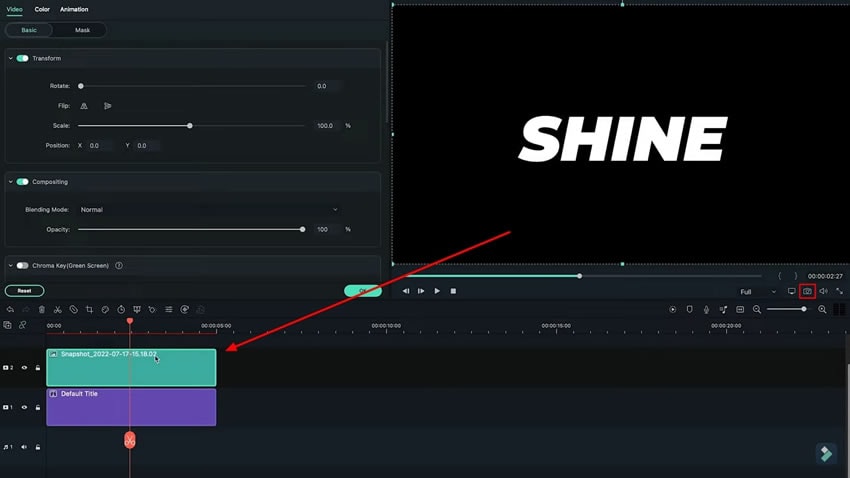
Take a snapshot of the image using the “Camera” button at the bottom of the preview screen. Ensure to save the image in “PNG” format and delete the title present on the second layer. Place the snapshot on the same layer where you’ve deleted the title and double-click to open its settings.
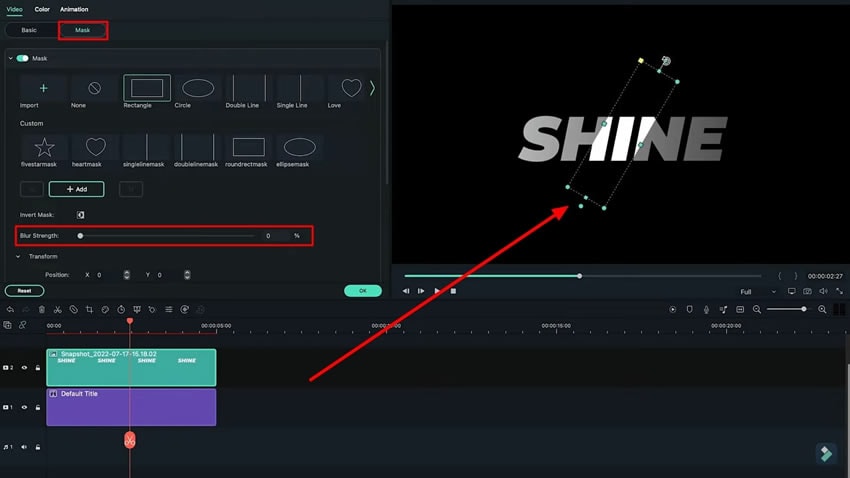
To create a shine Filmora effect on the title, continue into the “Mask” section for navigating into its options. Select the desired mask for this purpose and adjust its position on the preview screen. Change the size and “Rotate” value from the settings. Following this, use the slider to increase or decrease the “Blur Strength” settings.
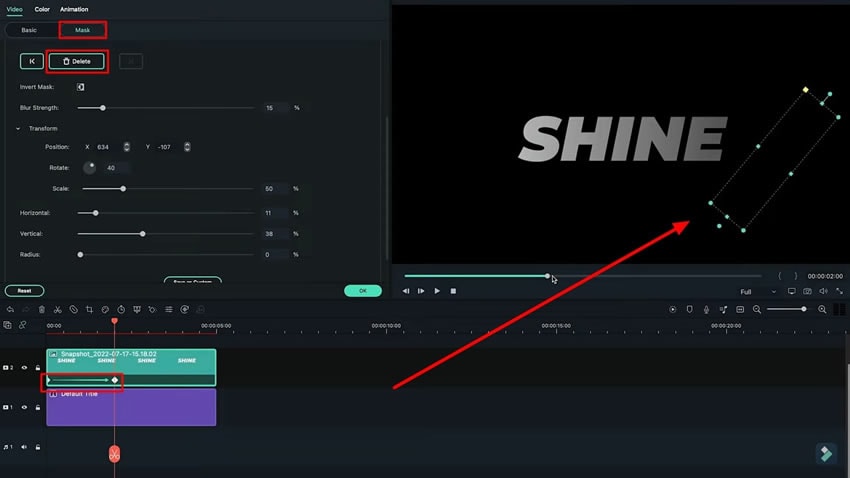
Once you have adjusted the settings of the added mask, change its position and navigate into changing its position. For that, you will have to add keyframes on your mask shape and click the “Add” button for adding a keyframe. Move your playhead and change the position of your mask shape and add another keyframe. This eventually creates a light sweep effect animation on the title.
If you are using a different color in the text, you will need to change the color of shining text as well according to the color you choose for the title. For this you can follow the same steps above to create the shining animation in different colors. After performing all the steps, you can finalize your light sweep effect.
Creating a shine effect with the help of Filmora can help you to save and lot of time and effort. You can also improve your content and ultimately increase your audience retention by providing them with a cool and smooth effects experience in your content. Using these steps, you can know how to create a light sweep effect in Filmora.


