Guide to Film High-Resolution Videos
The video gives a detailed guide on how to produce a good video that catches the audience's attention. If you want to create such a video, then read the detailed guide below.
Key Steps of This Video Tutorial To Follow
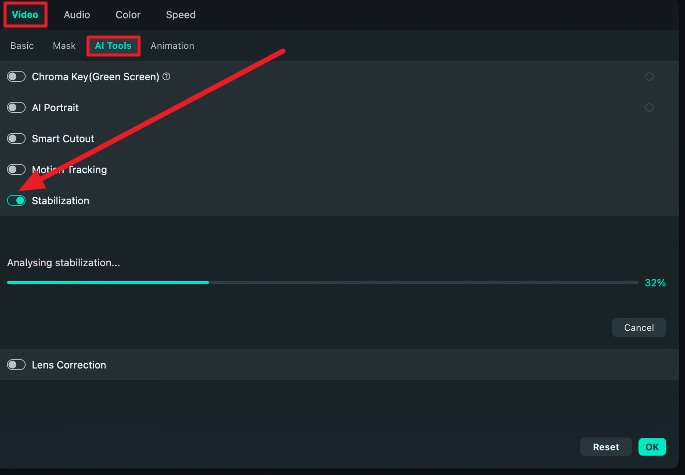
To increase the stability with Filmora, import your video and drop it on the timeline. Afterward, double-click on the video clip you want to edit. Now go to the video settings and click “AI Tools,” under the AI tools, you will find the “Stabilization” option; enable that option. This will make the process easier for you as Filmora will automatically stabilize the shaky video.
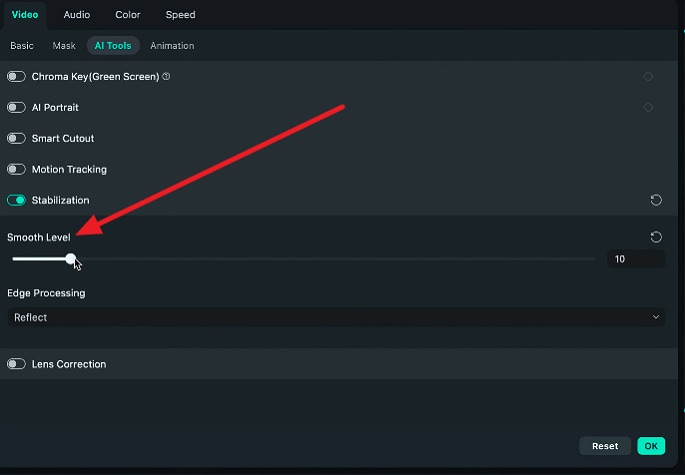
Once your video has been stabilized, you will see a smoothness option under it. Depending on how shaky your video is, you can choose the level of smoothness from 0-100. Keeping it between 25-30% is a safe option if your video is slightly shaky. Also, from the “Edge Processing” option, select “Reflect” to create natural and smooth edges.
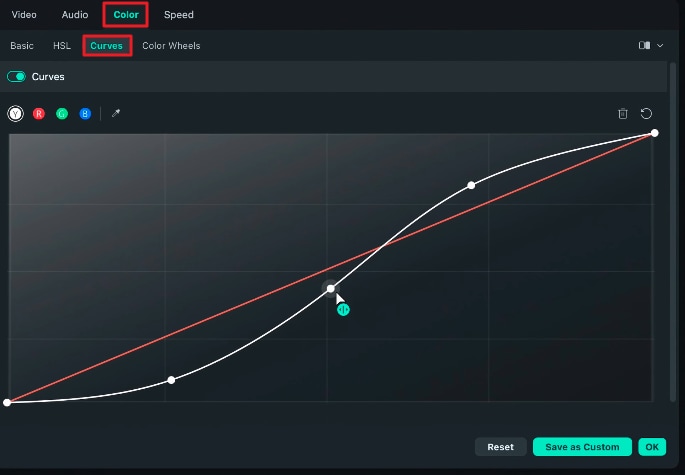
Go to the clip that you want to edit and click on it. From the editing options, select “Color,” then go to “Curves” and balance the color of the video in a natural but aesthetic shade.
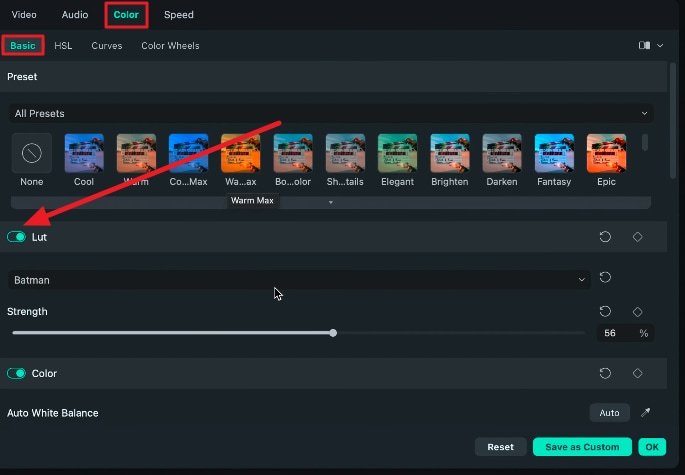
After that, click on the “Basic” option and enable “Color.” Set your video's saturation, vibrance, exposure, and brightness to match the color.
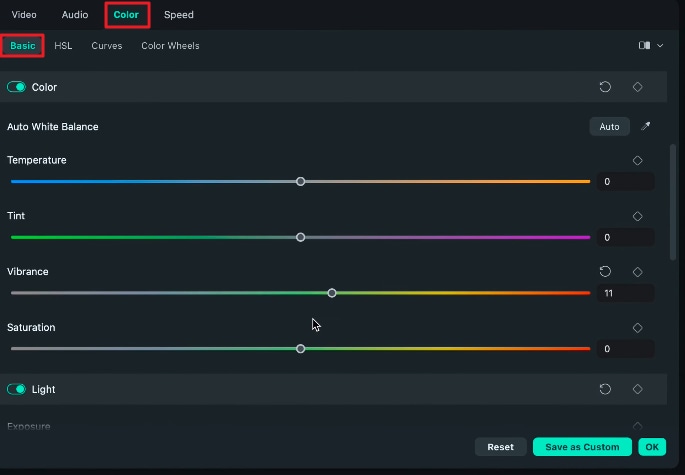
You can use LUTs if you don’t want to set your video color manually. LUTs are color templates that automatically set the vibe of your video. The option is right above “Color,” once you enable “LUT,” the tool shows a list of color templates you can apply to your video directly. After applying the template of your choice, choose the level of intensity of the template from 0-100.
If you are shooting your video and someone bumps into you, you lose your grip on the camera, making your videos shaky. This article is written with the perspective to overcome this problem. Using these techniques on Wondershare Filmora, you can turn your shaky video into a smooth, high-resolution film.

