Key Steps of This Video Tutorial To Follow
Guide to using Filmora AI Tools
Select your video and “Import” it into the project. Drag the video and drop it onto the “Timeline.” Zoom out from the timeline by pressing the “Minus” button present on the right side below the preview window.
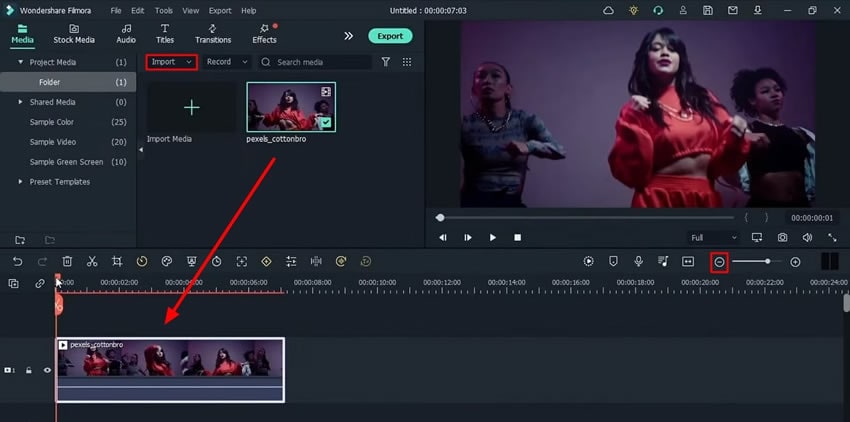
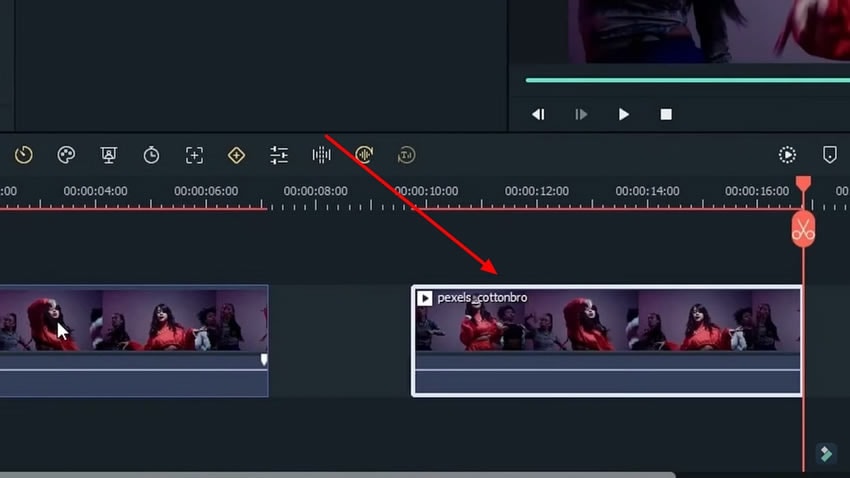
Duplicate the original video at the place next to it on the timeline on the same “Track”. To do so, move the Playhead forward in time and place it where you want to place your duplicate video. Copy your original video from the timeline and paste it at the point where you have placed your play head. Now you will have two original videos.
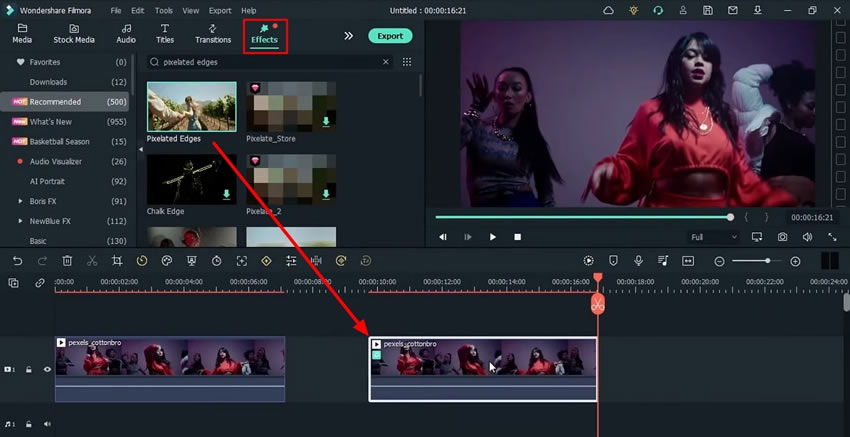
Select the duplicate video and go to the “Effects” section from the top. You need to type “Pixelated Edges” in the search bar on the top and select the “Pixelated Edges Effect” from there. Click on the “Download” option present on the effect and drag it onto the duplicate video. By doing so, you will see the lines will appear on the “Edges” of the subject in the preview window.
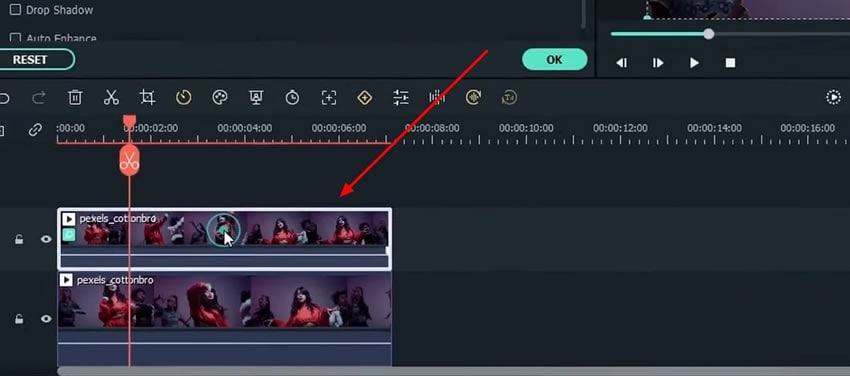
Select the video from the timeline on which you have applied the “Effect” by selecting the duplicate video and placing it right above the original video on the timeline.
To enter the “Video Settings,” double-click the video and navigate to the “Video” tab. Look for the “Basics” section under it and checkmark the “Compositing” section. As this enables the option, look for the “Blending Mode” option and change it to "Difference." In this way, you will get only the neon glow effect drawing without the subject in this video.
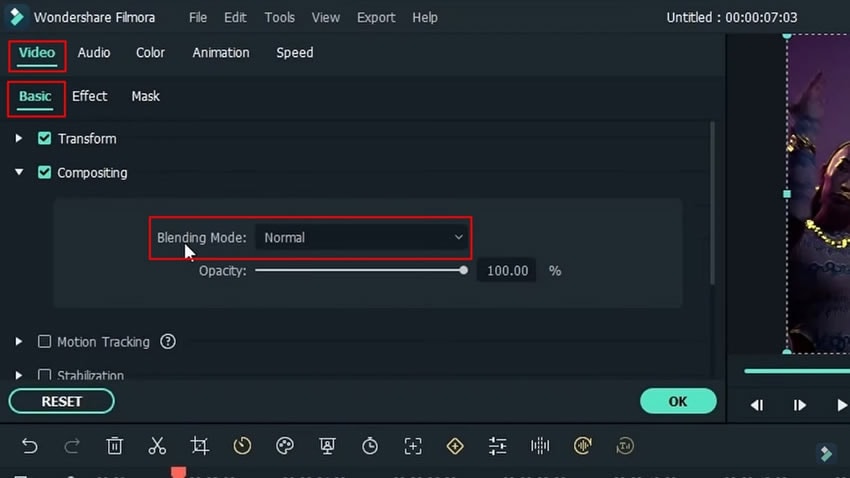
The purpose of keeping this “Blending Mode” is to keep the difference between the two videos in the timeline. To change the color of your choice, go to the “Effect” section next to the “Basic” section in the same window and select the color. Preferably, the color should be compatible with the neon outline. Once you have changed the appropriate color, “Export” the file and save it with the name of the color, you have chosen in this file to avoid confusion.
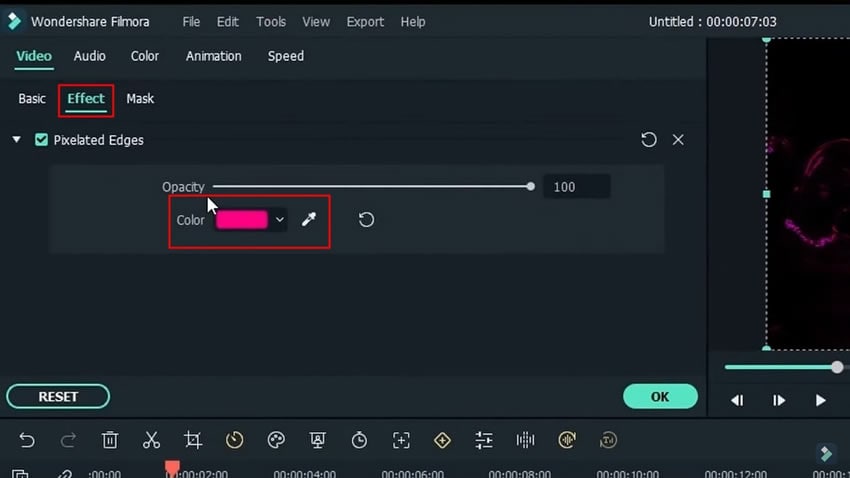
Once you have exported the file, repeat the same process on the second track and “Export” three different files to get multiple colors for the effect. Make sure to choose good contrasting colors every time and different from the previous ones.
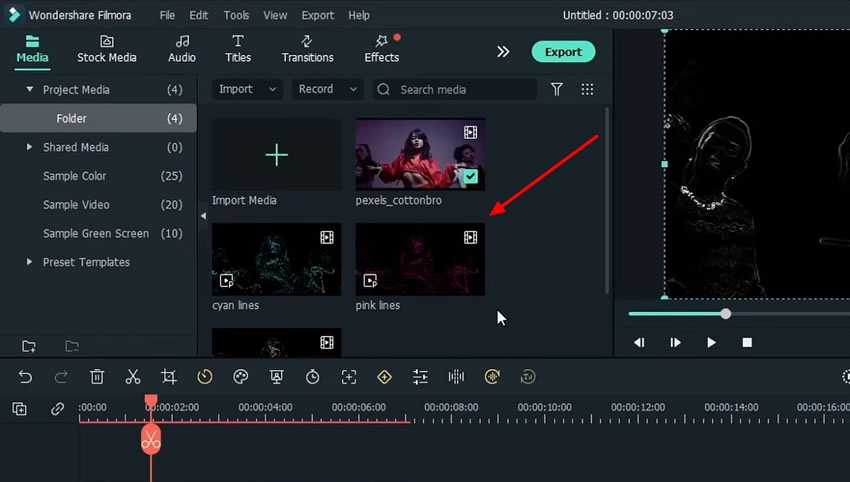
Once you have exported the files with the effects, delete the duplicated video track using the “Delete” button on your keyboard. Import back all the files with effects into the timeline right above the original video, which is placed on the first track.
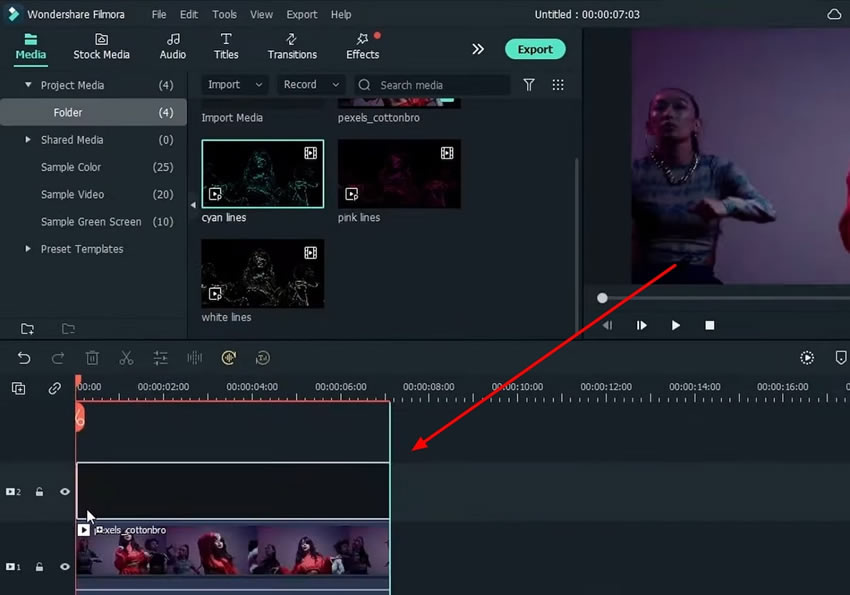
Select a video with effects on any track and lead to the “Video Settings” window. Under the “Video” tab, look for the “Basic” section and change the “Blending Mode” option from “Normal” to “Screen”. Repeat the same process for the other tracks holding the video with effects. Check the original video by playing it, and you will get the neon lines on the edges of the original video.
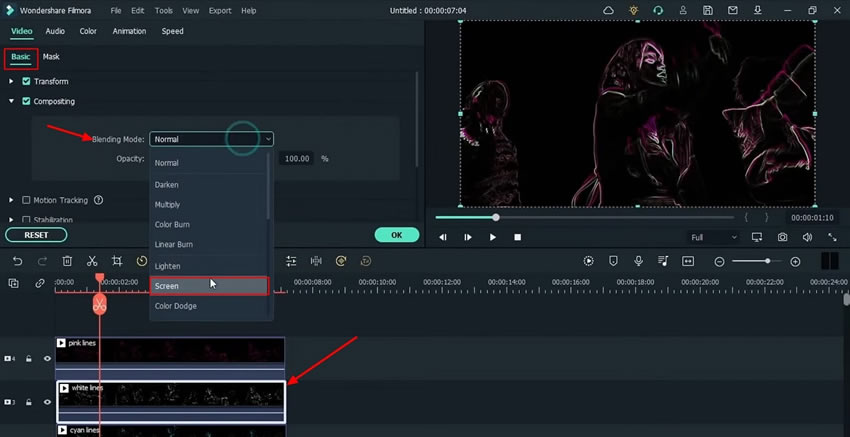
If you want to make your video more vibrant, you can make it possible by adding more effects to your video. Go to the “Effects” tab and select the glow effect of your choice. Drag it on all the tracks containing the neon effect.
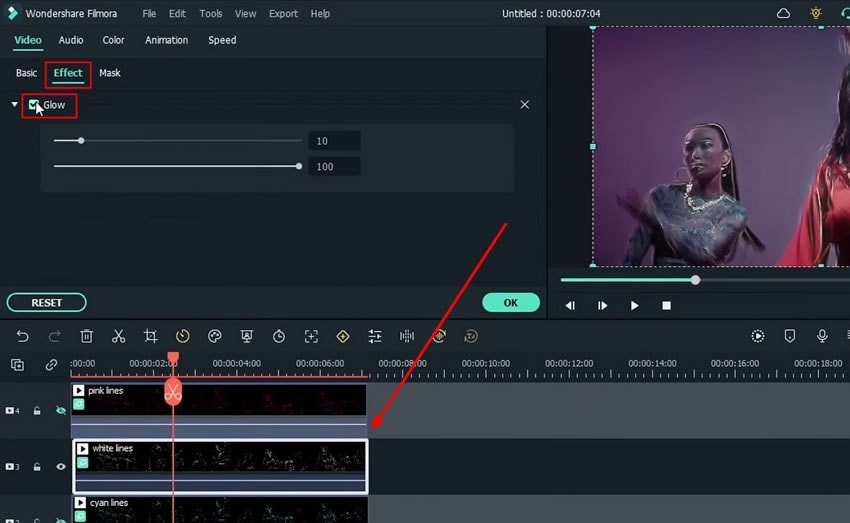
If you want to check your video with and without this effect, simply go to the “Effect” section from the “Settings” window and hit the check button against the “Glow” effect to see the before and after scenario. Keep the track containing the original video untouched. If you want to keep it protected, you can lock this track using the “Lock” button.
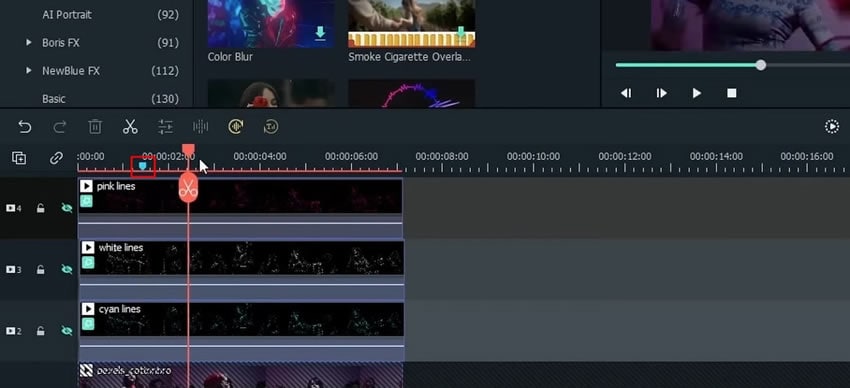
To make your video look better and more vibrant, mark the different points of the video. To do so, hide all the videos with effects on the tracks within the timeline. Move your Playhead towards the right on the “Timeline” and place it at the parts where you wish to remove the effects. Press “M” on your keyboard and mark those points in your video.
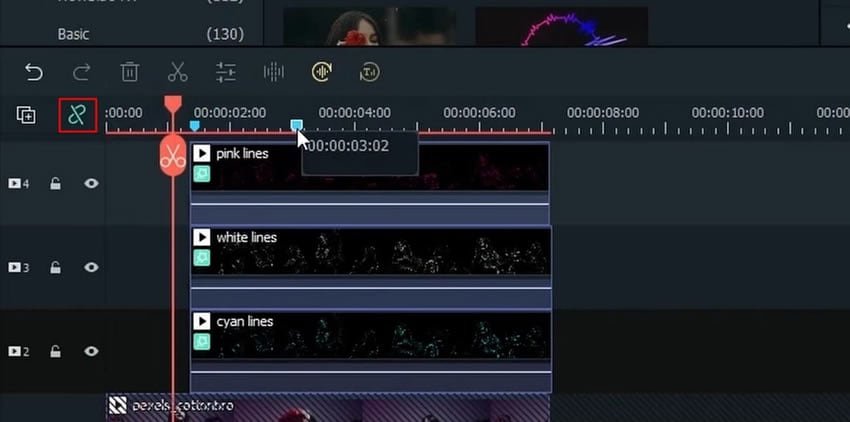
Unhide all these tracks and select them all by holding “Shift” and hitting the “Scissors” icon on these markers to split the videos from these points. Turn off the “Auto Ripple” option from the bar above the timeline and delete the videos on the left side of the playhead by tapping the “Trash” icon. Similarly, select the other “Markers” and delete the remaining part on the right to get the section with the neon effect.
Mark another part of the video by moving the Playhead and pressing “M”. Head over to the "Effects" menu and choose "AI Portrait" from the left panel. Choose the required effect and drag it on top of the video. Customize this effect by approaching its “Settings” window. Change the “Color” and press “OK” to save these settings for the newly added effect.
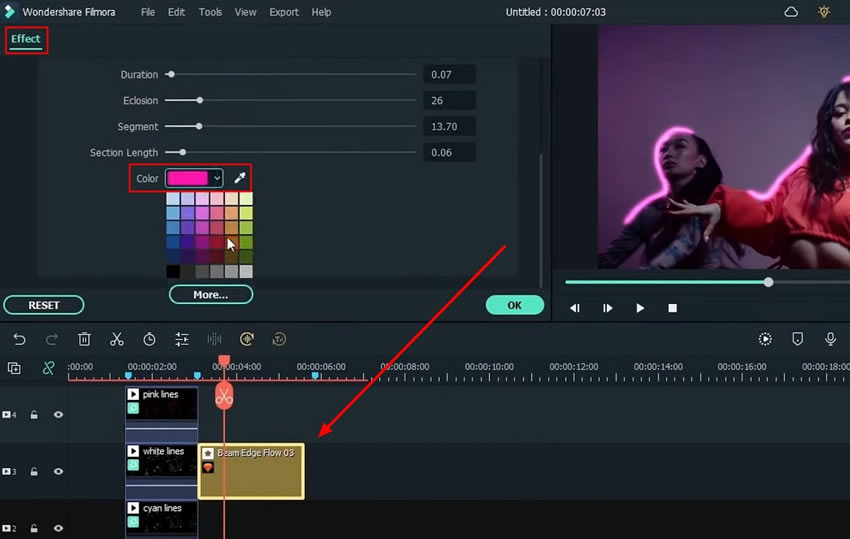
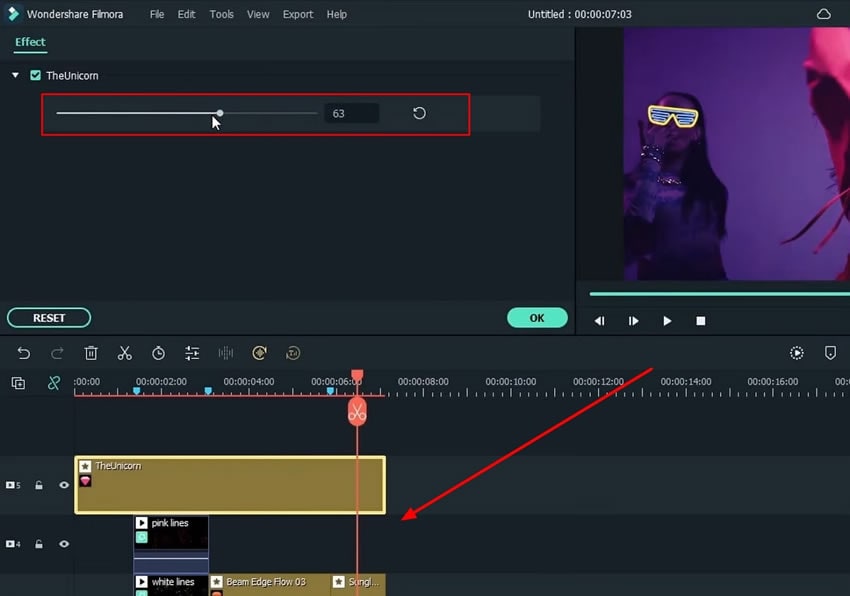
For the third effect in the video, choose “AR Stickers” from the left panel of the “Effects” menu. Similarly, you can add “Filters” by selecting any filter and dragging it on all the videos. Adjust the “Opacity” of the effects and hit “OK” to save these settings. Play the video to see the final results of the neon glowing effect on the dance video.
Adding innovative colors to your dance videos with Filmora video effects can make them more attractive to watch. If you are a dancing enthusiast and love to shoot glowing effect videos more often, the steps outlined in this discussion are surely going to help you. Try out this effect, and get the desired results in no time.


