Top 3 Hot Video Editing Software to Add Black Bars in 2025
Jan 15, 2025• Proven solutions
The black bars refer to the widescreen black bars you might have noticed on the top and bottom of a movie or a video clip. You may ask, why do we have these black bars for the video?
Good question! The black bars are used for the best viewing experience on all multimedia devices with different aspect ratios. Adding black bars to a video makes it more attractive as well imparts a cinematic feel to the viewers. Presentation of the video is equally important as the content which is why most people prefer to add these black bars to their videos while posting it on Facebook and YouTube. At the production time of a cinema, the people in the industry use the term Cinemascope for these black bars.
Best Video Editors to Add Black Bars
The best video editing software is one that has all the features to make a cinema movie in it and allows anyone to be a moviemaker. An easy-to-use interface and powerful tools are the necessities of such video editors. They should allow anyone without budget, experience or hi-tech equipment to create an eye-catching video. Some of the software we have chosen for you are Wondershare Filmora, VSDC, and Adobe Premiere Pro.
1. Wondershare Filmora
Wondershare Filmora is one of the best video editing apps in the market which will help you add black bars to your video by the title shapes. Once the widescreen black bars are created, the app allows you to apply wonderful cinematic filters to your project. Let’s see how:
Step 1: Start Filmora, and click on the File-Import Media option, and import your source files to the media library.
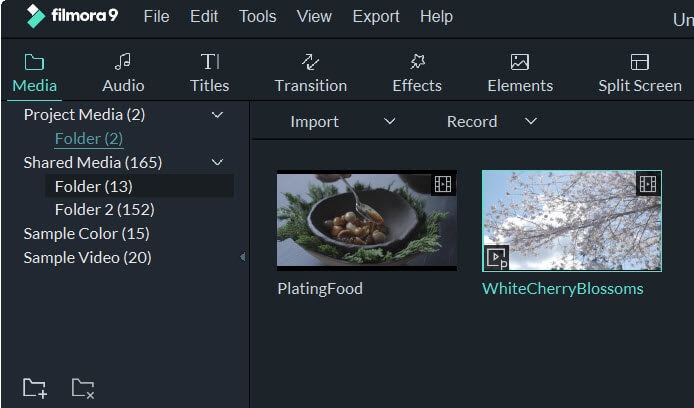
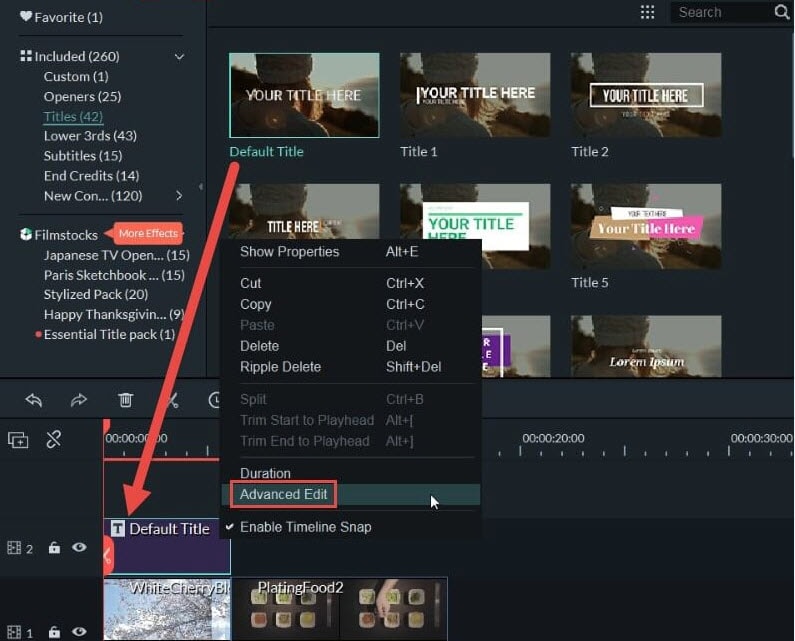
Step 2: Once you import the source files to the media library, you can simply click on the thumbnail of the video and drag/drop it down to the timeline. Then go to the Titles tab, add any title you want to the timeline, and then right click it to select Advanced Edit.
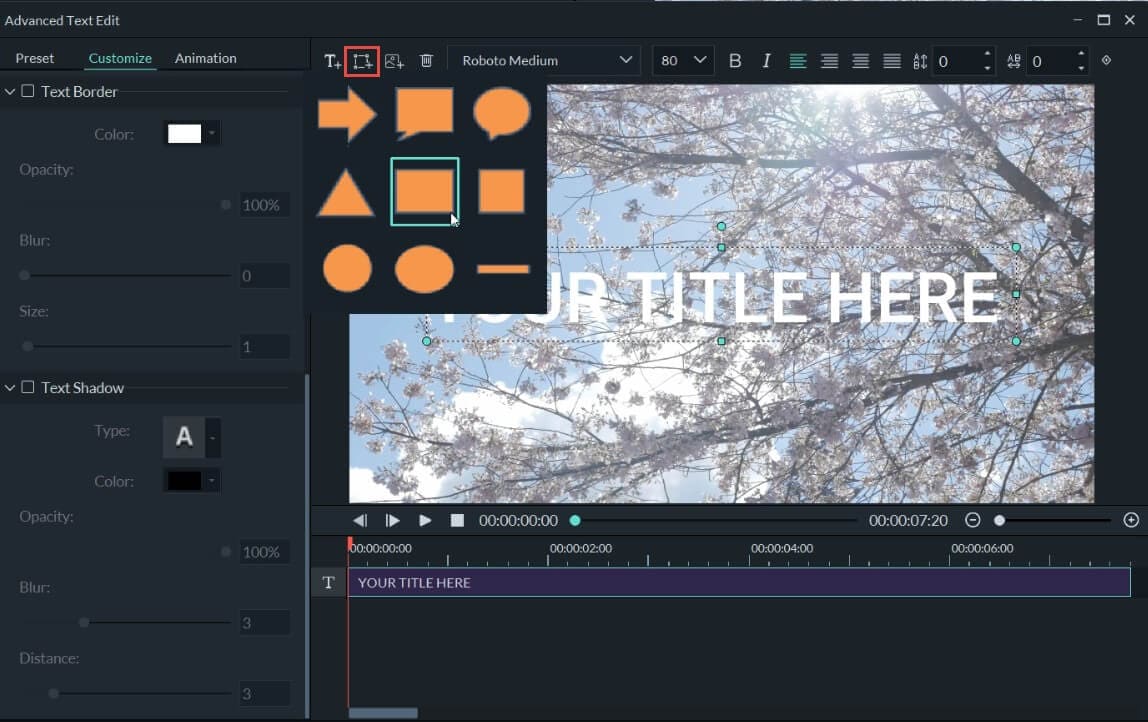
Step 3: Now that you have chosen Advanced Edit from the menu that appears, a new window will pop up displaying options to customize the title. Remember our goal is to add a black bar to the video. So, if any sample text appears on the screen, you can click on it and delete it. From the top bar of this pop-up window choose the shapes icon, and select the rectangle shape.
Step 4: Add two rectangle shapes to the top and bottom of the video respectively. Then you can resize them manually to fit the length and width of the video frame to make sure the alignment of both the bars.
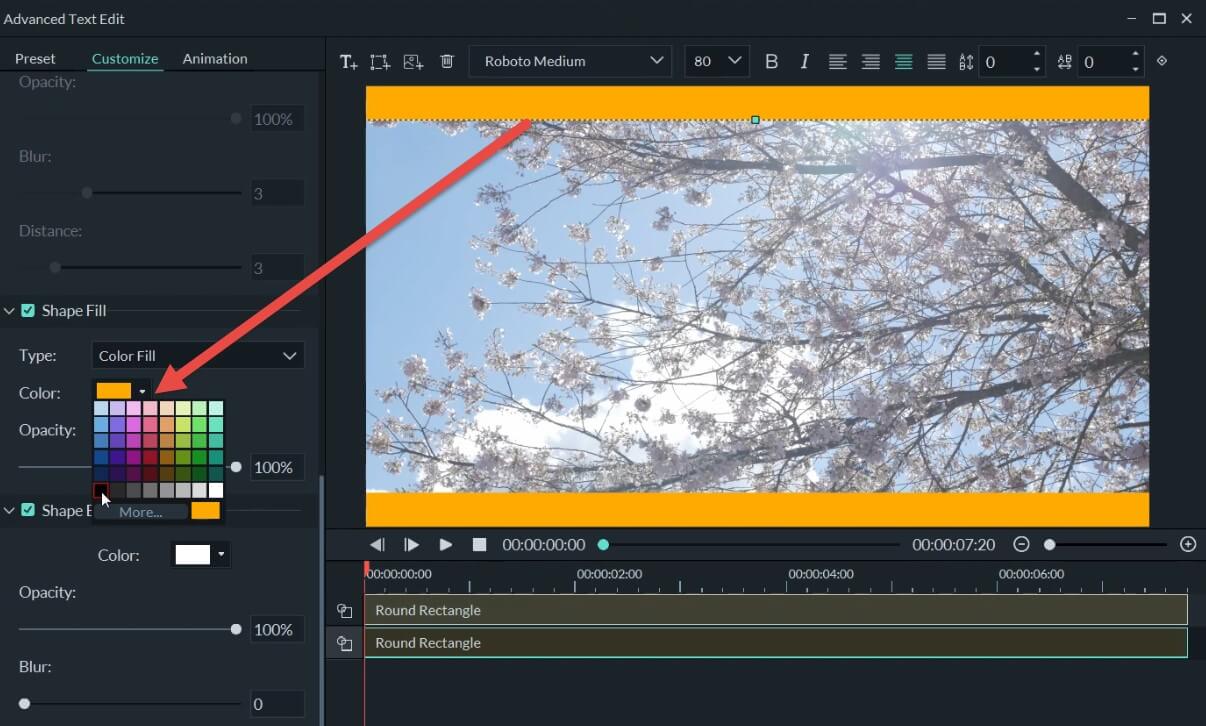
Step 5: Then scroll down to the color option on the left. Change the color to black for both the bars to create the black bars. Click OK to save the changes.
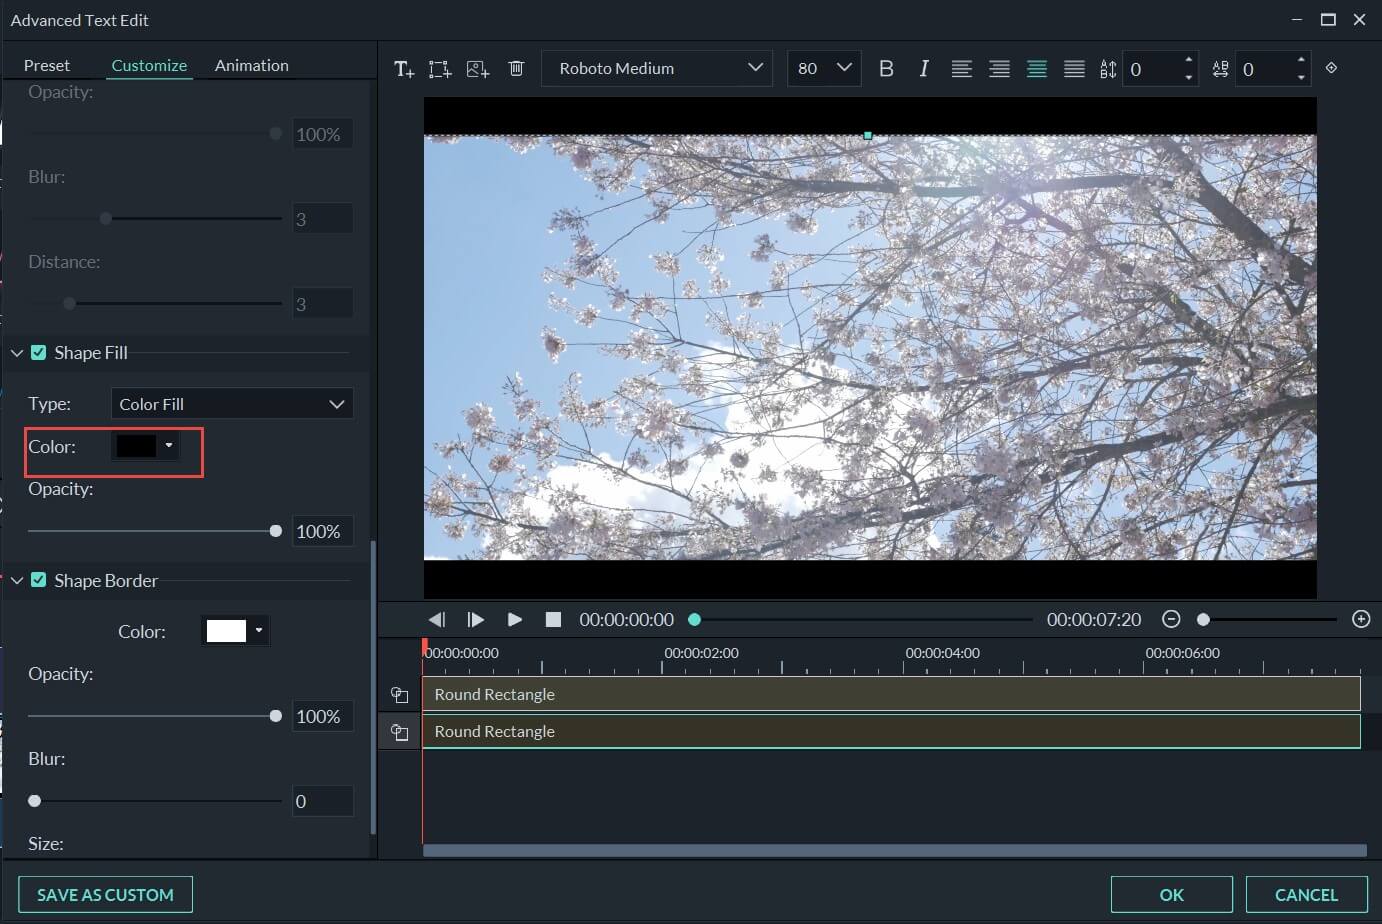
Step 6: After you finish creating the black bars, you can Go to the Effects-Filters tab, then apply the filter you like to your video. It will look more cinematic.

Step 7: Finally click on Export to save and export your video. Filmora gives you access to all the popular format options. That means you can convert your video in any format you like! You are good to go.

2. VSDC Video Editor
VSDC is a pro-level video editing software and offers a non-linear editing technique. It packs in a variety of features like masking, animation and color correction, which can take ones’ editing to the next level. To add black bars in VSDC, you can follow these steps:

Image source: VSDC Official Site
- Open the program and import the video you wish to edit by tapping the Import content Tab from the start screen.
- Using the menu on the left side, add the rectangle object to the scene
- Now, using the Brush color tab from the menu at the top, choose black color and paint the rectangle with it
- Go to the Properties window and tap “Set the same size as the parent has” to stretch the black bar to the width of the video scene. Then manually adjust the height as you desire.
- Once you have created one black bar, right-click on it and tap duplicate to create a similar one.
- Drag and place the black screens at the top and bottom of the scenes as you intended.
3. Adobe Premiere Pro
Adobe Premiere Pro was launched as a successor of Adobe Premiere in 2003. It is a video editing app based on a timeline, developed by Adobe Systems. It is a widely used app for editing videos, television, online videos and commercials on both Windows and Mac operating systems. To add black bars in Adobe Premier Pro follow these steps:

Image source: Adobe Premiere Pro Easy Tutorial
- Launch the Adobe Premiere Pro app
- Import the video that needs to be edited into the project (Try creating 1920 x 1080 HD timeline)
- Drag the video and drop it into the sequence timeline.
- Now an adjustment layer needs to be created and dropped above the footage area
- Search for the Crop option from the Effects tab. Drag and drop it to the adjustment layer.
- Now open the control panel and select 13% in the Top as well as the Bottom.
The black bars will be applied to your whole video project.
Pick the One you Like and Create Your Magic
We have listed out a few of the best video editing software available in the market above. Each of them has its own merits and special features, and you can use them to add black bars for your video and create your own magic! Do let us know what you think from your experience by leaving a comment below.
A black bar on video is known as a letterbox or the CinemaScope in movie production. Here is the tutorial about how to create and add a black bar to make a cinematic video
by Liza Brown Feb 28, 2025 17:32 PM
And in this guide, we will help you get rid of this trouble and remove annoying black bars from YouTube videos
by Liza Brown Feb 28, 2025 17:32 PM


