

 TL;DR:
Establishing a cinematic visual style requires selecting a color grading tool that aligns with your specific operating system constraints, timeline editing requirements, and the need for automated versus manual tonal control.
● Final Cut Pro and VEGAS Pro are restricted entirely to macOS and Windows ecosystems respectively, while Avid Media Composer and Adobe Premiere Pro provide cross-platform environments engineered specifically for complex, collaborative post-production pipelines.
● Users seeking a consolidated editing workflow can utilize built-in toolsets like those in Wondershare Filmora to apply an initial Auto Color baseline before manually isolating specific color ranges with HSL and balancing shadows, midtones, and highlights using Color Wheels.
● Workflows relying on legacy combinations like HitFilm require upfront verification of current product availability, while extending native capabilities with third-party plugins like Magic Bullet Suite or the macOS-exclusive Color Finale requires strict verification of host application version compatibility prior to installation.
Ask AI for a summary
 ChatGPT
 Perplexity
 Gemini
 Claude
 Grok
Grok
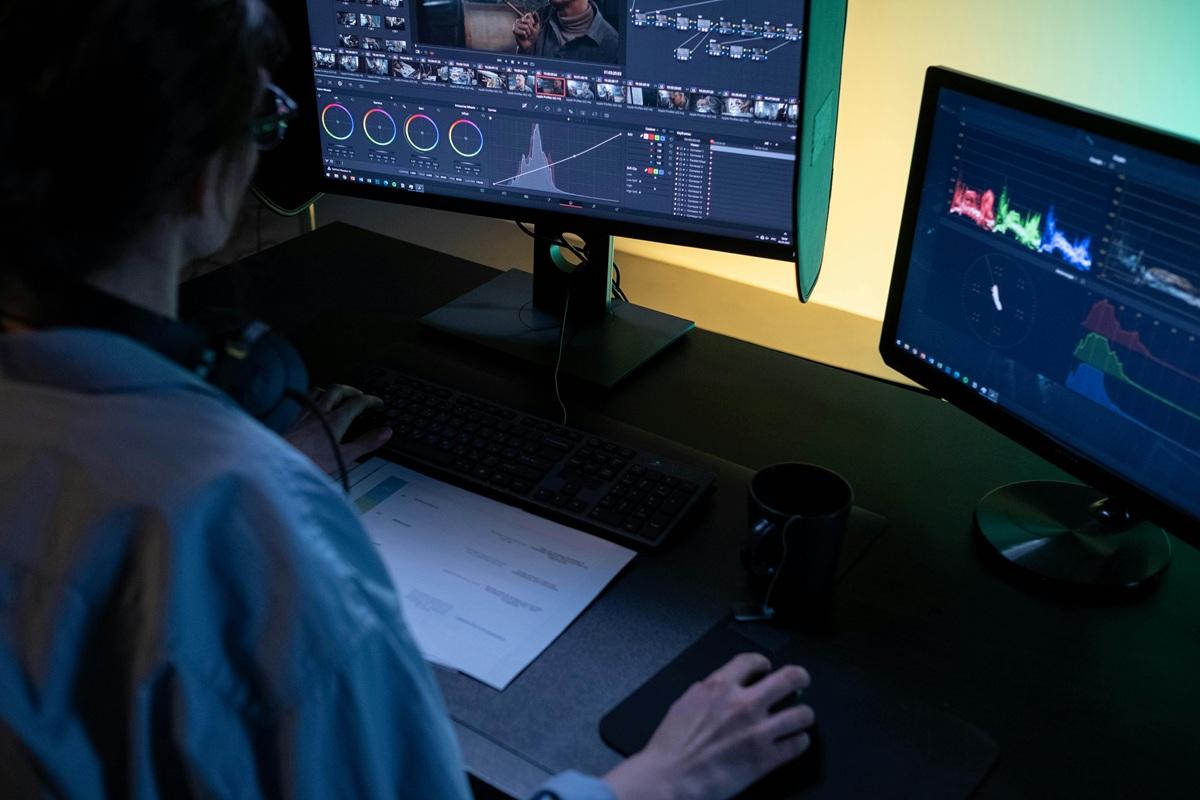
From YouTube videos and branded content to short films and commercial projects, color grading can shape the final look and mood of your footage. The right color grading software can help you correct uneven colors, build a consistent visual style, and create more polished results without slowing down your editing workflow.
Different tools approach color differently. Some focus on advanced professional control, while others combine automatic correction, LUTs, HSL, Curves, and Color Wheels in a more accessible editing environment.
Below, we compare seven popular video grading software options based on their color tools, platforms, workflow, and typical use cases.
Quick Comparison of Color Grading Software
The best fit depends on how much control you need, which operating system you use, and whether color grading is one part of a broader editing workflow.
| Software | Typical Use Case | Notable Color Tools | Platform |
| Final Cut Pro | Mac-based editing workflows | Color Wheels, Color Curves, Hue/Saturation Curves | macOS |
| Filmora | Creators who want accessible correction and grading | Auto Color, LUTs, HSL, Curves, Color Wheels | Windows, macOS |
| Adobe Premiere Pro | Adobe-based professional workflows | Lumetri Color | Windows, macOS |
| Avid Media Composer | Film, TV, and collaborative post-production | Integrated color correction tools | Windows, macOS |
| HitFilm | Editing and visual-effects workflows | Color correction and grading effects | Check current availability |
| Lightworks | Timeline editing with integrated color tools | Color correction and effects | Windows, macOS, Linux |
| VEGAS Pro | Windows-based editing and grading | Color Grading panel, LUTs, Curves, HDR tools | Windows |

7 Color Grading Software Tools to Consider
Each editor below approaches color grading differently. Rather than treating one option as universally better, compare the controls and workflow against the type of projects you normally edit.
1. Final Cut Pro
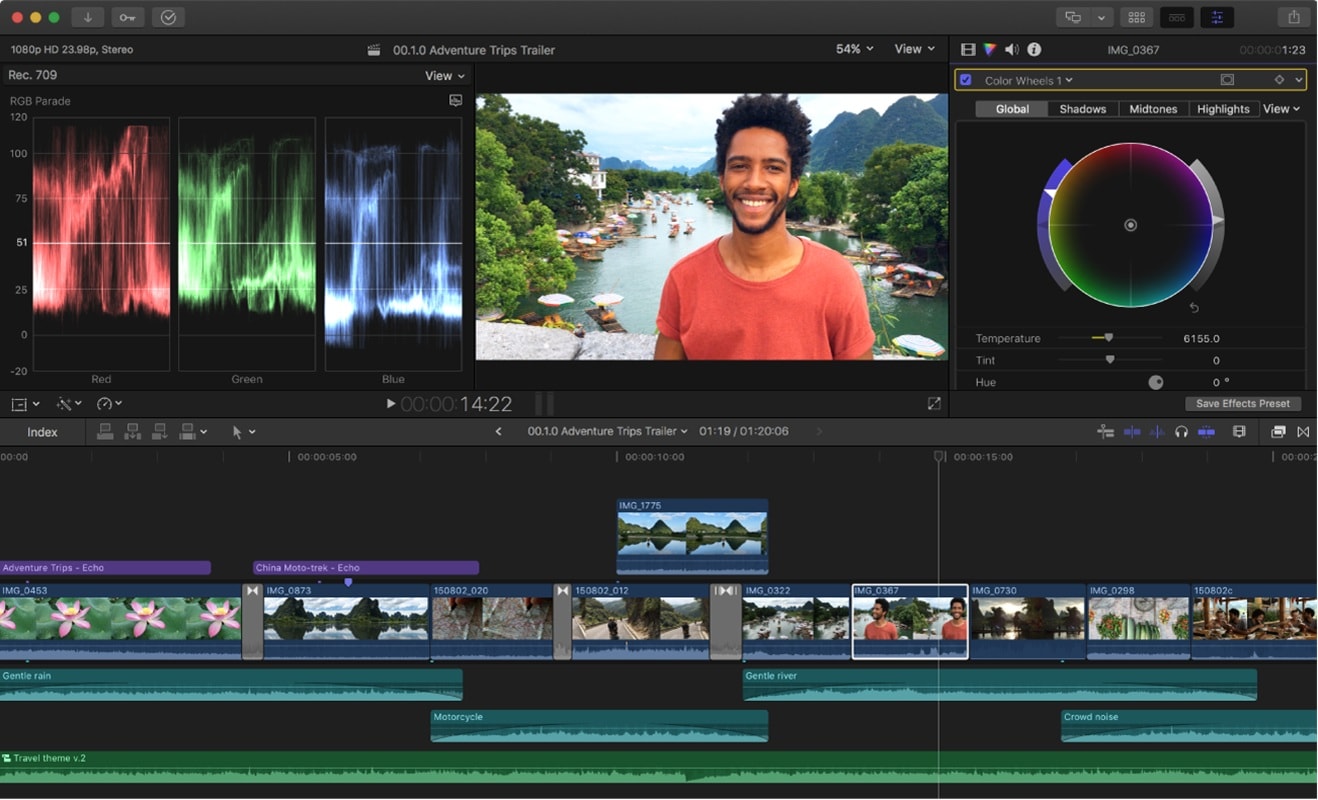
Final Cut Pro integrates color correction and grading directly into Apple's editing workflow. Its color tools are particularly relevant to editors already working on macOS who want to perform editing and grading inside the same application.
- Integrated editing and color workflow
- Color Wheels and Color Curves
- Optimized for Apple hardware
- Available only on Mac
- Advanced color workflows require more learning than basic preset-based editing
macOS
You edit primarily on Mac and want color grading integrated into a native Apple editing workflow.
2. Wondershare Filmora
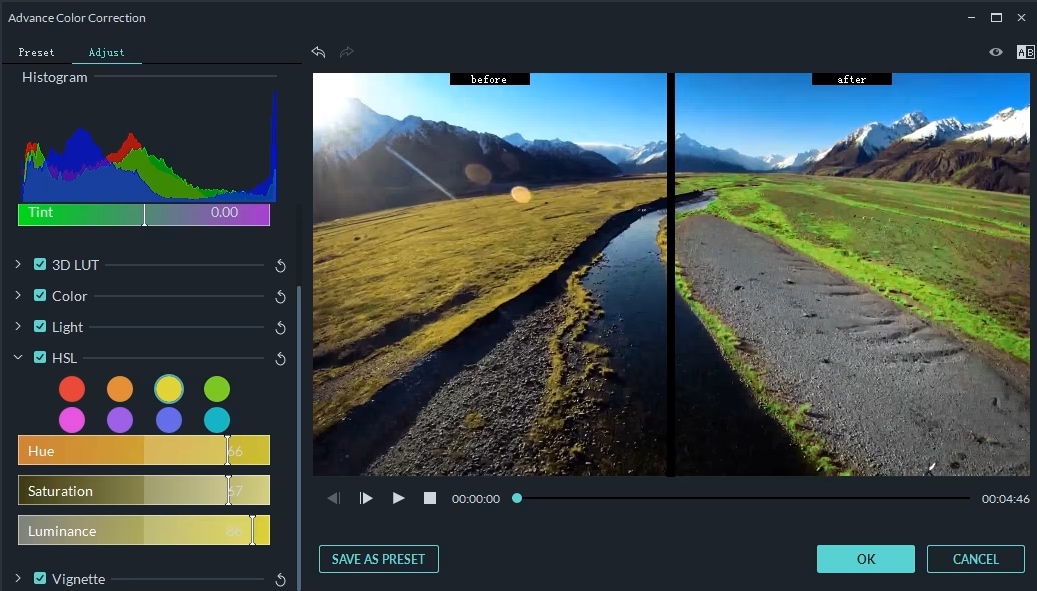
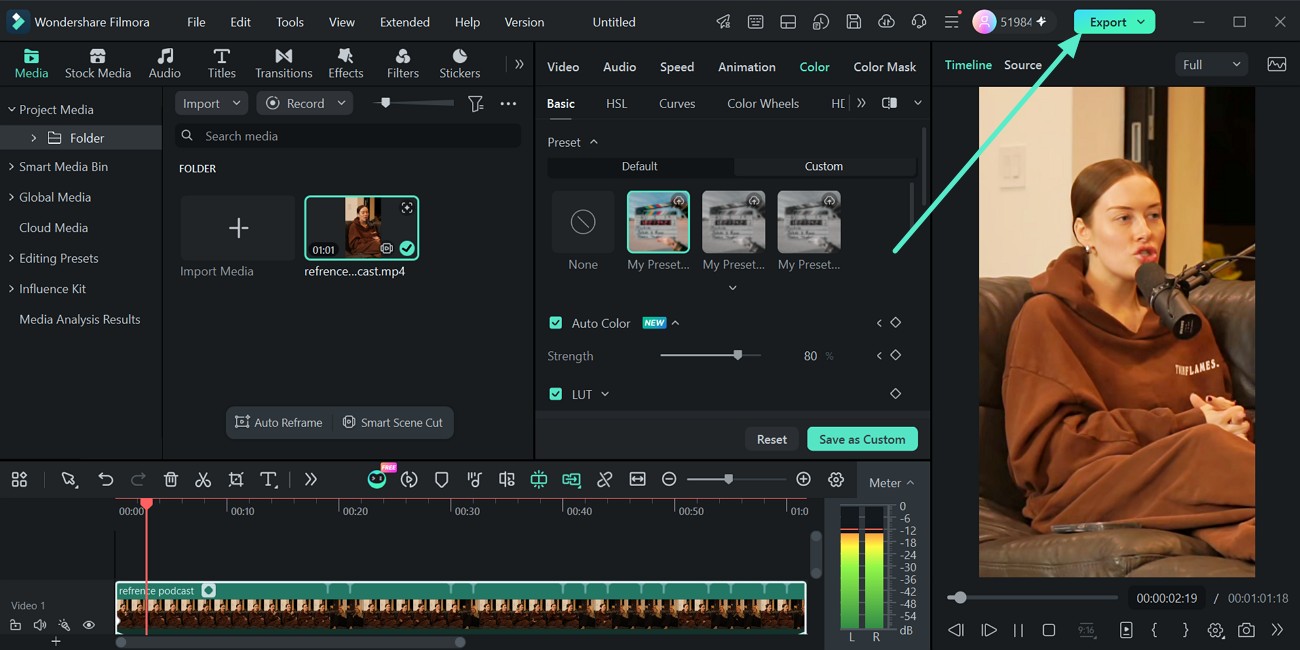
Wondershare Filmora combines automatic correction with manual color controls, making it useful when you want to move from a quick initial correction into more detailed grading without switching applications.
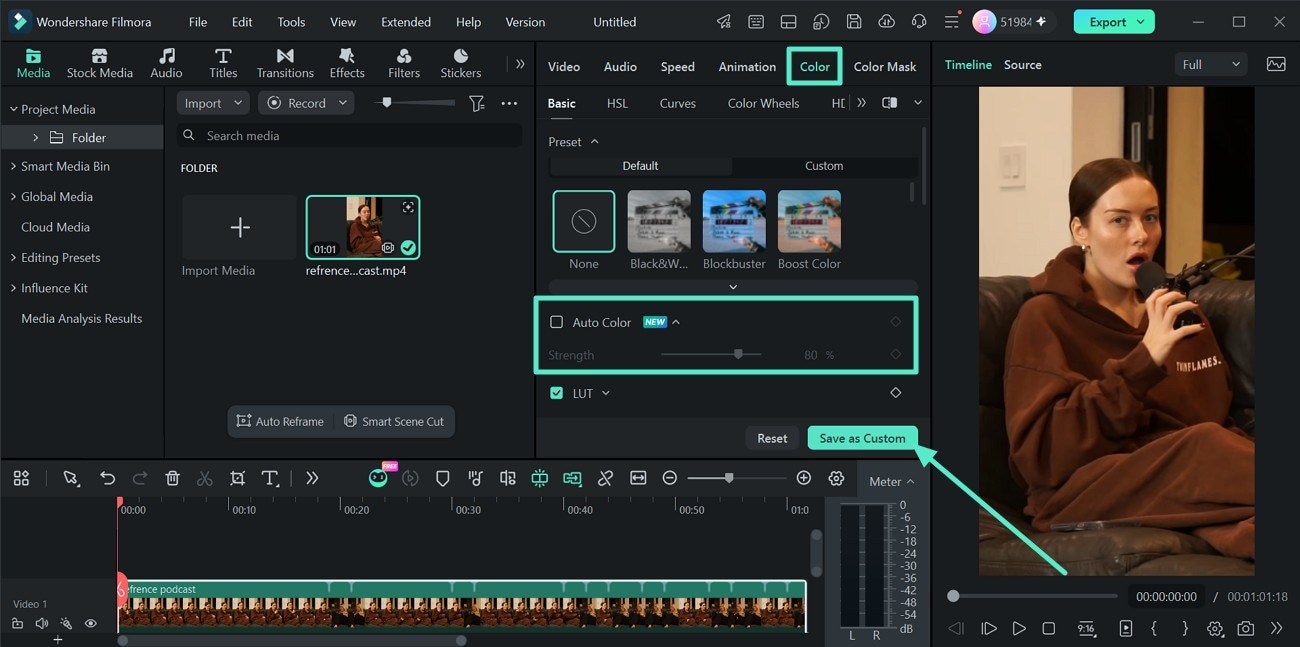
Under Color > Basic, Filmora provides LUTs, White Balance, Light, Sharpen, Vignette, and Auto Color. Auto Color can establish a faster starting point, while Strength lets you control how strongly the automatic correction affects the footage.
For more detailed grading, Filmora also provides HSL, Curves, Color Wheels, and HDR. HSL targets individual color ranges, Curves provide more detailed tonal and channel control, and Color Wheels let you work separately with Shadows, Midtones, and Highlights.
 Secure Download
- Auto Color for faster initial correction
- Built-in and custom LUT support
- Manual White Balance and Light controls
- HSL, Curves, Color Wheels, and HDR for more detailed grading
- Color tools integrated with the broader video editing workflow
- Editors working with highly specialized finishing pipelines may require dedicated color-grading environments
- Some advanced workflows require more manual adjustment than one-click correction
Windows, macOS
You want automatic correction and manual grading controls inside an accessible all-in-one video editor.
Auto Color, LUTs, White Balance, Light, HSL, Curves, Color Wheels, HDR, and Vignette.
3. Adobe Premiere Pro
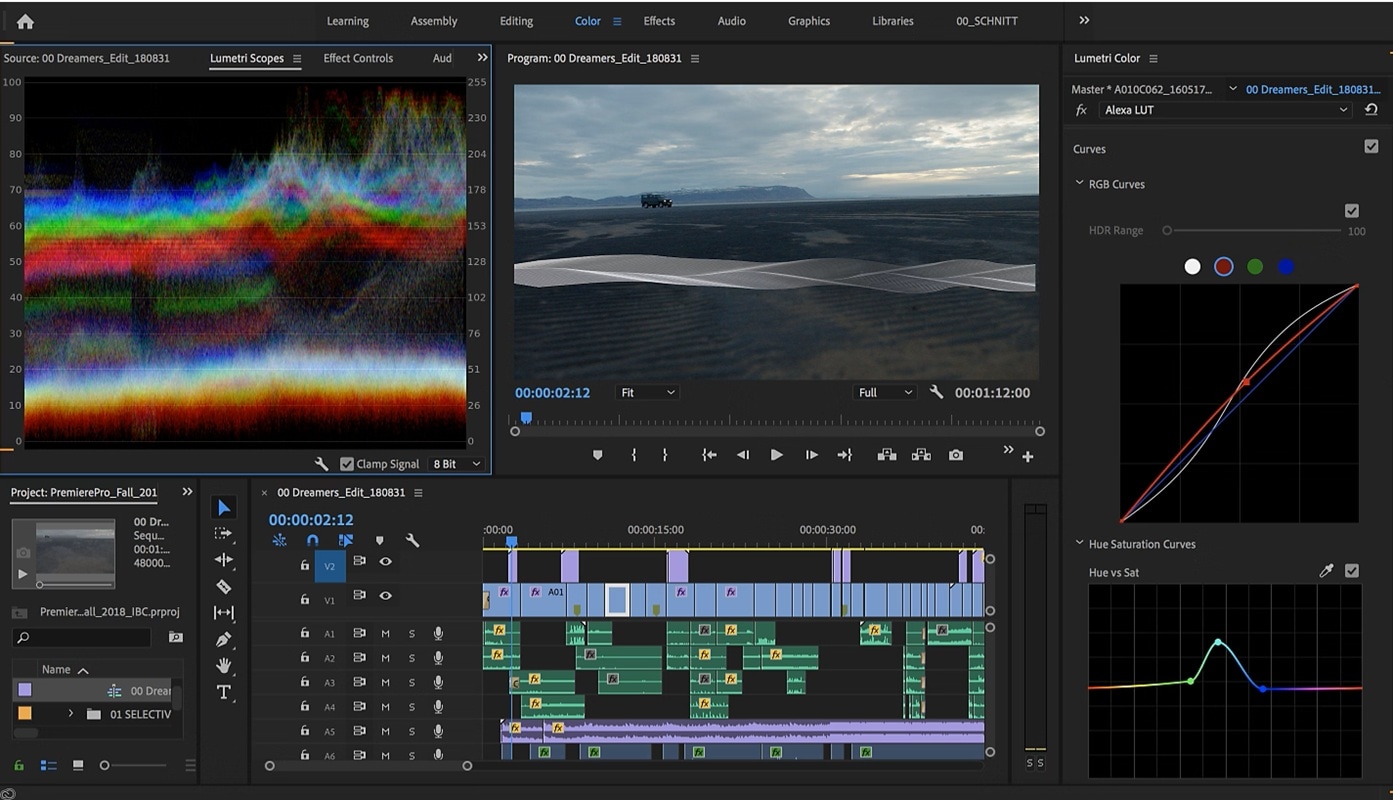
Adobe Premiere Pro integrates its color workflow through Lumetri Color, making it relevant to editors who already use Premiere Pro for timeline editing or work across Adobe Creative Cloud applications.
- Integrated Lumetri Color workflow
- Detailed manual grading controls
- Works within the broader Adobe ecosystem
- More complex interface for new editors
- Subscription-based workflow
Windows, macOS
Your editing workflow already relies on Premiere Pro, After Effects, Photoshop, or other Adobe applications.
4. Avid Media Composer
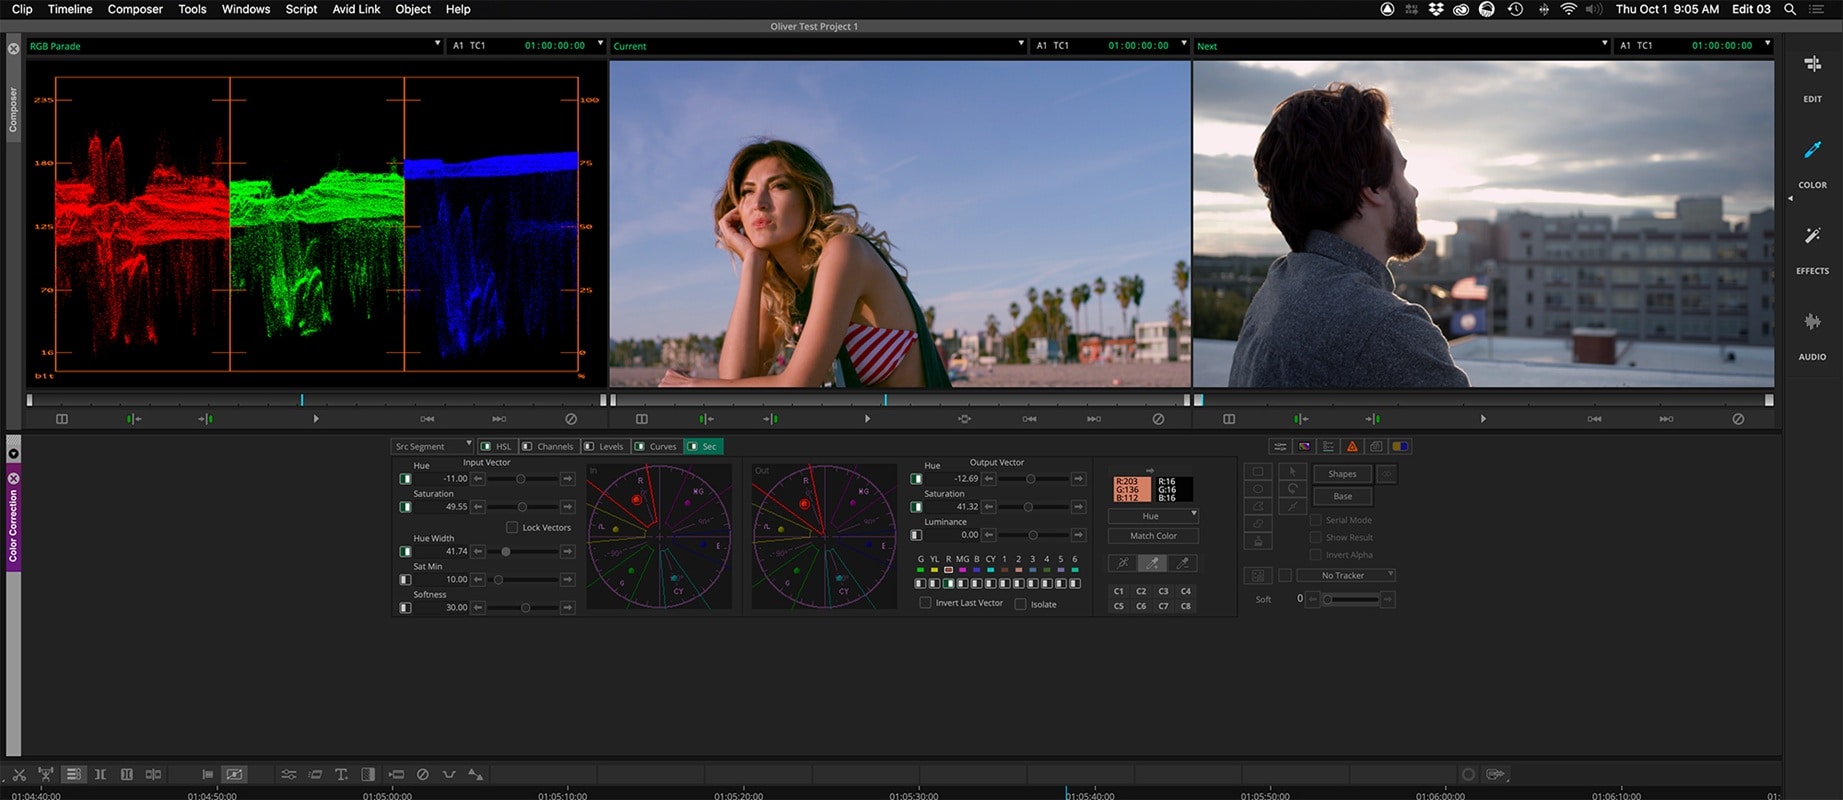
Avid Media Composer is designed around professional editorial and collaborative post-production workflows. Its integrated color tools are particularly relevant to productions where editing, media management, and team collaboration are central requirements.
- Built for professional editorial workflows
- Strong media and project management
- Suitable for collaborative productions
- More complex for casual editing
- Workflow can require more setup and training
Windows, macOS
Your priority is a professional film or broadcast editing environment with integrated color correction.
5. HitFilm
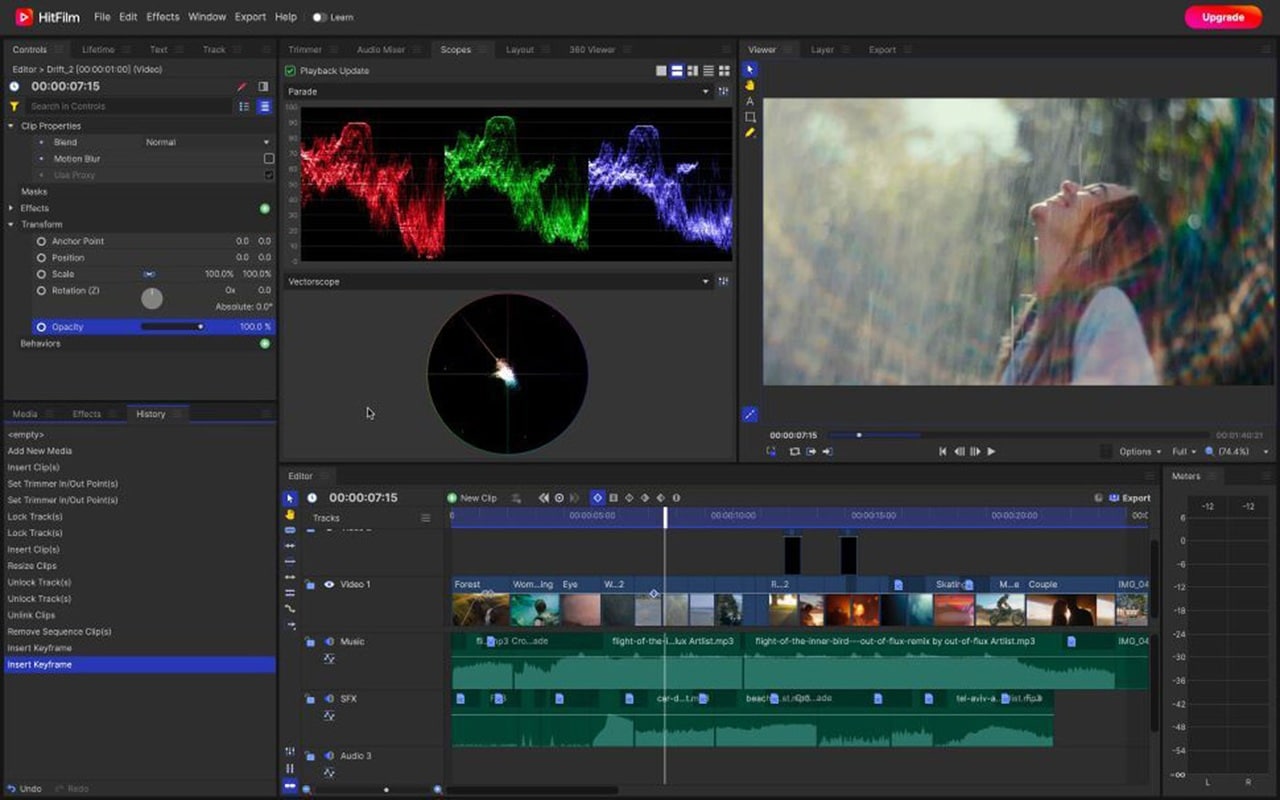
HitFilm combined video editing, compositing, visual effects, and color tools in one interface. If you're considering it today, check the product's current availability and support status before building a new workflow around it.
- Combined editing and VFX workflow
- Includes color effects and grading controls
- Current product availability should be verified before adoption
6. Lightworks
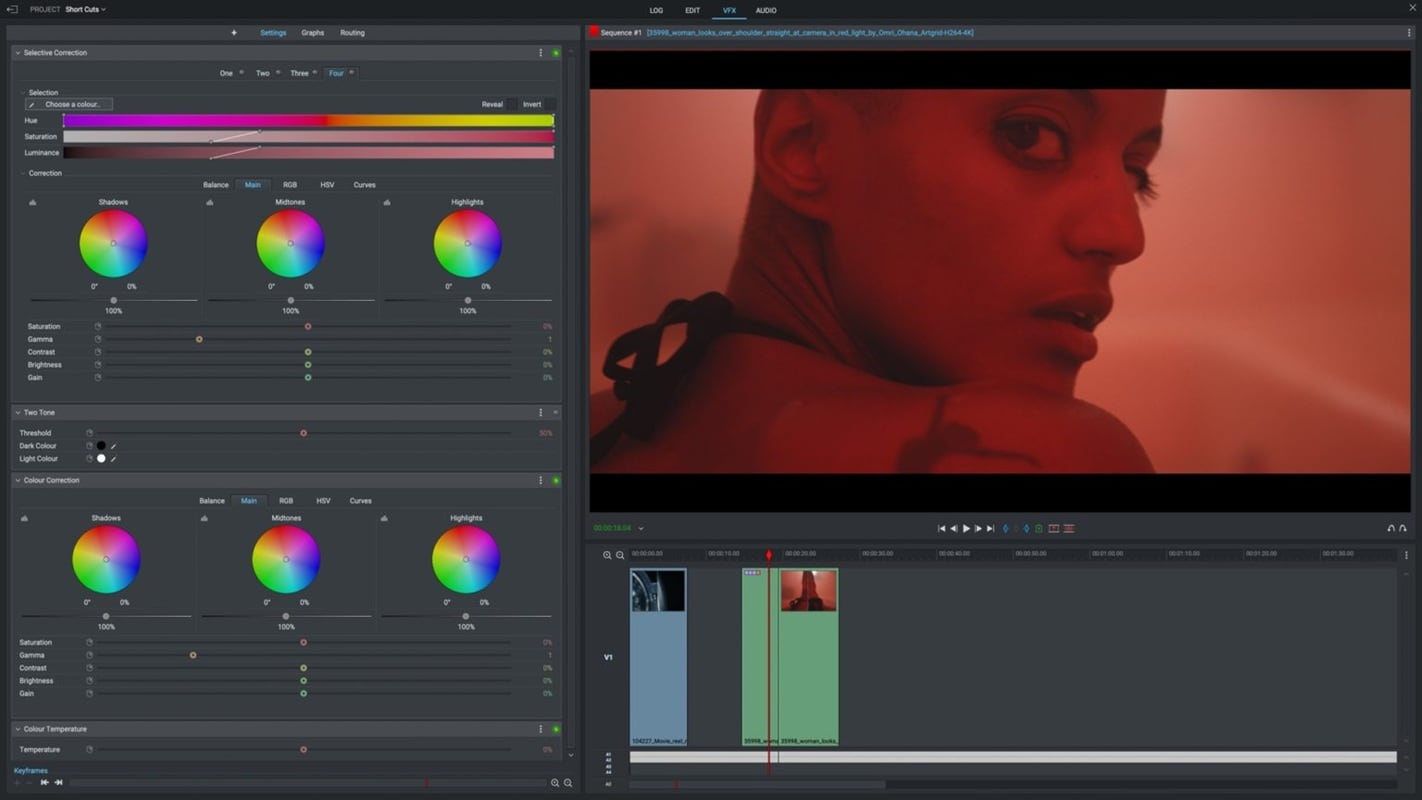
Lightworks combines nonlinear video editing with integrated visual and color tools. It can suit editors who want color adjustments to remain part of the same timeline-based editing environment.
- Integrated timeline and effects workflow
- Cross-platform availability
- Suitable for editing and finishing in one application
- Interface may take time to learn
- Color workflow differs from dedicated grading applications
Windows, macOS, Linux
7. VEGAS Pro
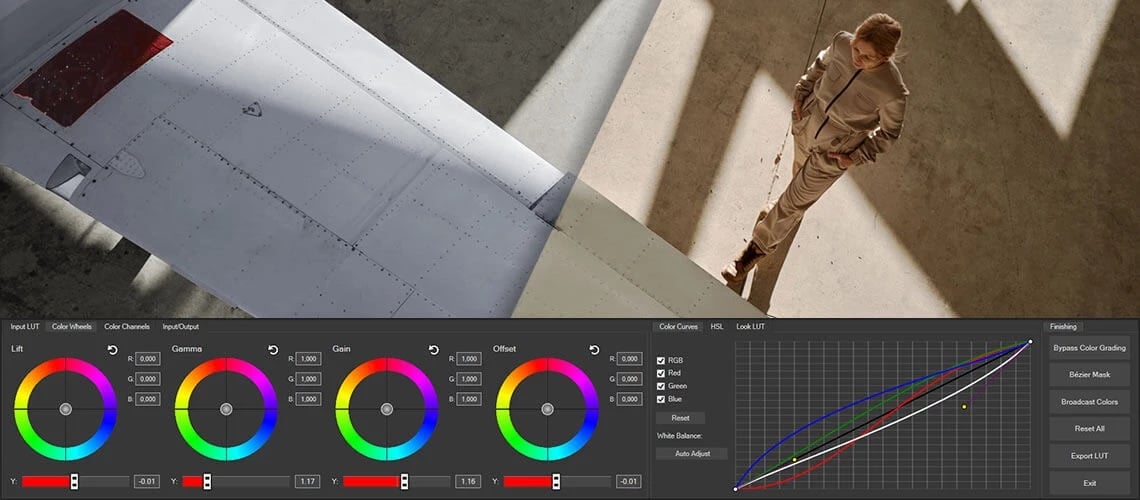
VEGAS Pro integrates color grading with its Windows-based timeline workflow. Its color tools can suit editors who want to perform correction, grading, editing, and delivery without moving between separate applications.
- Integrated color grading workflow
- LUT and curve-based controls
- HDR-oriented tools
- Windows only
- Available capabilities can vary by edition
Windows
How to Choose the Right Color Grading Software
Instead of choosing software based only on how many color tools it lists, consider how those tools fit into your actual editing workflow.
- Correction vs. grading: If your main need is fixing exposure, white balance, and inconsistent footage, prioritize strong basic correction tools. For creative finishing, look for HSL, Curves, Color Wheels, LUTs, and HDR controls.
- Automation: Automatic correction can reduce setup time when working with large numbers of clips. Filmora's Auto Color, for example, can establish an initial balanced look before manual refinement.
- Precision: Editors who need detailed tonal control should look for tools such as Curves and separate controls for Shadows, Midtones, and Highlights.
- Workflow: Consider whether you want grading integrated into your main video editor or prefer a more specialized finishing environment.
- Platform: Some applications are platform-specific. Final Cut Pro requires macOS, while VEGAS Pro is Windows-based.
- Learning curve: A larger set of controls is useful only when it matches the amount of time you want to spend learning and grading.
How to Color Grade Video in Filmora
If you choose Filmora, a practical workflow is to establish a balanced image first and then move into more detailed creative grading.
Step 1. Start With Basic Color Correction
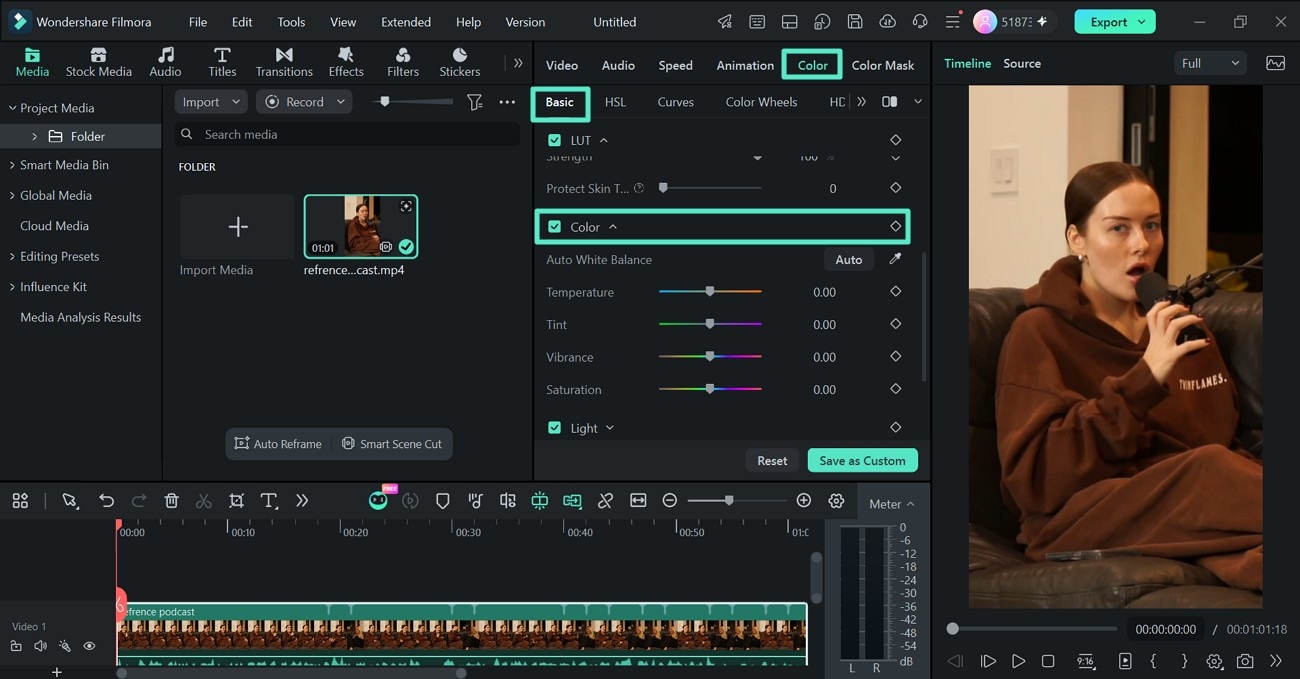
Import your footage, add it to the timeline, select the clip, and open Color > Basic.
From here, Filmora lets you work with:
- LUT: Apply a built-in LUT or import a custom LUT and adjust its Strength.
- Color: Correct White Balance with Auto, Eyedropper, Temperature, and Tint.
- Light: Adjust Exposure, Brightness, Contrast, Highlight, and Shadow.
- Adjust: Refine apparent detail with Sharpen.
- Vignette: Control the appearance around the edges of the frame.
- Auto Color: Automatically create an initial color and lighting correction.
Step 2. Use Auto Color for a Faster Starting Point
Enable Auto Color when you want Filmora to create an initial correction automatically. Adjust Strength until the result suits your footage.
Step 3. Refine Individual Colors With HSL
Open HSL when you need to modify a particular color range rather than changing the whole frame. Select a color and adjust its Hue, Saturation, and Luminance.
Step 4. Shape Contrast and Color With Curves
Use Curves for more detailed tonal and color-channel control. Filmora provides Y, R, G, and B curves, along with additional color curve adjustments.
Step 5. Balance Tonal Regions With Color Wheels
Use Color Wheels to work separately with Shadows, Midtones, and Highlights. This makes it easier to introduce creative color relationships across different tonal areas.
Step 6. Save or Export the Result
After completing the correction and grading, preview the footage and export the finished video. You can also save reusable color settings as a custom preset when you want to apply a similar look to other clips.
For the current workflows, see the Filmora Basic Color Adjustment Guide and Advanced Color Adjustment Guide.
Color Grading Plugins
If your existing editor does not provide the workflow or controls you need, a color grading plugin can extend its capabilities. Compatibility varies by host application and plugin version, so check current support before installing one.
1. Cinema Grade
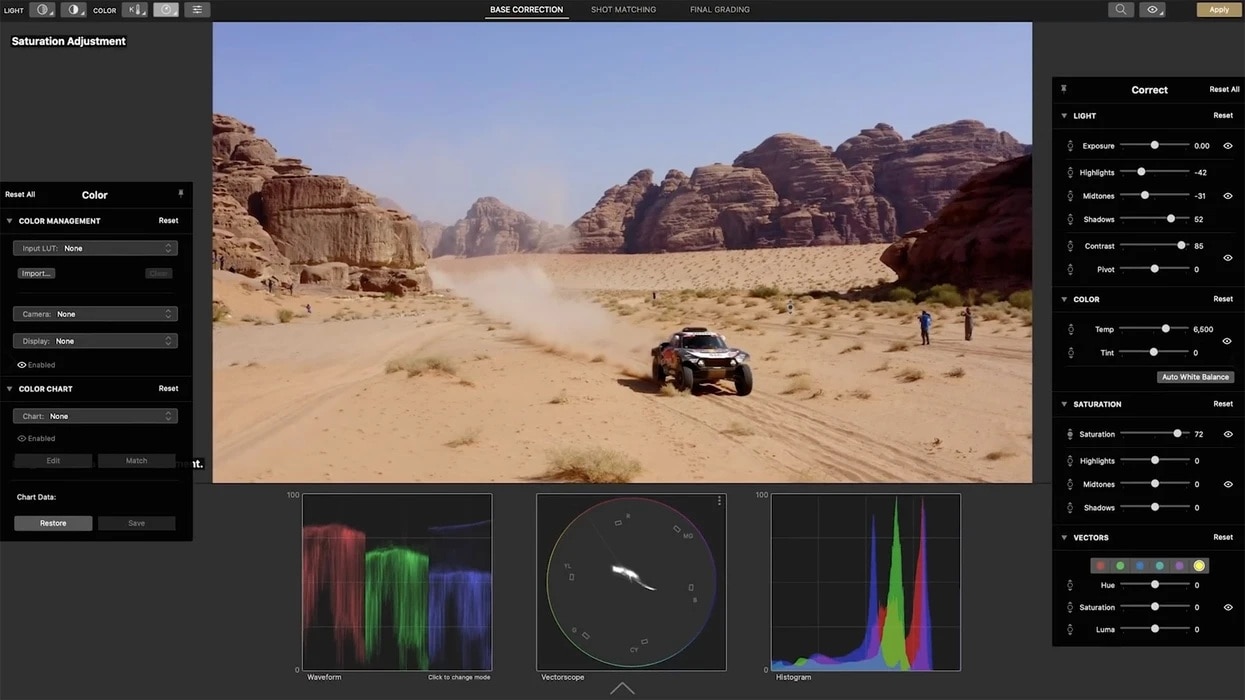
Cinema Grade is designed around a visual grading workflow that lets editors interact with the image while adjusting properties such as exposure, contrast, and color.
2. Magic Bullet Suite
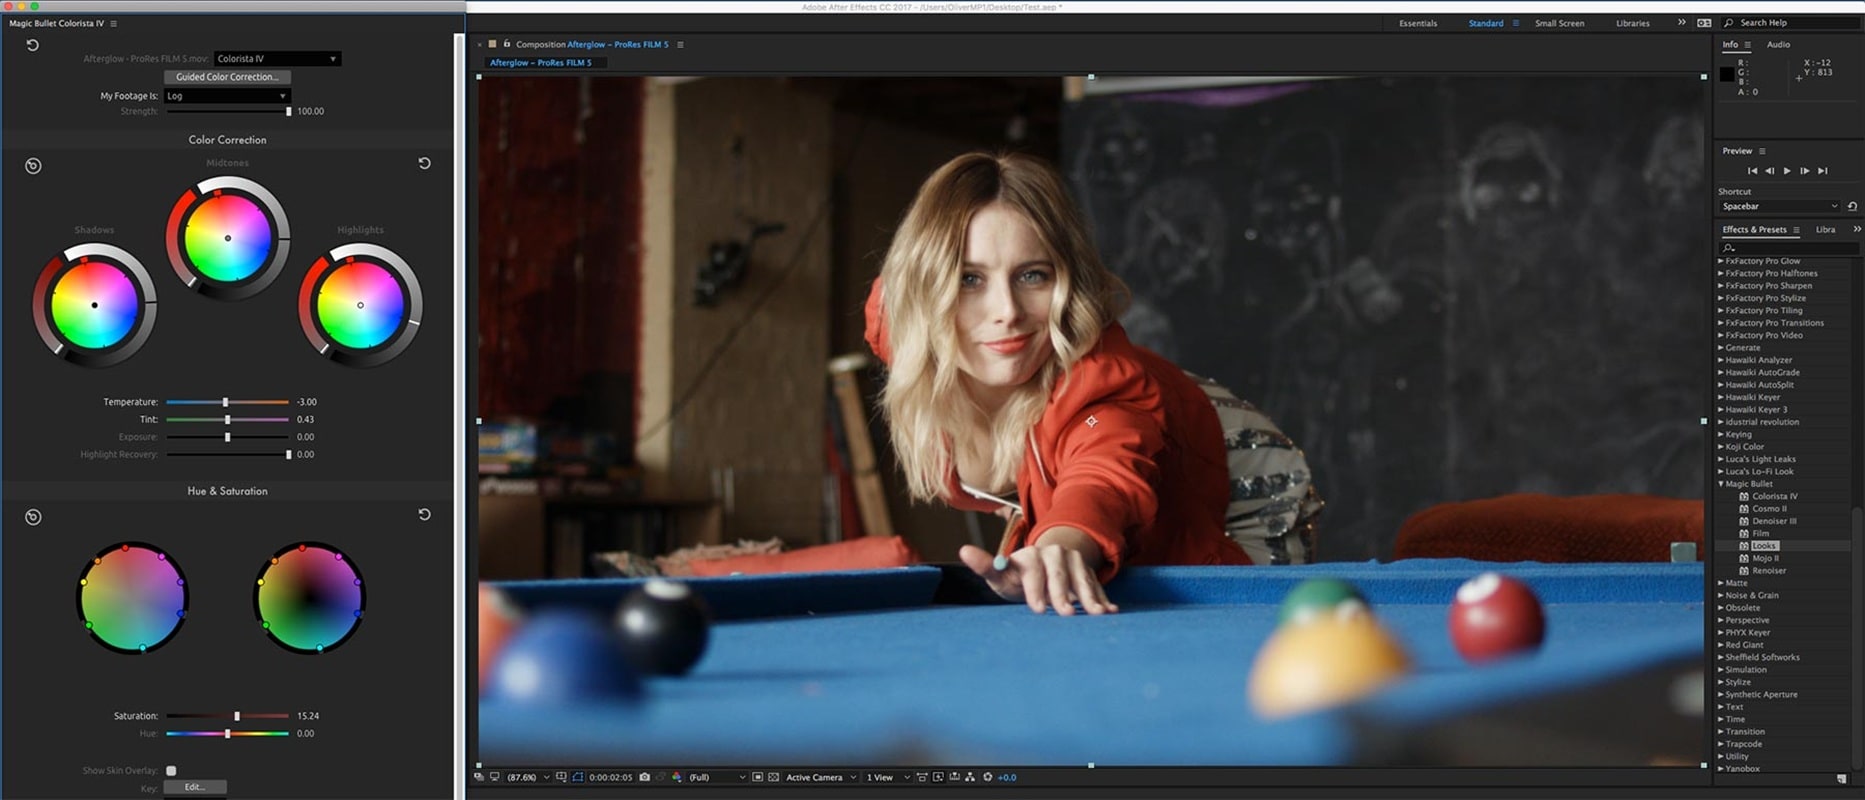
Magic Bullet provides tools for color finishing and stylized looks within supported host applications. Check the current Maxon compatibility list for supported editors and versions.
3. Color Finale
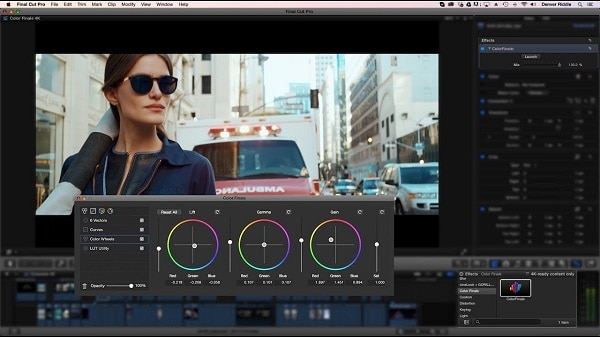
Color Finale extends the color workflow inside Final Cut Pro and is primarily relevant to editors who want additional grading controls without leaving their Final Cut Pro timeline.
FAQs About Color Grading Software
Common Questions About Video Color Grading
-
What is color grading software?
Color grading software provides tools for adjusting the color and tonal appearance of video. Depending on the application, these can include LUTs, HSL controls, Curves, Color Wheels, white balance, exposure controls, and HDR tools.
-
What is the difference between color correction and color grading?
Color correction fixes technical issues such as exposure, white balance, contrast, and inconsistent colors. Color grading builds on that corrected image to create a particular visual style or mood.
-
Does Filmora have color grading tools?
Yes. Filmora includes LUTs, HSL, Curves, Color Wheels, HDR, White Balance, Light controls, Vignette, and Auto Color. These tools support both basic correction and more detailed creative grading.
-
Can Filmora automatically correct video colors?
Yes. Filmora's Auto Color automatically adjusts the overall appearance of footage and provides a Strength control so you can determine how strongly the correction is applied.
-
Can I import custom LUTs into Filmora?
Yes. Under Color > Basic > LUT, choose Load new LUT... to import a custom LUT. Filmora also lets you control the applied LUT with the Strength setting.
-
Do I need dedicated software just for color grading?
Not necessarily. Many video editors include correction and grading tools directly in the editing workflow. Whether you need a dedicated grading environment depends on the precision, collaboration, delivery, and finishing requirements of your projects.
-
Which color grading tools should beginners learn first?
Start with White Balance, Exposure, Contrast, Highlights, Shadows, and LUT Strength. Once those controls are familiar, HSL, Curves, and Color Wheels provide more detailed creative control.
Conclusion
The right color grading software depends on your platform, experience, project type, and how deeply you need to control color. Final Cut Pro, Premiere Pro, Avid Media Composer, Lightworks, VEGAS Pro, and Filmora all approach editing and color workflows differently.
For creators who want correction and grading in the same accessible workflow, Filmora combines Auto Color, White Balance, Light controls, LUTs, HSL, Curves, Color Wheels, and HDR. You can start with automatic or basic correction and move into more precise grading as the project requires.
