- • 4K Video Tips
- 1. How to record 4K video
- 1.1 How to Edit Sony 4K Video
- 1.2 How to Edit GoPro 4K Video
- 1.3 Top 5 4K recorders
- 1.4 Top 10 4K cameras
- 1.5 How to record 4K video with iPhone
- 2. 4K video downloading and converting tips
- See more
- 3. 4K video software
- See more
How to Edit Sony 4K Video

Jul 14, 2025• Proven solutions
A 4k video footage really gives the accurate proof on how far the graphics and photography industry has progressed upto. Watching Sony 4k video is highly intriguing and gives real life experience to the viewers. But editing those super smooth and high definition videos is a Herculean task and can transform into an agony when you a lack a super computer. Your only life saver would be software like Adobe Premiere Pro CS5.5 and above or Adobe After Effects CS6.
How to Edit Sony 4K Videos
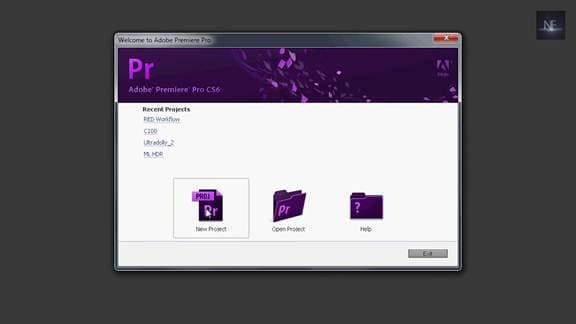
1. Install the Abode After Effects CS6 or Adobe Premiere Pro 5.5 :
In case you don’t have the above software, download and install Adobe Premiere CS 5.5 and up or After Effects CS6 since these 4k videos work really well with versions above 5.5 or 6 better. Make sure it gets installed properly.
2. Install RED importer for both After Effects and Premiere:
Go to the Adobe site and install RED importer for free.
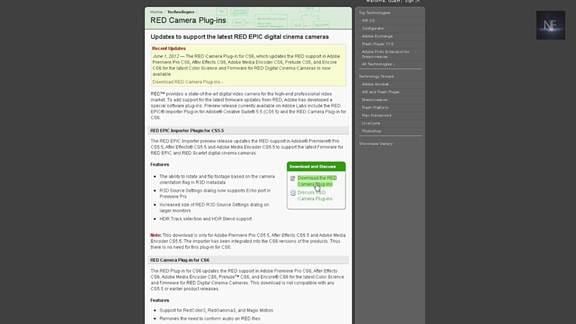
Download RED Epic importer plugin for CS5.5 and RED camera plugin for CS6.
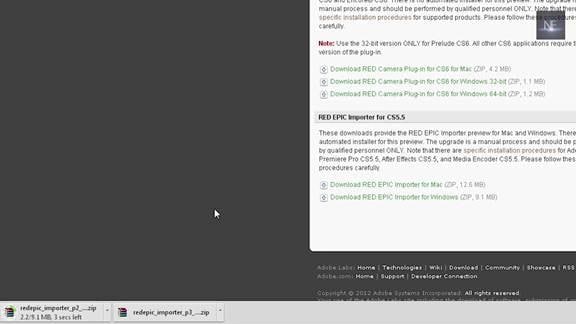
Unzip both of the files to your desktop. CS6 is ready to go with these plugins downloaded but for the people using CS5.5, here’s an extra step you need to do.

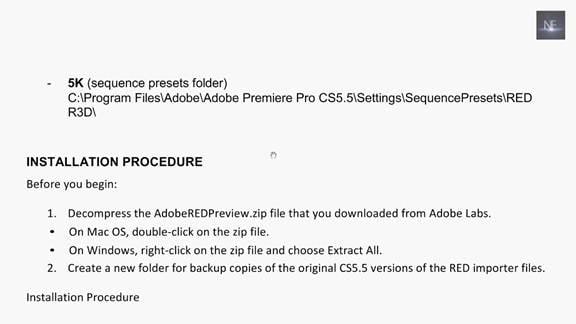
For CS5.5 users only:
The installation process is different for mac and windows. Just open the Read Me and go through the steps for installing the plugins. Basically you need to open Premiere Pro CS5.5 RED Review and take the imported files and replace them with the opens in your downloaded place (C drive). If still you have a problem in importing videos upgrade your version.
3. Creating a new project and completing the settings:
- Open Adobe Premier CS6.

- When the dialog box pops out click on New Project.
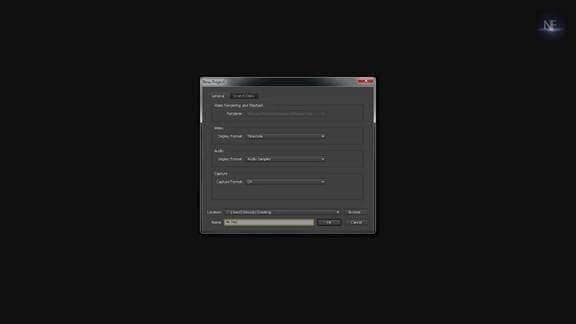
- Then another dialog box pops out. Choose the location where you want to store that project.
- In the New Project Dialog Box, make the necessary changes. Give name to your project.
4. Changing your Sequence settings:
In the sequence presets, choose RED R3D. It by default comes installed with Adobe CS6 but with CS5.5 you will have to make some more installations properly done. In RED R3D, choose the video you want to edit most specifically select 1080p and finally click on ok. So the 1080p sequence gets opened. This is done because the computer gets slowed down if you select the 4k option. Making the cuts , getting the timeline ready , all will be done in 1080 p version and once it is all done the video will be changed to 4k version . This is done to make editing faster.
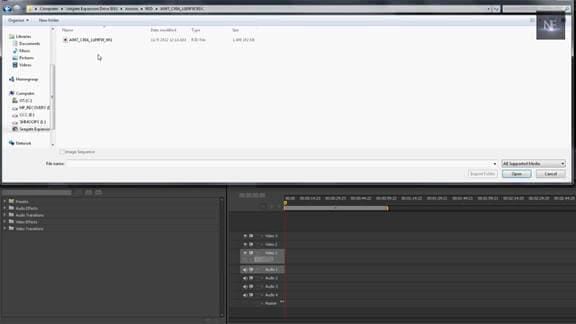
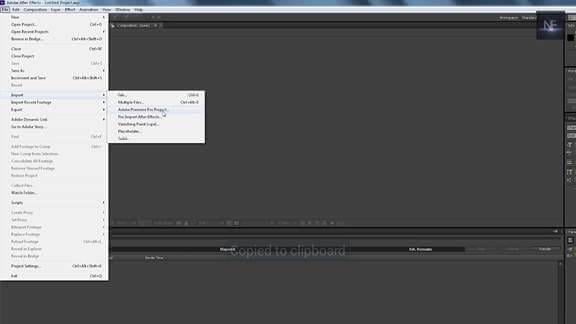
5. Importing the 4k video file:
For importing a new file, go to file -> import -> file. A new dialog box pops up. Choose the file you want to import and after that click on ok. Wait till your file gets imported.
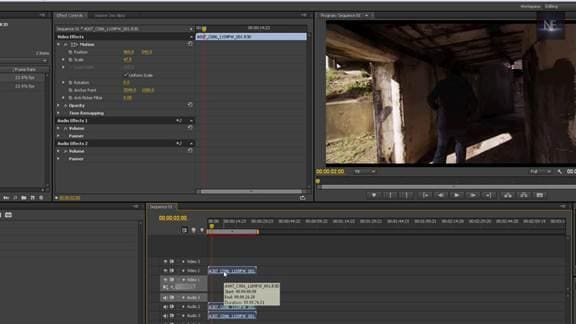
6. Scaling up the imported file:
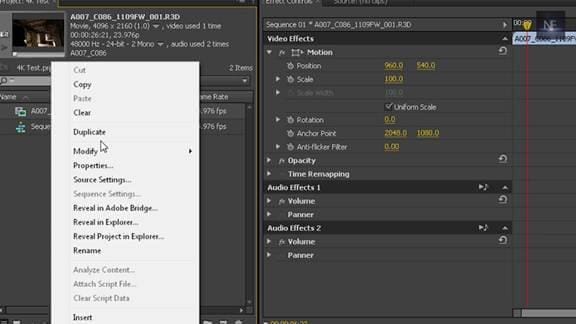
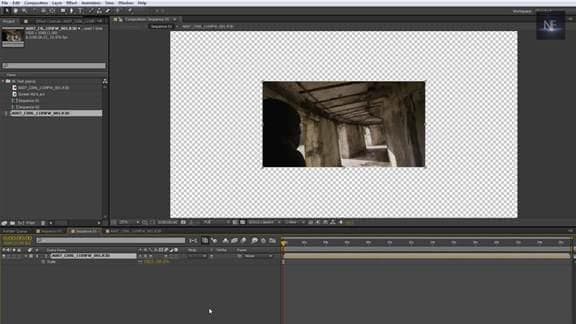
- After the video file gets imported, drag it to the timeline as shown in the picture below.
- Click on the clip and see the Effects Control dialog box just above the timeline.
- In Effects Control, click on Motion Control which is a drop down menu. The following picture shows how the dialog box appears on the screen.
- You can see the scale set up at 100. Scale the video file down to 47 %. But in doing so , it takes up a lot of computing space since the changes we are making is directly on the 4k file but not on the 1080p version . So this step should be avoided or Switch it back to 100%.
7. How to Scale up perfectly:
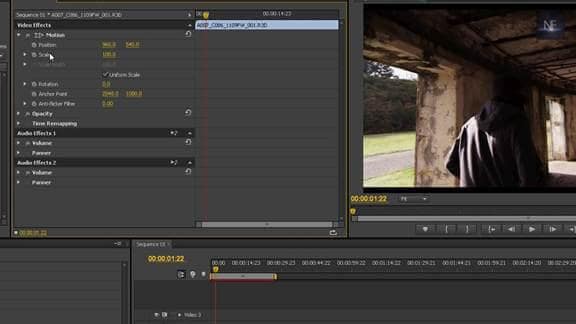
- The right way for scaling up the video is that go to edit.
- Edit ->Preferences->General.
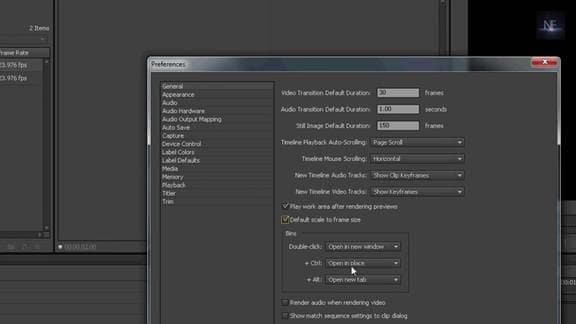
- A dialog box pops up. In that check on the box showing Default Scale to frame size if it is not selected. Adjust any other settings if you want to and then click ok.
- Delete the video footage which was imported in the timeline.

- But again drag the imported file back to the timeline which now has changed.
- Click on clip and see the Effects Control box right above the timeline.
- In Effects Control, click on Motion Control which is a drop down menu.
- In the Motion Control box, you can see the scale adjusted to 100 %. It means it is giving a 1080p proxy of a 4k file. This means you are not working anymore with the 4k file but with the mere 1080p copy of the 4k file.
- Go to half resolution or quarter resolution. The file will play in better.
8. Editing the 4k file:
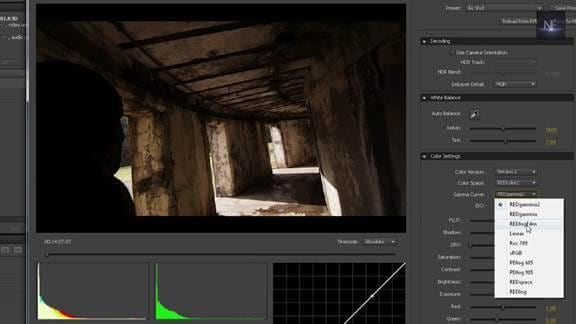
- In CS6 the software for editing RED sinix is already installed as a plugin but in case of Premier Pro, right clicks on the project window, select source settings to open that up.
- You can toggle through the clip and if you wish change the gamma curve to the REDLogFilm which will be quite helpful for you and gives a flatter view.
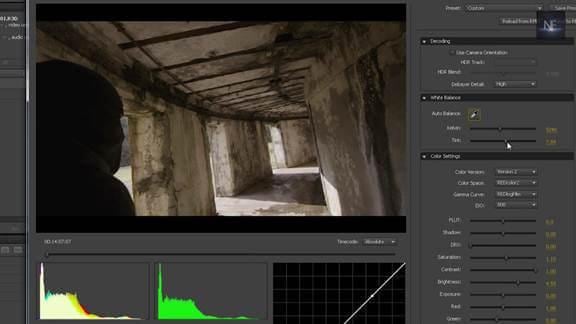
- According to your wish change the brightness, sharpness, white balance or any of the necessary things you want to do in order to edit it.
- Click ok. It will update the new changes in the video. Even now you can go back and make any changes if you want to. And then save the project.
9. Render all the 4k video file:
- Open Adobe After Effects.
- Go to file->import->Adobe Premiere Pro project.
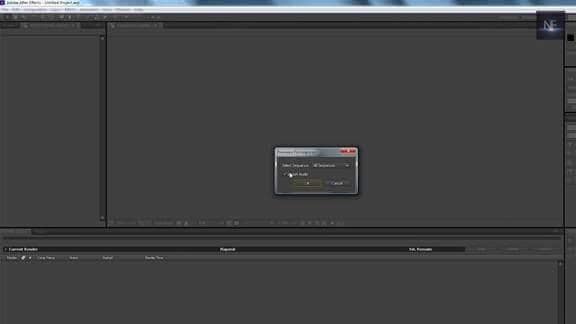
- A dialog box pops up and selects the file. If you want no audio, uncheck the box as shown below.
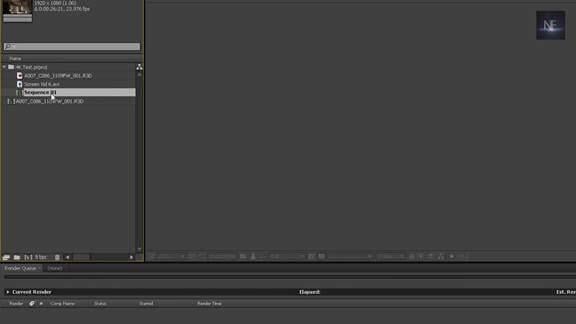
- Take sequence in your imported list and drag it to your new composition in after effects.
- Click on it and choose open composition and you will have all your cuts in that composition.
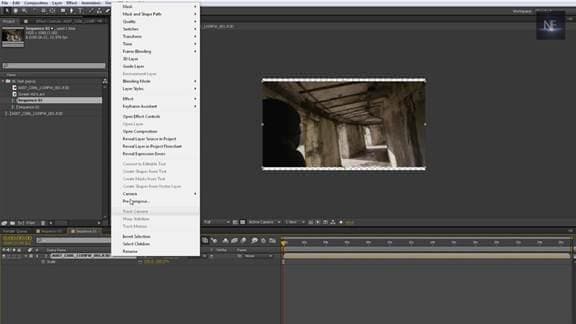
- Right click and go to open composition select the raw file and hit the s key. Now you can upscale to 100 %. You will find that in the premier one it fits the screen perfectly but in other case its way too big.
- Then click on Render to render the file.
If you think this is too complicate for you, you can try Wondershare Filmora (originally Wondershare Video Editor), which can edit Sony 4K video files with easy-to-use but powerful editing tools. Download free trial version below.


Many braids are wondering the difference between wedding cinematography and wedding videography. In fact they are different from many aspect. Join us and uncover the mystery of wedding cinematography
by Max Wales Jan 06, 2026 11:36 AM
What is VR controller? What are the controllers can be used on VR device? Check this article for more information.
by Max Wales Jan 06, 2026 11:35 AM
Max Wales
staff Editor
