
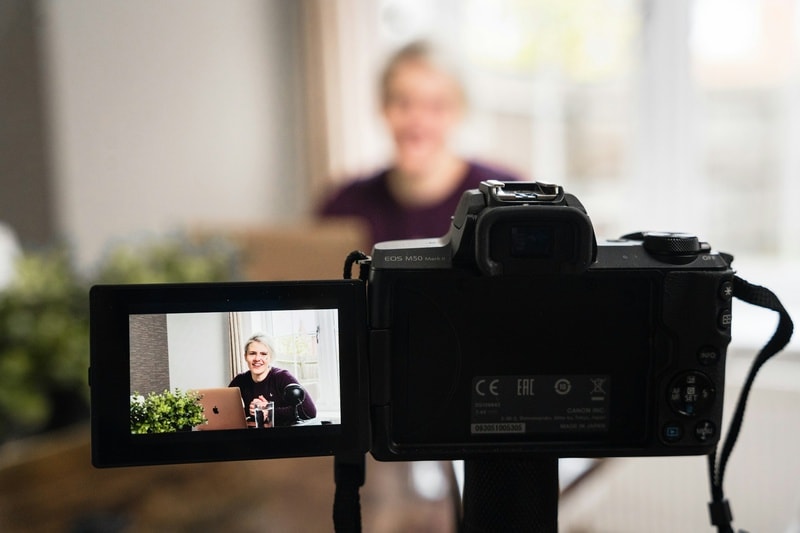
Short educational videos are a great way for teachers and students to share information quickly. As attention spans shorten, these videos make learning engaging and accessible for everyone. Creating short educational videos helps educators present lessons more effectively and keeps students interested.
In this guide, you'll learn how to make short educational videos step-by-step. We will cover their benefits, essential elements, and practical tips for creating your own. Additionally, you'll find six valuable resources for making your videos stand out. Let's get started and transform your teaching or learning experience!
In this article

Part 1. The Advantages of Short Educational Videos
Short educational videos offer many benefits for both educators and students. They transform how lessons are delivered and make learning more engaging. Let's explore the key advantages these videos offer for both educators and students.
For Educators
- Time Efficiency: Short videos allow educators to condense complex topics into manageable, bite-sized lessons. This type of video saves time while still covering essential information, making lesson planning more efficient.
- Flexibility in Teaching: Short videos allow educators to condense complex topics into manageable, bite-sized lessons. This type of video saves time while still covering essential information, making lesson planning more efficient.
- Enhanced Engagement: Videos with visuals, animations, and interactive elements capture students' attention better than traditional lectures. Short educational videos make it easier to keep students focused on key points.
For Students
- Improved Retention and Understanding: Short videos break down complex topics, making them easier to digest. Students can replay videos to reinforce their understanding and absorb the material at their own pace.
- Increased Motivation: Students are more likely to stay motivated with shorter, more engaging content. Interactive and visual elements keep learning fun and prevent information overload.
- Accessibility of Content: Short educational video clips are easy to access on various devices. It gives students the flexibility to learn anywhere and anytime. This approach makes learning more convenient and personalized to their schedules.

Part 2. Elements Should Be Involved in Short Educational Videos
To make short learning videos effective, certain key elements must be incorporated. These components not only help in delivering the message clearly but also keep the viewer engaged throughout. Let's explore the essential elements that should be involved in creating impactful short educational videos.
Engaging Visuals
Visuals are the backbone of any video. Use high-quality graphics, images, and animations to illustrate your points. Engaging visuals help break up text-heavy content, making it easier for viewers to absorb information. They also create a more dynamic and appealing learning experience.
Concise Explanations
Keep your explanations brief and to the point. The goal is to simplify complex topics into manageable segments. Short educational videos thrive on clarity, so avoid overloading the viewer with too much information. Focus on one or two key concepts per video for better understanding.
Storytelling
Incorporating storytelling helps humanize the content, making it more relatable to the audience. Presenting information in a story format helps maintain attention and enhances memory retention. Even a brief narrative can make learning more enjoyable and memorable.
Interactive Features
Incorporating quizzes, polls, or clickable elements can make your videos more interactive. These features encourage active learning and allow viewers to engage directly with the material. Interaction also helps reinforce key concepts and improves retention.
By combining these essential elements, your short educational videos will not only be informative but also engaging. In the next section, we will dive into the step-by-step on how to make short educational videos.
Part 3. How To Make Short Educational Videos Using Filmora
Creating short educational videos may seem challenging, but it's easy if you're using the right tools. Let's break down the steps to make one using Wondershare Filmora, a powerful video editing software. Filmora's latest version has a new feature called Smart Scene Cut. This feature can identify and highlight key moments in your educational videos.
Key Features of Smart Scene Cut in Filmora
- Highlight Detection for Short Video Creation
Smart Scene Cut lets users quickly identify and extract key moments from long videos. This feature is ideal for creating vertical short video content.
- Targeted for Various User Groups
Designed for users working with long video clips, short video creators, video remixers, and marketing professionals.
- Intelligent Segmentation and Extraction
The tool automatically recognizes and segments characters, objects, and key moments within a video. It allows users to extract highlights efficiently during the rough-cutting stage.
- Effortlessly capture standout scenes with precision.
- Customize object selection for targeted highlights.
- Enhance storytelling with automated scene detection.


Step-by-Step Guide on How To Use Smart Scene Cut
Here is the step-by-step guide on how to use Filmora's Smart Scene Cut tool:
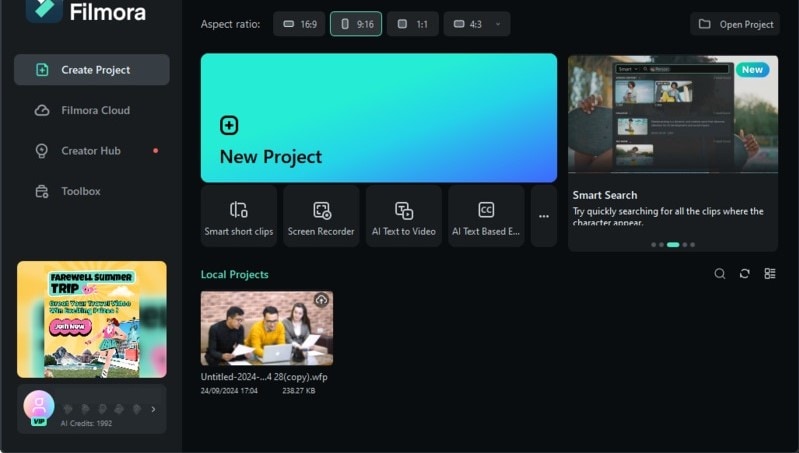
Step1Install the Latest Version of Filmora
You need to download the latest Filmora, Smart Scene Cut is only available for V14 and above. After installing, you can launch Filmora and create a new video editing project by clicking New Project. Ensure you choose 9:16 for the aspect ratio because in this guide we'll show you how to make educational videos for YouTube Shorts.

 secure download
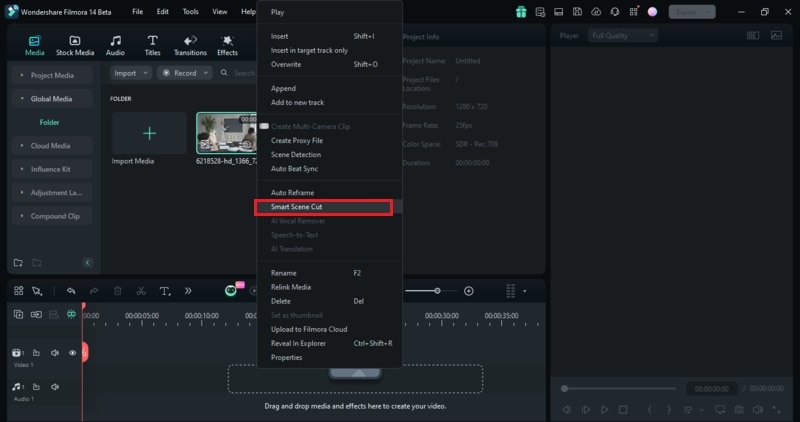
Step2Import Your Files and Access the Smart Scene Cut
In the editing interface, go to Media > Project Media and click Import to import the clips you want to edit. Then, drag these clips onto the timeline and right-click on it. Choose Smart Scene Cut from the menu that appears.
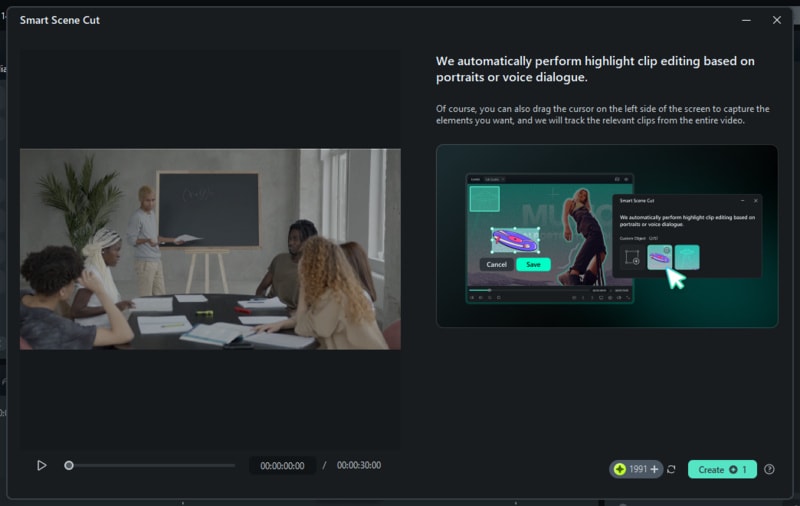
Step3Click Create to Let Filmora Process Your Video
In the Smart Scene Cut window, you can click Create right away. Then, the system will automatically process your video. Keep in mind that each minute of processing with Smart Scene Cut uses 1 point.
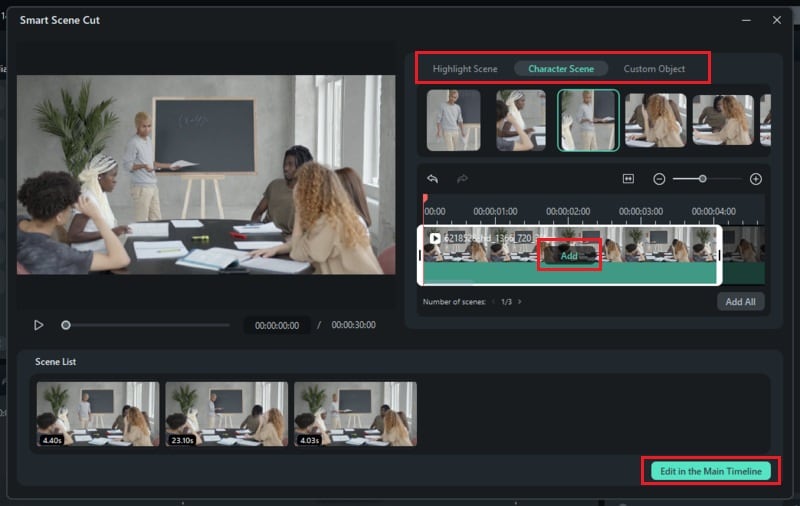
Step4Choose a Scene and Continue Editing
After the scene options are displayed, pick the one you want, such as Highlighted Short, Portrait Short, or Custom Short. Click Add to transfer it to the editing area for further tweaks and exporting. To make more adjustments, select Edit in the Main Timeline to continue editing the video in the main timeline.
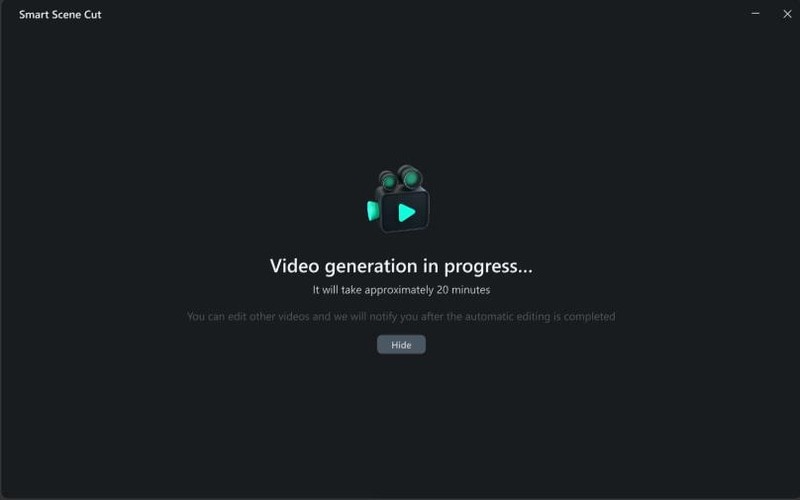
Step5Wait for the Smart Scene Cut Process to Finish
Once Smart Scene Cut completes its process, Filmora will notify you when the automatic editing is finished.
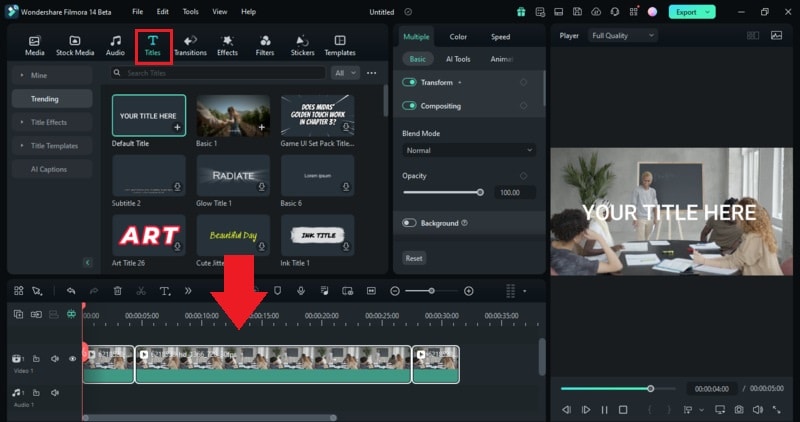
Step6Add Text or Annotations to the Video
Once the key scenes are identified, add Text overlays to emphasize critical points. You can use titles, captions, or annotations to guide students through the material. Filmora's text tools allow you to customize the font style, size, and color to match your video theme.
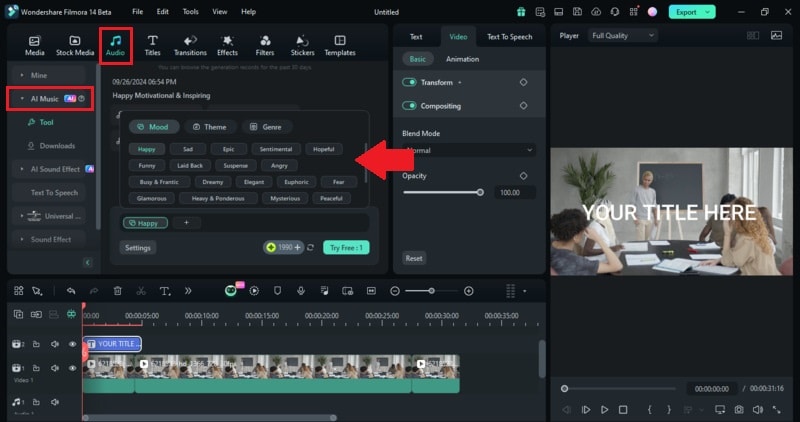
Step7Enhance Your Video with Music or Sound Effects
Audio is crucial in maintaining engagement. Add subtle background music or sound effects like a chalkboard tap to emphasize important points. Filmora provides an extensive sound library, ensuring your video has the right audio elements to keep it lively.
Bonus: 6 Short-Form Educational Video Resources for Students and Educators
Here are six valuable resources where educators and students can find short educational videos. These platforms cover various subjects and offer different content formats, perfect for enhancing learning experiences.
| Course Type | Description | Viewing Channel | |
| Khan Academy | General Education | Khan Academy provides a wide range of free, short educational videos on topics from math to science. Their concise, easy-to-understand format is great for quick learning. | view more>> |
| TED-Ed | Inspirational and Educational Talks | TED-Ed creates engaging educational videos that dive deep into topics like history, science, and technology. These videos are typically 5-10 minutes long, perfect for short-form learning. | view more>> |
| CrashCourse | High School and College-Level Topics | CrashCourse offers short videos covering a wide range of subjects like biology, philosophy, and history. Their dynamic presentation style makes learning fun and accessible. | view more>> |
| Edpuzzle | Interactive Video Lessons | Edpuzzle allows educators to create interactive video lessons by embedding questions into existing videos. It's a great way to make educational videos more engaging. | view more>> |
| Coursera | Professional and Academic Courses | Coursera offers short video lectures on a variety of subjects taught by instructors from universities and companies. Many courses are self-paced, allowing for flexible learning. | view more>> |
| YouTube Learning | General Educational Videos | YouTube Learning provides access to thousands of educational videos across different subjects, curated specifically for learners and educators. | view more>> |
🤩 Post You Might Be Interested In:
Conclusion
Creating short educational videos is a powerful way to enhance the teaching and learning experience. In this guide, we've explored the advantages of short videos, key elements to include, and provided the steps on how to make short educational videos using Wondershare Filmora.
Filmora has a new feature called Smart Scene Cut that simplifies the process of editing short educational videos. It helps identify and highlight the most important moments in your videos. Filmora offers many features that make video production accessible to both beginners and professionals. Start creating impactful educational videos today!
secure download
