Capturing extreme footage is what GoPro does best. Be it a new physical exercise, or perhaps you want to document yourself trying a new extreme outdoor activity, GoPro helps you record while exploring new terrains. However, raw footage alone isn't enough.
Even though it's high-resolution videos that are raw and exhilarating, you need to bring the experience to life. For aspiring content creators and seasoned pros alike, you may want to consider investing in the right video editing software.
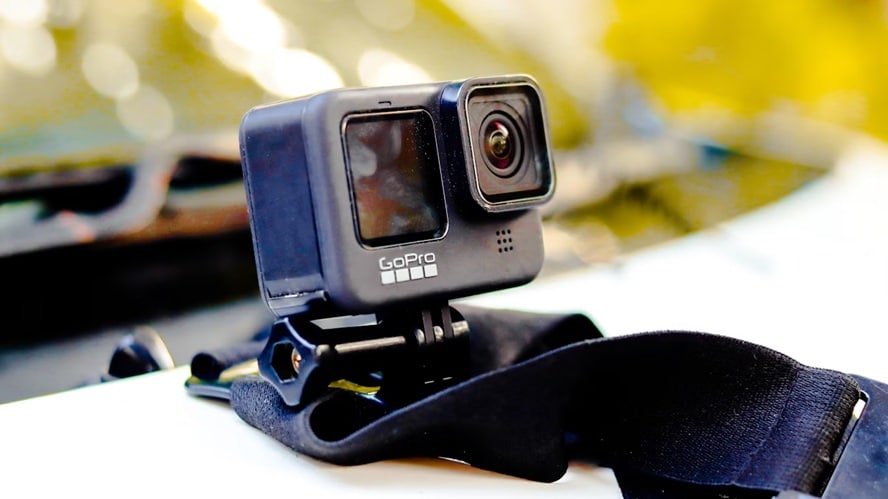
In this article, we've rounded up the 10 best GoPro video editors in 2025. Let's choose the perfect tool to make your action footage legendary!
Our Top 3 GoPro Video Editor Picks
Choosing the best video software for GoPro can be overwhelming. Among many video editors today, finding tools specifically suited for GoPro footage is a challenge. But only a few stand out when it comes to action-packed GoPro footage.
Our top 3 picks rise above the rest, offering a blend of features, ease of use, and compatibility essential for processing action shots. Each of these editors brings unique strengths to the table, ensuring you can find a perfect match for your workflow.
As one of the best video software programs for GoPro, Filmora offers fast rendering, easy-to-use features. It also comes with dedicated GoPro-ready presets for stabilization, speed control, and color grading. Perfect for both beginners and intermediate users.
The industry-standard professional editor. Premiere Pro provides customized control, advanced features, and seamless integration with Adobe Creative Cloud. It's ideal for serious creators.
A surprisingly powerful, even in the free version. Lightworks is designed for intermediate editors with action camera users in mind.
How We Test It
- The ease of use
- Support for GoPro video formats
- Stabilizations and action-focused tools
- Export quality and speed
- Sharing options and pricing
We also considered the software that balances power, performance, and overall user experience on various operating systems.
Part 1. Best GoPro Video Editor Comparison Chart
Overall ranking and summary recommendations (displayed in chart format)
| Name | System | User Level | Free/Paid | Maximum Video Quality |
| Wondershare Filmora | Windows, macOS, iOS, Android | Beginner to Intermediate | Paid | 8K |
| GoPro Studio | Windows, macOS, Mobile | Beginner | Free | 4K |
| Premiere Pro | Windows, macOS | Intermediate to Pro | Paid | 8K |
| FCP | macOS | Intermediate to Pro | Paid | 8K |
| Lightworks | Windows, macOS, Linux | Intermediate to Pro | Free | 4K |
| Video Proc Vlogger | Windows, macOS | Beginner to Intermediate | Free | 4K |
| HitFilm | Windows, macOS | Beginner to Intermediate | Free | 4K |
| Shotcut | Windows, macOS, Linux | Beginner to Intermediate | Free | 4K |
| iMovie | macOS, iOS | Beginner | Free | 4K |
| AVS Video Editor | Windows | Beginner to Intermediate | Paid | 4K |
|
Show more
Show less
|
||||
Part 2. Top 10 Video Editing Software for GoPro
Choosing the right editor can significantly impact your workflow and the final quality of your GoPro footage. Looking for a quick overview? This comparison chart highlights our top picks at a glance.
Wondershare Filmora--Best for Beginners and intermediate
The first in our GoPro video editing software list is Wondershare Filmora. Filmora is a feature-rich yet incredibly user-friendly video editor. It strikes a perfect balance between simplicity and powerful functionality. Filmora also includes specific tools for action camera footage, such as lens correction and video stabilization.
- Very easy to learn
- Enhance outdoor or underwater scenes with color grading.
- Affordable and flexible plans.
- Cross-platform support (available on Windows, Mac, Android, and iOS)
- Watermark on exports in free version
- No direct support for GoPro RAW image imports
- Smooth handling of high-resolution GoPro footage
- Advanced lens distortion correction using Mocha tracking
- Built-in stabilization to reduce shaky camera movement
- Speed ramping for dynamic motion effects
- Noise reduction to improve audio quality
- Basic color grading tools to enhance visual quality
- Streamlined multi-cam editing for faster multi-angle video projects
Filmora is well-suited for editing action cam footage, thanks to its overall ease of use and rich feature set. It enables even beginners to create impressive videos without a steep learning curve.
For more details, please visit the purchase page where various pricing plans are available.
4.5/5
Windows, macOS, iOS, Android
GoPro Studio (Quik)--Best for GoPro users who want an easy, official mobile editor
Even though the OG GoPro Studio has been discontinued, its spirit lives on in GoPro Quik. It's one of the best apps to edit GoPro videos, designed to make your footage easy to import, edit, and share directly from your camera. Some reliable sources also still let you download the software.
- GoPro-specific tools like Speed Ramps and Freeze Frames
- HyperSmooth Pro (available in-app)
- Cloud integration for auto-import and backup
- Lacks professional-level editing tools
- Limited flexibility and customization
- Speed Ramps and Freeze Frames for dynamic storytelling
- HyperSmooth Pro stabilization for smoother footage
- Cloud backup and auto-import with GoPro subscription
- Quick-edit templates and highlight videos
- Mobile-first design for on-the-go editing
For casual GoPro users, GoPro Quik instantly simplifies the editing and sharing process with intuitive tools and mobile convenience.
GoPro Quik is free with optional in-app purchases. Full features start at approximately $49.99/year. You can download the app from official stores or GoPro's website.
3.8/5
iOS, Android
Adobe Premiere Pro--Best for professional editors and filmmakers
Adobe Premiere Pro is the industry-standard used by professional filmmakers, YouTubers, and content creators worldwide. It has control over every aspect of video production, from stabilization to color grading and multi-cam editing.
While it has a steeper learning curve than beginner-friendly tools, it's an excellent editor for GoPro videos if you're aiming for a high-end production value.
- Industry-standard tool trusted by professionals
- Extremely powerful and versatile editing capabilities
- Supports high-resolution and high-bitrate footage
- Large community and plugin ecosystem
- Steep learning curve, not ideal for beginners
- Subscription-only pricing can get expensive over time
- Requires a high-performance system for smooth 4K editing
- Wide format support, including GoPro's 4K and HEVC files
- Deep integration with Adobe Creative Cloud (After Effects, Audition, etc.)
- Advanced color grading with Lumetri panel
- Multicam editing and precise timeline control
- Warp Stabilizer for fixing shaky GoPro footage
- Real-time waveform editing for audio and video adjustments
- Quick editing with multiple transitions for faster workflow
- Smoother timeline playback for seamless editing of high-resolution footage
If you're serious about video editing and want the most comprehensive tool, Adobe Premiere Pro is the champion. It offers professional-grade results and deep creative flexibility.
- Adobe Creative Cloud All Apps: Approx. $59.99/month or $699.88/year.
- Single App (Premiere Pro): Approx. $22.99/month or $263.88/year.
4.6/5
Windows, macOS
Final Cut Pro--Best for Mac users in the Apple ecosystem
Final Cut Pro, developed by Apple, is a professional-grade video editing software exclusively for macOS. It serves as a powerful editing software for GoPro, especially in terms of color correction, motion graphics, and media organization.
- Optimized for macOS and Apple Silicon (M1/M2 chips)
- One-time purchase (no ongoing subscription)
- Fast import/export, even with large GoPro files
- Works seamlessly with iMovie, Motion, and Compressor
- Only available for macOS
- Some advanced effects require third-party plugins
- Steeper price upfront compared to free or subscription-based editors
- Magnetic Timeline for fast, trackless clip arrangement
- Native support for 4K, HEVC, and ProRes formats
- Smart media organization with Libraries, Events, and Roles
- Built-in color grading and HDR support
- Fast rendering and export performance, thanks to Apple Silicon optimization
- Supports third-party plugins and Motion templates
It's a fantastic choice for Mac users for turning your GoPro footage into polished productions. It's fast, efficient, and tightly integrated into the Apple creative ecosystem.
One-time purchase: $299.99 from the Mac App Store.
Highly rated by professional Mac users
macOS only
Lightworks--Best for intermediate to professional editors
Lightworks has been used in major Hollywood productions and offers powerful editing features for those who want more control over their GoPro footage. This GoPro video editor offers a free version with powerful features and a paid version for full functionality.

- Free version includes many pro-level features
- Reliable performance when editing large GoPro files
- Advanced trimming and timeline controls
- Works on Windows, macOS, and Linux
- The interface can be intimidating for beginners
- The free version has limited export formats and resolution
- Not as beginner-friendly or modern-looking as some other editors
- Real-time effects and transitions without rendering delays
- Multi-track timeline with drag-and-drop editing
- Native support for GoPro formats, including 4K
- Background import and rendering for faster workflow
- Wide export format support in the Pro version
- Project sharing and timeline collaboration (Pro only)
If you need a powerful option for general editing, Lightworks is a compelling choice and still affordable.
- Free version: Limited export resolution (up to 720p)
- Pro Plan: Approx. $23.99/month or $239.99/year
4.2/5
Windows, macOS, Linux
VideoProc Vlogger--Best for beginners wanting a free action camera editor
VideoProc Vlogger is a completely free and specifically designed for action camera and drone footage. It stands out with its focus on motion effects, speed ramping, and color grading.
- Tailored specifically for GoPro and action cam editing
- Great speed and motion effects with curve-based control
- Beginner-friendly interface with powerful features underneath
- Lightweight and runs well on mid-range systems
- Some advanced export and plugin features are paid
- Not ideal for collaborative or professional studio workflows
- Limited support for external plugins or effects libraries
- Customize speed curves and apply 28+ motion presets (tilt, roll, dolly, etc.)
- Color grading tools for enhancing outdoor or underwater scenes
- Lens distortion correction for action camera footage
- A stabilization tool to fix shaky clips
- Split-screen and picture-in-picture (PiP)
- Completely watermark-free, even in the free version
VideoProc Vlogger is an outstanding choice to create dynamic videos without breaking the bank.
Free
4.2/5
Windows, macOS
HitFilm--Best for creators adding visual effects to GoPro footage
HitFilm (formerly HitFilm Express and HitFilm Pro) is a unique video editor that combines editing tools with visual effects and compositing capabilities. A great entry point for those interested in adding cinematic effects to their GoPro videos.
- Combines video editing and VFX tools in one software
- Great for creating cinematic and YouTube-style content
- Offers free version with many effects included
- Strong community with tutorials and downloadable assets
- Interface may be overwhelming for beginners
- Requires a relatively powerful system for smooth performance
- Not as fast for simple edits compared to lighter editors
- Integrated VFX suite with 100+ built-in effects like fire, lightning, muzzle flash, and more
- Green screen support with chroma key tools
- 3D compositing and motion tracking
- Timeline-based editing with layering and masking
- Built-in tutorials and templates to help you learn visual effects
- Support for 4K and GoPro footage formats
If you envision your GoPro footage with cool cinematic visuals, HitFilm offers an all-in-one solution.
- Free version with core features
- Pro Plan: Approx. $12.99/month
4.1/5
Windows, macOS
Shotcut--Best free, open-source editor for GoPro footage
Shotcut is a free, open-source, and cross-platform video editor that offers reliable core editing features. While it may not have flashy effects or AI tools, it's a great no-cost option for editing GoPro footage with solid format compatibility and timeline control.
- Completely free and open-source
- Good support for high-resolution GoPro footage
- Customizable UI and flexible workflow
- Less intuitive interface for beginners
- Limited visual effects compared to commercial tools
- Occasional stability issues depending on system setup
- Supports 4K and HEVC formats, ideal for GoPro videos
- Cross-platform (Windows, macOS, and Linux)
- Wide format support via FFmpeg
- Customizable filters, transitions, and video scopes
- Active open-source community and regular updates
Shotcut is an excellent choice for those committed to free and open-source software. Explore without any hidden costs or restrictions.
Free
3.8/5
Windows, macOS, Linux
iMovie--Best for beginners and casual Mac/iOS users
iMovie is Apple's free video editing software. It's pre-installed on most Macs and available for iOS devices. It can handle GoPro footage well and can be an excellent starting point for beginners.
- Completely free for all Apple users
- Very easy to learn with minimal setup required
- Optimized performance on a Mac device
- Good enough for basic GoPro edits, trimming, and titles
- Syncs across devices via iCloud
- Only available on macOS and iOS
- Lacks advanced editing tools or effects
- Limited flexibility and customization
- Not ideal for complex or professional-level editing
- Seamless Apple Ecosystem: Start editing on iPhone/iPad and finish on Mac
- Built-in transitions, titles, and music
- Drag-and-drop timeline for easy editing
- Trailer and movie templates for guided creation
- Fast export optimized for Apple devices
For Mac users just starting with GoPro video editing, iMovie is the perfect free-complex tool.
Free (for Apple device owners)
4.4/5
macOS, iOS
AVS Video Editor--Best for Windows users seeking an all-in-one editor
AVS Video Editor is a GoPro video editor for Windows that offers a full suite of features for general video editing. While not built specifically for GoPro, it handles GoPro footage well and includes extras like DVD/Blu-ray burning and basic visual effects.
- Covers a wide range of editing features
- Includes disc authoring and burning tools
- Good format compatibility for GoPro footage
- Lightweight and runs well on mid-range PCs
- Only available for Windows
- Free trial adds a watermark on exports
- Stabilization and motion tools are basic compared to other editors
- UI feels slightly outdated compared to modern software
- Blu-ray/DVD burning: Create and burn videos directly to physical discs
- Timeline-based editing with multiple tracks
- Support for 4K and common GoPro formats
- Video stabilization tool (basic, but available)
- Built-in transitions, effects, and text tools
- Voiceover and audio editing support
AVS Video Editor is a great choice for Windows users who want a versatile and easy-to-use editor.
Unlimited Access (Lifetime) approximately $69 (one-time purchase)
3.6/5
Windows only
Part 3. How to Choose the Best GoPro Video Editing Software
Selecting the ideal GoPro video editing software is a critical decision. It can impact your overall creative experience, especially in workflow and quality of final output. Here's a detailed guide to help you make an informed decision with your specific needs and the nature of GoPro footage.
Stabilization and Action Tools
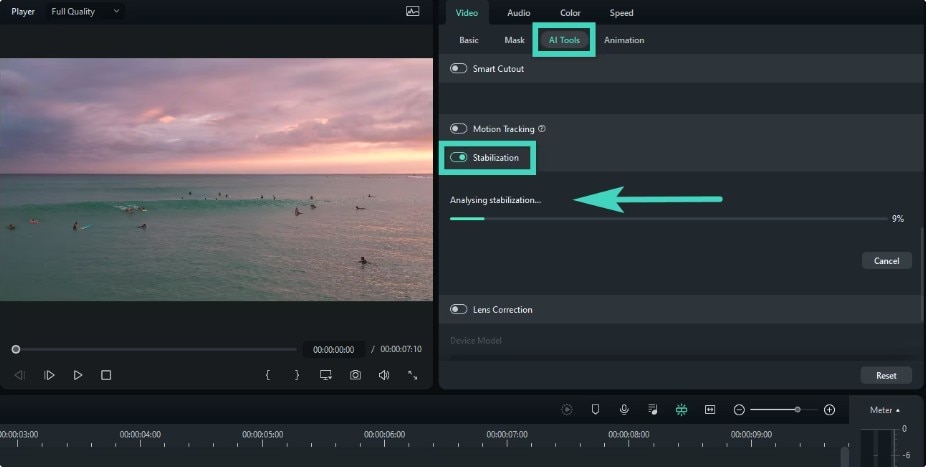
GoPro footage, by its very nature, is often dynamic and prone to shakiness. It's proven due to movement and mounting positions. So, video stabilization is paramount. Look for editors that offer advanced stabilization algorithms.
Additionally, features like lens distortion correction, speed ramping, and motion tracking are crucial and beneficial. These specialized tools can truly make your GoPro videos stand out.
Ease of Use
Your comfort level with video editing software is important. If you're new to editing, choose a tool with more intuitive and drag-and-drop editing, like Filmora or iMovie. On the other hand, experienced professionals might prefer the detailed control of industry-standard tools like Adobe Premiere Pro or Final Cut Pro.
Format & Resolution Support
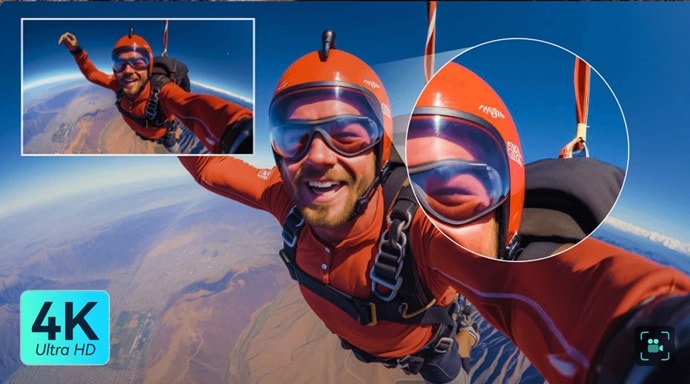
GoPro cameras record in various high-quality formats. It also often includes 4K (and increasingly 5K/8K) resolutions and efficient codecs like HEVC. Ensure the video editor you choose fully supports importing and editing these specific formats and resolutions without issues. Compatibility is key to a frustration-free editing process.
Export Options
Once your epic GoPro footage is edited, you'll want to share it. The best editors offer a variety of export options tailored for different platforms and uses. Look for presets for popular social media sites, options to customize resolution, and the ability to export in common video formats. Efficient export times are also a major plus, especially when dealing with large 4K files.
Conclusion
Still deciding which GoPro video editor to go with? If you're editing action-packed footage, a specific action cam feature with great performance is essential. There are indeed a lot of free options that offer incredible value for action camera enthusiasts.
Choose based on your needs, budget, and skill level. Yet, for those who seek a balance of powerful features and an intuitive workflow for both beginners and aspiring professionals, Filmora stands out as an exceptional choice. It empowers you to transform your raw adventures into captivating stories with ease and efficiency.
Frequently Asked Questions
-
Q1: Does GoPro have its own video editor?
A: Yes, GoPro has its own video editor: the GoPro Quik. It's available for desktop and mobile. However, it's fairly limited for complex editing. -
Q2: What formats do GoPro videos use?
A: GoPro cameras primarily record videos in the MP4 file format. They often use advanced video codecs like AVC or the more efficient HEVC, especially for higher resolutions (4K and above) and frame rates. -
Q3: Do I need to convert GoPro videos before editing?
A: Generally, no. Most modern video editors support GoPro's MP4 files natively. But if you experience lag or performance issues, you can create proxy files for smoother editing. -
Q4: Can I edit GoPro videos on a Chromebook?
A: Yes, but your options may be more limited than on Windows or macOS. Chromebooks primarily rely on web-based video editors or Android apps available through the Play Store.


