

 TL;DR:
Wondershare Filmora delivers the most adaptable video masking capabilities for both PC and mobile by combining AI Smart Masking with Boris FX Mocha planar tracking, while Adobe Premiere Pro and Avid Media Composer remain the optimal choices for advanced editors executing complex manual rotoscoping.
● Filmora bypasses manual keyframing for human subjects via the AI Mask tab's Smart Brush detection, and handles complex dynamic objects by launching the Mocha UI to generate precise moving mattes.
● Final Cut Pro X and CyberLink PowerDirector best serve moderate users needing quick shape or text masks through intuitive Mask Designers, whereas Magix Movie Edit Pro requires using an Alpha Mask property imported via the Chroma Key menu.
● Professional-grade masking in Adobe Premiere Pro and Avid Media Composer strictly demands drawing custom paths with pen tools or the Draw Mask window, presenting a significantly higher learning curve than AI-assisted mobile or desktop apps.
Ask AI for a summary
 ChatGPT
 Perplexity
 Gemini
 Claude
 Grok
Grok
Masking video editing is the secret behind professional visual effects. Whether you need a video masking app for quick mobile edits or advanced video masking software for rotoscoping, this 2025 guide covers the top free video masking tools to blur faces, clone objects, and more.
Part 1. What is Masking?
Masks are a feature of editing software that allows you to choose a particular portion of the video or utilize video overlays to hide, duplicate, reveal, or change your footage. The mask is the portion of the video you've chosen to pick, either with a template or a custom frame. The mask then becomes isolated, and you may modify it as desired to produce your intended effect.
Masks may be used to do some fantastic things with your videos. You can clone people or objects, overlay several pictures, create glitch effects, blur faces out, etc. Masks add a lot of excitement and color to videos, making them more dynamic, enjoyable to watch, and professional. It can draw attention - and keep it!
Different types of masking
There are three primary types of masking: rotoscoping, chroma-keying, and motion tracking.
- Rotoscoping: Rotoscoping is the process of manually tracing an object in a video frame by frame to create a mask. This can be a time-consuming process, but it allows for very precise control over the masked area.
- Chroma-keying: Chroma-keying is a type of masking that makes use of color to isolate a particular area of the frame. For example, this is often used to remove a green or blue screen from the footage, but can also be used to isolate other colors.
- Motion tracking: Motion tracking is a masking technique that allows you to track the movement of an object in a video clip. This is often used to add special effects, such as explosions, to a video.

Part 2. Full Comparison Chart of the Useful Masking Tools
| Software Name | Masking Features | Complexity/Learning Curve | Price Model | AI Masking | Motion Tracking | Key Differentiator (Masking) |
| Wondershare Filmora | Standard shapes, custom masks, AI Smart Masking (human detection), Boris FX Mocha integration for planar tracking. Chroma Key. | Easy to Moderate | Subscription (Free Trial) | AI Masking for human detection & industry-leading Mocha integration. | ||
| Final Cut Pro X | Shape Mask, Draw Mask (custom points), color mask. | Moderate | One-time Purchase | Intuitive Shape Mask tool for quick masking. | ||
| Adobe Premiere Pro | Shape tools, Pen tools (custom masks), built-in Rotoscope tool, Lumetri Color masks. | Advanced | Subscription | Precise control with shape & pen tools, integrated Rotoscope. | ||
| Avid Media Composer | Built-in masking tools, custom mask creation with Draw Mask window. | Advanced | Subscription | Comprehensive masking for various levels of editors. | ||
| Sony Vegas Pro | Basic masking (event pan/crop), advanced mask creation for specific effects. | Moderate to Advanced | One-time Purchase | Robust tools once familiarity is achieved. | ||
| Magix Movie Edit Pro | Alpha Mask property with Chroma Key, basic shape masks. | Easy to Moderate | One-time Purchase | Ease of learning and stable rendering, useful for basic masking. | ||
| Studio (Pinnacle) | Mask creation window, panel tools for custom shapes, asset integration within masks. | Moderate | One-time Purchase | Preloaded with pro-caliber tools and premium effects. | ||
| CyberLink PowerDirector | Enhanced Mask & Blend feature, Mask Designer with templates & custom options (image/text masks). | Easy to Moderate | Subscription/One-time Purchase | Intuitive Mask Designer for creative masking. | ||
|
Show more
Show less
|
||||||
Part 3. Top 8 Video Editor with Useful Masking
1. Wondershare Filmora: Best AI Video Masking Editor for PC & Mobile
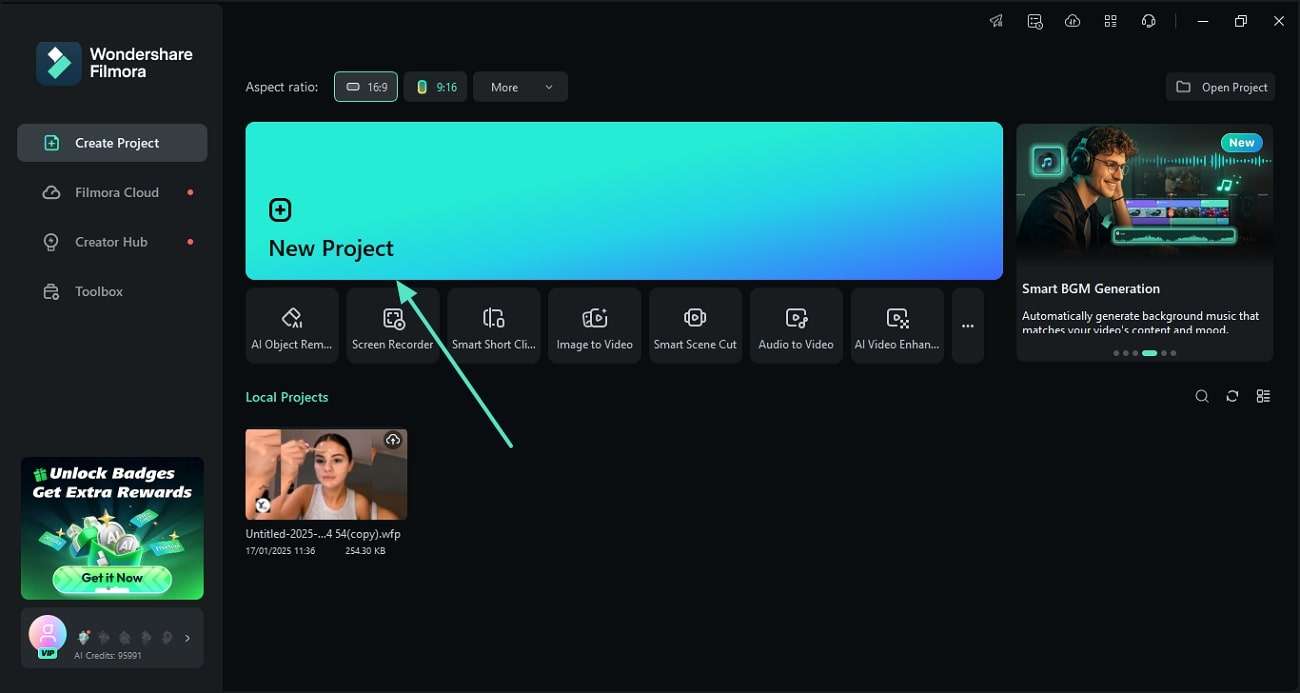
Wondershare Filmora is a powerful and intuitive mask video editing software that offers a full range of features for creators of all skill levels. It's a top-tier video masking app for both desktop and mobile, providing a seamless editing experience across platforms. It stands out by simplifying complex tasks like video object masking while offering professional-grade tools for advanced users.
Filmora's Versatile Masking Solutions:
Filmora provides both intelligent automation and precise manual control for your video masking needs:
Solution 1: Standard & AI Masking for Everyday Projects
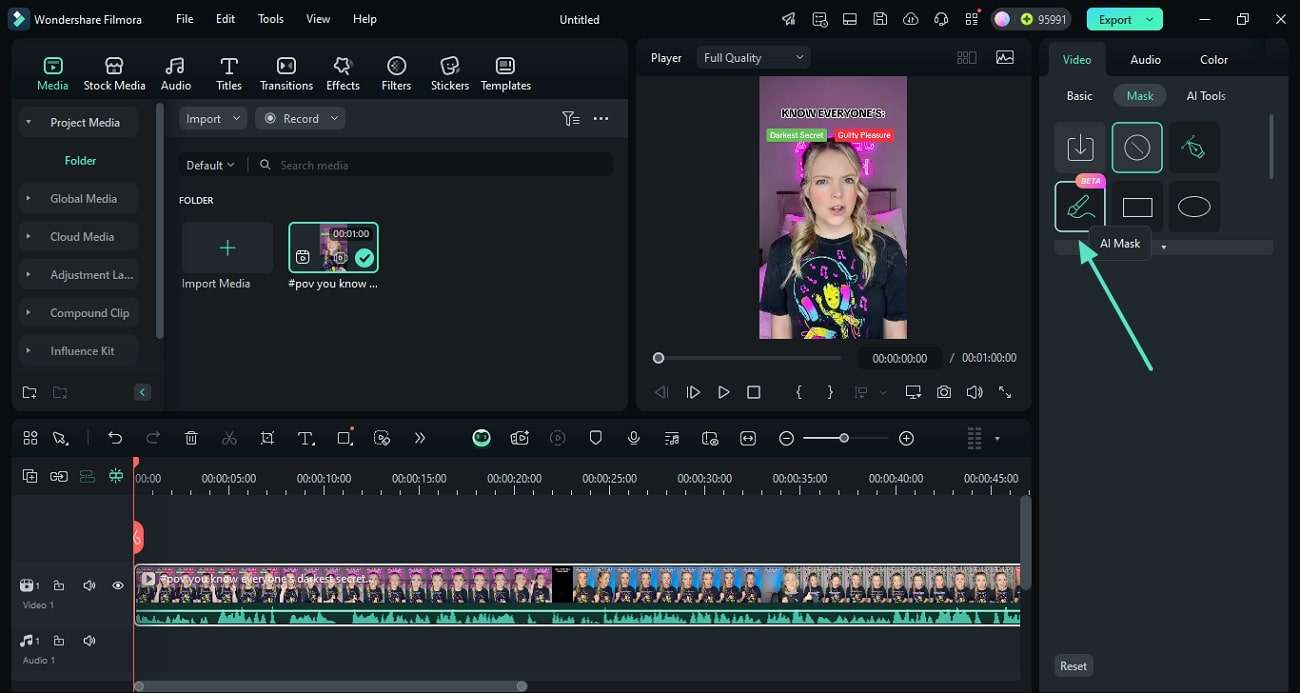
For common video masking applications, Filmora offers intuitive tools including a variety of shapes and advanced AI Masking. This allows for quick and effective isolation of subjects, perfect for blurring faces, highlighting objects, or creating artistic overlays. Filmora is truly a versatile free video masking tool for many scenarios.
- Shape Mask: Pick a preset shape and adjust its position, scale, rotation, and feathering directly in the preview or settings.
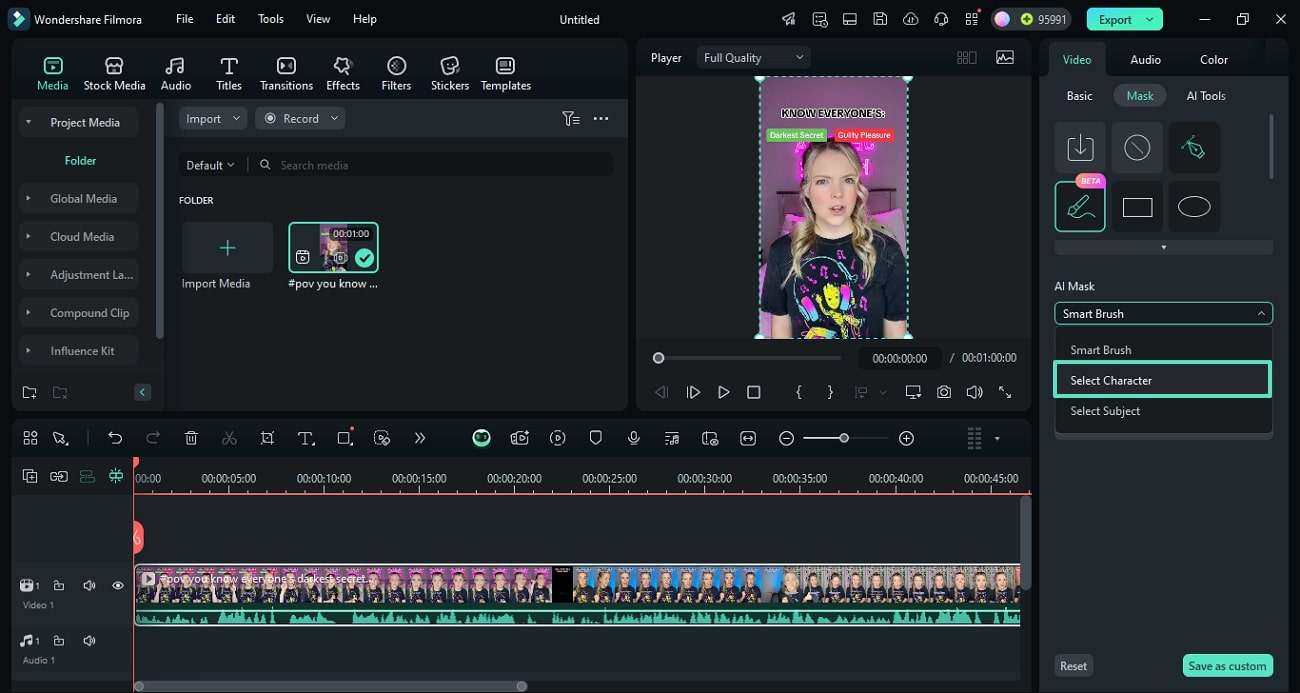
- AI Mask: For complex objects, switch to the "AI Mask" tab. Use the Smart Brush to highlight your subject — Filmora will automatically create a clean outline for you.

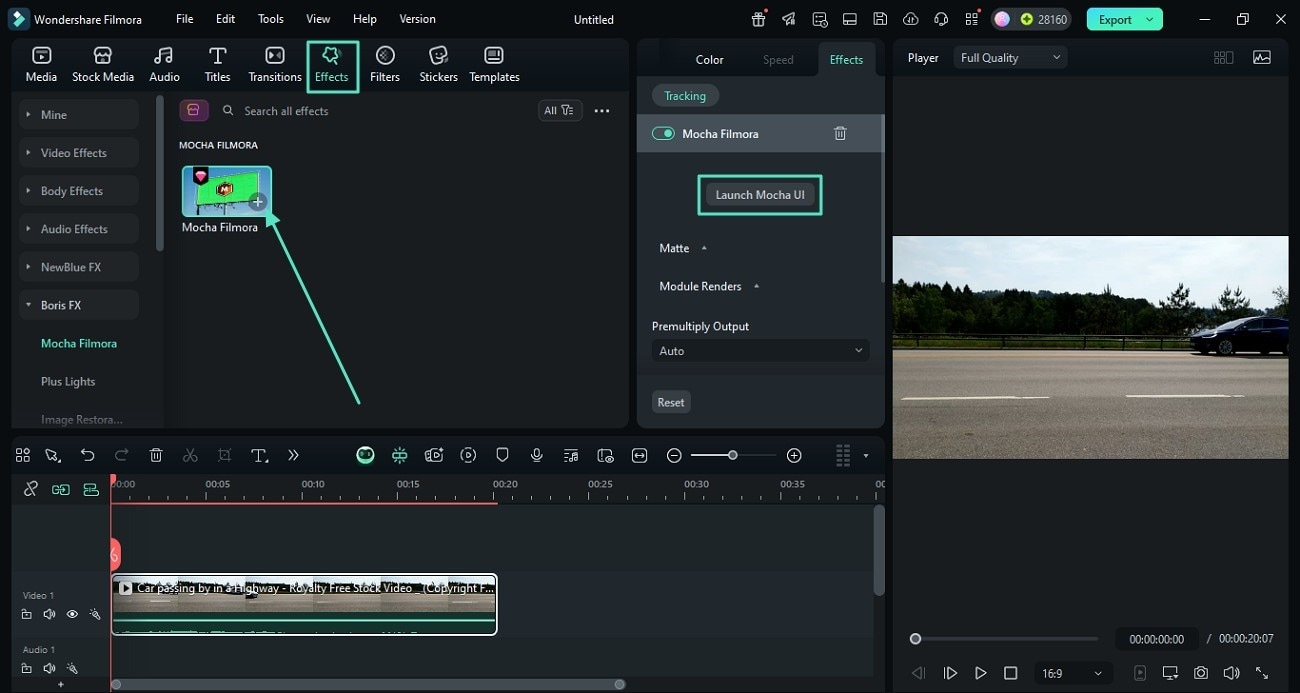
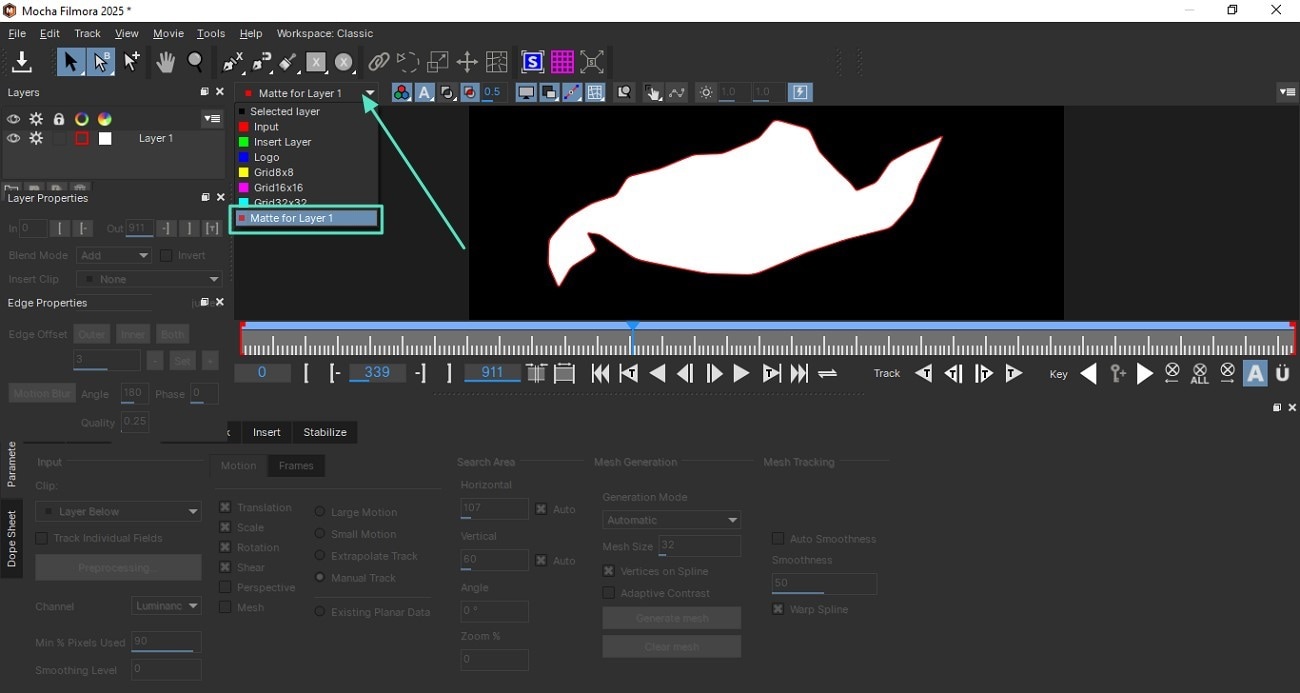
Solution 2: Advanced Masking for Dynamic Objects with Boris FX Mocha
When dealing with complex, moving objects that require precise tracking and rotoscoping, Filmora's integration with the industry-leading Boris FX Mocha engine is invaluable. This powerful plugin enables professional planar tracking, ensuring seamless and accurate masks even with challenging footage. This makes Filmora a top-tier masking software for advanced users.
2. Final Cut Pro X
Final Cut Pro X is a proficient video editing software with powerful masking tools. It allows you to create custom masks or isolate objects in your footage.

How to Create a Mask in Final Cut Pro X
With little effort, the Shape Mask tool allows you to make a mask in any shape on the continuum, ranging from an ellipse to a rectangle.
The Shape Mask is a simple mask that may be changed to editable control points in order to create complex bespoke masks (converting it into a Draw Mask).
Tip: Use the search bar and type "shape" for quick access.
- Drag the effect onto the clip in the timeline.
- Double-click the effect thumbnail in the Effects Browser.
3. Adobe Premiere Pro
Adobe Premiere Pro is a professional video editing software with a wide range of features and precise masking controls. It allows you to create custom masks or use the built-in rotoscope tool to isolate objects in your footage quickly.

How to Create a Mask in Premiere Pro
Do you understand how to construct a mask in Adobe Premiere? Shape tools and pen tools may be used to make the Adobe premiere mask.
By Using Shape Tools
- Select the shape tool you'd like to utilize from the Tools panel.
- Then, create a mask by drawing a shape on the video clip in the Timeline.
By Using Pen Tools
- Click the pen tool icon in the Tools panel.
- Click and drag to draw a path around the object you wish to isolate.
- After drawing your path, click the "Mask" button in the Tools panel.
4. Avid Media Composer
Avid Media Composer has a comprehensive masking feature for video editors of different levels. You can either use the built-in masking tools or make your own one.

Masking in Avid Media Composer
In the Masking Effect window, you can choose to either create a new mask or use an existing one.
- Select the "Create Mask" option and then click on the "Draw Mask" button to create a new mask.
- This will open up the Draw Mask window, where you can draw your mask using the various tools provided. To apply the mask, simply click the "Apply" button.
If you want to use an existing mask, select the "Use Mask" option and then choose the mask you want to use from the drop-down menu.
5. Sony Vegas Pro
Sony Vegas Pro is a professional video editing software with robust masking tools. The interface of the editor may looks complicated for beginners, yet once you get familiar with it, you will be amazed by what you can achieve with the Vegas Pro.

Masking in Sony Vegas Pro
- Drag the clip from the Explorer or Project Media windows and drop it on the timeline. Then, look for another video that is quite distinct from the first.
- Drag it to the timeline below the first video event. A new track will be created. Place the original event directly beneath the video occurrence.
The Video Preview window does not display the second video because it is covered by the first video, which resembles one photo sitting on top of another in a stack. So to view the lower clip, we'll need to add a mask.
6. Magix Movie Edit Pro
Magix Movie Edit Pro is another video editor that is great for adding masks to your video. It is famous for its ease-of-learn and stable rendering. When it comes to masking, it is also quite powerful.

Masking in Magix Movie Edit Pro
They let you apply special effects to only certain parts of a video. You may dramatically improve the aspect of your movies with this Magix Movie Edit Pro Plus feature.
When you apply color effects to the software's template, it appears that you can only use color effects.
To add additional effects to specific portions of the shot, simply import an image and apply the Alpha Mask property from the Chroma Key menu. Then you must duplicate the video section and place it on a lower track, while keeping the alpha mask picture in between the two videos (click the graphic above for a visual guide).
7. Studio
Studio is a pro-level video editing software. It is preloaded with pro-caliber tool and premium effects to help you create the videos you want. We will show you how to apply masking in Studio in the following paragraphs.

Masking in Studio
Select the clip you want to overlay your media on, then click the ‘Mask' button on the editing toolbar. After that, open the mask creation window by clicking 'Create Mask.'
- First, click "Create Panel" to create a video mask panel.
- To make a panel, use the panel of tools on the left side of the preview window. They'll only be shown in your video when you add assets later if they're inside this panel.
- To access the media selection possibilities, click on the ‘Asset' tab of the mask creation window. To discover the picture or video you want to include in your panel, go through your imported files by selecting 'Select media.' After that, select the media to be included in your panel video mask and hit 'Apply.'
- Use the left-hand slider or the resizing box in the preview window on the right to change the size and placement of your media in your panel video mask.
- To adjust the 3D position of your panel video mask, go to the ‘3D' tab of the mask creation window.
8. CyberLink PowerDirector
CyberLink PowerDirector has recently enhanced its mask & blend feature to help you create artistic scenes. If you are interested in the feature, you can try it out.

Masking in CyberLink PowerDirector
- Drag and drop a photo from the media room into track 2 of your timeline, then drag the background image into track 1.
- Then, go to the Quick Settings menu (press the Menu button at the bottom of your screen), select Cloud Print from the drop-down menu, and then select your photo. Then open up the design interface by selecting Mask Designer from the drop-down menu.
- You may select from a variety of templates in the Mask Designer. If you want to make your own mask shape, the Mask Designer has three alternatives for you to create new mask types.
- Create an image mask - You may use any picture or video, and it will be resized to fit the shape.
- Create a text mask - Enter the text you'd like to appear in your photo. Then, go to the left side of the panel under Font/Paragraph on the left side for font style, size, and other options. To alter the text mask itself, go to the preview window and resize it on the left panel.
Part 4. Masking Videos to Perfection Using Wondershare Filmora
As learned from the discussion above, mask video editing serves many benefits to a content creator. Filmora offers masking facilities in both mobile and desktop versions. Explore the following sections to learn about these versions in detail:
Using Filmora on Desktop For Video Masking
The desktop version of Wondershare Filmora is efficient in masking your content and executes the process in two ways. You can mask the video manually to add a personal take on the editing. This tool also provides an Mask BlendAI Smart Masking facility to users looking for automated video masking. The manual technique allows you to select from a list of practical shapes and mold your mask accordingly.
AI Smart Masking: A Game-Changer for Video Object Masking
Unlike many competitors that rely on manual keyframing, Filmora's AI Smart Masking automatically detects and isolates humans in your footage. This powerful feature is perfect for precise video object masking and quickly blurring faces, making it an ideal face mask video editor. This advanced technology directly addresses the user's need for an efficient video object masking software.
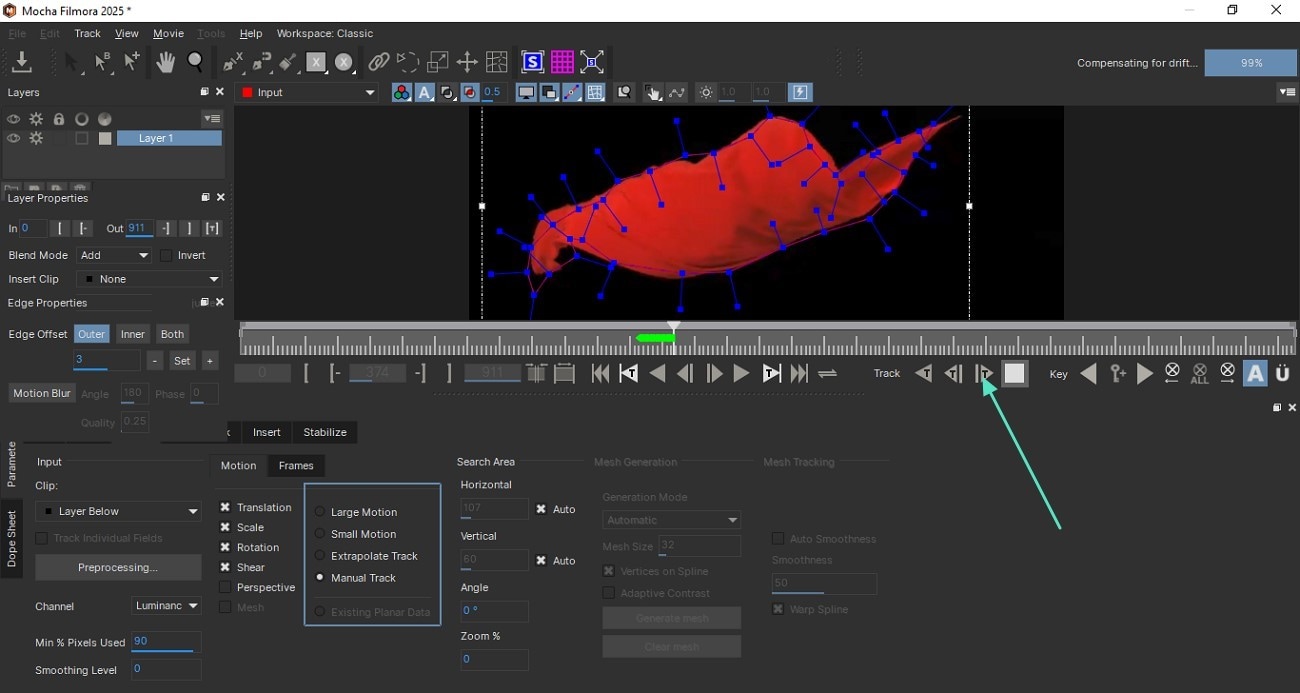
Mocha Plugin Integration: The Choice for Professional Rotoscoping
For high-end effects and precision tracking, Filmora seamlessly integrates the Boris FX Mocha engine. This best video editing software for masking and rotoscoping allows you to accurately track objects and complex shapes, enabling sophisticated effects that go beyond standard masking capabilities. This feature positions Filmora as a serious contender against industry giants like Premiere Pro and Final Cut Pro, solidifying its place as a professional masking video editing app.
As for the AI-powered masking, it autodetects the humans in your videos and isolates them from the rest of the frame. This technique is ideal for people looking to create ads for their products or creators looking for a different take on content creation. Follow the guide below to learn how to use this face mask video editor:
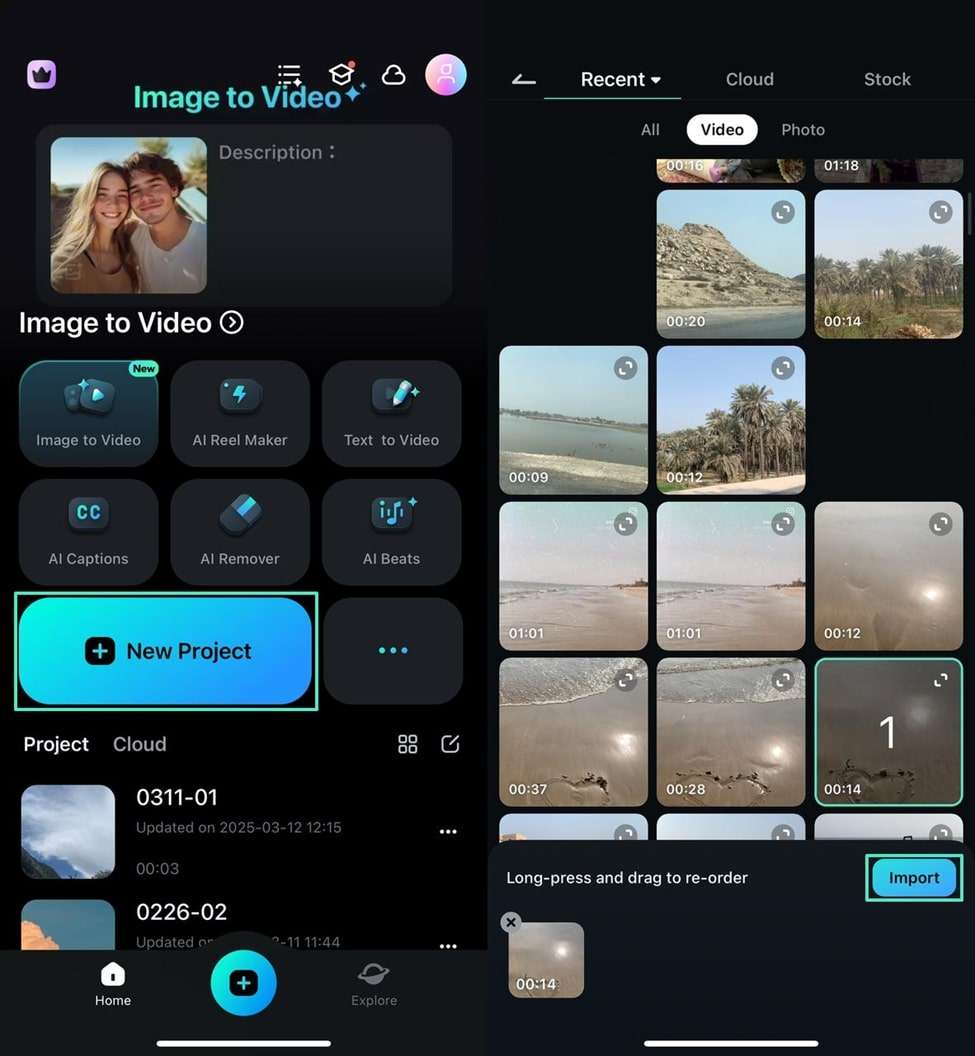
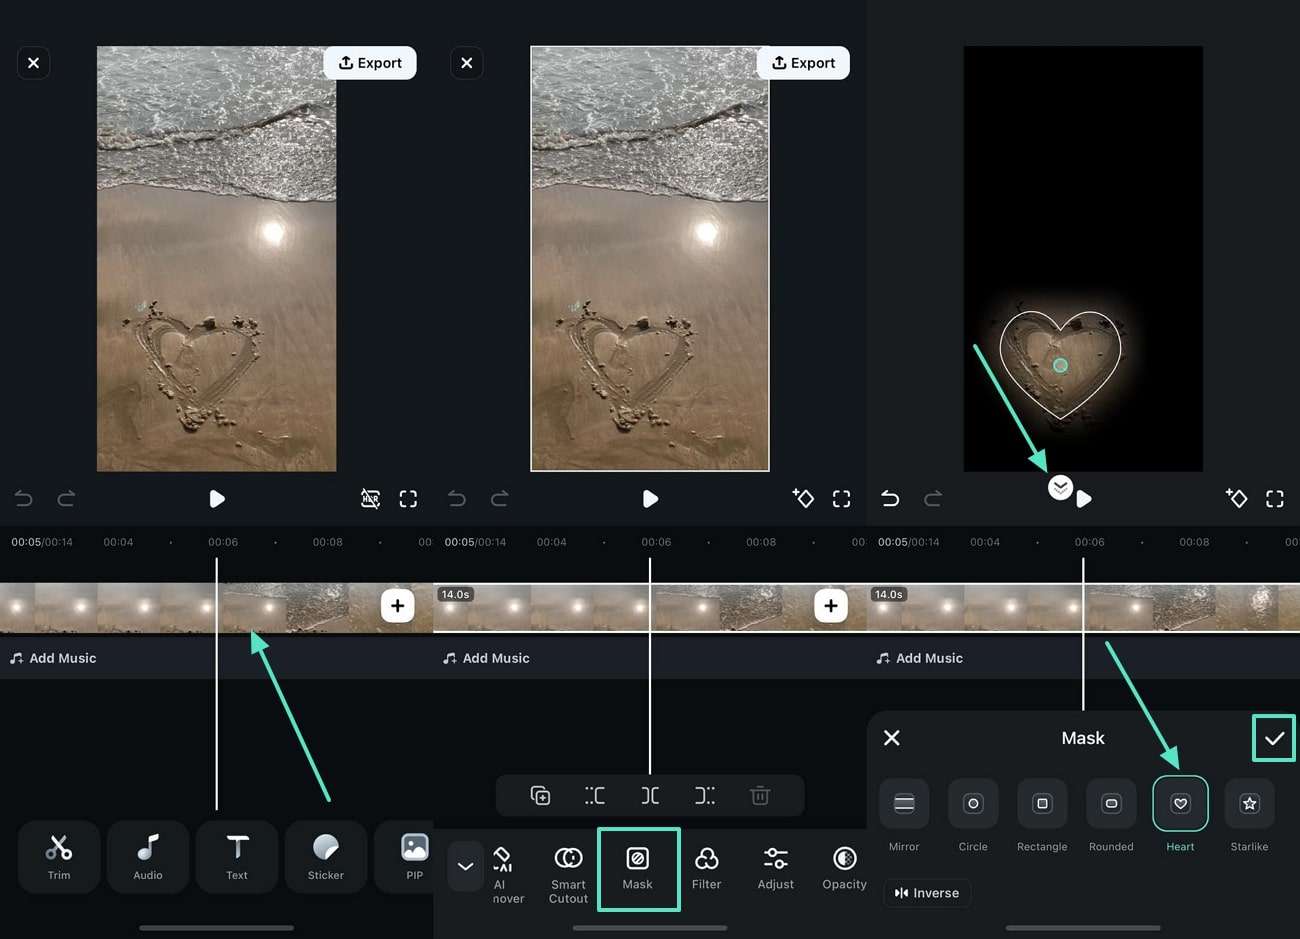
Exploring the Filmora App for Effective Masking
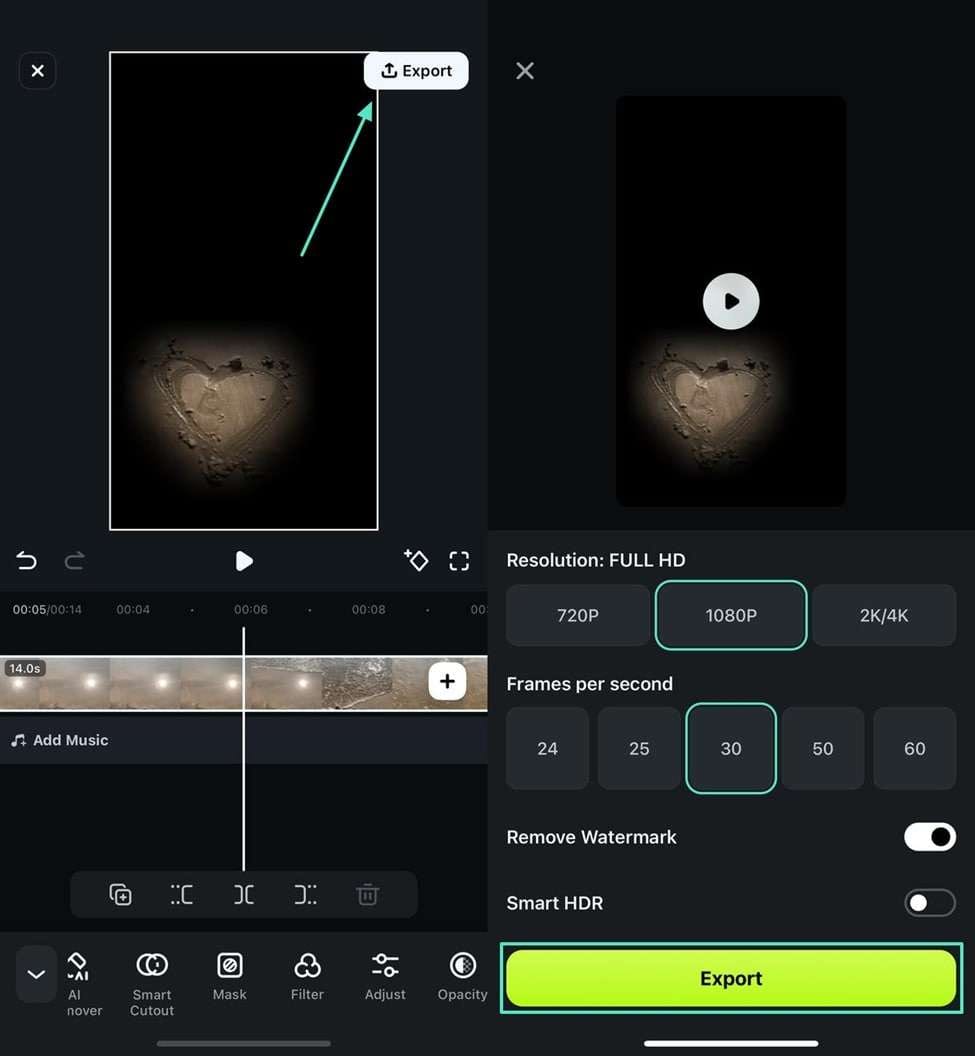
Users looking for quick video masking can use the Filmora App and have their video editing on the go. The manual mask video editing facility allows you to add personal efforts for a flawless look. You can avail of the exciting shapes and adjust them over the size of the object that needs to be masked. For a subtle blending of the mask, users can change the blur and create a professional look.
Conclusion
Maybe you want to add a picture-in-picture effect, or maybe you want to replace the background with a new image. Whatever the reason, it's easy to do with most video editing software. We've shown you how to mask videos in eight different editors in this article. So now you can get started creating your own custom videos!
FAQ
-
What is the best video masking software for beginners?
For beginners, Filmora is highly recommended. It offers intuitive masking tools, including shapes and AI-powered masking, making it easy to get started without a steep learning curve. Its user-friendly interface simplifies the entire masking video editing process. -
Can I get a free video masking tool?
Yes, many video editors offer free trials or limited free versions with masking capabilities. Filmora provides a free trial that includes its powerful masking features, allowing you to explore its capabilities before committing to a purchase. Some online tools also offer basic free masking, but often with limitations like watermarks or reduced export quality. -
What is the best app to put mask on face in a video?
If you're looking for an app to put mask on face, the Filmora App (available for iOS and Android) offers effective and easy-to-use face mask video editing features. Its AI Smart Masking can automatically detect and isolate faces, simplifying the process of blurring, highlighting, or applying creative masks to faces in your videos directly on your mobile device. -
Is motion tracking important for video masking?
Yes, motion tracking is crucial for advanced video masking, especially when dealing with moving objects or subjects. It allows the mask to automatically follow the movement of an object frame by frame, saving significant time compared to manual keyframing. Software like Filmora, with its integrated Boris FX Mocha, offers professional motion tracking capabilities for precise masking of dynamic elements. -
What is the difference between rotoscoping and chroma-keying for masking?
Rotoscoping involves manually tracing an object frame by frame to create a mask, offering very precise control but being time-consuming. Chroma-keying, on the other hand, uses color (like a green or blue screen) to isolate and remove a specific background, creating a mask around the subject automatically. Both are powerful masking techniques used in video editing.
