

Slow motion is a popular effect, but it often looks choppy or uneven. The Premiere Pro time interpolation Optical Flow feature is the key solution, analyzing frames to generate new ones for fluid, natural-looking movement. This comprehensive guide shows you exactly how to use Optical Flow in Premiere Pro step-by-step—covering the built-in tool, third-party plugin options, and crucial tips to avoid unwanted artifacts, especially when Premiere Pro Optical Flow not working as expected.
Part 1. What Does Optical Flow Do in Premiere Pro? (The Science of Smooth Slow Motion)
In Premiere Pro, the Optical Flow time interpolation option helps fix the loss of smoothness that often happens when you slow down a video. But how is that even possible? We will explain exactly what does Optical Flow do in Premiere Pro: The simple idea is that it studies how movement continues from one frame to another and then intelligently recreates that motion.
This method makes it look as if the scene was originally filmed with a camera capturing far more frames per second. As a result, the movement looks more natural and avoids the jittery or blurry effect you often see with regular slow motion.

Practical Use Cases:
Optical Flow in Premiere Pro isn't just a technical feature, it's something you can use in real editing situations to make slow motion look its best. Here are a few examples:
- Sports Replays: Every detail of an athlete's movement becomes clear and easy to follow when slowed down without choppiness.
- Cinematic Sequences: Added fluidity enhances the drama of a scene and gives it the polish of a professional production.
- Creative Tutorials: Perfectly smooth slow motion highlights each step, making demonstrations easier to watch and understand.
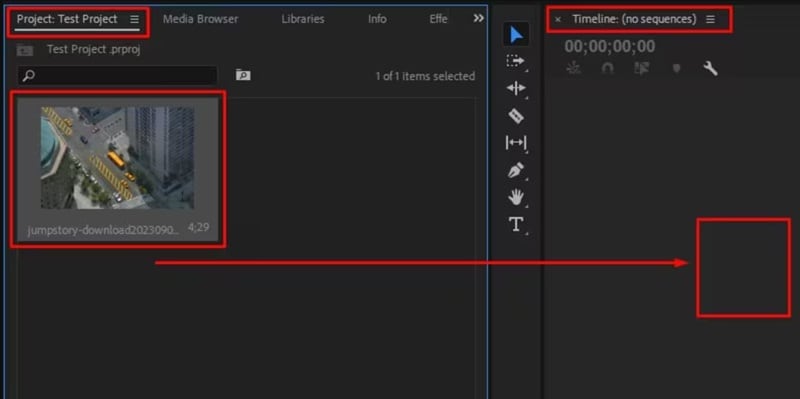
Part 2. How to Use Optical Flow in Premiere Pro
Now that you understand what it does, let's look at how to actually apply it in your edits. If you want to learn how to use Optical Flow in Premiere Pro, there are two main ways to do it: directly in Premiere without any plugins, or with the help of third-party plugins for more control.
Below, we'll go through both methods step-by-step.
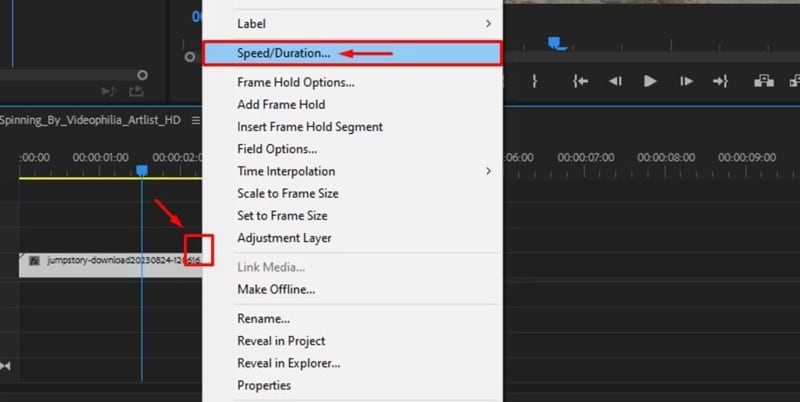
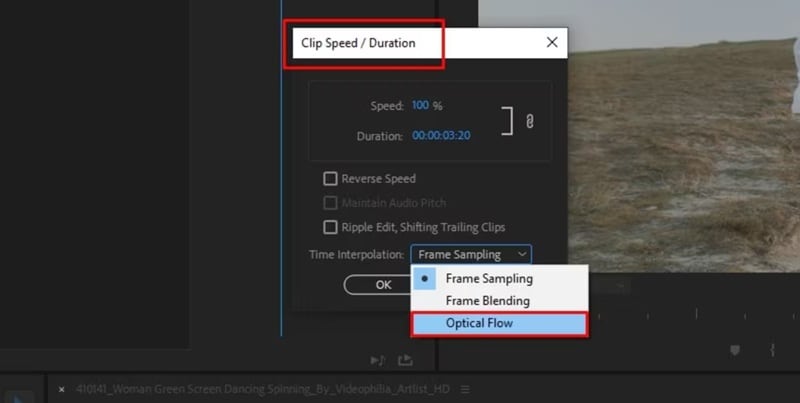
Method 1: Without Plugin (Using Time Interpolation "Optical Flow")
The following steps show how to apply this process simply and effectively.
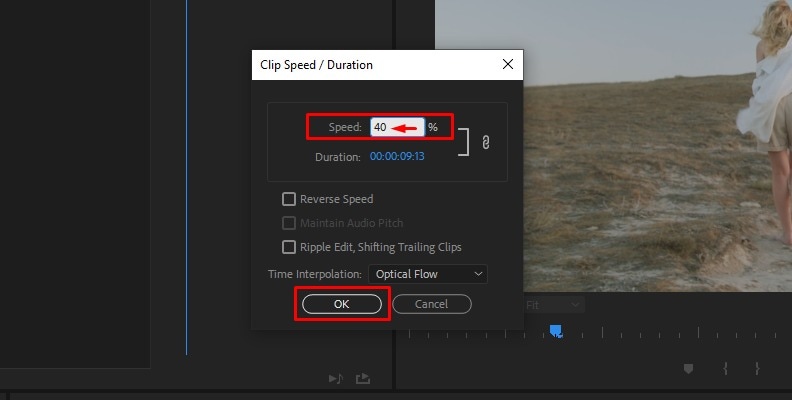
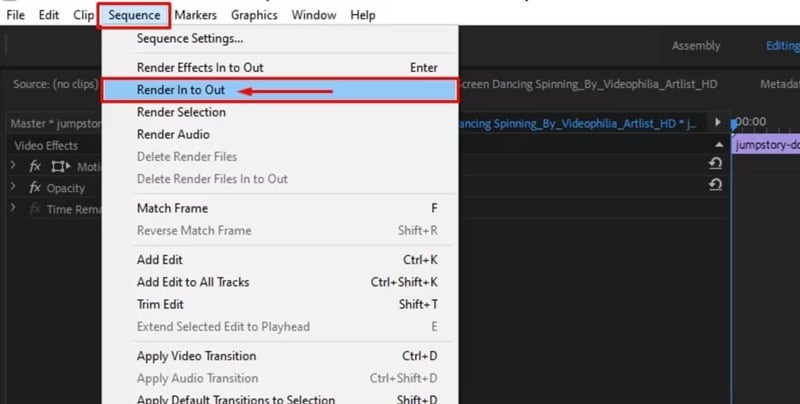
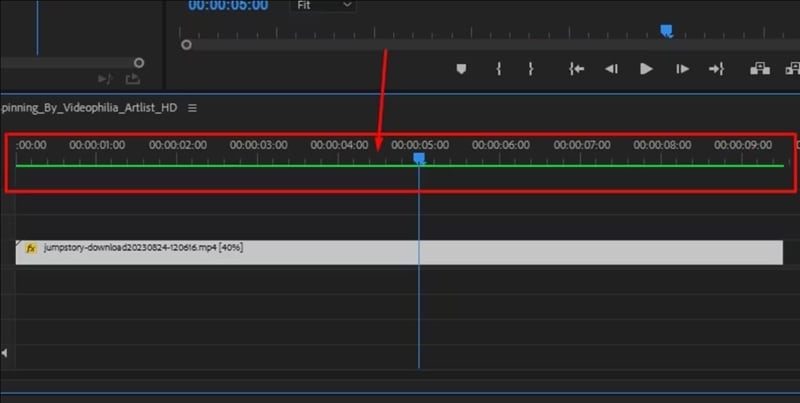
👉 Practical tip: If the scene contains a lot of detail (crowds, water, smoke, etc.), the algorithm may generate artifacts. In this case, use a moderate slowdown (50% rather than 25%) and always render the sequence before evaluating the result.
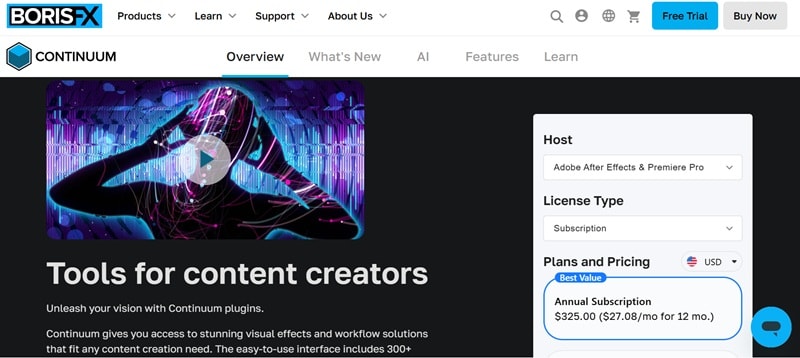
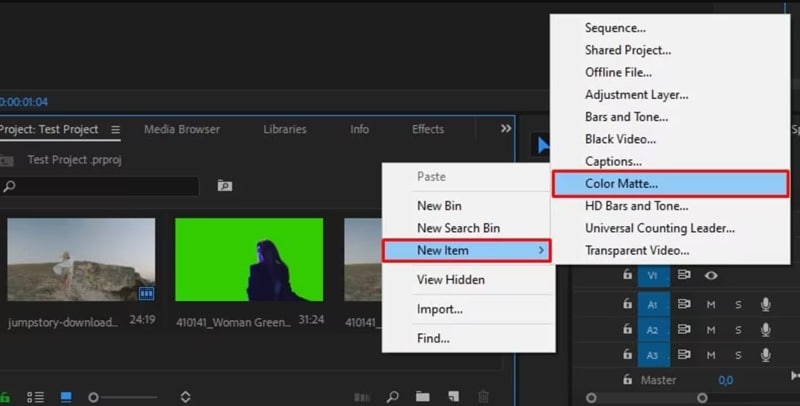
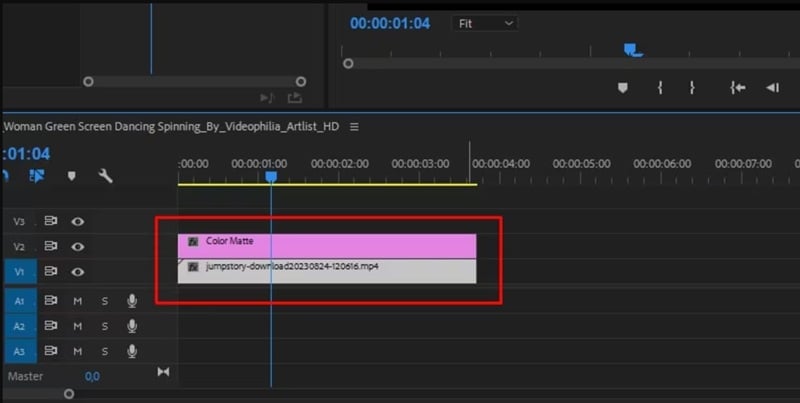
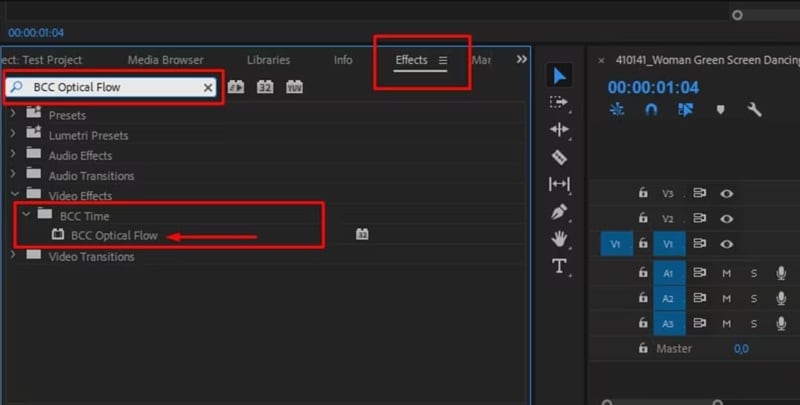
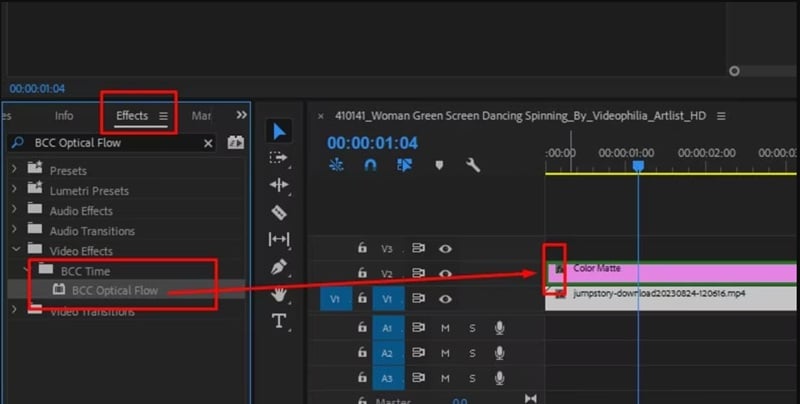
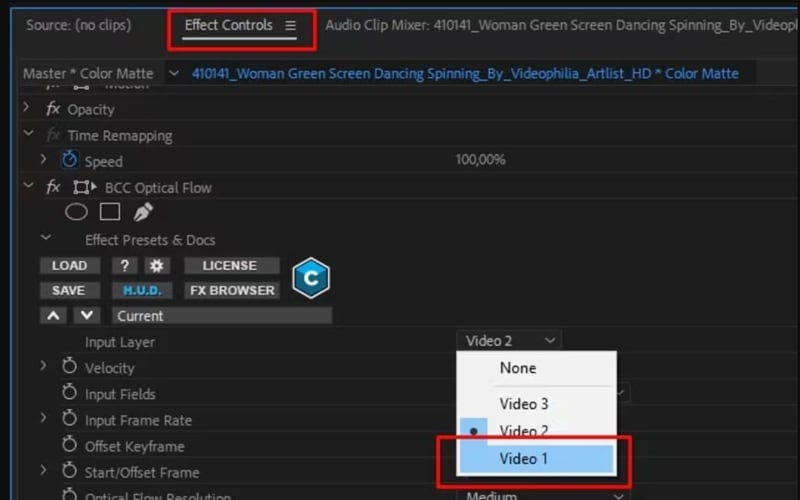
Method 2: With Plugin (BCC Optical Flow by Boris FX)
Another way to apply Optical Flow in Premiere Pro is with a third-party plugin. One of the most popular options is BCC Optical Flow by Boris FX, which offers more control and often delivers cleaner results.
Here's how you can use it step-by-step:
Comparing Both Methods
Once you've tried both ways of using Optical Flow in Premiere Pro, it becomes easier to see the differences in how they perform. To make things clearer, here's a simple comparison that sums up the pros and cons of each method.
- Without plugin: fast, directly integrated into Premiere Pro, ideal for simple projects.
- With BCC Optical Flow: more powerful, with more settings, but requires the installation of a paid plugin.
In both cases, the final result depends on the scene: shots with simple movements are ideal for Optical Flow of Premiere Pro, while complex scenes may require several attempts to avoid artifacts.
Part 3. Premiere Pro Time Interpolation: Optical Flow vs Frame Blending vs Frame Sampling
Actually, Optical Flow in Premiere Pro is just one of three options for slowing down footage. The other two are Frame Blending and Frame Sampling. Each method handles time interpolation in a different way, and the results can vary depending on the type of motion in your clip.
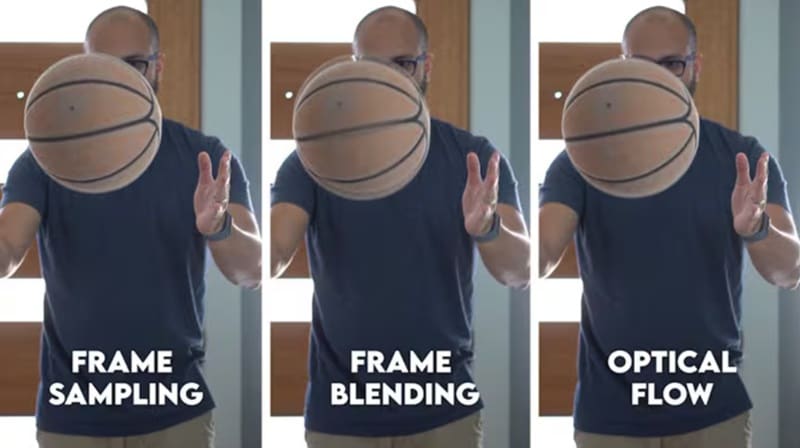
If you're comparing Premiere Pro Optical Flow vs Frame Blending, or want to see how Premiere Pro time interpolation Optical Flow stacks up against Frame Sampling, the table below breaks down their main differences.
| Method | How It Works | Visual Result | Rendering Load | Best For |
| Optical Flow | Creates new frames from pixel motion | Smooth slow motion, sometimes small glitches | Slowest | Sports, tutorials, cinematic shots |
| Frame Blending | Blends nearby frames | Softer look, visible blur | Medium | Quick edits, creative clips |
| Frame Sampling | Repeats frames | Choppy and jerky | Fastest | Simple tests, low-priority projects |
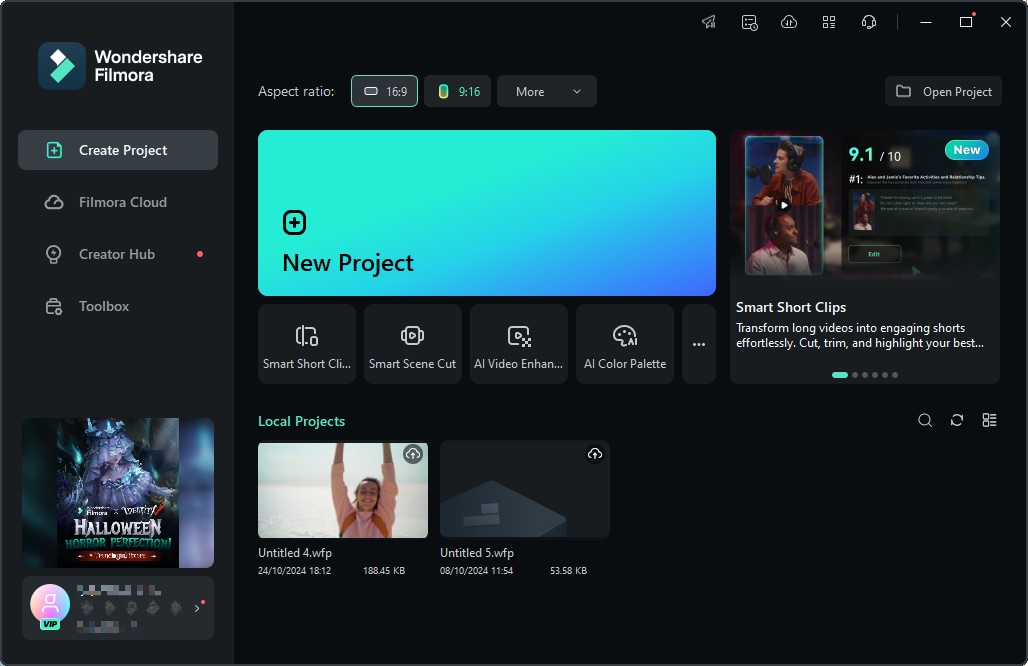
Part 4. Filmora: An Easier & Faster Alternative to Premiere Pro Optical Flow
While Optical Flow in Premiere Pro can deliver precise and polished slow-motion effects, it isn't perfect. Rendering takes time, the results aren't always flawless in complex scenes, and adding plugins for better control can quickly get expensive.
That's why it helps to have simpler and more affordable alternatives. Among the options available, Wondershare Filmora stands out. It has its own Optical Flow feature built right in, so you don't need extra plugins or complicated setups.
Not to mention, Filmora is easier to learn, lighter on your system, and budget-friendly, making it a great choice if you want smooth slow motion without the heavy workflow of Premiere Pro.
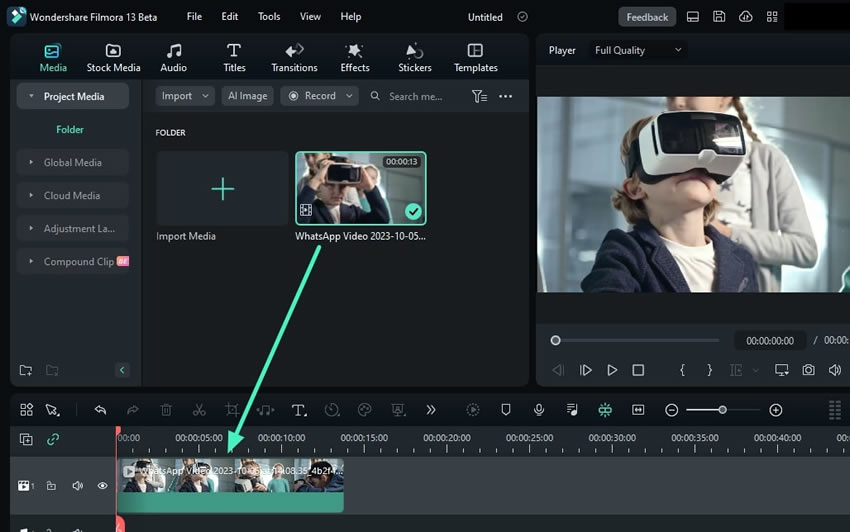
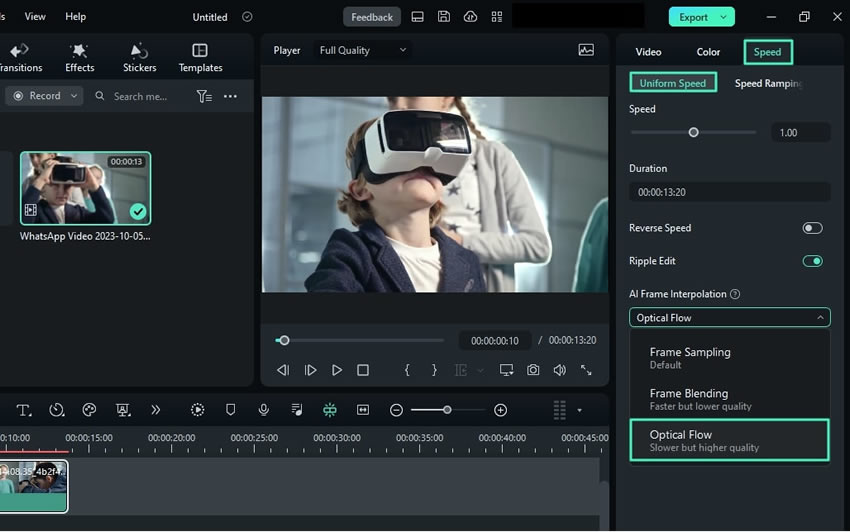
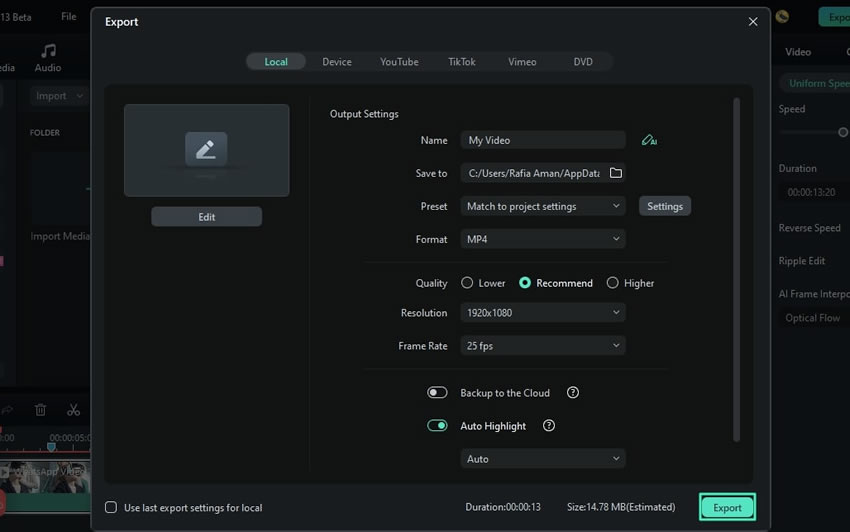
Below, we'll walk you through a quick guide on how to use Filmora Optical Flow step by step.
Now let's see how to proceed, step by step.
Conclusion
Premiere Pro Optical Flow is a powerful way to turn ordinary slow motion into smooth, cinematic sequences. Its biggest strength is the precision it brings, creating results that feel close to footage shot at higher frame rates.
However, it can be demanding on your system, especially with complex motion. Give it a try to see how much more impact your videos can have. And if you're looking for a simpler and more budget-friendly option, remember that Wondershare Filmora also includes Optical Flow along with other creative tools worth exploring.
Frequently Asked Questions
-
Why is Premiere Pro Optical Flow Not Working / Why Don't I See a Difference?
It is common not to notice anything immediately. Without a complete render, the preview may remain jerky. Make sure you have enabled Premiere Pro optical flow in the temporal interpolation option and avoid lowering the speed too much on complex shots. -
Does Optical Flow increase export time?
Yes. Rendering additional images requires more resources. Render your sequences, use proxies, and maintain a reasonable speed to limit export time. -
Why does my clip with Optical Flow appear distorted?
Some "warping" or "ghosting" effects appear when multiple objects intersect. In Optical Flow Premiere Pro, reduce the speed, simplify the frame, or try Frame Blending. -
Do I need Optical Flow for time-lapse images?
No. In this case, Premiere Pro Optical Flow offers no advantage. Frame Sampling is generally sufficient, as the tool is primarily designed to improve slow motion.
