

Why does color correction matter for YouTube, TikTok, or Instagram videos? Many creators look for Adobe Premiere Rush LUT options, yet the editor doesn't support custom LUT imports.
Still, you're not limited. Adobe Premiere Rush color grading tools include built-in presets and correction features that simulate LUT workflows. With these, you can balance brightness, adjust contrast, and fine-tune color for your videos.
This guide explains the difference between correction and grading and how to use Adobe Premiere Rush LUT presets. It also shows how Rush compares with another editor for advanced options. Let's get started!
Part 1. What is Color Correction vs Color Grading?
Before diving into Premiere Rush LUT options, it helps to break down the difference between color correction and color grading. Many people mix them up, but they serve different purposes in video editing.
- Color correction is about fixing technical issues in your footage: For instance, adjusting exposure when a clip looks too dark or bright. Correcting white balance if skin tones appear unnatural and restoring contrast when footage looks flat are also considered color correction. The goal is to make clips look accurate and consistent.
- Color grading goes beyond fixing mistakes in the footage: With Adobe Premiere Rush color grading, you can set the mood and give footage a cinematic tone that fits your content's theme. These adjustments help keep the look consistent, even when you work across multiple clips.
Why Color Grading Matters for YouTube and Social Media Creators
For YouTube and social media platforms, grading helps build a visual identity. A consistent color style makes videos recognizable, ties them to your brand, and keeps your content cohesive across different posts.
Part 2. Step-by-Step: How to Apply Color Correction in Adobe Premiere Rush
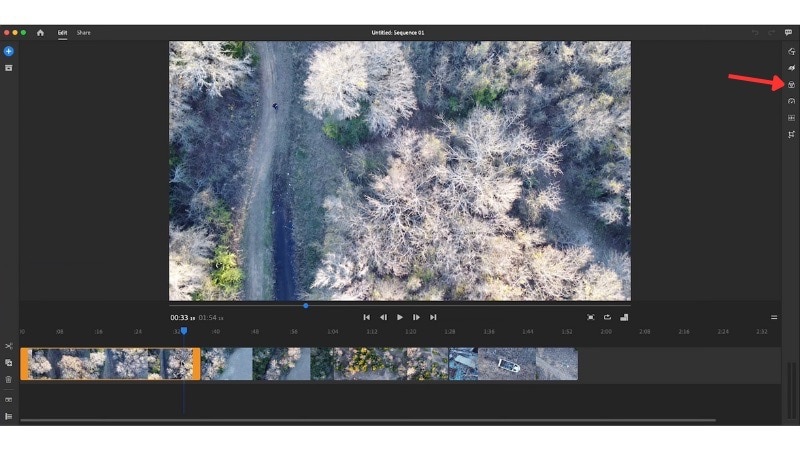
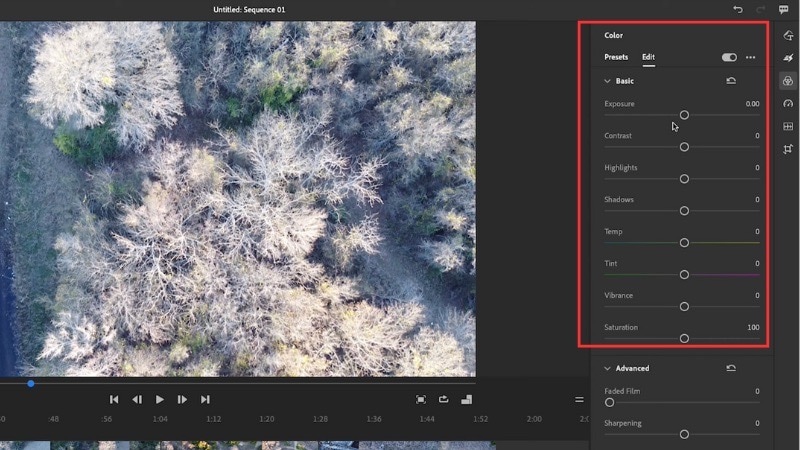
After understanding the differences between Premiere Rush color grading and color correction, the next step is learning how to apply them in the editor. Premiere Rush makes this adjustment simple with its Color panel, where you can adjust exposure, white balance, and tones.
Follow the steps below to start manual color correction on your footage:
- Exposure: Adjust overall brightness.
- Contrast: Define the difference between lights and darks.
- Highlights: Control bright areas of the image.
- Shadows: Bring detail to darker parts.
- Temperature: Adjust the color tone between warm and cool.
- Tint: Add green (left) or magenta (right) hues.
- Vibrance: Enhance muted colors naturally.
- Saturation: Boost or reduce overall color intensity.
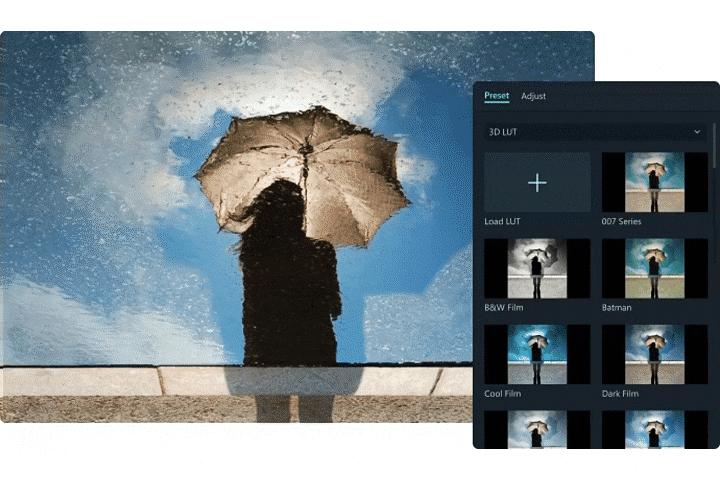
Part 3. Premiere Rush LUTs: Why Custom LUTs Don't Work & How to Use Presets as an Alternative
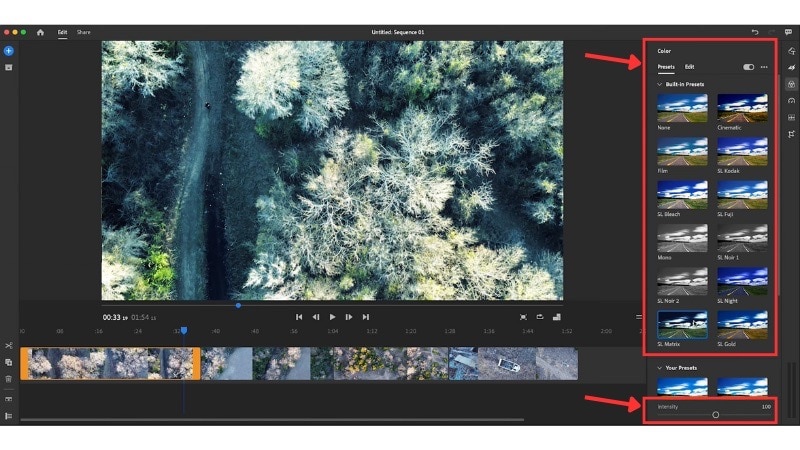
Color grading often uses LUTs to apply a look quickly. When people search for Adobe Premiere Rush LUTs, they soon realize the app does not support external LUT imports. Instead, Rush offers built-in color presets that work like LUTs and give you a fast-starting point for grading.
You can still create a consistent style with these presets and save your own adjustments. This approach gives you workflows that feel close to using LUTs while staying within Rush's built-in tools.
Follow these steps to use presets as LUTs for Premiere Rush:
In the Color panel, open Presets and pick one that fits your video's style.
Scroll down to the Intensity tool and use the slider to control how strong the effect looks.
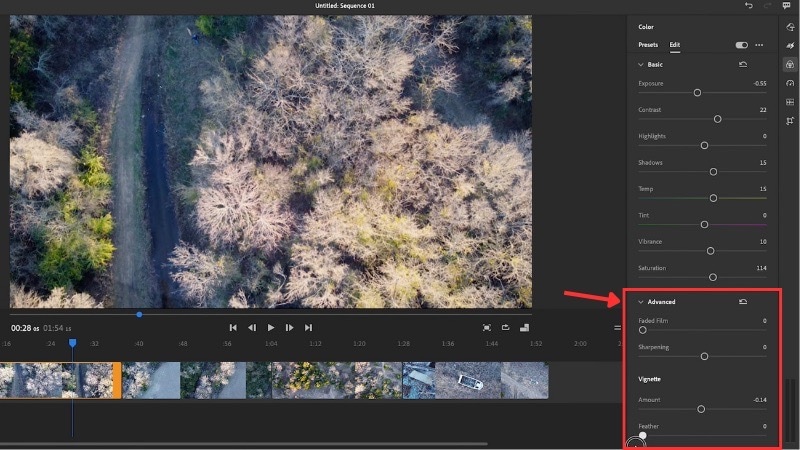
Switch to the Edit panel and fine-tune exposure, contrast, temperature, and other sliders until the look matches your vision.
If needed, open the Advanced controls to adjust:
- Faded Film: Reduce contrast for a soft, vintage-style look.
- Sharpening: Enhance edges to give the video a clearer appearance.
- Vignette Amount: Darken or lighten the corners of the frame.
- Vignette Feather: Adjust how soft or sharp the vignette edge appears.
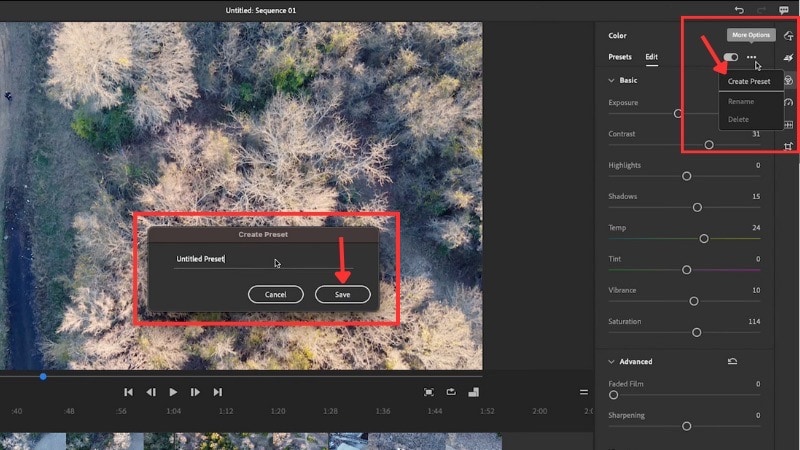
Click the Three-dots icon in the top-right of the Edit panel to open More Options.
Choose Create Preset, name it, and click Save. You can now reuse the same look in future projects.
Click on the other video tracks on the timeline and apply the same Preset settings you created.
Part 4. Premiere Rush vs Filmora: Color Grading Comparison
The Premiere Rush LUT trick with presets we tried earlier can work for simple edits. But it may feel limiting if you want more creative control. In that case, you can consider using another editor like Wondershare Filmora.
Filmora supports both built-in LUTs and custom LUT imports. It also includes AI-powered tools and advanced color correction options such as HSL tuning, color wheels, and keyframing. This makes Filmora flexible for creators who want pro results without extra complexity.
You'll get plenty of choices from cinematic, vintage, and retro styles. You can also apply Camera LUTs such as S-LOG, C-LOG, or D-LOG, which match the output of high-end cameras. All of these work through simple drag-and-drop, with the option to adjust the opacity afterwards.
Premiere Rush vs Filmora: Color Grading Comparison
Here's how Premiere Rush and Filmora compare side by side:
| Feature | Adobe Premiere Rush | Wondershare Filmora |
| Ease of Use | Clean interface with basic presets, fast for social media edits. | User-friendly with drag-and-drop LUTs, plus more customization if you need it. |
| Color Correction Tools | Essentials: exposure, contrast, highlights, shadows, white balance, vibrance, saturation. | Includes those basics plus HSL tuning, curves, keyframes, and advanced AI tools. |
| LUT and Preset Support | Limited to built-in presets, no custom LUT imports. | Built-in LUT library, Retro and Cinematic LUT folders, Professional Camera LUTs, and custom LUT import. |
| Flexibility & Professional Control | Limited flexibility: presets are few, and manual sliders require some technical knowledge. No support for external LUTs. | High flexibility: wide preset categories, simple sliders for opacity and skin tones, plus support for custom LUTs and advanced tools like curves and HSL. |
| Best For | Editors who want basic tools but don't mind manual adjustments. Works better if you already understand exposure and color balance. | Beginners and experienced creators who want ready-to-use LUTs, easy adjustment, and room to grow with advanced options. |
Check out this video for a closer look at Filmora's color grading features:
Conclusion
LUTs in Premiere Rush aren't available, but you can use its color presets to achieve LUT-style effects. By combining presets with manual adjustments, you can build a consistent look.
Adobe Premiere Rush color grading can refine exposure, white balance, and contrast. Still, you need some knowledge of grading to use these controls effectively. Because the tools stay basic, many editors eventually look for alternatives.
With Adobe Premiere Rush LUTs limited to built-in presets, Filmora becomes a better alternative. It offers broader LUT categories, supports custom LUT imports, and includes easy sliders. Try both tools and see which workflow fits your editing needs best.
Frequently Asked Questions
-
Can I match the color between clips automatically in Premiere Rush?
No, Premiere Rush doesn't include an auto color match feature. You need to adjust exposure, white balance, and contrast manually from one clip to another for consistency. -
What's the best way to avoid over-editing when grading in Rush?
Start with small changes. Adjust white balance and exposure first, then fine-tune contrast and saturation. Use the Vibrance slider before Saturation to keep skin tones natural. Always compare with your original clip to avoid pushing colors too far. -
Do I need LUTs to make my videos look cinematic?
Not necessarily. LUTs help apply a film-style look quickly, but you can also create cinematic results through careful adjustments in exposure, contrast, and color balance. LUTs simply speed up the process if you want a ready-made style.
