

Transcription in video editing involves converting spoken words into written text, an essential practice that enhances accessibility and user engagement. Subtitles and captions help include audiences such as those with hearing impairments and non-native speakers, while also increasing watch time and making content easier to find. One such tool that converts the spoken words into text is Adobe Premiere Pro.
Its Speech to Text feature revolutionizes transcription by automating this conversion directly within the editing workflow. However, the tool requires high editing skills and technical knowledge. In this article, we will learn how to use transcription in Premiere Pro, along with a more efficient and budget-friendly alternative.
Part 1. How to Transcribe Audio in Premiere Pro Step by Step
Premiere Pro uses advanced speech-to-text functionality to detect the spoken words in the video and transform them into accurate transcripts. You get the ability to copy and paste the generated transcript and repurpose it according to your preferences. Moreover, you can modify the text within the transcript according to your preferences.
Steps for Transcribing Audio With Premiere Pro
Using Premiere Pro transcription helps you transcribe the video file into text as it does not support audio-only transcription. An important to note amidst this process is that Premiere Pro only supports transcribing the audio within video files, which means it lacks direct audio support. To learn how to transcribe the audio of the video using this tool, read the steps mentioned below:
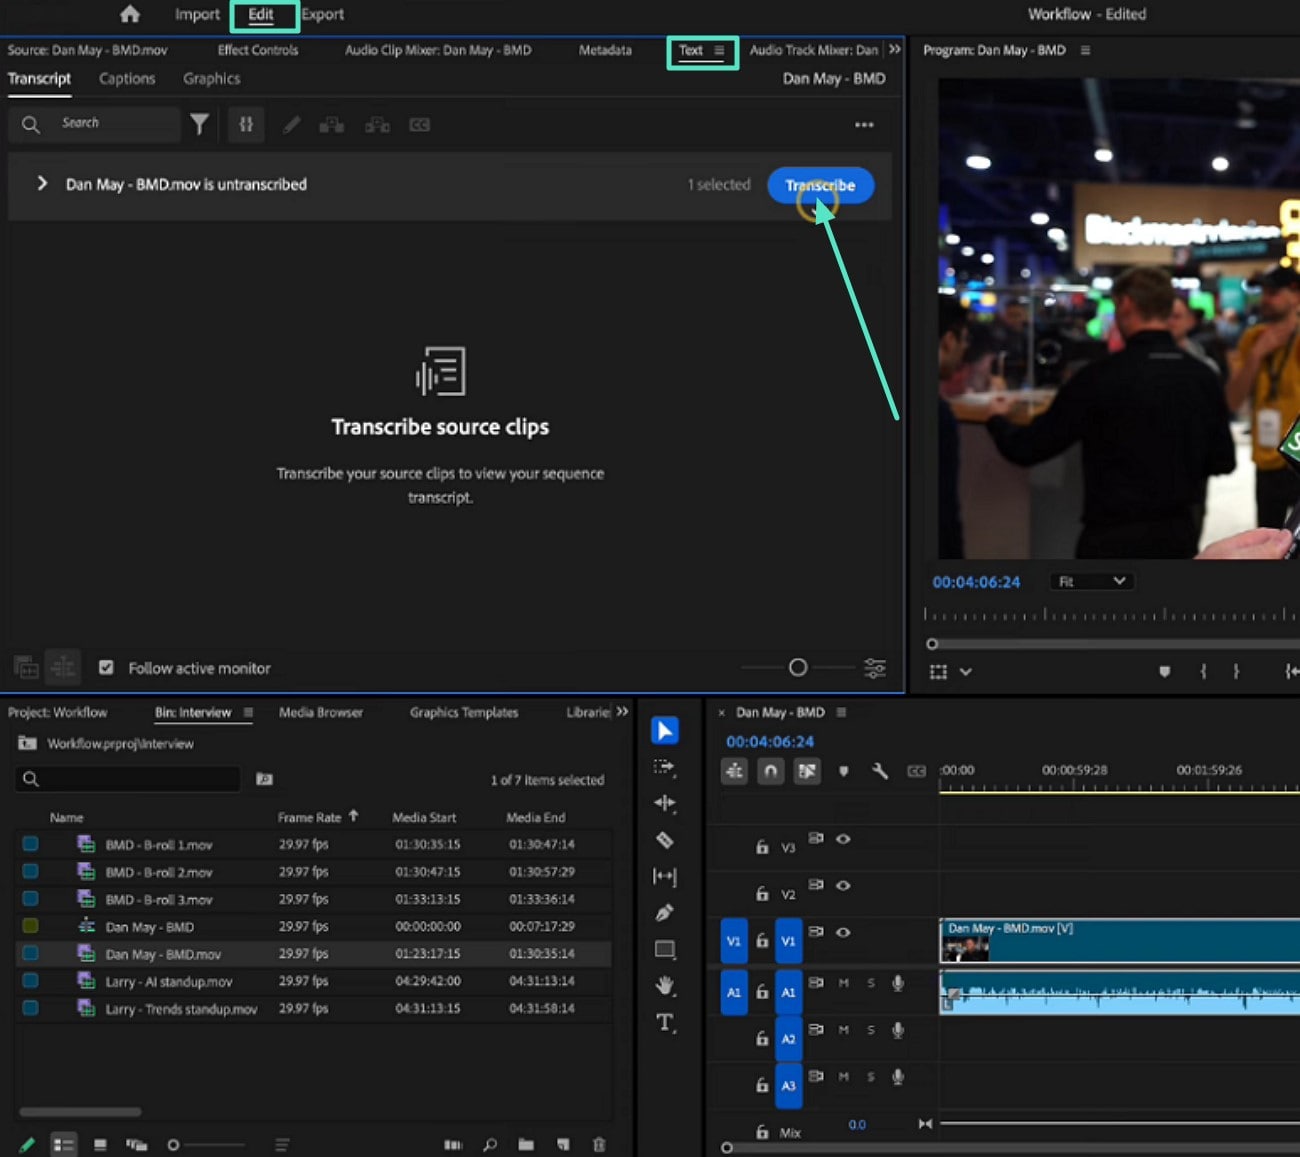
- With the video imported, head to "Text" under the "Edit" panel.
- Press the "Transcribe" button located within the interface.
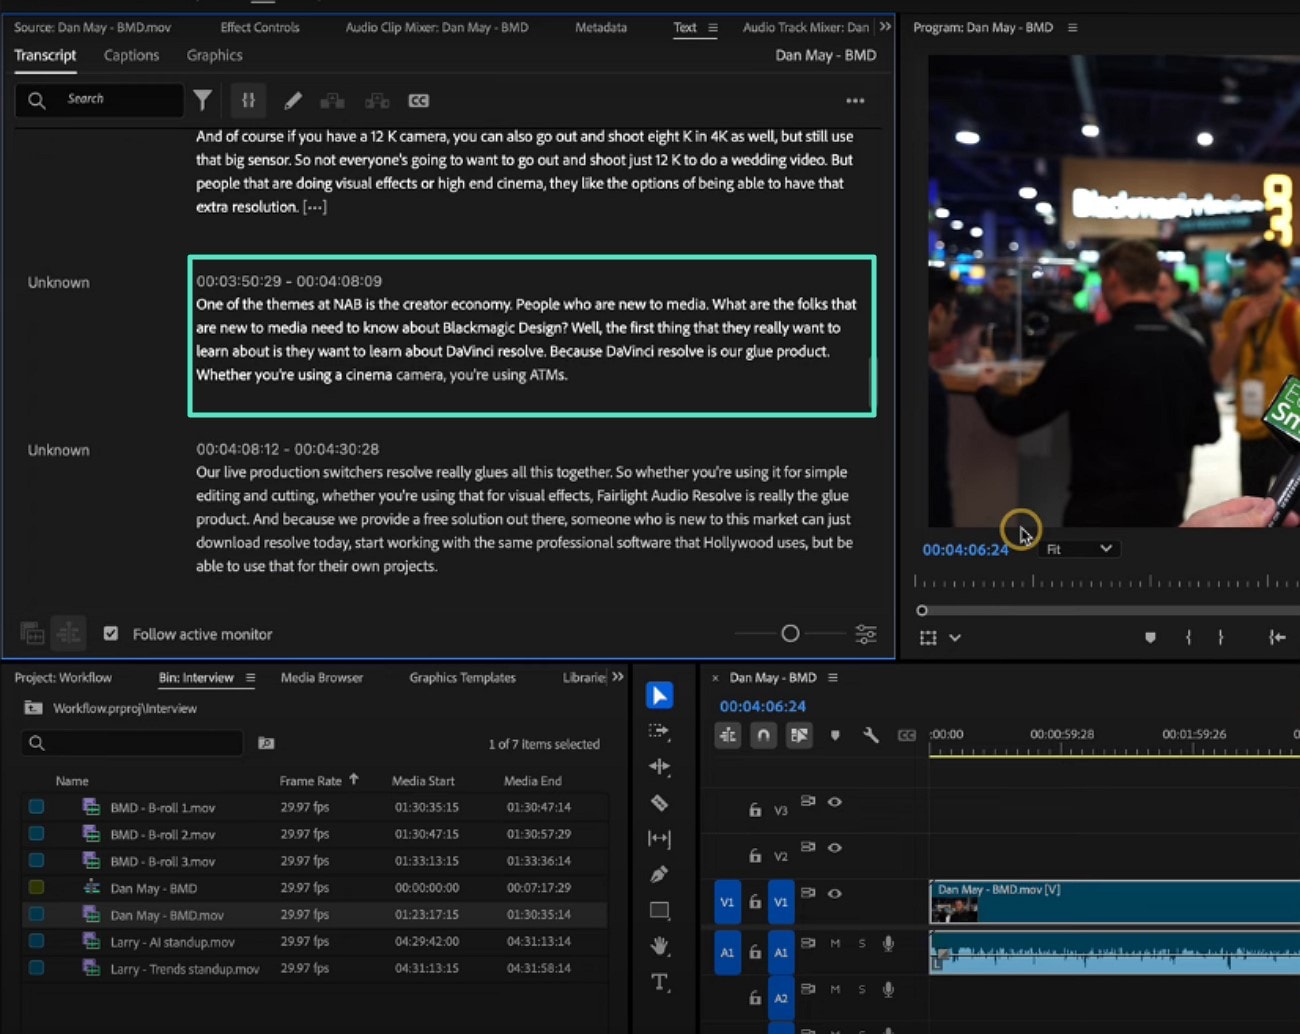
- Once you press transcribe, the tool will immediately begin the process.
- When done, edit the transcribed text and copy and paste it easily anywhere.
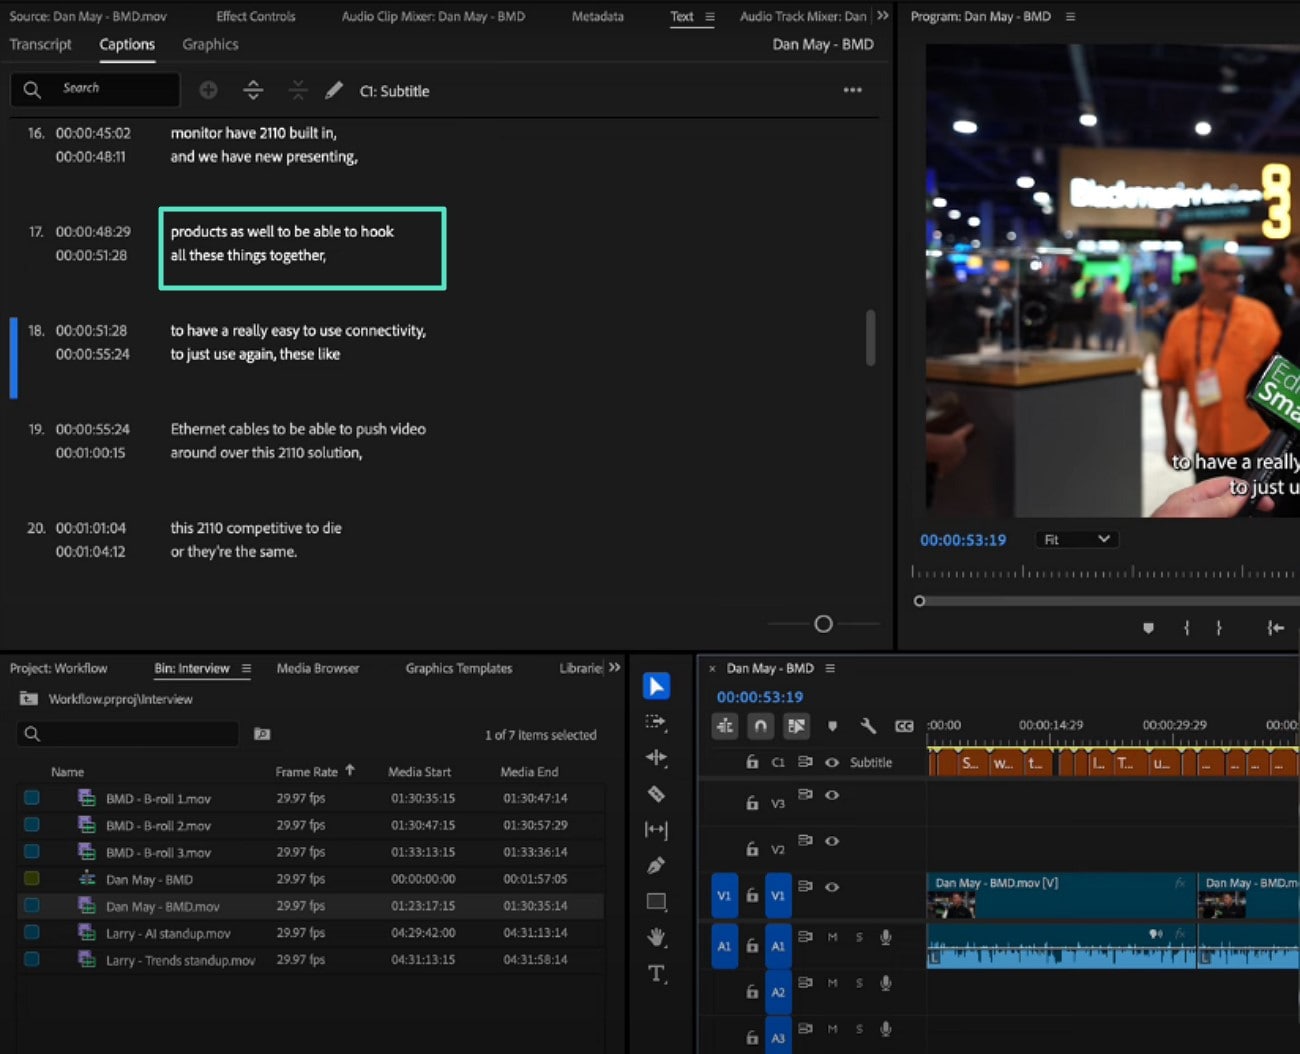
- Enable the "Captions" section next to "Transcript" located on the top-left corner.
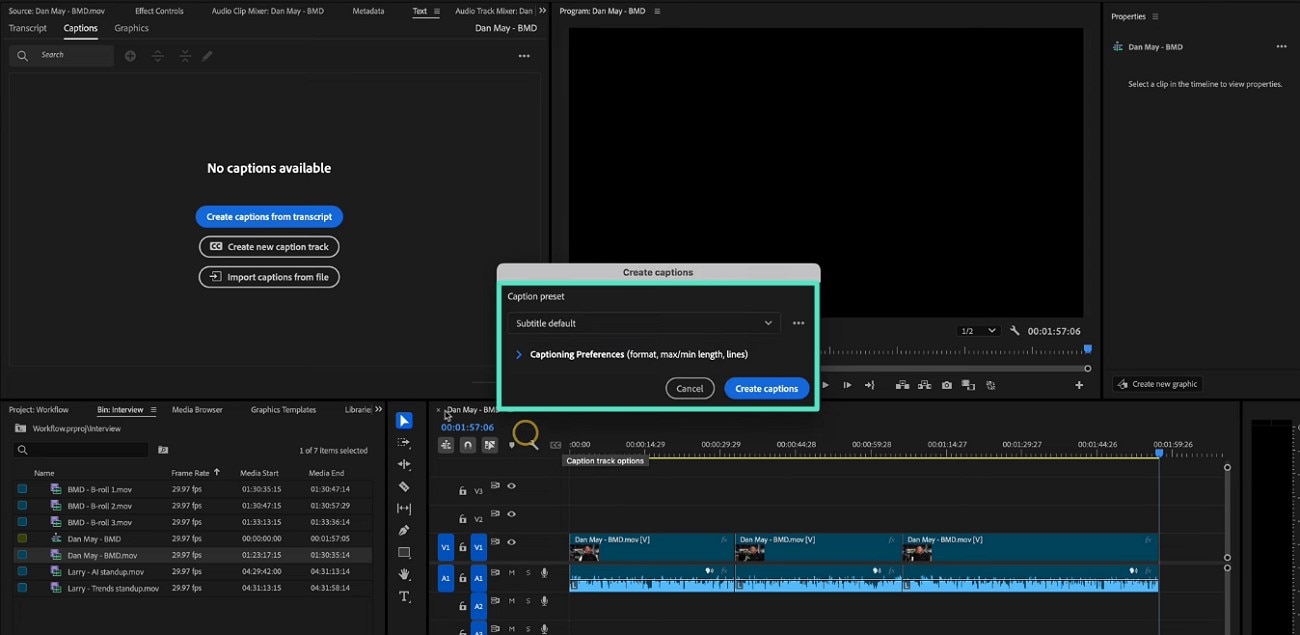
- Now, select the "Create Captions from Transcript" option by clicking on it.

- In the following dialogue box, select the caption preset by expanding the menu.
- Once done, hit the "Create Captions" button to execute the process.
- Review the generated captions within the "Captions" section and make changes if required.
- Once done, save the subtitles as SRT or TXT successfully to your device.
Limitations Of Premiere Pro That Make You Look For Better Alternatives
Adobe transcribes audio with Premiere Pro with certain constraints that may pose challenges for those new to transcription. Below is a detailed overview of some common limitations of Premiere Pro's transcription features and how these impact the editing process:
| Limitations | Impact on Workflow |
| Limited Free Usage | Requires a paid subscription to access Speech to Text, limiting trial or casual use. |
| Steep Learning Curve | Complex interface demands time to master, slowing down initial transcription tasks. |
| Manual Correction Needed | Automatic transcription may require extensive manual proofreading and editing, increasing time. |
| Language Support Limitations | Fewer language options compared to specialized transcription tools. |
| Integration Complexity | Integration with third-party plugins can be complex, raising barriers for non-professionals. |
Points to Ponder [Important Notes]
- Accents reduce transcription accuracy as AI may misinterpret non-standard pronunciations.
- Segment long videos into smaller parts to improve transcription quality and manage processing.
- Minimize background noise by recording in quiet areas or using noise reduction tools beforehand.
- Use custom vocabulary or glossaries for specialized terms to boost recognition accuracy.
- Select transcription services that balance speed and accuracy based on project needs.
Part 2. Filmora Audio Transcription: Quick, Simple, Multilingual, Cost-Effective Solution!
For a smooth and cost-effective transcription solution that's quick and easy to use, Wondershare Filmora is an excellent choice. With its "one-click transcription" feature, Filmora automatically converts spoken audio into text, saving users time and effort. The interface is designed for ease, allowing straightforward proofreading and editing of generated subtitles or captions.
Filmora supports multiple languages and offers exports in various formats, including .srt, .txt, and embedded subtitles. With this video editor, users get the ability to transcribe audio and video files effortlessly, a utility that is not available in Premiere Pro.
Steps for Creating Audio Transcription Using Filmora
After learning about Filmora's transcription quality in detail, let us now have a look at the step-by-step guide to use this Premiere Pro transcription alternative:
- Begin by launching Filmora and clicking the "New Project" tab on the homepage.
- Next, import the video for which you want to generate a transcript and drag it to the timeline.

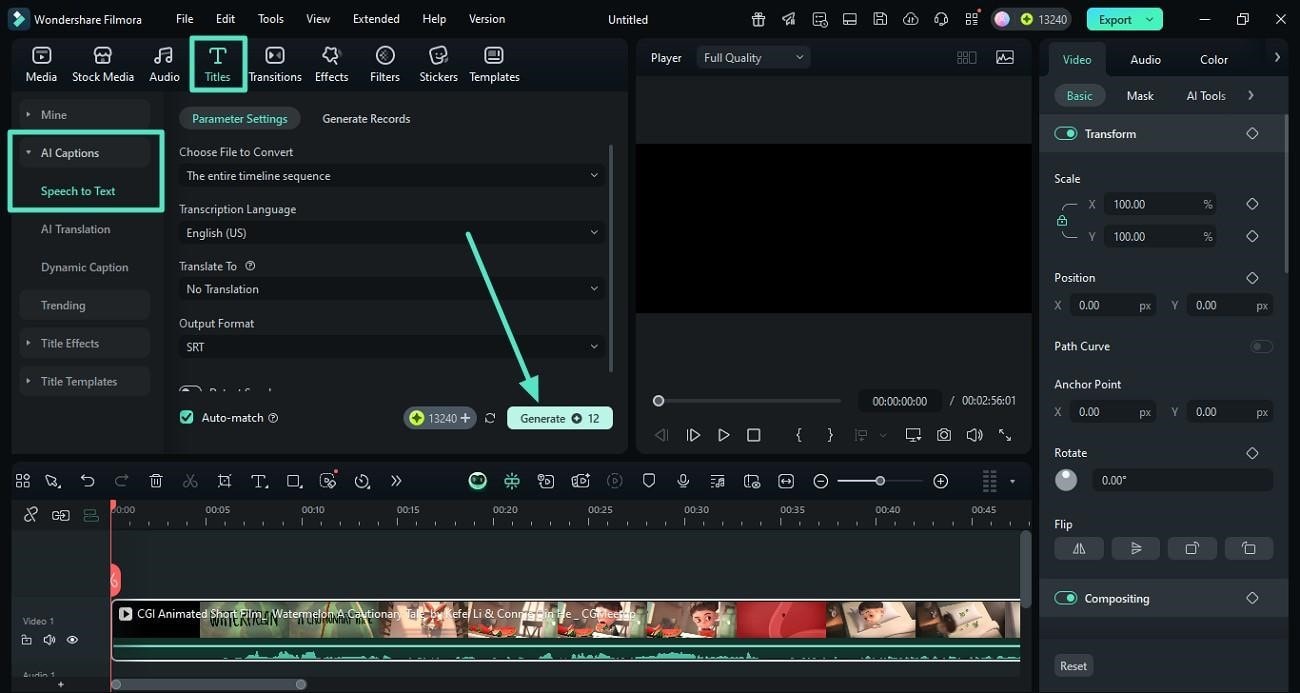
- In the following interface, head to the menu bar and click the "Titles" option.
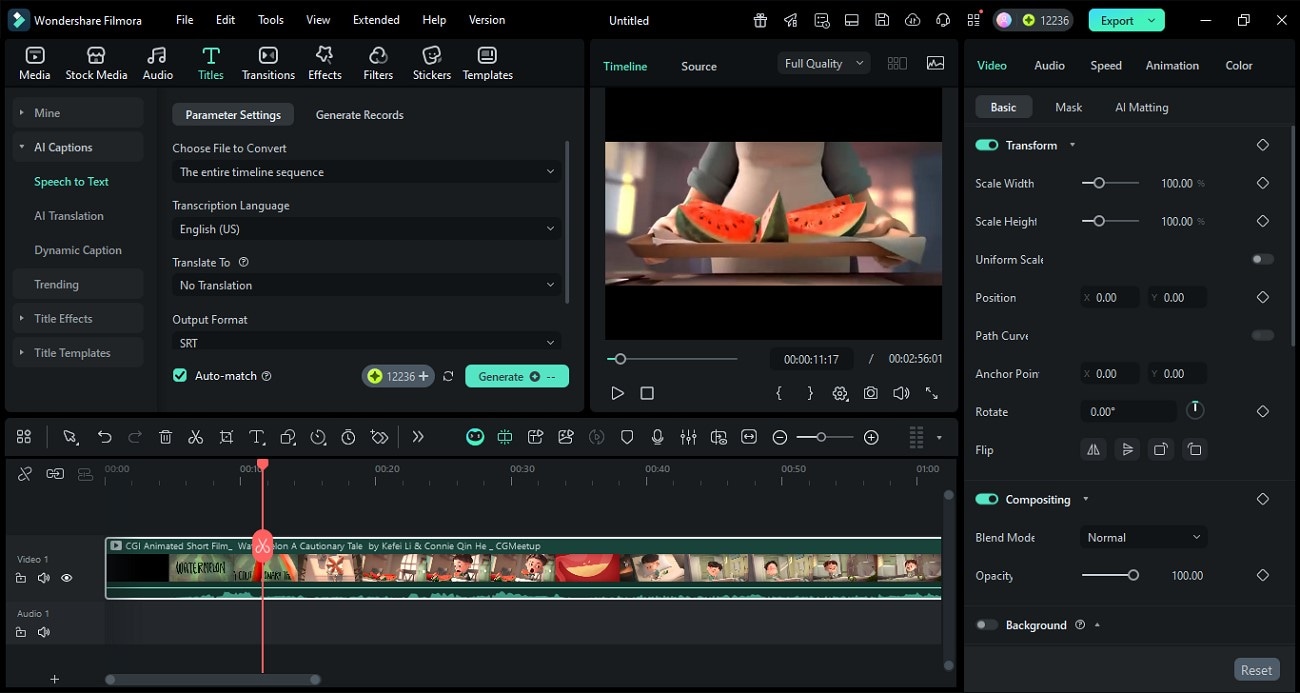
- Access "AI Captions" and enable "Speech To Text" to select the language and output format before hitting "Generate."
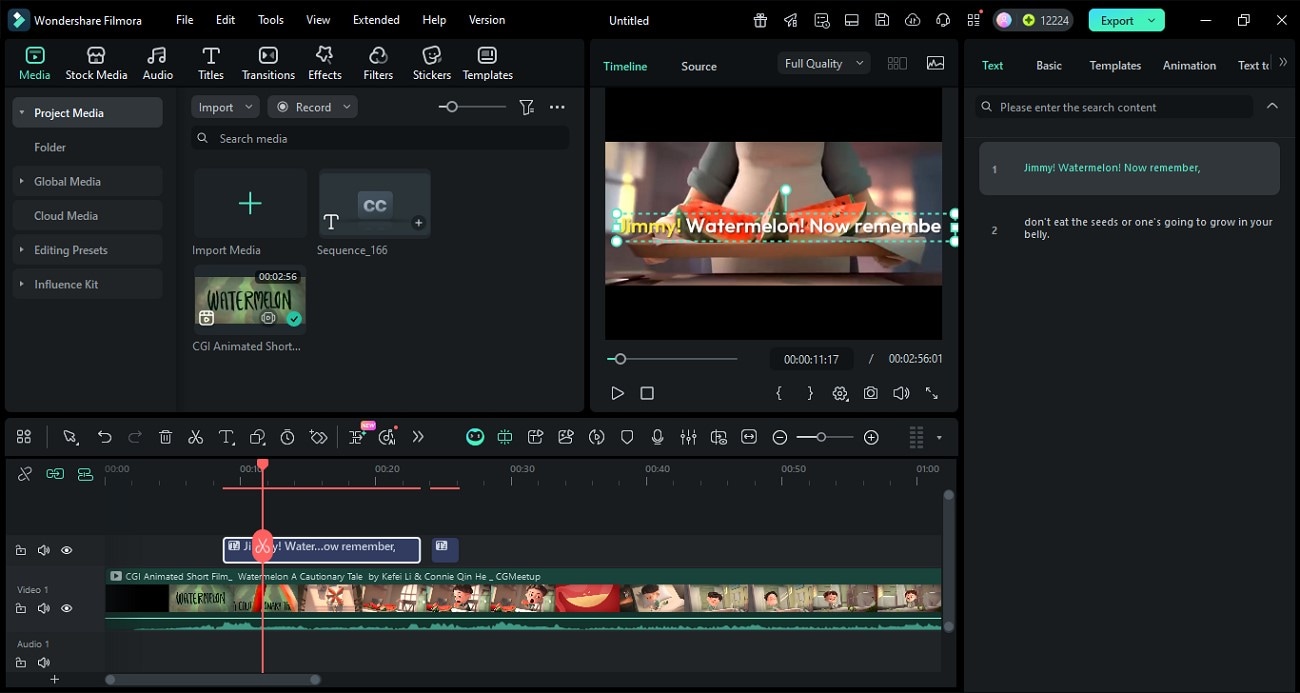
- Once the captions are generated, right-click on the track to enable the editing window.
- Make changes to the text or customize its appearance before pressing "Apply To All".
- You can select the text overlay from the presets offered and animate the captions as well.

- Adjust the timing of each caption appearing on screen by accessing the timestamps.
- Preview the generated subtitles and save the results using the "Export" button.
Why Choose Filmora for Audio Transcription
Choosing Filmora as an Adobe audio transcription alternative offers several distinct advantages that simplify the editing process while maintaining quality. Mentioned below are some of the benefits users get when they opt for Filmora for their transcription needs:
- Speech-to-Text & AI Translation: Filmora's AI-powered tools automatically generate accurate speech-to-text captions, supporting multiple languages and real-time translation.
- Dynamic Captions & Animations: The tool's AI captions are not just static; they can be animated and positioned creatively, making subtitles more engaging and suited for social media content.
- Cloud Storage and Cross-Device Access: Keeps projects synced across devices for seamless editing on desktop, laptop, or tablet.
- Extensive Assets Library: Filmora's extensive asset library enhances usability by providing instant access to a wide range of effects, transitions, titles, stickers, and music.
- Quick Export and One-click Publishing: Users can fast-track their projects with rapid export options and direct publishing to popular social media platforms, streamlining distribution.
- Cost/Subscription: Filmora provides more economical pricing with options like one-time purchases, making it ideal for small creators or those on a low budget.
- Lower Learning Curve: Designed to be intuitive, Filmora is accessible for novices without professional editing experience, ensuring a smooth start for creators needing efficient transcription tools.
Beyond audio transcription, there's a lot more to consider when choosing the right editing software — from ease of use to AI assistance and export flexibility. To help you make the best choice, we've put together a full comparison between Premiere Pro and Filmora.
👉 Read more: [Premiere Pro vs. Filmora – Full Comparison Guide]
Part 3. How to Get More Accurate Transcriptions (Pro Tips + AI Support)
To ensure the best transcription accuracy, employing pro tips tied with AI support can significantly improve results. Here are some of the techniques you can apply to get the most out of your transcription experience:
| Tips | Explanation |
| Record in a Clean Environment | Minimize background noise to improve audio clarity, leading to more precise transcription. |
| Use AI Audio Enhancement Before Transcribing | Enhance speech clarity and reduce noise automatically using tools like Filmora to enable better text conversion. |
| Record with 32-bit Float Audio | Capture audio with higher dynamic range and fidelity, ensuring transcription accuracy. |
| Speak Clearly and at a Steady Pace | Consistent speech reduces errors caused by hurried or muffled words. |
| Use High-Quality Microphones | Better capture sound nuances, improving speech recognition performance. |
| Regularly Proofread and Edit Generated Text | Catch and correct any misinterpretations, optimizing final subtitle quality. |
Conclusion
To wrap it up, this article discussed a complete overview of how to use transcription in Premiere Pro effortlessly. However, using this tool for transcription may require some professional skills and an expensive subscription. For this, the article suggested Filmora as one of the most cost-effective and simpler alternatives. The tool offers an easy-to-use interface with extensive functionality to generate transcripts and captions effortlessly.
