
 100% Security Verified | No Subscription Required | No Malware

Are you tired of clunky zoom controls in DaVinci Resolve? Don’t worry—many people struggle with this issue. We will resolve problems related to the DaVinci Resolve zoom-out timeline.
In this blog, we have discussed tricks to tackle the inefficient timeline zoom controls in DaVinci Resolve. You will also explore the troubleshooting methods for common problems with timeline navigation.
If you want to streamline your video editing experience, this blog is for you! And what if you could use more user-friendly and easy-to-use software for your video editing? We will also explore Wondershare Filmora - a tool for all your editing needs.
First, Let's get straight to our topic and learn to resolve timeline zooming option issues with DaVinci Resolve.
In this article
Part 1. How To Zoom Out/In Timeline in DaVinci Resolve
DaVinci Resolve is a favorite video editing tool among filmmakers and content creators. It is known for its powerful features for colors, effects, and audio.
If you’re working on complex video projects, zooming in and out becomes essential sometimes. Zooming in allows you to set up the details precisely while zooming out gives you an overview of the timeline set-up.
Several methods and shortcuts are used for the DaVinci Resolve zoom out timeline. Let’s review them one by one.
-
Using the Slider Bar in DaVinci Resolve to Zoom Out/in Timeline in DaVinci Resolve
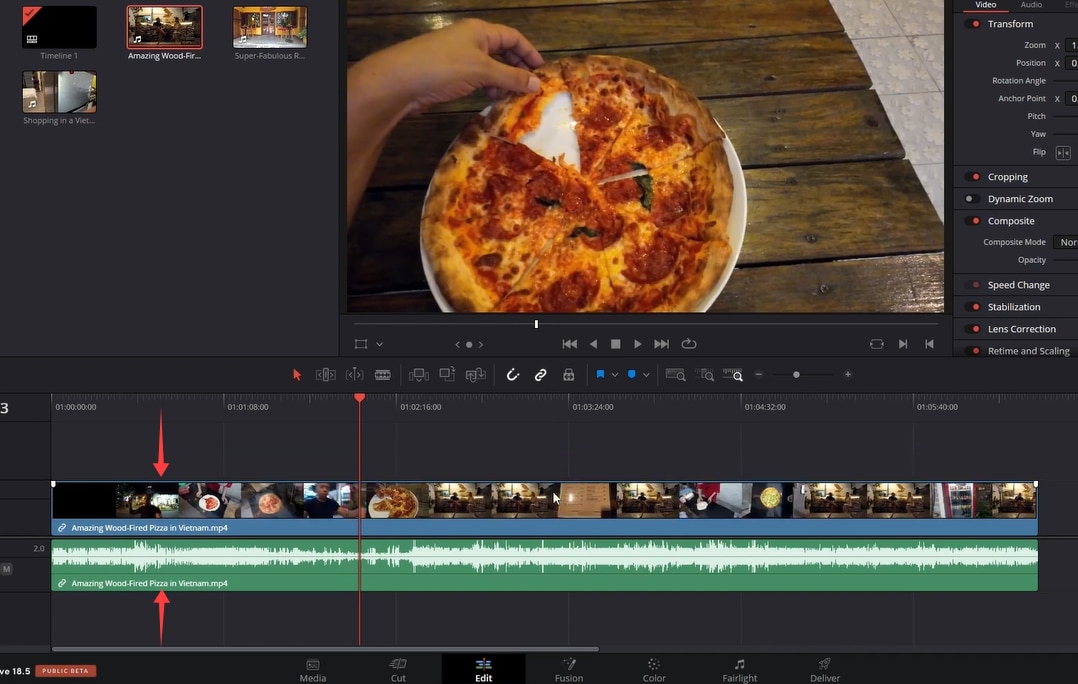
In DaVinci Resolve, a tiny slide bar is on the edit page's top right side of the timeline. This slide bar is mostly overlooked.
To adjust the zoom, change the slider position or click the “+” and “-” signs on the sides of the slide bar.

-
Using Keyboard Shortcuts to Zoom Out/in Timeline in DaVinci Resolve
Windows and Mac users are supposed to follow different keyboard shortcuts for zooming in/out.
For Windows: Hold the keys “Ctrl” + “-” if you want to zoom out and “Ctrl” + “=” key to zoom in the timeline.

For Mac: Hold the “Cmd” + “-” to zoom out and CTRL + “=” to zoom in to the timeline.

 Note that using the num pad keys along with the “Ctrl” key will not work.
 -
Using the Mouse Wheel in DaVinci Resolve to Zoom Out/in Timeline in DaVinci Resolve
The mouse scroll wheel is the easiest method to zoom in/out into the timeline in DaVinci Resolve.
If you’re using a Windows computer, simply scroll the mouse wheel. On a Mac, you must hold down the “Alt” button and scroll the mouse wheel to activate the zoom. By default, it will zoom into wherever your mouse pointer is positioned.

To change this, click “View” and toggle off the “Zoom Around Mouse Pointer.” Now, the zooming using the mouse wheel will behave differently. Moving your mouse wheel will now zoom the timeline where your play cursor is located.

DaVinci Resolve also offers some additional zoom options. Let’s find out more avout these advanced options.
Part 2. Additional Timeline Zoom Options in DaVinci Resolve
Full Extent Zoom vs Detailed Zoom Options
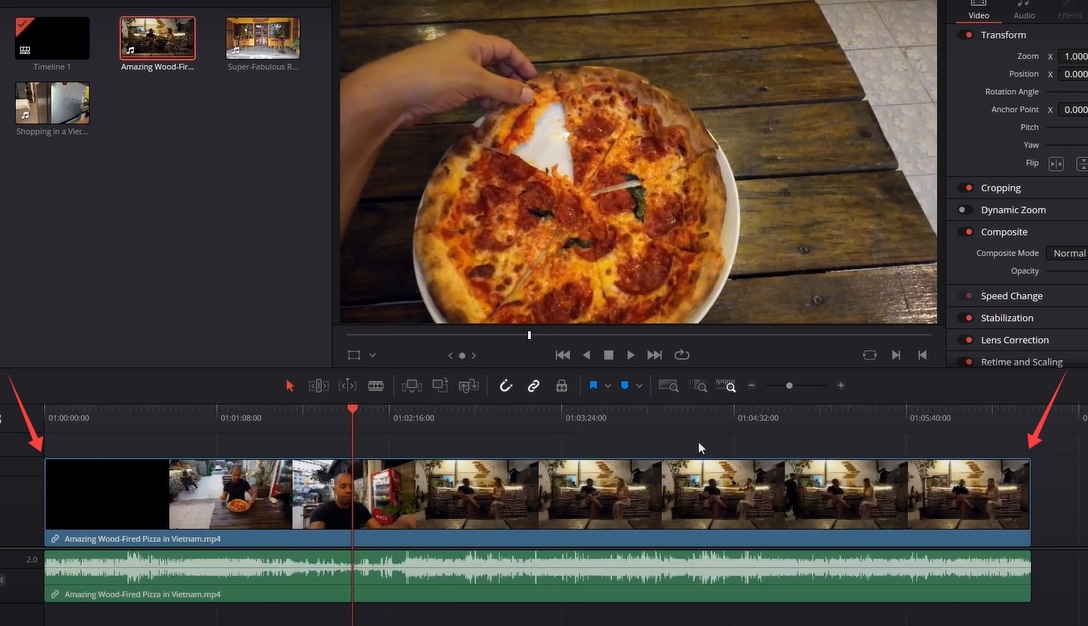
The slider, keyboard shortcuts, or mouse wheel work with the control buttons at the left.
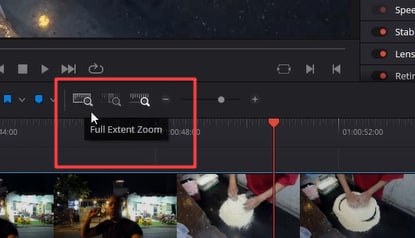
Here are three options: Full Extent Zoom, Detail Zoom, and Custom Zoom Control. The slider will work for the zoom mode you highlighted here.
Full Extent Zoom
This will show all of your clips and dynamically adjust the timeline zoom while you edit them. This means that if you add or remove a portion or clip from your video timeline, the zoom will adjust automatically based on the nature of the edit you made.
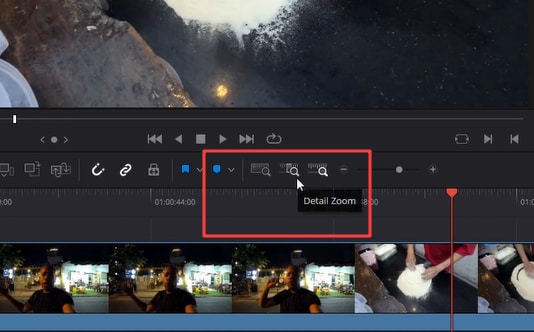
Detail Zoom
This mode zooms into the timeline to the frame level. Detail Zoom is a preferred option for focusing on a specific area.
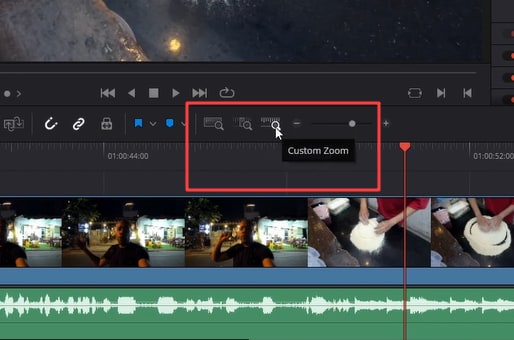
Custom Zoom
The custom zoom mode is activated when you use the slider, keyboard shortcuts, or mouse wheel. This option allows you to zoom according to your choice as you use these ways.
Fit Timeline to Screen
If you’re already zoomed in and want to see all your clips within the timeline, press “Shift” + “Z,” and all the clips will zoom out.
Adjust Track Height / Vertical Zoom
To Zoom In vertically, press and hold down the “Shift” button and scroll the mouse wheel. You can also drag the horizontal divider between tracks to resize.
Part 3. Why Did I Fail to Zoom Out/In the Timeline in DaVinci Resolve
-
Unresponsive Keyboard Shortcuts
Sometimes, the keyboard shortcuts for zooming in and out do not work. To resolve this issue:
Make sure that your keyboard is properly connected and functioning. The keyboard shortcuts do not work with “+” and “-” located in Num Pad. Double-check that you are using the correct keys.
-
Mouse Wheel Not Zooming
Some of you may face the issue of the mouse wheel not zooming in or out as expected.
To resolve this issue, you need to check the settings. Click the "View" menu and check the "Zoom Around Mouse Pointer" option. If it is disabled, the mouse wheel will zoom around the play cursor instead.
-
Slider Bar Missing or Not Working
Some users complain that the slider bar at the top right of the timeline is not visible or does not respond on Reddit.
If you’re facing such an issue, make sure that you are on the Edit page where the slider bar is located. If the slider bar is still not visible, reset the workspace layout by going to the "Workspace" menu and selecting "Reset UI Layout."
Limitations of Zooming Out Timeline in DaVinci Resolve
- Complex Interface: The interface can be overwhelming for beginners. There are many tools and options, and the users find it hard to learn the zoom controls quickly.
- Keyboard Shortcut Confusion:For users switching operating systems, different shortcuts for Windows and Mac can be confusing.
- Limited Customization:Some users find that the zoom options are not flexible enough for their needs. Users prefer more intuitive or customizable zoom controls.
- Disruptive or Jagged Zooming Experience:In DaVinci Resolve, the zooming process feels jaggy and disruptive. The timeline often jumps from one size to another, making it sometimes challenging to maintain a smooth workflow.
This was all about the zoom-out timeline in Davinci Resolve. Due to its zooming mechanics, even editing a small clip can become a chore in DaVinci Resolve. If you are also experiencing such issues, consider switching software. Let’s explore Wondershare Filmora.
Part 4. A Better Way To Edit Video and Adjust Timeline in Video Editing
Filmora offers a much smoother experience when it comes to timeline zooming options. In Filmora, you can simply point your mouse cursor where you want to zoom and scroll in or out. This intuitive control saves a lot of time and effort. Unlike DaVinci Resolve, Filmora provides a seamless zooming experience. The timeline adjusts fluidly, and you can make precise edits without any interruptions.
An intuitive and seamless experience when it comes to zooming in and out of the timeline for precise video editing.

- Smooth Zooming: Filmora provides a fluid and responsive zooming experience. Simply point your mouse cursor where you want to zoom and scroll in or out using the mouse wheel. The timeline adjusts fluidly without any interruptions, allowing for smooth and precise edits.
- Slide Bar Options: Filmora has a dedicated slide bar for zooming in and out of the timeline. It is located above the timeline on the right side. Press the "+" or "-" buttons or move the slider to adjust the zoom level. There is also a "Zoom to Fit Timeline" button to quickly see an overview of your edits.
- Mouse Zooming: Filmora offers an alternative method for those without a mouse wheel. Simply left-click and hold on to the empty area of the timeline, then move the mouse left to zoom out or right to zoom in. This works on both Windows and Mac operating systems.
- Precise Control: Zooming in and out of the timeline gives you the flexibility to work with video edits in detail. Filmora's intuitive zooming options allow for precise adjustments and a smooth editing workflow, making it easier to navigate and fine-tune your projects.
Now, let's learn how to zoom in and out quickly and smoothly on the timeline using Filmora. First, let's learn a basis from a tutorial below.
-
Using the keyboard shortcuts
Some people prefer to use keyboard shortcuts instead of mouse commands. Keyboard shortcuts serve as handy tools to ease things out. Filmora has similar shortcuts for both Windows and Mac and a person who keeps switching OSs can easily adapt those shortcuts.
- Keyboard Shortcuts for Windows
You can use “Ctrl” + “=” to zoom into the timeline and “Ctrl”+“-” to zoom out.
Use “Shift”+“Z” to fit the timeline to the screen.

- Keyboard Shortcuts for Mac
You can use “Command” + “=” to zoom into the timeline and “Command”+“-” to zoom out.
Use “Shift”+“Z” to fit the timeline to the screen.

- Keyboard Shortcuts for Windows
-
Using the Slide Bar Options
Filmora also has a dedicated slide bar for zooming into the timeline. It is present above the timeline on the right side. Press the “+” or “-” buttons or move the slider to zoom in/out.

It also has a dedicated “Zoom to Fit Timeline” button present on the left of the slide bar. Simply press it to have an overview of your edits.

-
Using a Mouse With or Without a Mouse Wheel
- Zoom out/in the timeline using a Mouse wheel
You can try to hold down the “Alt” key and use the scroll wheel.
- Zoom out/in the timeline just with a Mouse
Filmora allows you to zoom in/out using your mouse movements if your mouse doesn't have a scroll wheel. Filmora has the ability to zoom in and out of the timeline by left-clicking and moving left or right on the empty area of the timeline, which would be a time-saving feature. Also, you can use this method no matter whether you use a Mac or Windows.
Zooming the timeline gives you flexibility to work with video edits in detail. We have reviewed all the methods that help you zoom in or out of a timeline in video editing. Let's learn some practical timeline navigation tips for a better editing experience.
- Zoom out/in the timeline using a Mouse wheel
Part 5. Tips for Efficient Timeline Navigation
An efficient timeline gives a productive video editing experience. These tips to help you navigate the timeline in a better way in your video editing software:
-
Use Zoom in Combination with Scrolling
- Zoom In for Precision:
When you need to make an accurate edit, zoom in to examine the timeline closely. This will help you see the finer details of your clips.
- Scroll for Movement:
You can move along the timeline using the mouse scroll. This is useful while navigating to a different section of your project quickly.
- Combine Both:
Zoom in to make detailed edits, then scroll to move to the next section. This combination makes the editing process more fluid and less time-consuming.
- Zoom In for Precision:
-
Practice Quick Zooming for Better Editing Workflow
For better workflow, you need to learn and practice quick zooming. Here are some tips you can use to build your skills:
- Practice Regularly:
Like any skill, quick zooming improves with practice. Try to practice zooming in and out on the timeline each day. The more you practice, the more natural it will become.
- Set Up Custom Controls:
Filmora allows you to customize the zoom controls. You can set up the shortcuts you desire to suit your preferences. This will make zooming quicker and more intuitive.
To set up custom controls, go to File > eyboard Shortcuts and edit your desired controls.

-
Use the Mouse Wheel
Get comfortable using the mouse wheel for zooming. In most video editing software, you can simply scroll the wheel to zoom in and out. And It feels more professional too to zoom in and out of the timeline using the mouse rather than clicking on the three icons on top.
- Practice Regularly:
Now that you know how to zoom in/out on the timeline in DaVinci Resolve and Filmora also. You may have some questions in mind. Let’s review some frequently asked questions and see if you get your answer.
Conclusion
Navigating into the timeline and especially zooming can be challenging in DaVinci Resolve. This guide describes the methods and troubleshoots problems for DaVinci Resolve zoom-out timeline. You can also try using the Filmora video editor. Filmora has a friendly user interface and offers a seamless zooming experience. So, give Filmora a try and improve your video editing workflow.


