
 100% Security Verified | No Subscription Required | No Malware


 ChatGPT
 Perplexity
 Gemini
 Claude
 Grok
Grok
Need help with timeline navigation in Adobe Premiere Pro? Zooming in and out doesn't have to be tricky. This guide covers effective methods to master smooth zooming and timeline control for an enhanced editing experience.
We’ll also introduce an alternative: Wondershare Filmora, known for its user-friendly interface and seamless timeline navigation. It might just become your go-to editing tool!
Before diving into zooming techniques, we’ll explore Premiere Pro and the importance of precise timeline navigation. Let’s get started!
In this article
Adobe Premiere Pro is a popular tool used by many video editors worldwide. It's known for its powerful features, which help you create amazing videos. Whether you’re making short clips or long movies, Premiere Pro has the necessary tools.
A timeline is an essential part of video editing. It is where you can see and arrange your video clips, audio, and other elements. The timeline represents the video depending on its length, which may be a few seconds or hours.
To edit videos effectively, you need the capability to zoom in or zoom out to make precise edits. Zooming in shows more details in the timeline, while zooming out gives an overview.
Let's dig deeper and learn how to zoom in and out the timeline in Premiere Pro.
How to Zoom In and Out Timeline in Premiere Pro
Premiere Pro offers several methods to zoom in/out. Many of people who like to use keyboard shortcuts also prefer keys for zooming into the timeline. Let’s learn the method.
Method 1. Using Keyboard Shortcuts
To zoom into the timeline using keyboard shortcuts, you don’t need to select your timeline or place the mouse cursor on it.
By pressing the backslash key “\” you can completely zoom out timeline in Premiere Pro. By pressing the backslash key “\” again, you can zoom into the position where you were before zooming out.
Similarly, by pressing “-” you can gradually zoom out of the timeline. By pressing the “=” key, you can zoom in gradually into the timeline.
Check out this YouTube video tutorial if you still need clarification about these keyboard shortcuts.
Method 2. Using Zoom Controls
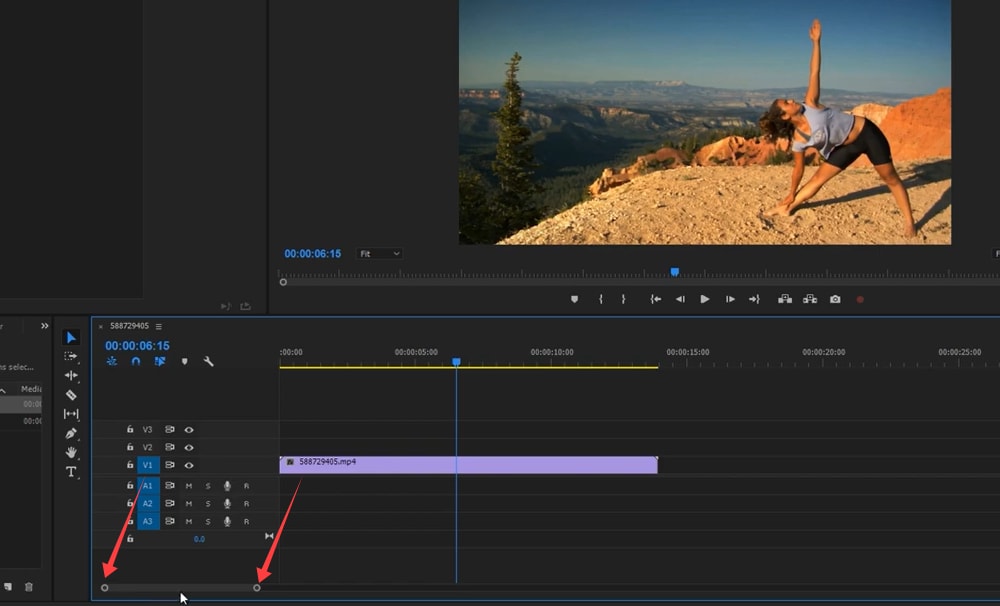
To use zoom control buttons, you first need to position the play head where you want to zoom in.
At the bottom of the timeline is a bar with two circular handles on each side. When you move these handles closer together, you will zoom in on the timeline.
To zoom back out, you will use the same bar, but this time, move one of the handles away from the other.
Method 3. Using Mouse Scroll Wheel
Another faster way to zoom onto the timeline is to use the mouse scroll wheel.
Hold down the Alt key and zoom in or out by moving the mouse scroll wheel. This time, the timeline will zoom in or out according to the position of your mouse pointer. You need to place the mouse pointer where you want to zoom in/out onto the timeline.
These methods seem pretty simple. However, Premiere Pro has some bugs that make the zooming experience inconvenient. Let's explore the details.
Limitations of Premiere Pro When Zooming In and Out of the Timeline
While Adobe Premiere Pro is a powerful video editing tool, it does have some limitations regarding zooming in and out on the timeline. You often discuss these limitations in forums, sharing their frustrations and looking for solutions.
Here are a few common issues that you face with real user experiences:
Inconsistent Zoom Behavior
Sometimes, when you zoom in close to the maximum limit in the effect controls tab, Premiere Pro may not zoom in on the area around the playhead. This means focusing on the specific keyframes or sections you want to edit can be challenging. This inconsistency can be frustrating when you need precision.
Check out this experience a user has shared on the Adobe Community forum:
Platform-Specific Issues
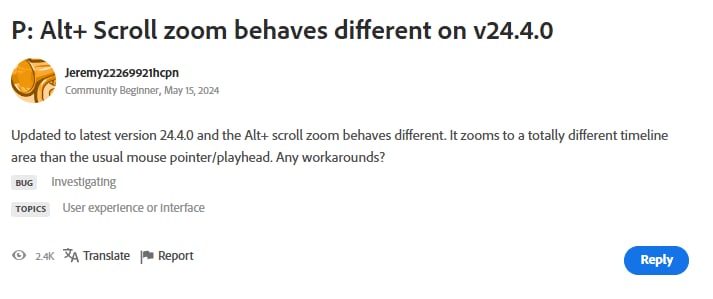
Another issue is that the zooming behaviour can differ depending on whether you use Windows or Mac. On Windows, zooming with the mouse scroll wheel while holding the Alt key might not zoom in on the cursor's location, while on a Mac, it usually does. This difference can disrupt your editing workflow, especially if you switch between these operating systems. Here is a user's query on Reddit:

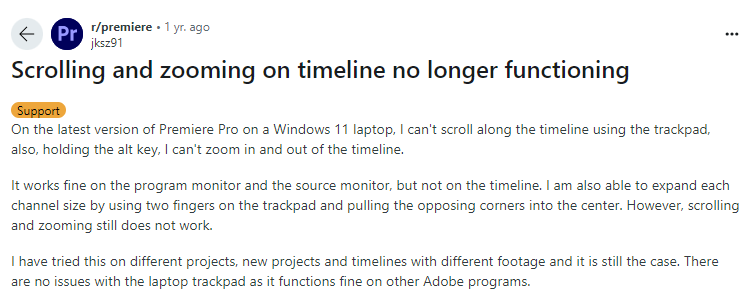
Automatic Zooming
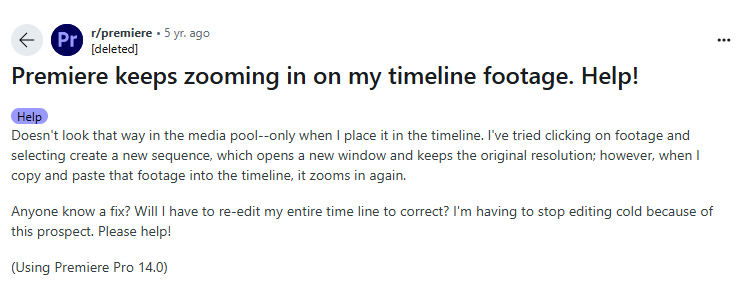
Sometimes, the timeline automatically zooms in in larger projects when you move clips around. This can be quite annoying because it often requires you to restart your computer multiple times a day to fix the problem temporarily. It disrupts your editing flow and makes it hard to focus on your work. Check this user seeking for help on Reddit:
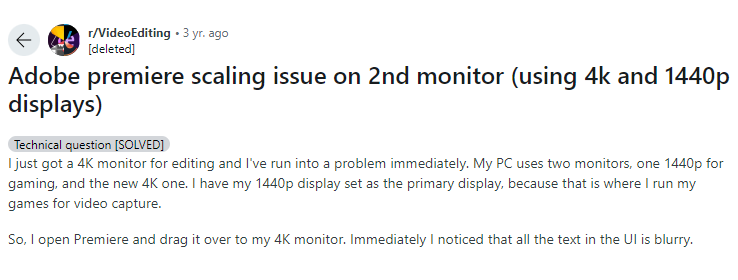
UI Scaling Problems
Adjusting the UI scaling settings to fix zoom issues can sometimes cause other problems. For example, the text and icons might become fuzzy, which affects the overall user experience. This can make the software harder to use and less pleasant to look at. This user is facing issues scaling issues on 2nd monitor:
Apart from these specified inconsistencies, you also face some random errors in Adobe Premiere Pro zoom out timeline. An example is given in the complaint below:
If you are also facing such issues for zoom in and out timeline in Premiere Pro and don’t know how to fix them, maybe you can try an easier and beginner-friendly video editing tool, like Wondershare Filmora for your video creation.
A More Accessible Alternative to Zoom In and Out Your Timeline in Video Editing
Wondershare Filmora is a video editing tool for people who want to create professional videos without using complex softwares. It is a more accessible tool to learn. Even if you’re a beginner, you can use Filmora effortlessly.
Easily navigate and adjust the timeline view with keyboard shortcuts, slide bar options, and mouse gestures, enabling precise editing and a streamlined workflow.

Let's compare Filmora's key timeline features with Premiere Pro's in the table below:
| Feature | Filmora | Premiere Pro |
| Timeline Zoom | Effortless, varied methods, clear. | Varied methods, inconsistent. |
| Track Management | Up to 99, drag/drop organize. | Supports multi-tracks, for large projects. |
| Track Control | Hide, mute, lock via simple icons. | / |
| Markers | Easy, customizable, organized alignment. | Used for multicam syncing and organization. |
| Auto Alignment | Ripple Edit, automatic snapping. | Manual snapping, limited overall alignment. |
How To Zoom in and out on Timeline in Filmora
Here are the different ways you can zoom in/out on the timeline:
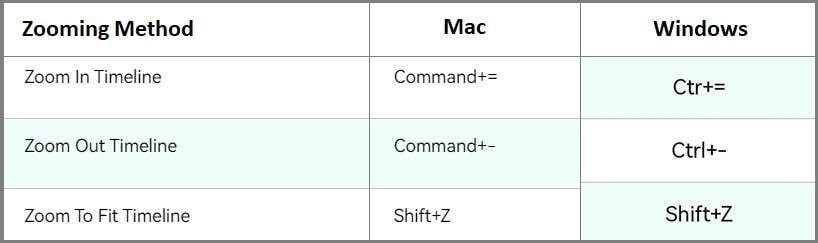
Method 1. Use Keyboard Shortcut
Some people find keyboard shortcuts easier than using the mouse. Filmora has similar shortcuts for both Windows and Mac, making it easy for you to switch between operating systems.
For Windows
- To zoom in, press "Ctrl" + "=."
- To zoom out, press "Ctrl" + "-".
- To fit the timeline to the screen, press "Shift" + "Z".
For Mac
- To zoom in, press "Command" + "=."
- To zoom out, press "Command" + "-".
- Press "Shift" + "Z" to fit the timeline to the screen.
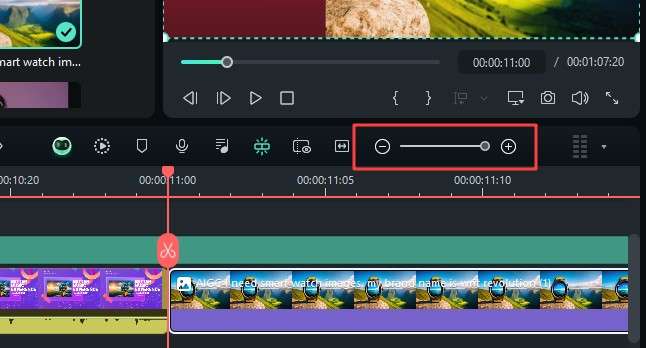
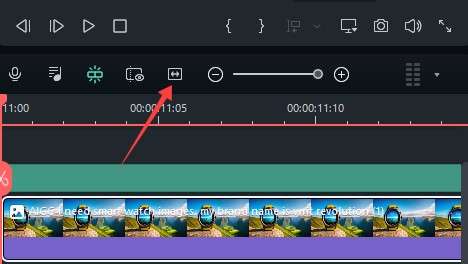
Method 2. Use the Slide Bar
Filmora has a slide bar above the timeline. You can use this to zoom in and out.
- Press the “+” button to zoom in.
- Press the “-” button to zoom out.
- You can also move the slider left or right to adjust the zoom level.
from-premiere-pro-to-filmora-10
- A “Zoom to Fit Timeline” button is next to the slide bar. Press this button to see your entire timeline at once.
Method 3. Use a Mouse Without a Scroll Wheel
If your mouse doesn’t have a scroll wheel, you can still zoom using it. Follow the steps below:
- Place the mouse over the timeline and hold the left mouse button.
- Move the mouse left to zoom out or right to zoom in.
This method works on both Mac and Windows.
Method 4. Use a Mouse Scroll Wheel
You can zoom in or out on a timeline/ sequence by pressing “Alt” and scrolling with a scroll wheel and it zooms in or out exactly where your mouse pointer is.
That was all about timeline zooming in and out while editing videos in Premiere Pro and Wondershare Filmora. We will move on to frequently asked questions to see if it can help you with your other questions.
Conclusion
Zoom in and out timeline in Premiere Pro can be challenging sometimes. Premiere Pro is an advanced software with many features, but it has some limitations and issues when it comes to zooming in and out on timeline. This guide has provided all the possible solutions for problems related to timeline navigation.
If you are facing disruptive issues, consider using Filmora. Filmora is a user-friendly software with seamless zooming controls. It has many features to improve your video editing experience.
So, whether you stick to Premiere Pro or try out Filmora, the zooming methods that we have shared will help you improve your editing workflow.


