

 TL;DR:
DaVinci Resolve users can export videos using the restricted Quick Export tool for fast platform presets or the Deliver tab to customize formats, configure bitrates, and queue batch renders, while beginners seeking a less technical workflow may prefer Wondershare Filmora.
● The Quick Export feature ties settings directly to the timeline configuration for basic H.264 outputs, whereas the advanced Deliver tool allows manual adjustments for formats like QuickTime or MXF and specific bitrates, such as 8,000 to 12,000 kbps for 1080p.
● DaVinci Resolve is ideal for professionals needing advanced tools like the Render Queue for batch exports, but misconfigured manual audio routing can result in silent renders, and effects-heavy high-resolution projects may crash on low-end hardware.
● Wondershare Filmora is best suited for content creators and vloggers who prioritize ease of use, as it bypasses manual audio routing issues by offering built-in 32-bit float PCM audio export and direct uploads to TikTok, though it lacks batch rendering capabilities.
Ask AI for a summary
 ChatGPT
 Perplexity
 Gemini
 Claude
 Grok
Grok
Are you curious about how to export DaVinci Resolve projects without messing up your video quality or format? Exporting videos is the final and most important step to share your edits with the world. However, many users get confused about which settings to choose.
If you're unsure how to export from DaVinci Resolve, this blog breaks down everything you need to know. This guide also includes a bonus alternative editor for easier edits and exports.
Keep reading to learn how to export in DaVinci Resolve projects smoothly from start to finish.
Part 1. How to Export Videos from DaVinci Resolve: Step-by-Step
When your edit is done, it's time to wrap things up with a clean export. Learning how to export DaVinci Resolve videos correctly ensures that your project maintains its quality and plays smoothly on any platform.
Method 1: Using the Quick Export Tool
Use the Quick Export feature for a fast and easy way to export your project. It lets you upload straight to platforms like YouTube, Vimeo, or Twitter. You can also use it if you just want a basic H.264 file without extra settings.
Here's how to export from DaVinci Resolve using the Quick Export tool:
- Go to the File tab > Quick Export option.
- Or, you can use the Quick Export button on the top right of the toolbar.
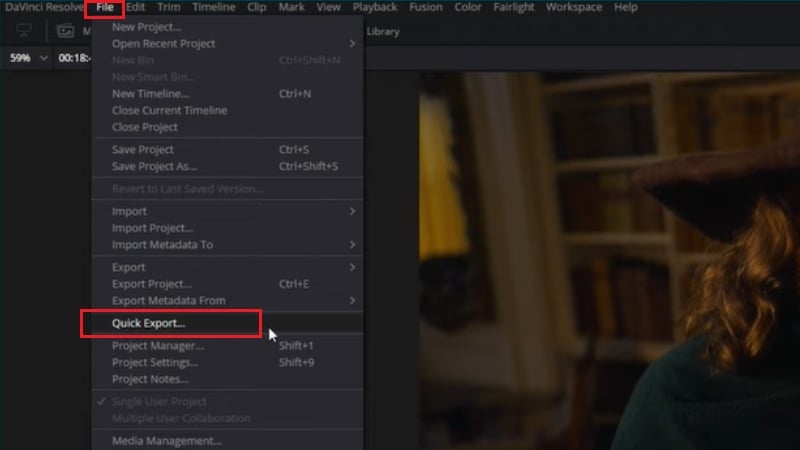
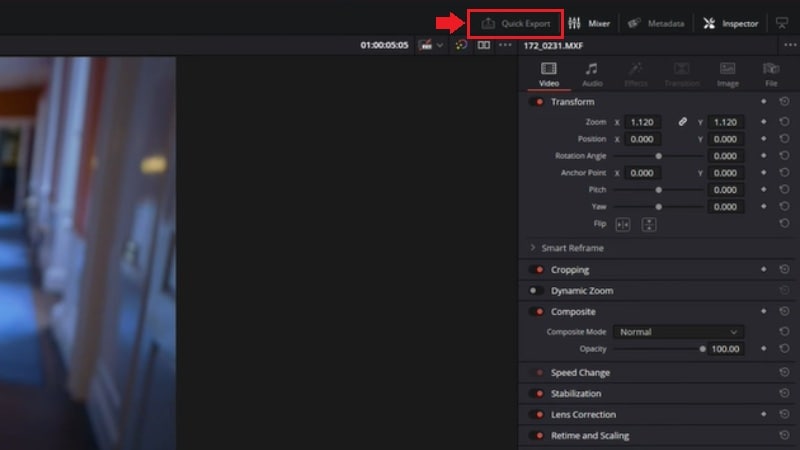
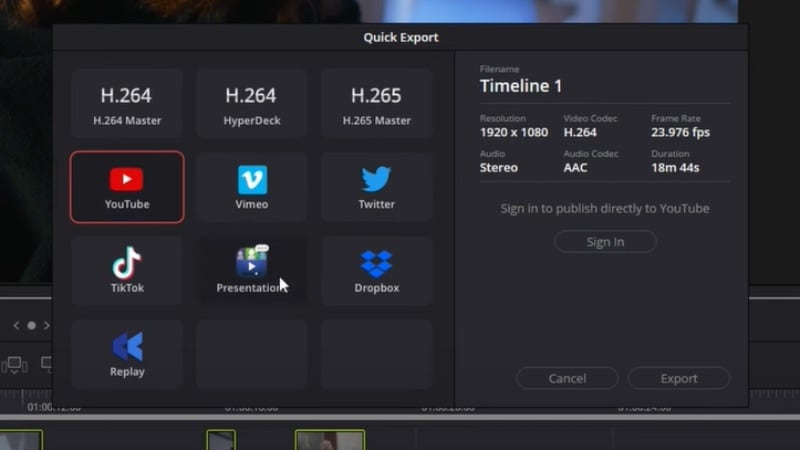
Note: The Quick Export tool doesn't allow parameter adjustments. Its settings are tied to your timeline configuration.
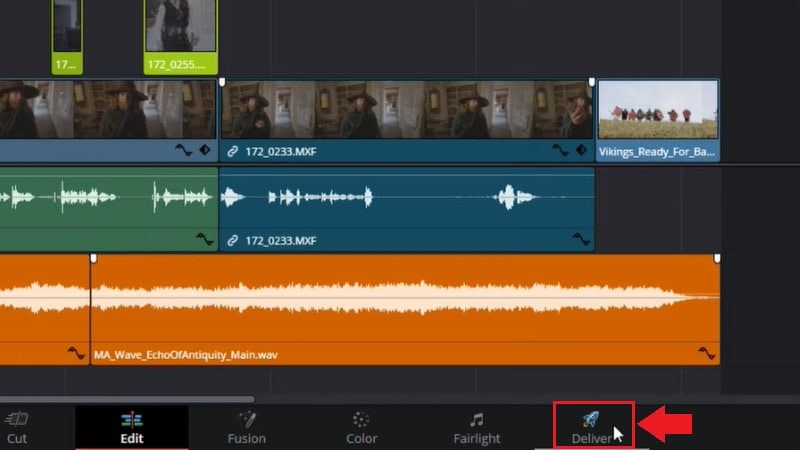
Method 2: Using the Deliver Export Tool (Advanced Export)
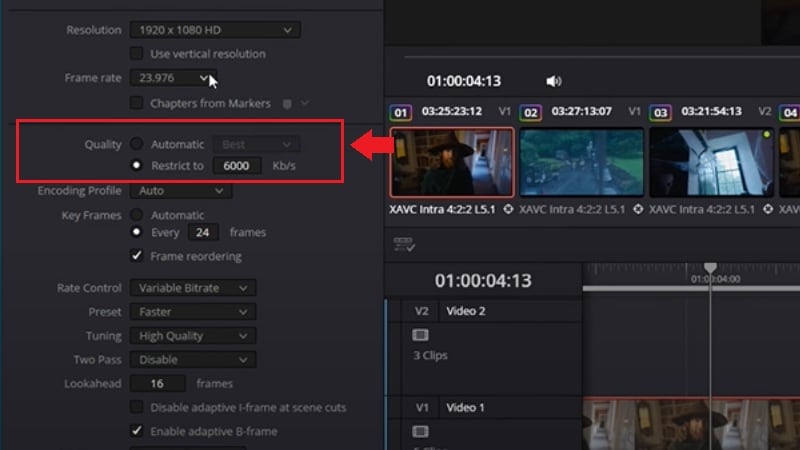
Quick Export handles the basics, but if you want more control, go with the Deliver Export tool. It lets you customize resolution, bitrate, codec, and format of the video. This method gives you full control over how to export video from DaVinci Resolve.
Follow these steps to export videos from the DaVinci Resolve Deliver page:
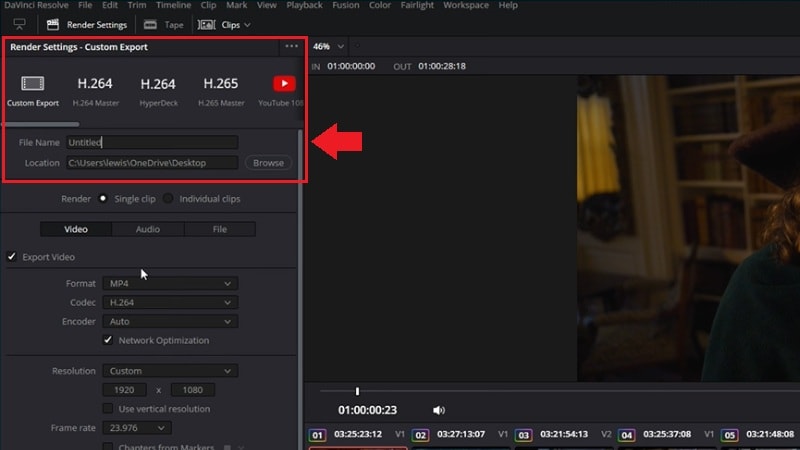
- Select the Format and set the Codec. MP4 with H.264 or H.265 is ideal for online platforms, while QuickTime suits professional-grade exports.
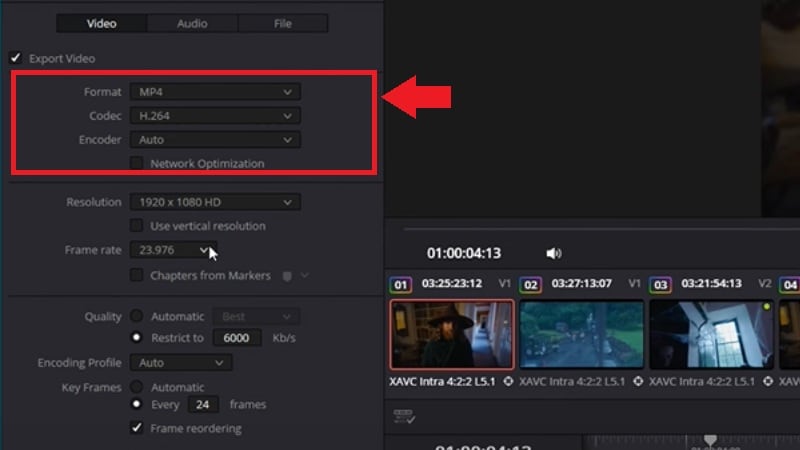
- Match the Resolution and Frame Rate to your timeline settings (e.g., 1080p @ 30fps).

- Adjust Quality settings by enabling Restrict to and setting a bitrate value based on your target platform.

Part 2. Reviewing the Export Tools in DaVinci Resolve
After learning how to export on DaVinci Resolve, you might want to dive deeper into its export tools. This editor is known for its powerful video editing capabilities. But it's also known for being a bit complex, especially for new users.
DaVinci Resolve comes packed with advanced export features. Its Deliver page gives you full control over how your project is rendered, saved, and optimized for different platforms. Here's a quick look at what makes DaVinci Resolve's export tools stand out.
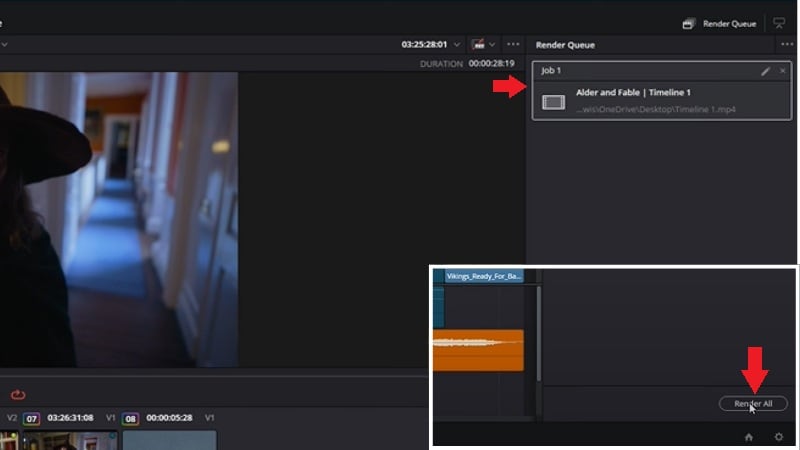
You can line up multiple export tasks using the Render Queue instead of rendering one file at a time. This feature is useful for handling multiple timelines or creating different versions of a project.
- Advanced Export Control: You can customize resolution, bitrate, codec, and frame rate to suit different platforms or delivery formats.
- Multiple Output Formats: Supports MP4, QuickTime (MOV), DNxHD, and more.
- Quick & Batch Export: Offers Quick Export presets for fast sharing and a Render Queue to export multiple timelines efficiently.
- Steep Learning Curve: The interface may overwhelm beginners unfamiliar with advanced video tools.
- Audio Export Issues: Videos may render without sound if audio settings are misconfigured or routing is incorrect.
- Performance Limits: Large projects with heavy effects or high-res footage may cause crashes, especially on low-end systems.
DaVinci Resolve offers two versions:
- DaVinci Resolve: Free
- DaVinci Resolve Studio: $295 (one-time purchase, and the price may vary depending on your region.)
Windows, macOS, and Linux
Part 3. Alternative Editor for Easier Export and High Precision Audio
If you find the export process in DaVinci Resolve a bit complex or technical, you're not alone. While it's packed with professional-grade tools, it may take time to master—especially if your focus is simply on getting high-quality videos out quickly and smoothly.
👉 Some common challenges creators may encounter during export include:
- Configuring audio and codec settings correctly
- Longer render times for high-resolution projects
- Unfamiliar export presets or parameter adjustments
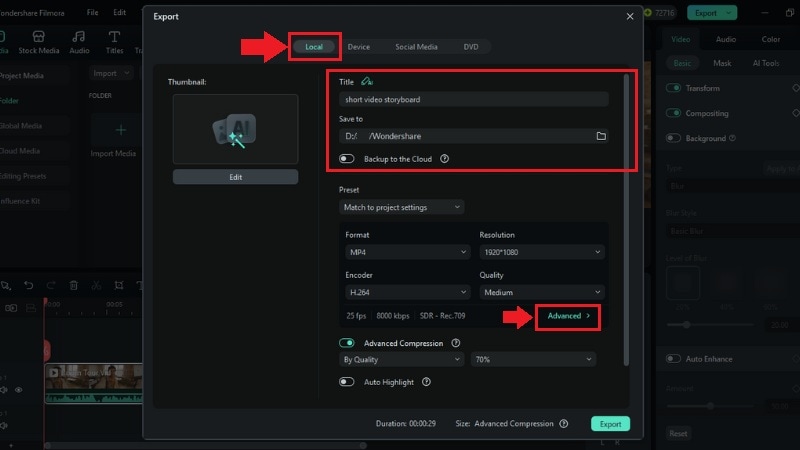
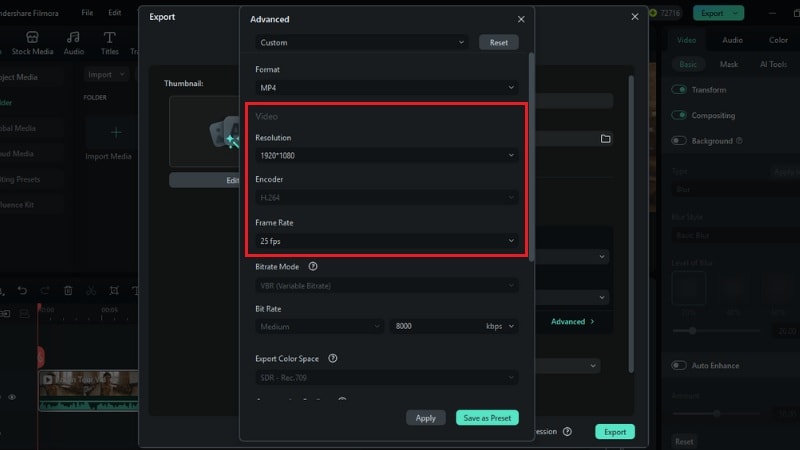
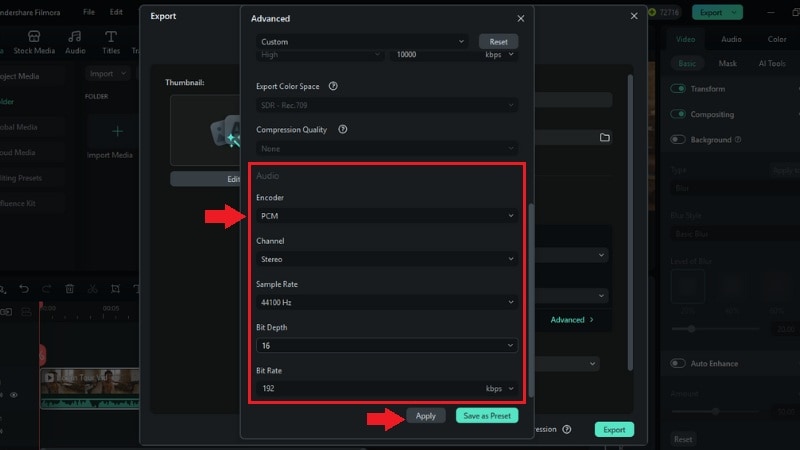
If you're looking for a more streamlined option, Wondershare Filmora offers a user-friendly export experience with intuitive controls and flexible output settings. From resolution to bitrate and even 32-bit float audio export, Filmora makes it easier to ensure your final video meets your expectations—without extra complexity.
Pricing: For more details, please visit the purchase page where various pricing plans are available.
Compatibility: Windows and macOS
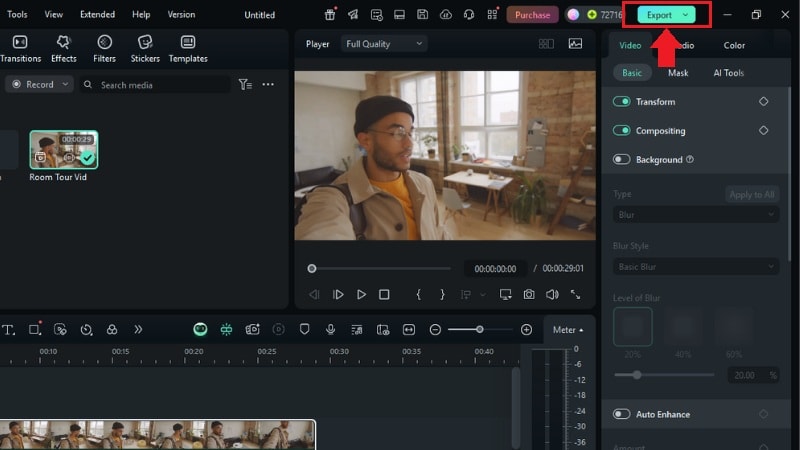
How to Export Videos from Filmora
Follow these steps to get high-quality video and professional-grade audio in Filmora:
Part 4. DaVinci Resolve vs. Filmora - Which One Should You Use to Export?
Now that you've seen how both DaVinci Resolve and Filmora handle exporting, it's easier to spot the differences. While DaVinci Resolve is packed with pro-level settings, Filmora offers more beginner-friendly features.
Here's a quick side-by-side comparison to help you decide:
| Features | DaVinci Resolve | Wondershare Filmora |
| Best For | Professionals, advanced editors, and filmmakers. | Beginners, content creators, educators, and vloggers. |
| Ease of Use | Complex interface with a steep learning curve. | Beginner-friendly with intuitive controls. |
| Export Complexity | Full control, but requires manual setup. | Easy export with format flexibility and basic customization. |
| Export Quality | Professional-grade output with support for advanced codecs. | High-quality export with minimal setup required. |
| Audio Reliability | Can be tricky, manual routing and codec settings may cause export issues. | Stable audio export with built-in 32-bit float support. |
| Batch Rendering | Supported via Render Queue. | Not supported. |
| Direct Upload | Available for YouTube and Vimeo (via Quick Export) | Direct upload to YouTube, Vimeo, and TikTok. |
| Pricing | Free version available; Studio version $295 (one-time purchase). | $9.99/mo, $34.99/yr, or $49.99 lifetime. |
|
Show more
Show less
|
||
Both DaVinci Resolve and Wondershare Filmora have their own strengths in different ways. If you need advanced control and don't mind the complexity, DaVinci Resolve is the option. But if you value ease of use and want a faster export process, Filmora is a great pick.
Conclusion
Exporting your videos is the final—and often most important—step in the creative process. As we've seen, DaVinci Resolve offers advanced export features tailored for professionals who want full control over settings like bitrate, codec, and render queue. However, for creators who prefer speed, simplicity, and reliable audio-visual results, tools like Wondershare Filmora provide a more beginner-friendly export workflow.
Whether you're delivering high-resolution content for clients or sharing your latest project on YouTube, the best export tool is the one that fits your workflow and comfort level. Take the time to test both options, and choose the editor that helps you focus more on creativity—and less on technical barriers.
