
 100% Security Verified | No Subscription Required | No Malware


 ChatGPT
 Perplexity
 Gemini
 Claude
 Grok
Grok
While watching a video, a smooth flow of events plays a huge role in keeping the audience hooked. Transitions in a video allow users to enhance the storytelling element, ensuring maximum audience captivation. Kinemaster is an effective video editing application that offers many editing features, along with transitions. Therefore, this article dives into the Kinemaster transitions while exploring a better alternative for mobile and desktop.
In this article

Part 1. What is Kinemaster?
Due to strict competition in content creation, the market is producing competitive video editors like Kinemaster. This video editor offers a suite of AI and basic editing features to ensure a high-quality video output. From audio to video, it offers extensive tweaking to result in a comprehensive video. To make your video accessible to a wider audience, you can enable AI captions in the language of your choice.
Besides, users can apply the AI video effects to transform their human photos into attractive cartoons. Kinemaster effects benefit from AI by removing the background of your video to isolate the key object for editing.
Key Features
- Sharpens your video through AI by offering you the Super Resolution feature.
- Allows users to elevate the video outlook through preset filters and manual color grading.
- Offers a diverse library of royalty-free music and sound effects to complement your videos.
- Enables you to transform your voice into a character using the Voice Changer.
Part 2. How to Add Transitions in Kinemaster?
In addition to effective editing features, Kinemaster also offers countless transition assets. From 3D to classic, this tool has all the transition types you might need. Follow the steps below to learn how you can execute transitions in Kinemaster:
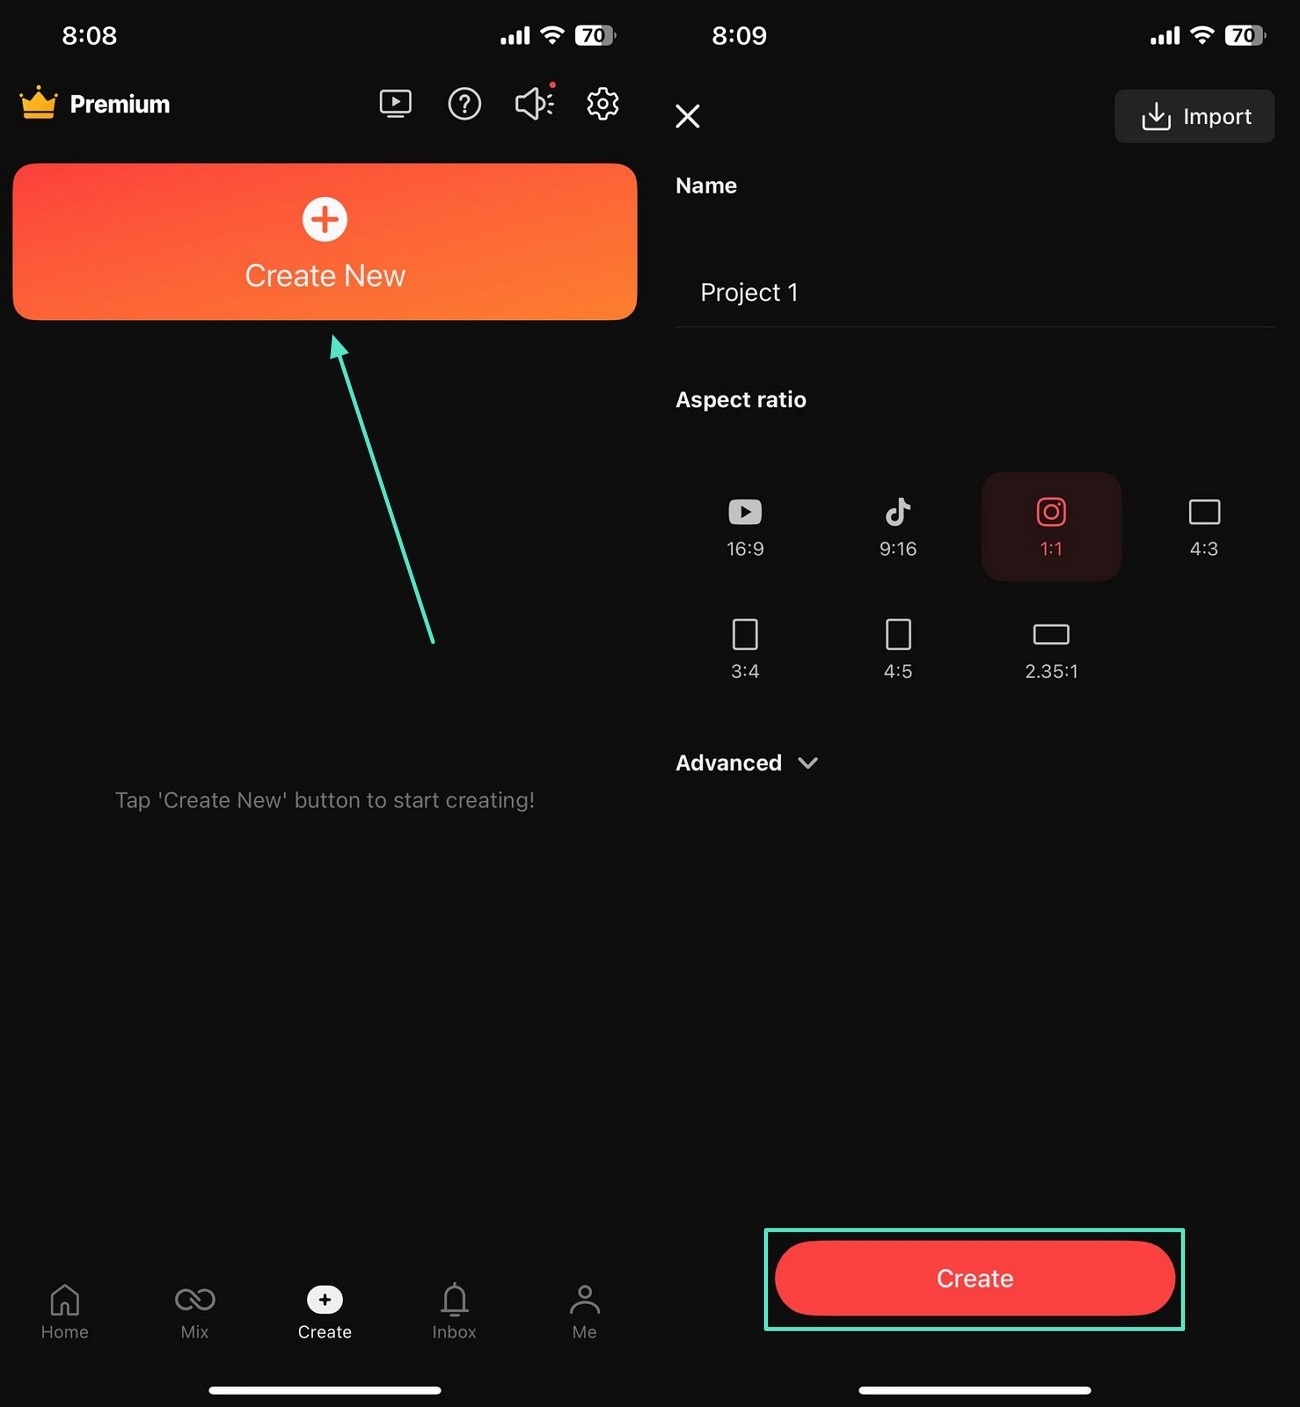
- Step 1. Create a New Custom Project. To begin with, open Kinemaster and tap "Create New" from the main interface to "Create" in your desired settings.
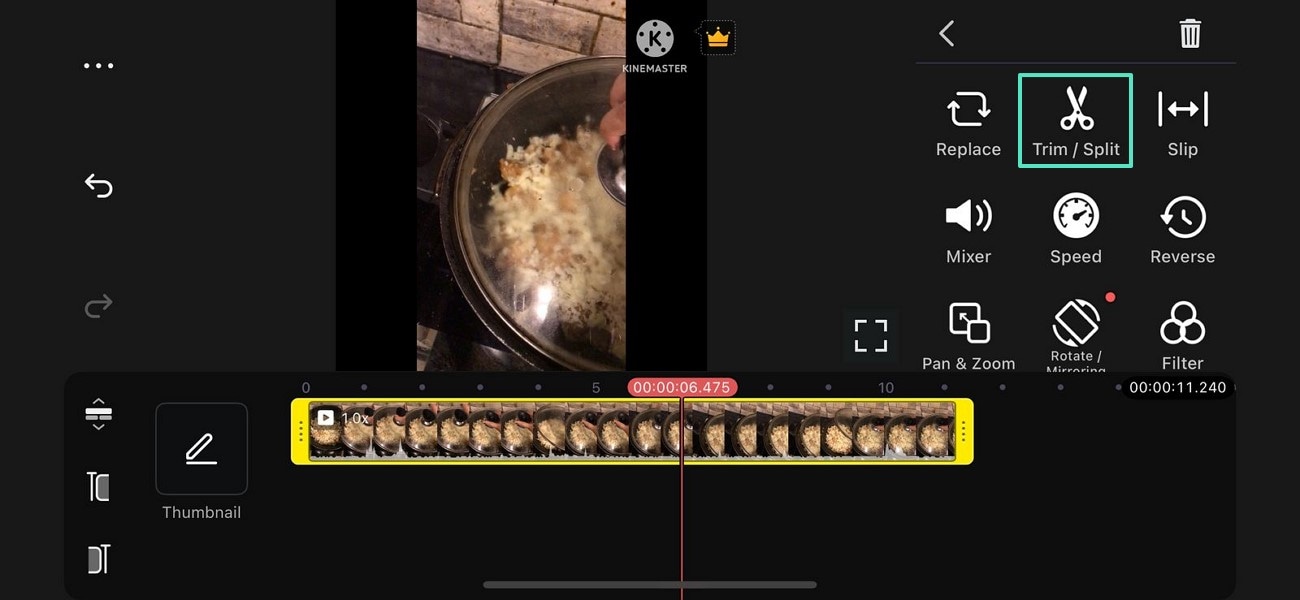
- Step 2. Tap the Timeline to Split the Track. Import the video that needs a transition and select the video track on the timeline. Use the right panel to tap the "Trim/Split" button to proceed to the next interface.
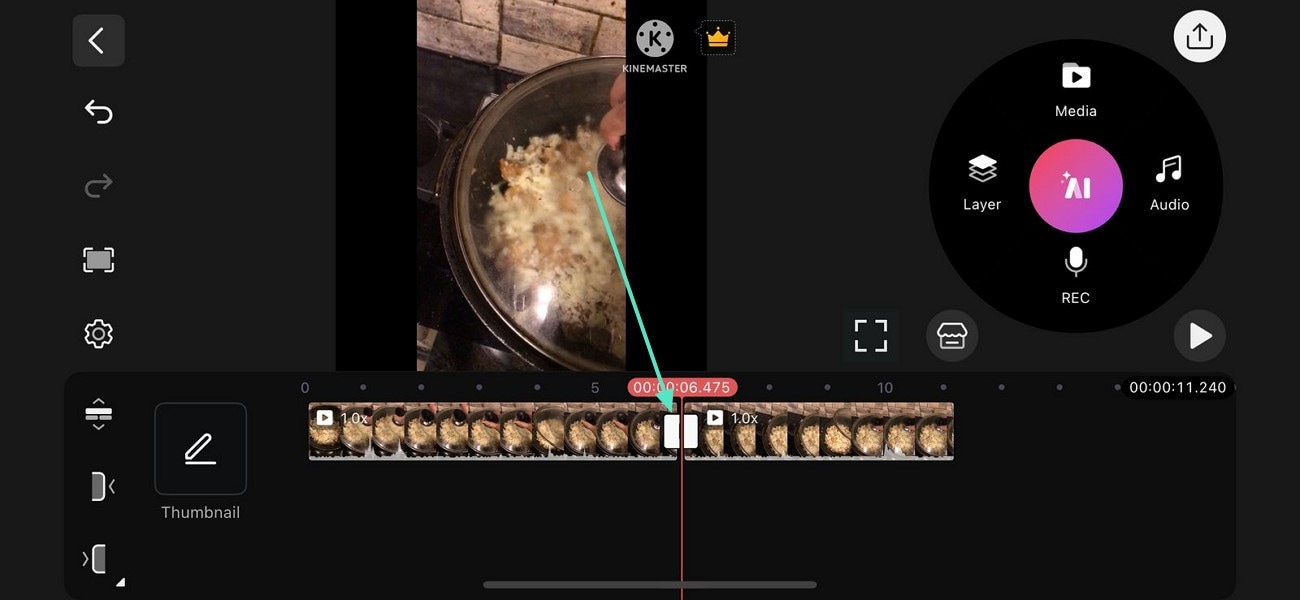
- Step 3. Split the Video to Begin. From the right side of the screen, tap "Split" to divide the timeline in half.

- Step 4. Tap the Transitions Icon to Continue. When the "Transition" icon appears on the video timeline, select it and continue.
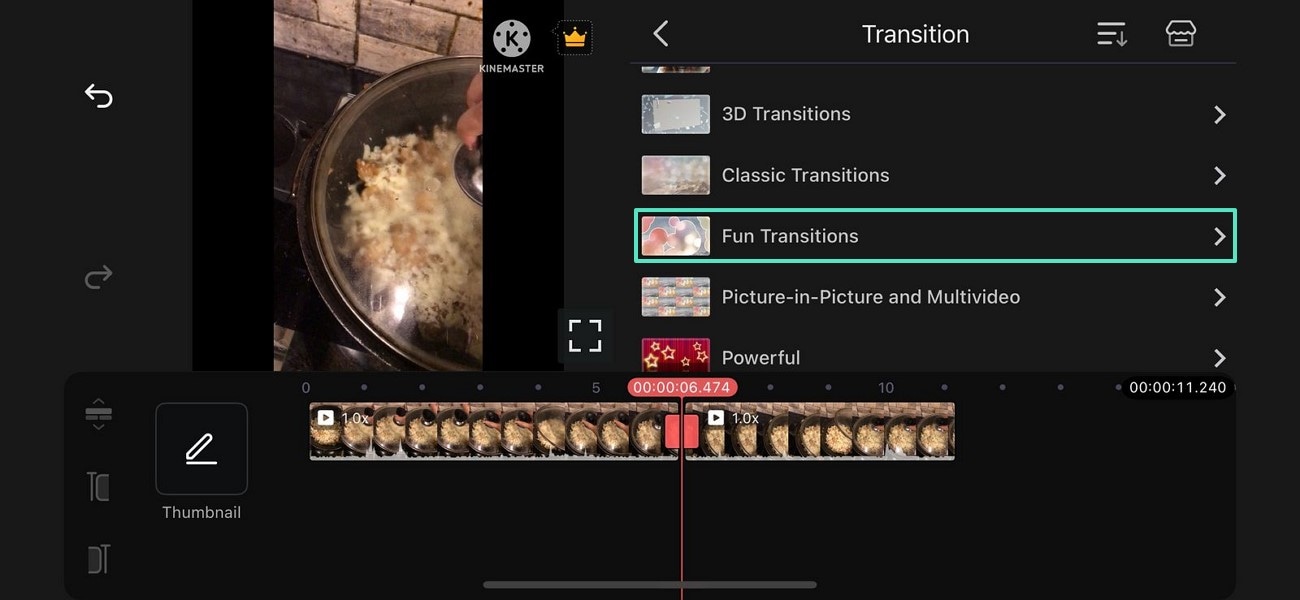
- Step 5. Select the Desired Transitions Pack. As the transition presets appear in the right panel, select the desired folder to proceed.
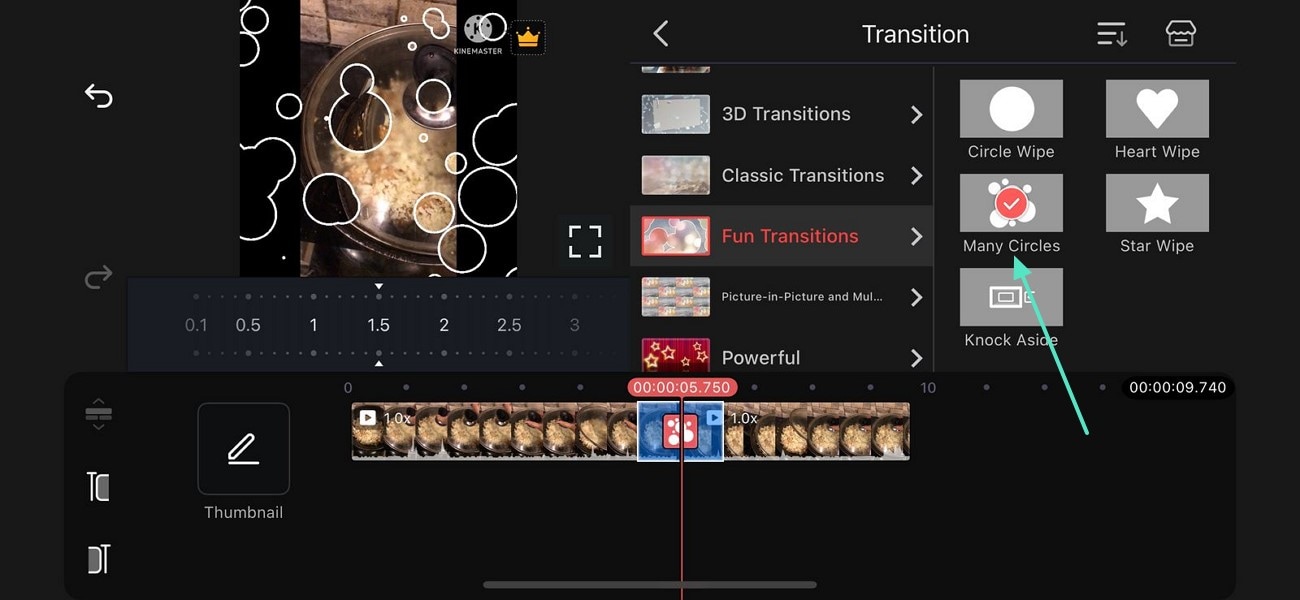
- Step 6. Apply the Suitable Transition Preset. Next, apply the desired template asset and view the results in the preview window on the left.
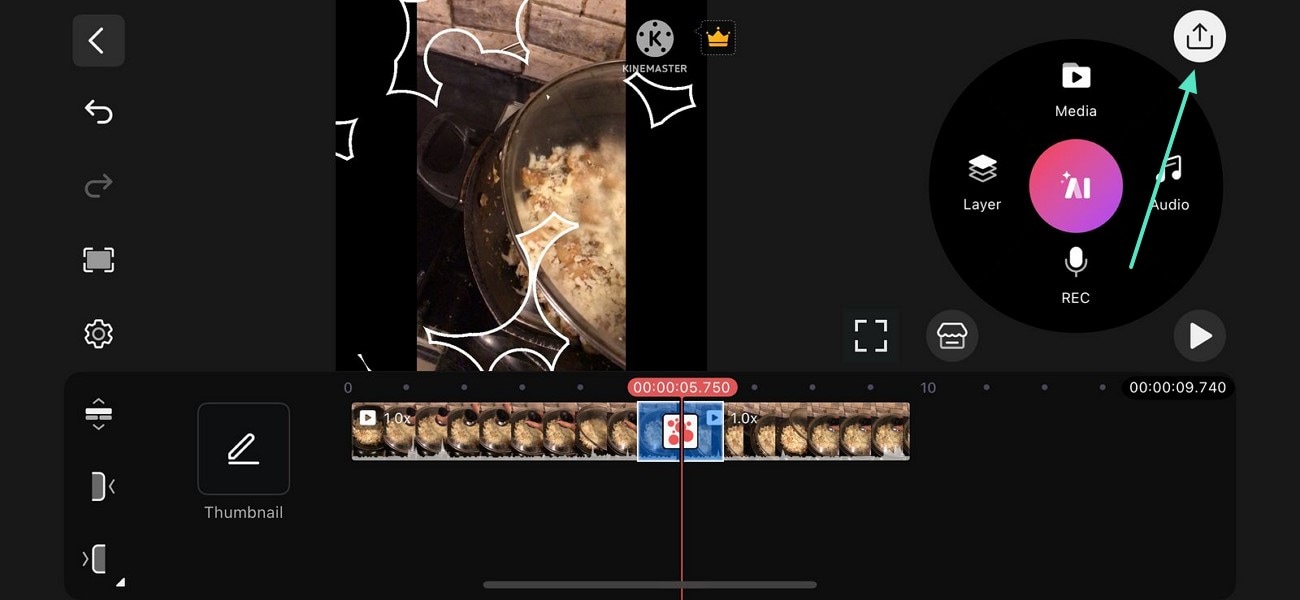
- Step 7. Export the Video in Your Required Settings. Once you are done editing, tap the "Share" icon on the top-right to save the video in your desired quality.
Part 3. Basic Transition Effects of Kinemaster
After learning how to add transitions in Kinemaster, let's take a look at the top assets available in this app. The following section breaks down the best transition presets to enhance the storytelling element of your videos:
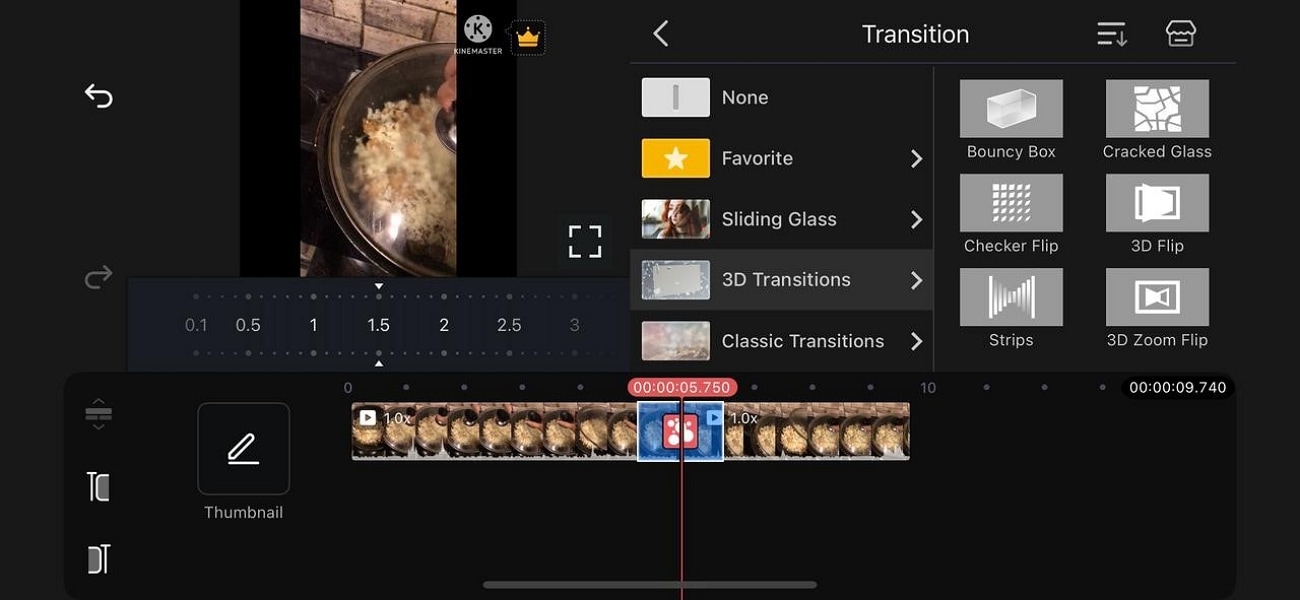
1. 3D Transitions
Fit for futuristic videos, the 3D transitions in Kinemaster bring a sturdy look to your videos. When in need of an artistic and solid look in a single video, these assets will surely blow you away. If your video needs a transition of time and era, using the "Cracked Glass" preset is an ideal choice.
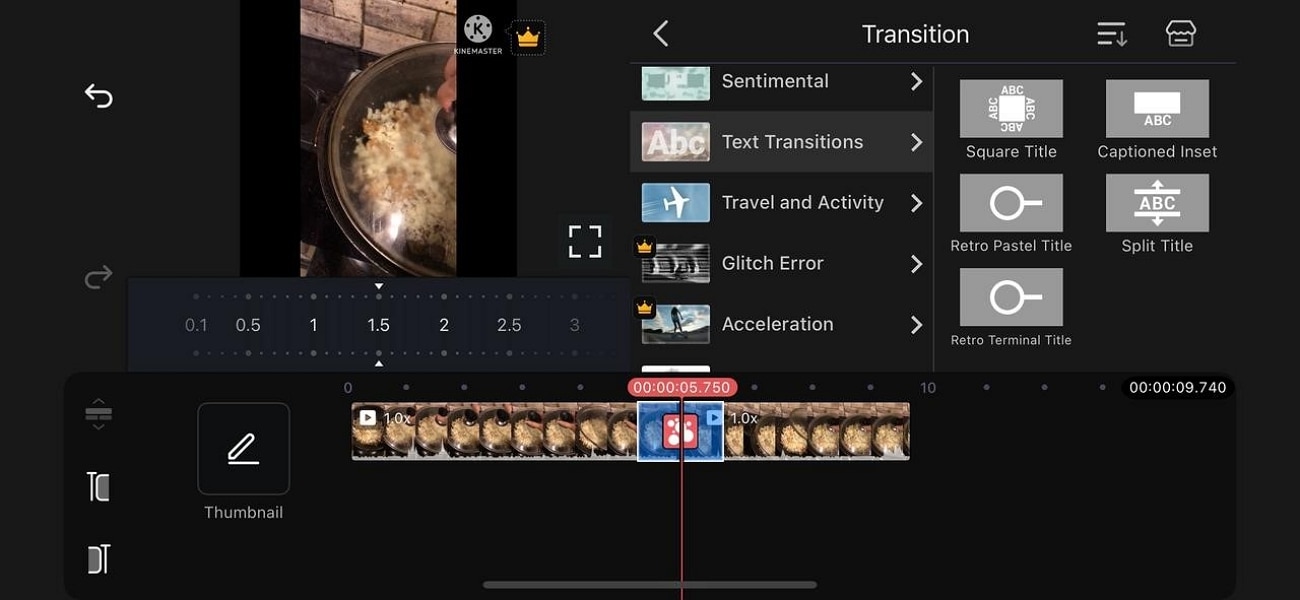
2. Text Transitions
If video editors need to showcase a change of time, the "Text Transitions" pack is a decent choice. You can use the text of your choice to present the time difference before switching to the next video frame. This Kinemaster transition pack is also fit for videos that require before and after transformations.
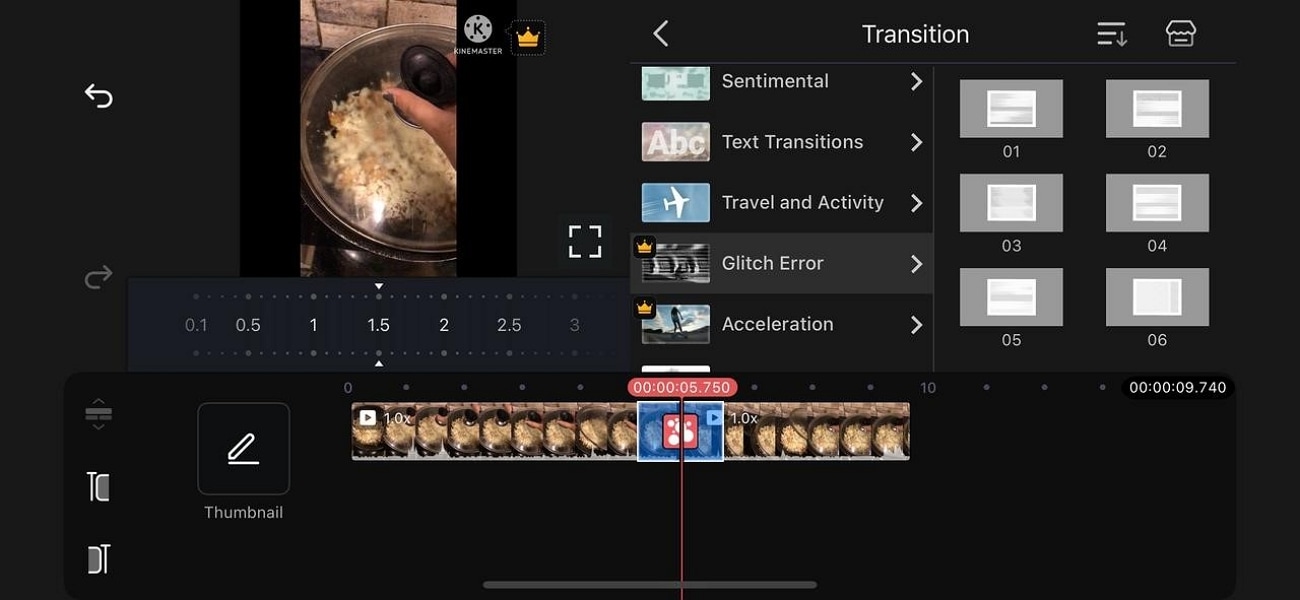
3. Glitch Error
When your video needs an artistic touch to switch from one clip to the next, the Glitch Error transitions pack is the first choice. With 6 presets in this pack, Kinemaster ensures that you have an adequate selection of assets to choose from. In addition to giving your video an artistic look, it also gives a vintage vibe with a distorted TV effect.
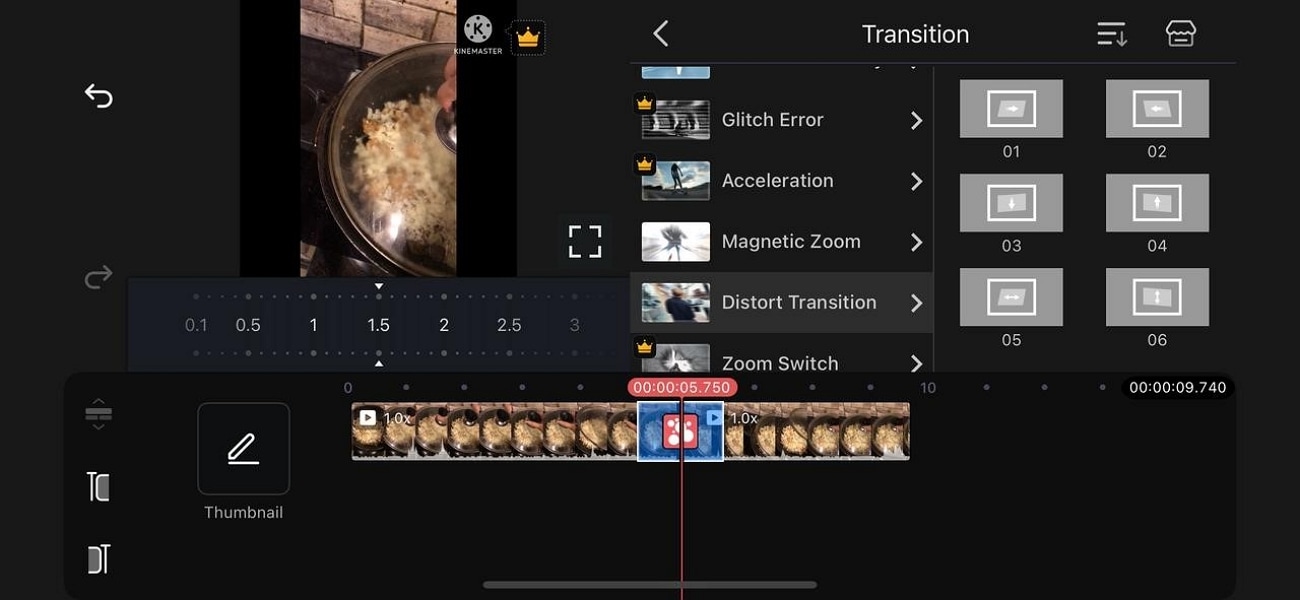
4. Distort Transition
This Kinemaster effect gives an ideal transition to your clips while keeping the impact classy. When the distortion appears on the screen, it enables the audience to smoothly transition. Besides, they can have an aesthetic view of the distorted glitch as the two scenes blend.
Tip: Additional Transition Effects with Filmora on PC and Mobile
After learning how to add transitions in Kinemaster, we explored that this app has a confusing interface. As an alternative, you need a platform that offers extensive transitions and a user-friendly interface. When trying to create a story through videos, it is important to rely on tools like Wondershare Filmora. The following section dives into the desktop and mobile versions of Filmora for adding transitions:
Exploring the Desktop Version
The desktop version of Filmora is a comprehensive destination for users looking to add video transitions. It has transitions carefully categorized to help you land the intended assets when needed. This tool allows you to set the duration of the transition to create a dramatic effect. The following steps are a detailed guide on using this Kinemaster effect alternative for impactful looks:
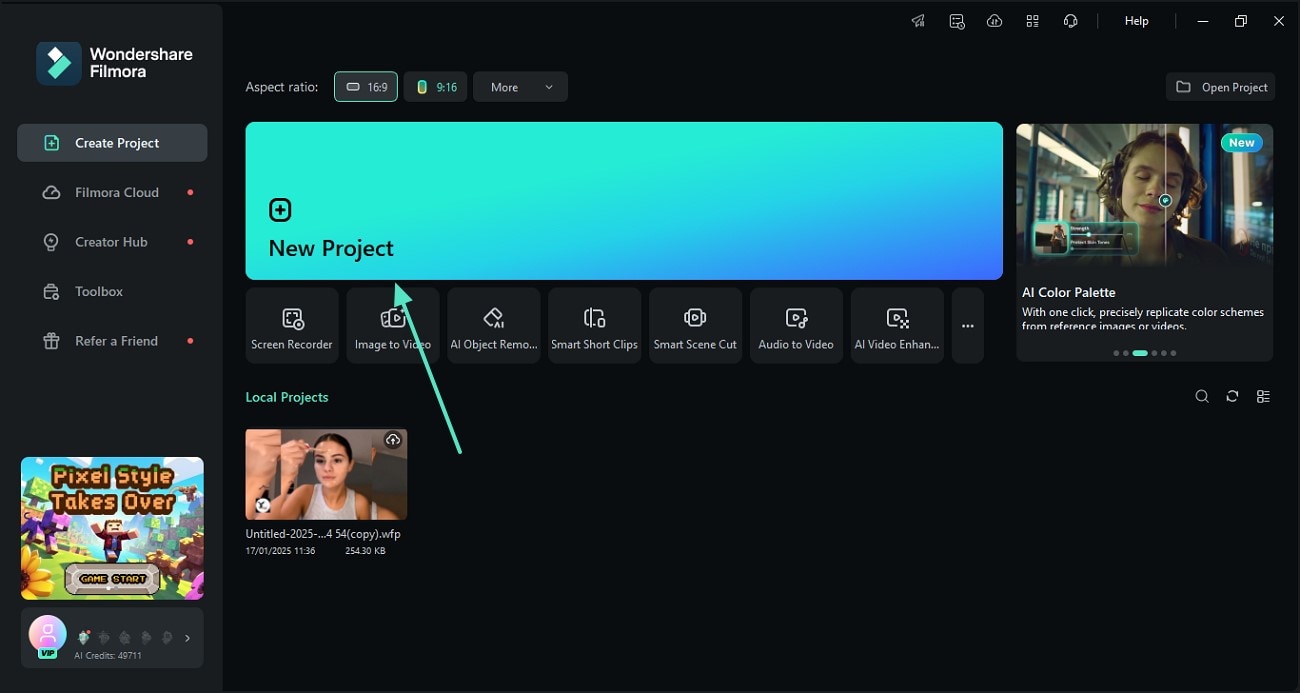
- Step 1. Import a Video into the New Video Project. Start by opening the main interface of Filmora, then click "New Project" to import a video.
- Step 2. Divide the Video Track to Add a Transition. Now, drag the video to the timeline and right-click on the video track to "Split" the track.

- Step 3. Add a Transition Template and Preview the Results. Next, enter the "Transitions" tab from the top toolbar and apply the desired transition preset where needed.
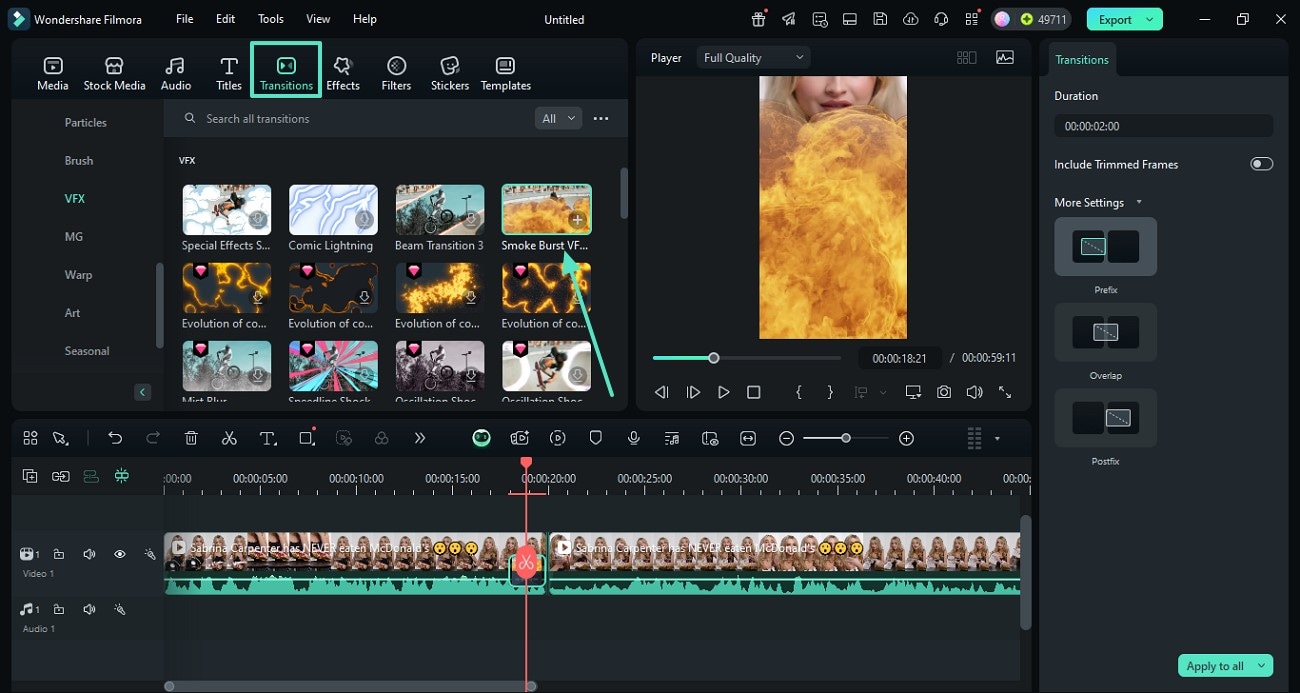
- Step 4. Set the Transition for a Professional Look. Using the right panel, set the "Duration" of the transition and pick the spot where you want to add the asset.

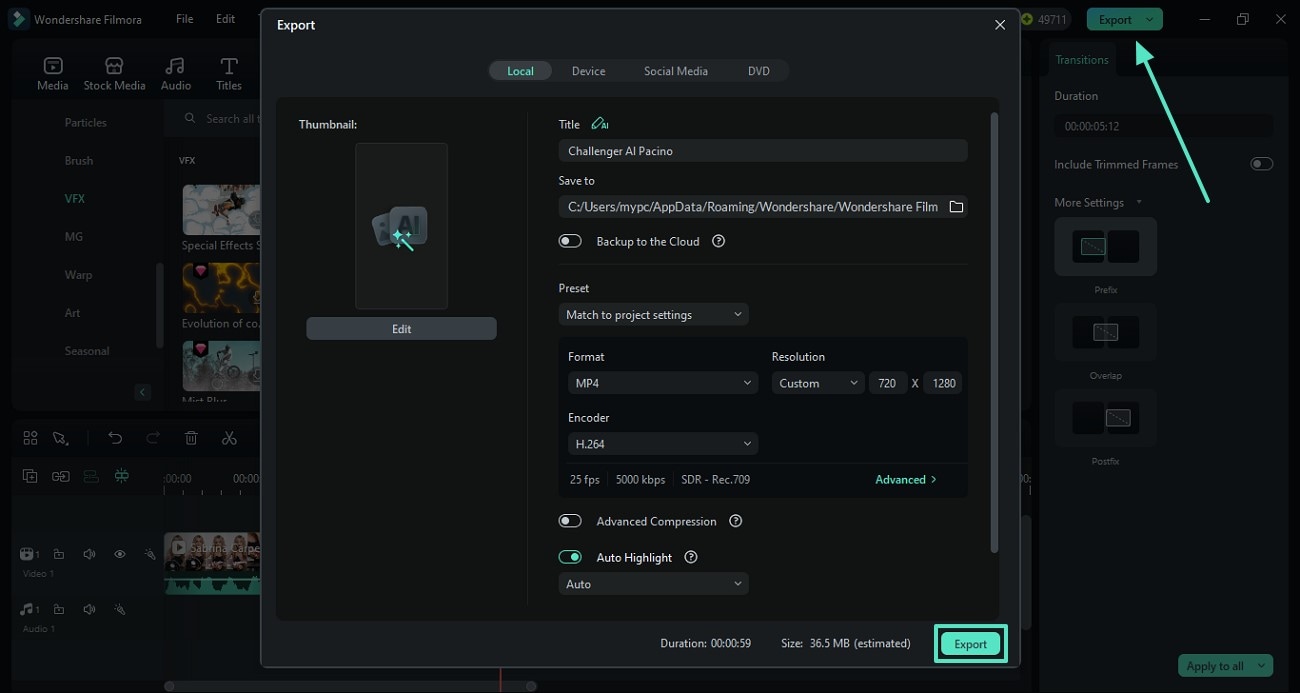
- Step 5. Export the Video When You Are Done Editing. Once you are done, navigate to the top-right and "Export" the video using the next window.
 secure download

Exploring the Filmora App
Users who need their video editing features on the go can use the Filmora App [iOS/Android] to add transitions. This Kinemaster transitions alternative offers an array of transition templates that can be customized to user preferences. You can adjust the duration of the templates to add a professional polish to the effect. The following section is about using this app to add video transitions:
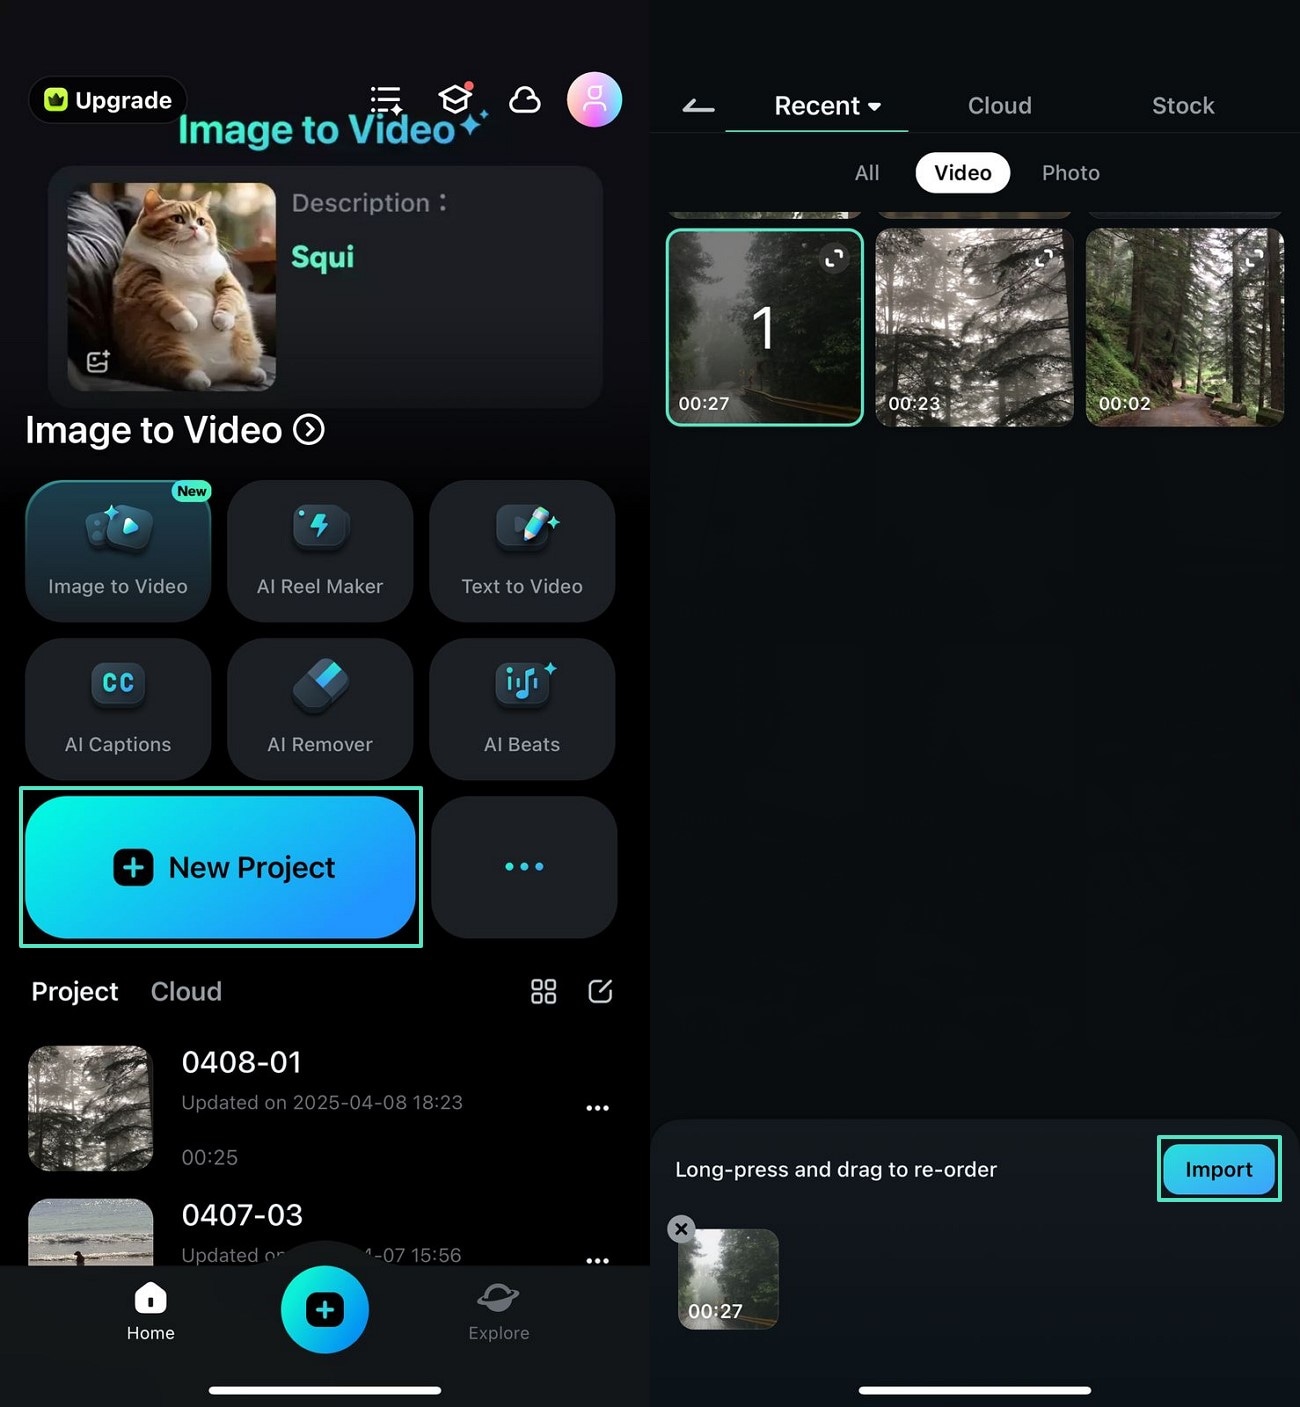
- Step 1. Import a Video to Start the Process. First, open the Filmora App on your phone and start a "New Project" to import the desired video.
- Step 2. Add a Video Transition and Customize it. Tap the video track and press the "Split" icon to cut the track into two. Using the "Transition" icon between the two clips, access the templates and apply the desired asset. To customize the transition, drag the designated slider.
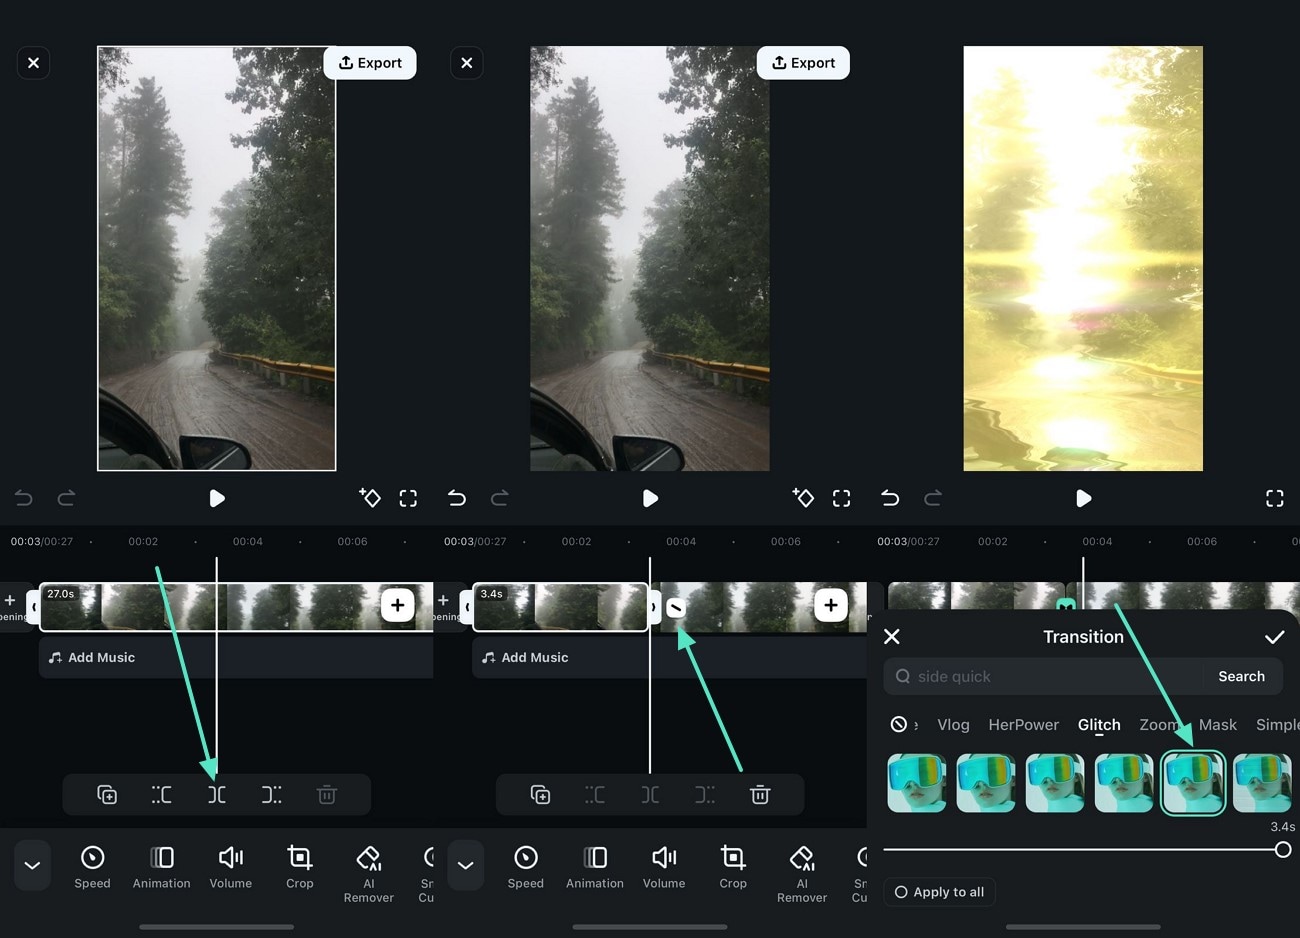
- Step 3. Save the Video to Your Phone After Editing it. When you are done editing the video, access the "Export" button on the top right to save the video in your desired settings.

secure download
Conclusion
Wrapping up, this article discussed the Kinemaster transitions and how you can use them to create a smooth series of events in your videos. After exploring that this app has a complex interface for editing, we concluded that Wondershare Filmora is a better alternative. Besides offering an intuitive interface, it offers extensive transition presets on the desktop and mobile versions.
