

 TL;DR:
Changing a video's resolution to meet platform upload limits or specific device requirements can be done through video editors or converters, but upscaling a lower-resolution video typically only increases its file size without actually improving the visual quality.
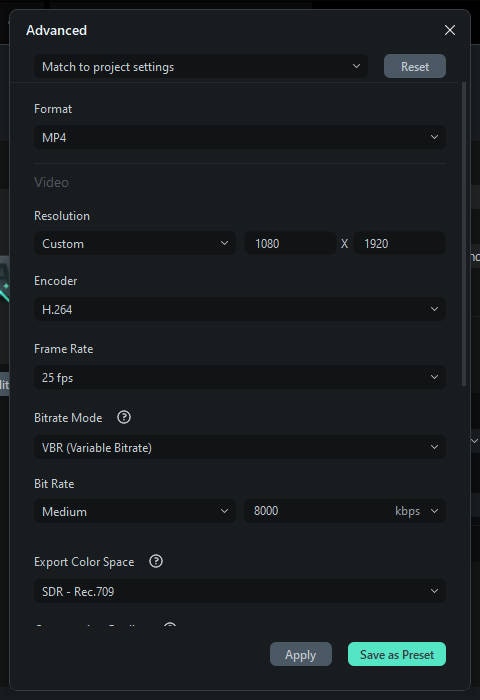
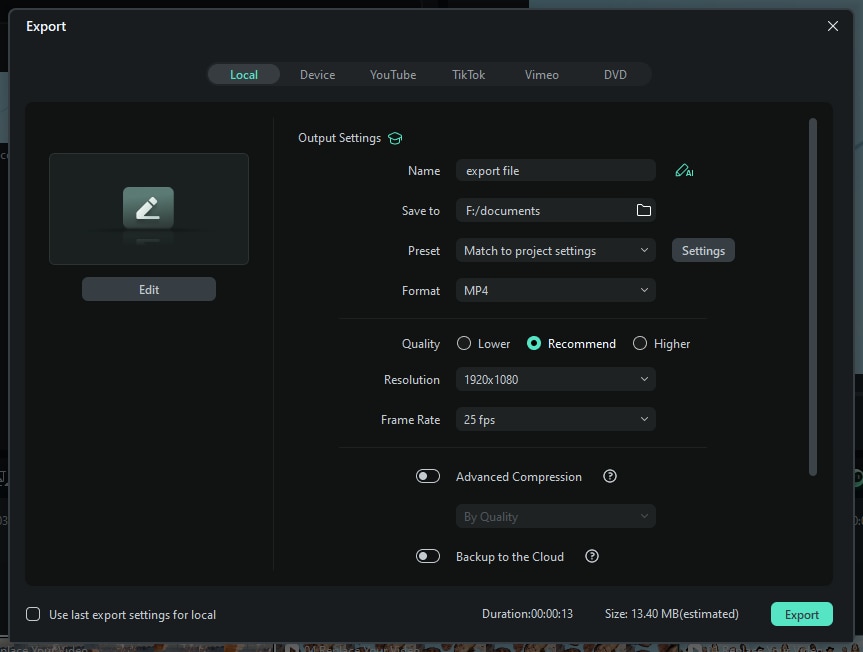
● In Wondershare Filmora for Windows and Mac, adjust resolution by clicking Export, selecting a format like MP4 or MOV with predefined settings, choosing "Custom" to manually set width and height, or using the "Device" tab to automatically optimize playback for Apple devices.
● For dedicated conversion, HandBrake provides free, open-source batch processing and bitrate customization but lacks editing tools and has a steeper learning curve, whereas VLC Media Player handles lightweight, single-file conversions, and web tools like Online Converter or Online Video Cutter offer immediate browser access but rely on stable internet and may restrict upload file sizes.
● Choose 1080p (1920 x 1080) or 4K (3840 x 2160) for optimal YouTube and social media quality, scale down to 720p for faster uploads, or use 853 x 480 (480p) specifically when preparing video files for standard DVD burning.
Ask AI for a summary
 ChatGPT
 Perplexity
 Gemini
 Claude
 Grok
Grok
There are circumstances in which you need to change the video resolutions. For example, when you upload videos from computer to your smartphone or mobile devices, the video resolution needs to decrease to reduce because these devices may support specific resolutions only.
Besides, when uploading videos to online websites, you may encounter the video size and video resolution limitation, for example, you can't upload 4K video footage to some free online video editors.
While in some cases, you may need to increase the video resolution, for an example, consider the case in which you are trying to burn a video having resolution 320 × 240 to DVD. As the DVD standard needs a high resolution (which should be at least 720 × 480) for every video, you will need to raise the video's resolution (quality) as per needs.
Note: Increasing the video resolution will not improve the video quality accordingly, in most cases, only the size will be increased.
In this article, we are going to show you how to change video resolution with a step-by-step tutorial.
Part 1: How to Change Video Resolution? 2 Ways!
There are several ways you can use to change the video resolution:
You can choose any of the methods above to increase or decrease the video resolution based on what you have. In the following part, I'll show you how to use the user-friendly and intuitive Filmora to change video resolution and create your own videos first.
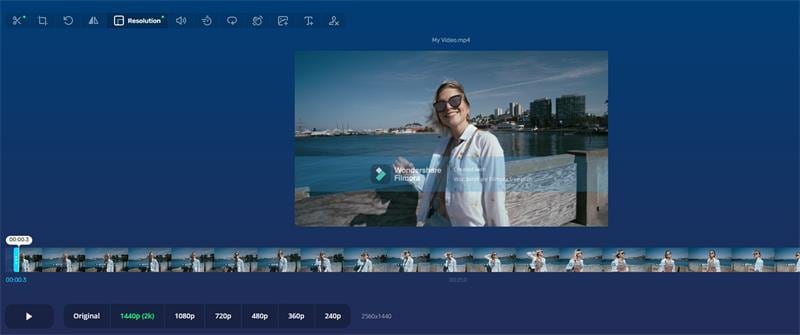
1.1 Change Video Resolution Easily on Windows & Mac Using Filmora
Wondershare Filmora is a very easy-to-use video editor that can also change and convert video resolutions. Just click on Export and choose the video resolution from the Export window. Then, your video will be exported with the resolution you want.
Below are the detailed steps for changing video resolution in Filmora:


1.2 Change Video Resolution Online Using Video Converters
If you prefer not to download software or need a quick solution, online video converters are a great alternative. The online tool allows you to change video resolution directly through your web browser.
There are a number of online tools. Choose one trusted site. There are some points that you should keep in mind while using any video resolution-changing online tool:
- The first point is security: Make sure to read reviews and check the security of the site to ensure your files are safe.
- Secondly, some converters offer additional features like cropping into circles, which supports cropping videos into a circular shape and adjusting the size and background color.
- Lastly check if the converter can support the latest technologies of video processing. If it does, then the video conversion will not only be efficient but will also be quick.
Based on the 3 points above, we recommend Online Converter. Here's a detailed guide on how to change video resolution using the Online Converter:
- Upload Your Video
- Choose Video Resolution
- Start to convert

Part 2: Other Recommended Tools to Adjust Video Resolution
Before, you knew how to use Filmora and Online Converter to change the video resolution. If you're looking for more tools to change video resolution or increase video quality, here are some other recommendations. These tools cater to different needs, whether you're a beginner or a professional, and include both free and paid options.
1. HandBrake
HandBrake is a free, open-source video resolution converter that is widely praised for its versatility and ease of use. It supports a wide range of video formats and resolutions, making it a go-to tool for many users.
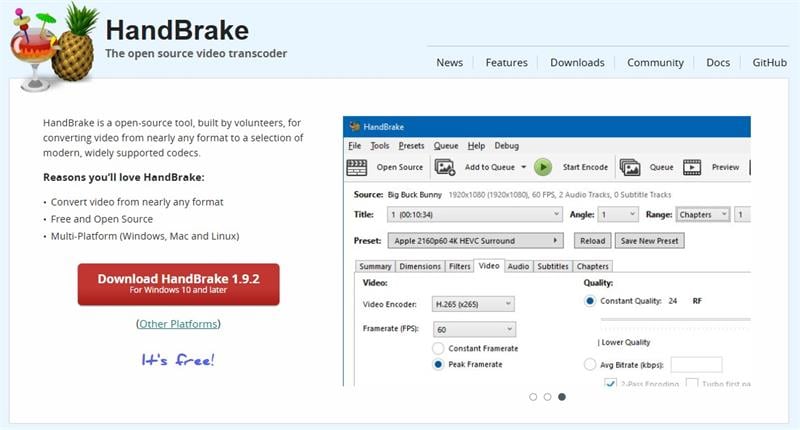
- Free and Open-Source: No cost involved, and it's regularly updated by a community of developers.
- Wide Format Support: Works with almost all video formats, including MP4, MKV, and AVI.
- Customizable Settings: Allows you to fine-tune resolution, bitrate, and other parameters to increase video quality.
- Batch Processing: Convert multiple videos at once, saving time.
- Steeper Learning Curve: Beginners might find the advanced settings overwhelming.
- No Built-in Video Editing: Primarily a converter, so it lacks editing features like trimming or adding effects.
2. VLC Media Player
VLC is more than just a media player—it's also a powerful tool to change video resolution and convert files. Its simplicity and wide compatibility make it a favorite among users.
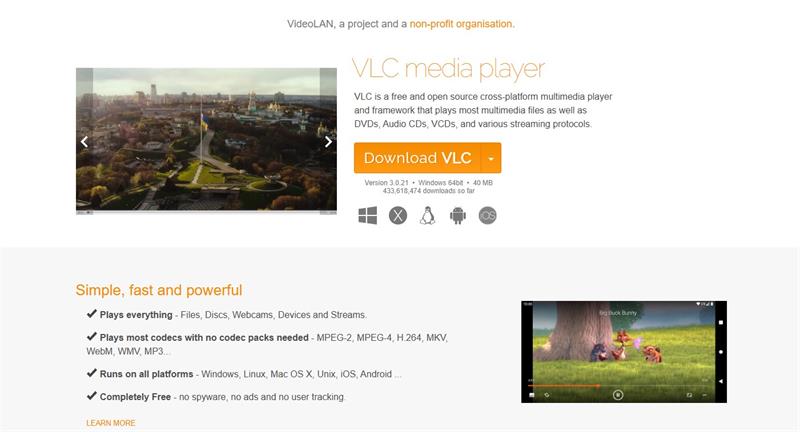
- Free and Lightweight: No installation of additional codecs required.
- Multi-Platform Support: Available for Windows, macOS, Linux, and mobile devices.
- Basic Conversion Features: Easily adjust resolution and convert videos without needing extra software.
- Playback Testing: Preview changes in real-time before saving.
- Limited Advanced Features: Not as robust as dedicated video converters.
- No Batch Processing: You can only convert one video at a time.
3. Online Video Cutter
This user-friendly online tool allows you to change video resolution and trim videos in just a few clicks, all without compromising quality. Whether you're a beginner or a seasoned editor, the intuitive interface makes it easy to adjust video size, cut unnecessary parts, and save your files in the desired format. Plus, there's no need to download any software—it can run directly in your web browser, making it accessible from any device.
- Convenience: Accessible from any device with an internet connection.
- Ease of Use: Perfect for beginners with no editing experience.
- Time-Saving: Quickly edit and resize videos in just a few clicks.
- Free to Use: No cost involved for basic editing features.
- File Size Limits: May restrict the size of videos you can upload.
- Internet Dependency: Requires a stable connection for uploading and downloading.
- Limited Advanced Features: Lacks professional editing tools like color correction or effects.
4. Wondershare UniConverter
Wondershare UniConverter is a user-friendly tool designed to change video resolution and enhance video quality. It's a great middle-ground between basic and professional software.
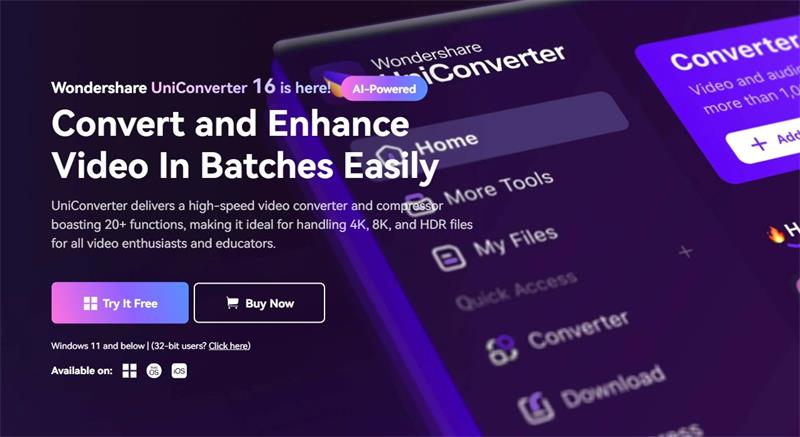
- Intuitive Interface: Easy to use, even for beginners.
- Wide Format Support: Converts videos to over 1,000 formats.
- Additional Features: Includes video editing, compression, and DVD burning tools.
- Fast Conversion Speed: Optimized for quick processing.
- Paid Software: Free version has limited features.
- Watermarks: Free trials often add watermarks to exported videos.
Part 3: What is Video Resolution?
Video resolution can be described as the number of pixels that displays on the screen of any device in both the dimensions. The usual format to quote the video resolution is width × height. For instance, "720 × 480" means 720 pixels is displayed horizontally and 480 vertically. The resolution on the display is affected by factors like flat panel display and cathode ray tube which are incorporated in the computer monitors and televisions.
7 Common types of video resolution
When watching videos on YouTube, you may find 144P, 240P, 360P, 480P, 720P, 1080P, or 4K options at the Quality menu. Here, we summarized some of the most popular video resolution types for your reference.
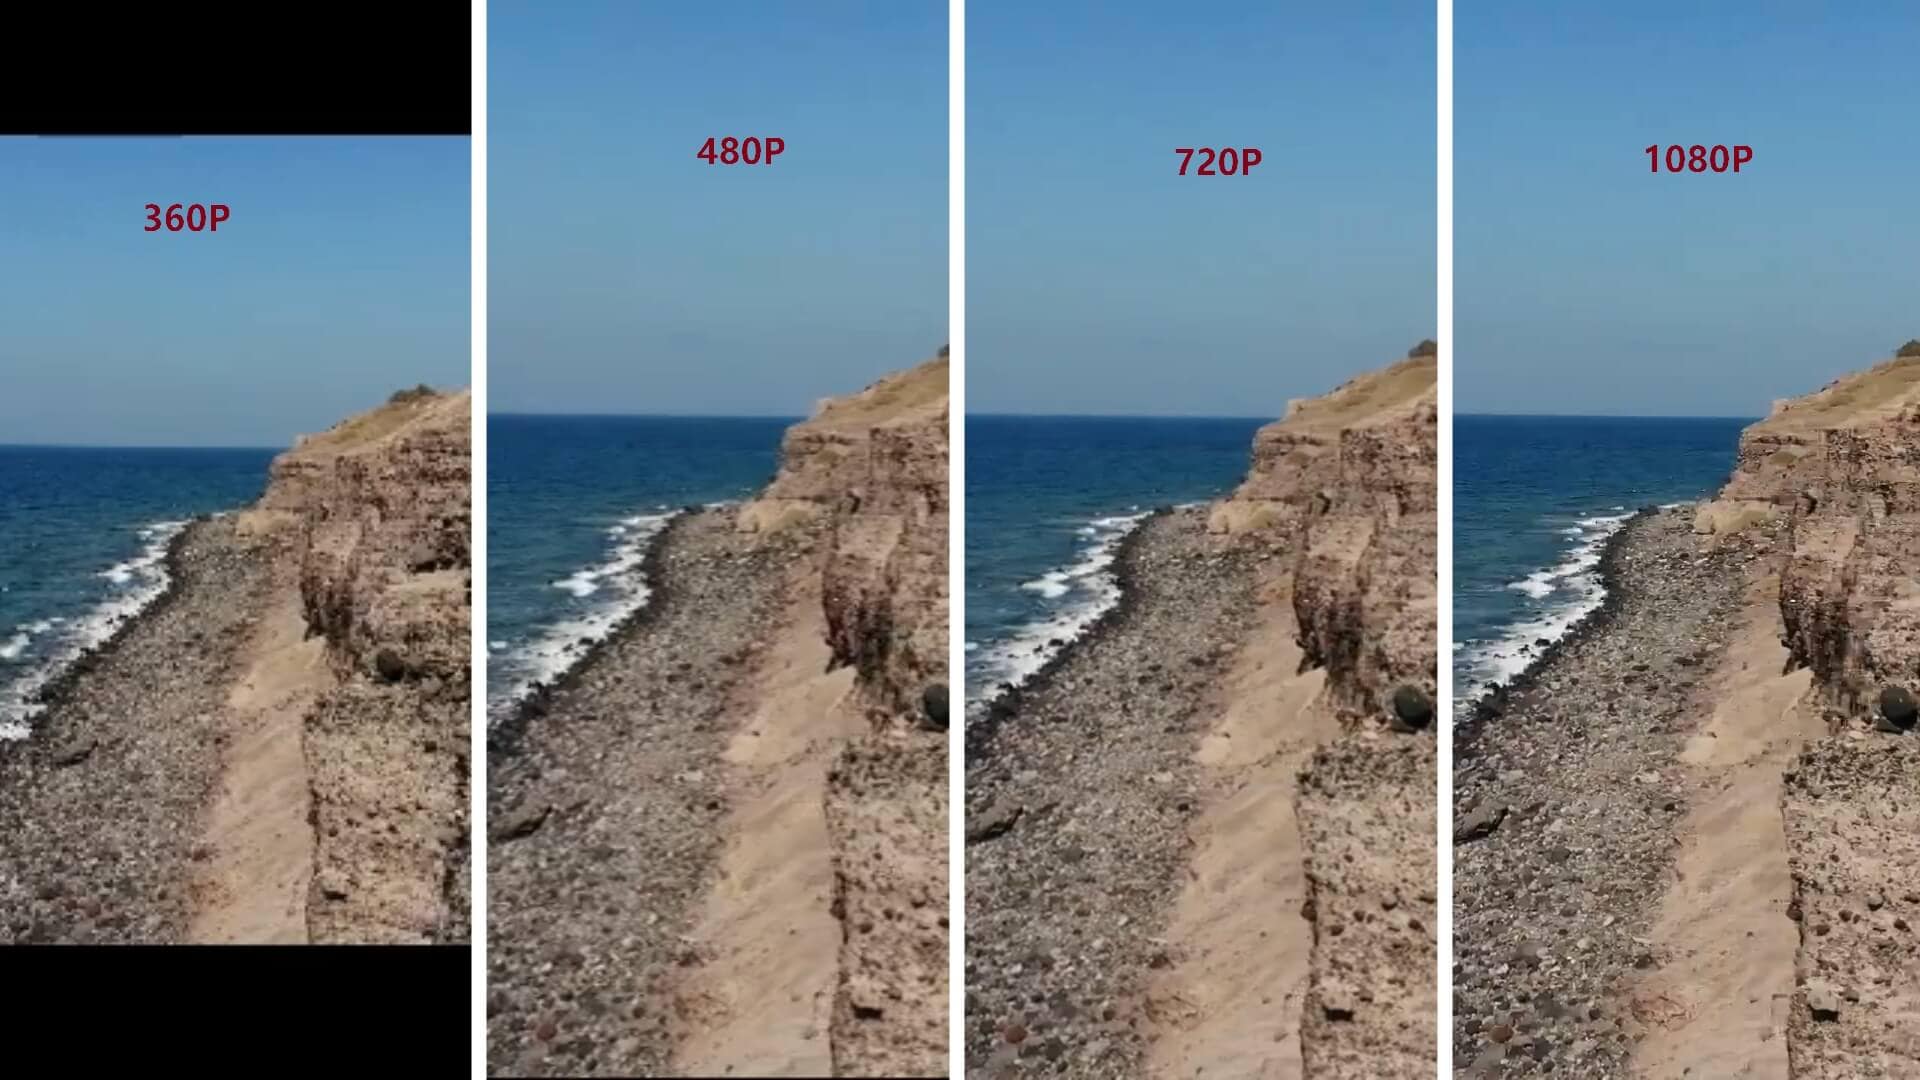
- 360p= 480 x 360 - has a total of 480 pixels horizontally and 360 pixels vertically, is well-suited on small screen smartphone devices.
- 480p= 853 x 480 - has a total of 853 pixels horizontally and 480 pixels vertically , is suitable for burning DVD. It will display well on small TVs, laptops and desktop comptuers.
- 720p = 1280 x 720 - is usually known as HD or 'HD Ready' resolution, looks great on most screens.
- 1080p = 1920 x 1080 - is usually known as FHD or 'Full HD' resolution. It's recommended to sharing videos in this resolution on social media.
- 1440p = 2560 x 1440 - commonly known as QHD or Quad HD resolution, and typically seen on gaming monitors and on high-end smartphones. 1440p is four times the resolution of 720p HD or 'HD ready'.
- 2160p = 3840 x 2160 - commonly known as 4K , UHD or Ultra HD resolution. It's a very large display resolution and it's found on high-end TVs and monitors. 2160p is called 4K because it offers four times the resolution of 1080p FHD or 'Full HD'.
- 4320p = 7680 x 4320 - is known as 8K and it offers 16 times more pixels than the regular 1080p FHD or 'Full HD' resolution. Although you're not going to see TVs or computer monitors with this resolution too soon, you can test whether your computer can render such a large amount of data.
Conclusion
Whether you're using Windows, Mac, or online tools, changing video resolution is a straightforward process that can significantly increase video quality. With tools like Wondershare Filmora, HandBrake, VLC, and online video resolution converters, you can easily adjust your videos to meet your needs. Start experimenting with these tools today and take your video content to the next level!
FAQ
-
How do I change video resolution on an iPhone?
To change the video resolution on an iPhone:- Open the Settings app.
- Scroll down and tap Camera.
- Select Record Video.
- Choose your preferred resolution (e.g., 720p, 1080p, or 4K).
-
What is the best resolution for YouTube videos?
YouTube recommends uploading videos in 1080p (Full HD) or 4K (Ultra HD) for optimal quality. However, 720p is also acceptable if you prefer smaller file sizes. -
How do I change video resolution for social media?
For social media:- Use 1080p for platforms like Instagram and Facebook.
- Use 720p for faster uploads and smaller files.
-
Is it possible to change the quality of a video?
Yes, you can change video quality by adjusting its resolution, bitrate, and format. Tools like Wondershare Filmora and online editors make it easy to improve video quality or reduce file size.
