Transcript
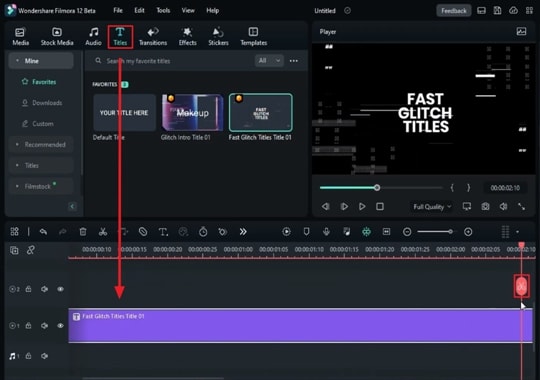
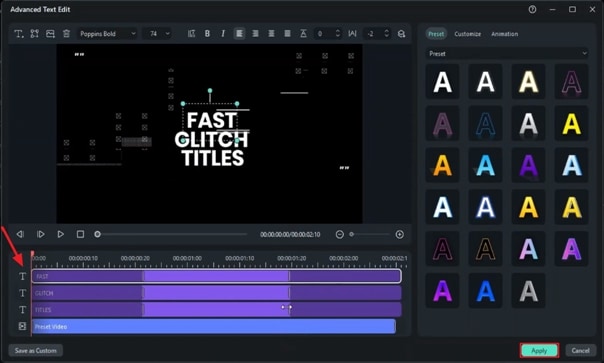
In this video, we will show you how to create this epic glitch intro in Wondershare Filmora. First, go to the "Titles," drop "Fast Glitch Title 1" on track 1, and split it at 2 seconds. Double-click to access the "Advanced" panel, delete all the text from the title, and click on "Apply."
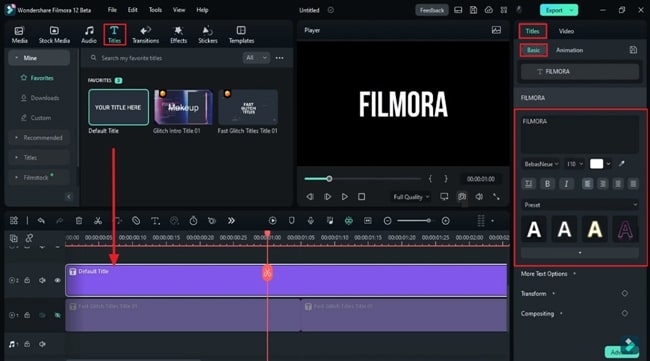
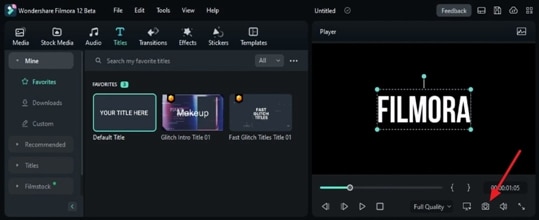
Then, split it at 1 second and 5th frame. Hide this track, and drop the default title on track 2. Change font to any bold font, enter your word, increase the font size to 110, and take a snapshot. Then, enter another word and take a snapshot.
Delete the default title from track 2, drop the first snapshot on track 3, and split it at 1 second and 5th frame. Unhide track 1, duplicate it on track 1, and make it 15 frames long.
Select track 3 snapshot on the "Position" keyframe and set the Y value to 60. Go about 7 frames further and set the Y value to 0. Select track 2 snapshot, change the Y value to -60 at the start, and set it at 0 at the 7th frame.
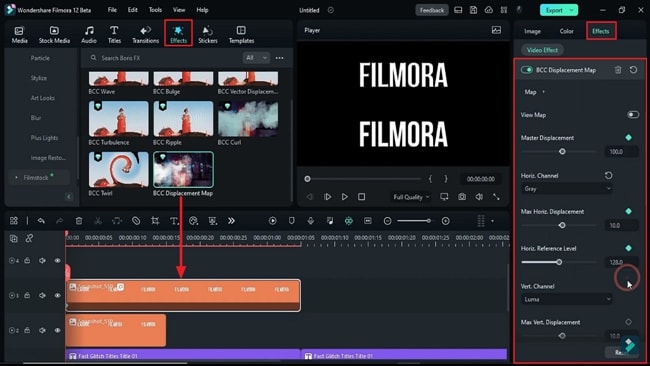
Go to "Effects" and apply the “BCC Displacement Map” on the track 3 snapshot. Go to the “Effect” settings and change the “Horizontal Channel” to gray. Turn on the “Process Alpha” option and keyframe for all the levels. Change “Master Displacement” to -1000, “Max Horizontal” to 100, “Horizontal Reference” to around 200, and “Vertical Channel” to Luma, “Max Vertical” to 12.
Let's change the “Horizontal Reference” to 146 and the “Vertical Reference” to 1.7. Go 1 frame forward, change the “Vertical Reference” to 75, “Max Vertical” to -20.5, “Master Displacement” to -630, and keep Max Horizontal between -54 to 55.
Go 1 frame forward, change the “Horizontal Reference” to 239, “Max Horizontal” to 11, and “Master Displacement” to 685. Then again, go 1 frame forward, and change the “Max Vertical” value to around 26, “Vertical Reference” to 147, “Max Horizontal” to -4, “Horizontal Reference” to 117, and “Master Displacement” to around 959. Repeat the same process for the leftover keyframe.
Just keep on changing the displacement position according to the kind of glitch you need. Next, change the "Master Displacement" to 0 at the 10th frame, then duplicate the effect on the track 2 snapshot. Now, you can see we got all the keyframes on this snapshot. Go to the "Basic" and define position keyframes again. Now, change the value of all the keyframes for the track 2 snapshot according to your need.
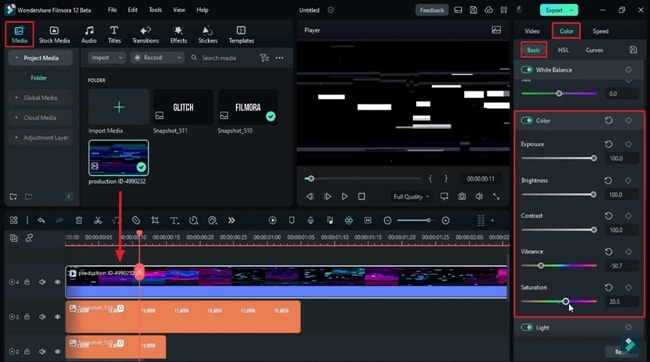
Then go to the “Media” and drop this glitch clip on track 4. You can download it for free from pexels.com. Change the “Color” to “B&W,” increase "Exposure," "Brightness," and "Contrast" to the maximum. Decrease "Vibrance" and "Saturation."
Then go to the "Curve," on "Curve," select the Alpha string at this point, and drag it upward. Select the string from this point and drag it down. Create a kind of S shape; split the clip at the 11th frame. Slide the footage to the 25th frame and split it again at 1 second.
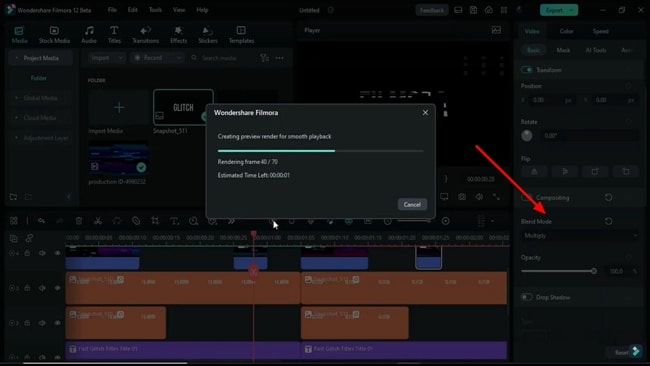
Now, drop the 2nd snapshot, split it at 2 seconds and 10th frame. Adjust the glitch clip position and split it at 1 second and 15th frame. Drag it forward and split it at 1 second and the 26th frame. Now, "Copy Effect," hide track 4 and paste it on the 2nd snapshot. Now, follow the same process as we did on 1st snapshot. Finally, change the "Blending Mode" of the glitch clip on track 4 to "Multiply."
Let's see the final preview. If you want more glitches, increase the number of keyframes duration on the snapshot clip from 7 frames to 15 frames.
Step-by-Step Guide to Creating a Cool Glitch Intro Title in Filmora
What you need to prepare:
- A computer (Windows or macOS)
- Your video materials.
- Filmora video editor
Add and Adjust Glitch Title
Start by clicking "New Project" on the main interface of Wondershare Filmora. From the top toolbar, access the "Titles" tab and drag any glitch title to the timeline. Adjust the duration of the title in the timeline track, split it accordingly, and double-click on it.
By double-clicking, you’ll reach the “Advanced Text Edit” window, where you should delete the default text. Then click on "Apply," split the glitch title at a suitable point, and hide this track by clicking the "Eye" icon at the left.
Edit the Default Title and Take Snapshots
Select the "Default" title and drop it into the second track, and select it to change the font. You can choose a font from the drop-down menu and adjust the font size using the "Scale" slider if needed. Enter the word you want to display in the textbox.
Press the "Snapshot" button on the Preview Screen. Type another word in the same textbox and take another snapshot; delete the default title layer from the timeline.
Modify the Snapshots
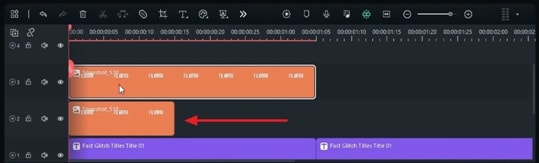
After taking snapshots of default titles with customized texts, delete the "Default Title" layer from the timeline track. Bring the first snapshot from Project Media to the timeline track and trim it to match the duration of the split glitch title.
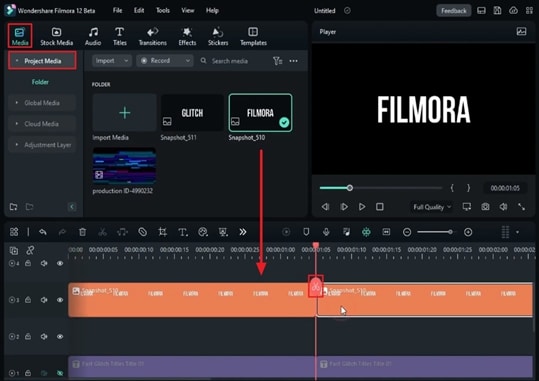
Afterward, unhide the glitch title track by clicking the "Eye" icon. Duplicate this snapshot layer on the timeline track and adjust its duration accordingly.
Add Keyframes to Snapshot
Place the playhead at the start and click the first snapshot you added in the timeline track. From the right-side panel, go to the "Image" tab, and under "Basic" settings, enable the "Position" keyframe and change its values. Keep changing the "Position" values until you get the desired results, and repeat the process for the other snapshot as well.

Add Displacement Effect
Access the "Effects" tab, choose a displacement map effect, and drop it onto the track where you added the first snapshot. Adjust the “Effects” settings from the right side panel and enable all the keyframes. Following that, experiment with the elements’ sliders as desired. Furthermore, add multiple keyframes throughout the duration of the snapshot layer by moving the playhead and making modifications.
Copy-Paste the Effect and Make Adjustments
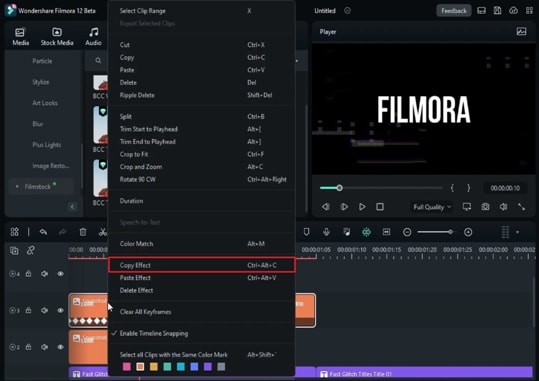
Now, after making all the required adjustments in the first snapshot, right-click on it, and from the drop-down menu, select "Copy Effect." Following that, paste the effect onto the second snapshot in the timeline track. This process copies all the keyframes and effects of the first snapshot to the second. You'll need to go to "Basic" settings to adjust the "Position" keyframes and values for the second snapshot.
Add a Glitch and Make Changes
In the end, add a glitch effect to another timeline track and make some adjustments. Then, split and place the effect at different frames for variation.
Add the second snapshot from the Project Media window next to the first snapshot layer in the timeline track. Then, copy the effect from the existing snapshot layer and paste it onto the new snapshot layer. Repeat the same process for the second snapshot layer in the timeline track. If needed, change the "Blending Mode" from the adjustment panel on the right corner of the screen.
To sum up everything, sometimes you don't need to use a simple pre-built intro title. A creative mind and some skills are all it takes to create a unique, cool title intro. This guide has enlightened you by teaching you to create a glitch title of your own with Wondershare Filmora.


