Transcript
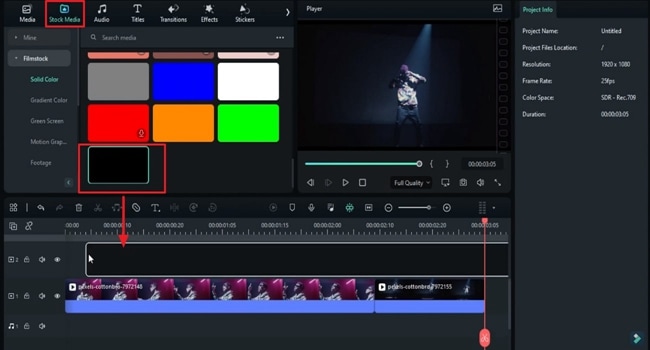
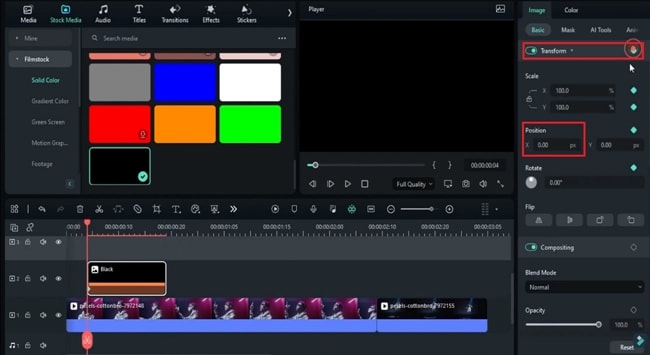
In this video, we will teach you how to create a luma lyric transition in Wondershare Filmora. First, drop your footage on the timeline, split them, and leave the parts as you like. Then go to the “Stock Media” and drop a black solid color on track 2 at the 4th frame. Split it at the 19th frame and delete the rest of the part. Turn on the "Transform' to add a keyframe and take the solid color out of the screen. Adjust the "Video" "Scale" if required.
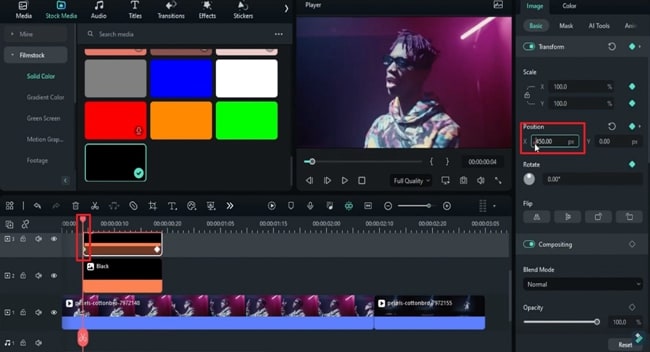
Then go to the 18th frame and bring the solid color back to the specific "Position." Then copy this solid color and paste it on track 3. Click on the start keyframe, add a negative sign on the "X" value, and add the negative sign on the "X" value for the second keyframe. Now you can see this is what we want at the start.
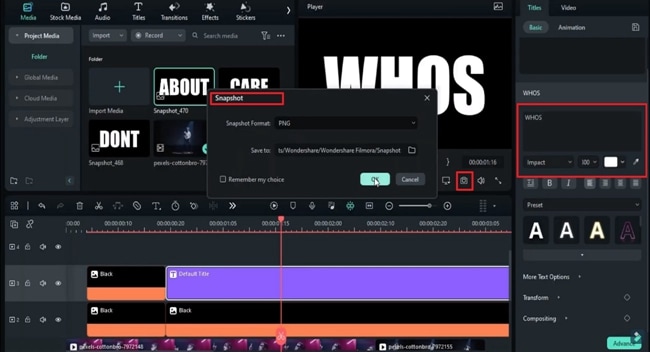
Next, we will create lyrics text. Drop the solid black color on track 2. Then, go to the "Titles" and drop "Default Title" on track 3. Change “Font” to “Impact” and change "Font Size" to 300. Enter the first word or lyrics and take a "Snapshot," then enter the second word and take a "Snapshot." Again, take three more snapshots of the lyric word. If the word is too long, you can edit it in the "Advanced" panel and then delete the default title and solid color from the timeline.
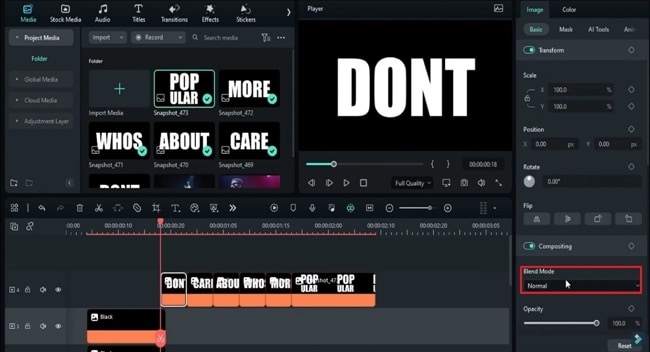
Drop the first word on track 4 at the 18th frame. Keep it for 5 frames. Drop the second word and keep it for 5 frames. Do the same for the remaining 4 words. Last, drop the “Popular” word on track and split it at 2 seconds and 9th frame. Select the first word and change “Blending Mode” to “Multiply”. Copy effects and paste them on all the words so all words in "Blending Mode" have changed to "Multiply."
Select the first word "Don't" on the keyframe for transforms. Lock the "Scale" ratio, increase the "Scale" and adjust its "Position" on the visible footage. Change "Scale" to 2100, then go two frames forward and change the "Scale" value to 100 and the "X" value to 100. Add a blank keyframe one frame forward. At the end, set "Scale" to 105.
Then select the second word on keyframes for transform and lock scale ratio. Set "Scale" to 105 in continuation form, and at the end, set "Scale" to 110. Select the third word on keyframes, set "Scale" to 110, and at the end, set "Scale" to 115. Select the fourth word on keyframes, set the Scale to 115, and at the end, set the Scale to 120. Do the same with more words.
Select the “Popular” word on the keyframes and lock the "Scale" ratio. Set "Scale" at 125. Go five frames further, set the scale to 100, then go three frames forward and set the "Scale" at 110. It will create a small pop-up effect. Go 5 frames forward, increase the "Scale" to 1300. Then, after two frames, set the "Scale" to 2200, and our word is gone.
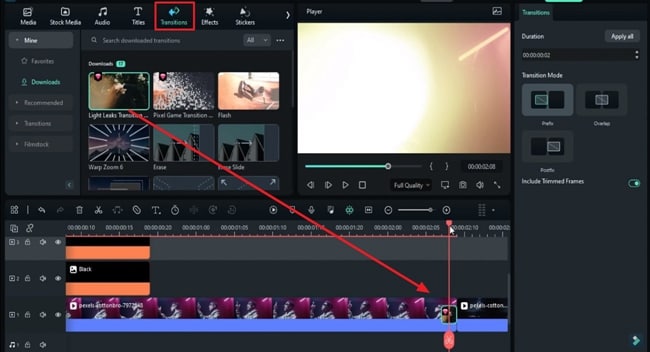
Then go two frames backward, go to the "Transition" and apply the "Leak Light" transition, and keep it two frames long. This will create a nice bright flash before jumping to the subsequent footage. Now, let's see the final preview.
How to Add Luma Lyric Transition in Videos by Using Filmora
What you need to prepare:
- A computer (Windows or macOS)
- Your video materials.
- Filmora video editor
Launch Filmora and Add Solid Color from Stock Media
To start editing videos in Filmora, you first need to import and add files to the main timeline. Following this, you can split them per your requirements and head towards the "Stock Media” to drop back solid color on the timeline.
Add Keyframes and Adjust Position
Split the color at the required frames and head to the right-side panel to enable the “Transform” to add keyframes. After this, if needed, adjust the video scale and take out the solid color from the screen. Once this is done, move a few frames ahead and bring back the solid color at a specific position.
Copy the color, paste it on another layer, and adjust "Position" on its different keyframes according to your requirements. This will give you the desired effect at the beginning of your video.
Add Default Title and Background of Text
Furthermore, to create the lyric effect , bring the solid color on the second video layer to keep it as the background of your text. Head towards the "Titles” tab, drop the "Default Title" on the track, and adjust its settings according to your requirements.

Enter the Lyric Text and Take Snapshot
Following this, take snapshots of your lyric’s words one by one. In case the words are too long, you can easily edit them with the help of the "Advance” panel by accessing it from the bottom right corner of the editing window. Moving forward, when all of this is done, simply delete the “Default Title” and the solid color from the timeline.
Change the Mode of Words and Copy Paste It
Add the snapshots on the desired track at the specific keyframes and ensure they all have the same length. After this, change the “Blending Mode” of all words that are part of the video. To do this, select the first word and head towards the "Blend Mode" below the "Basic" tab on the right-side panel. From the dropdown menu, choose the desired mode.
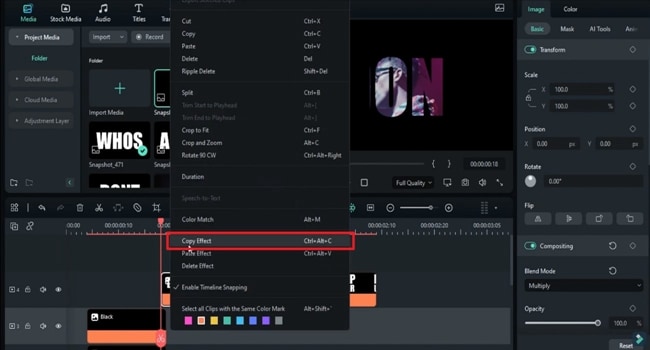
After this, right-click on the first word to access the settings menu. From this menu, select the "Copy Effect” option to paste the effects of this word on the other words.
Add Keyframes and Adjust the Settings
Go to the settings panel and click the “Video” tab. Choose "Basic" and adjust the playhead on snapshots in the timeline panel at multiple keyframes. After that, set the customized "Scale" values for "X" and "Y" and also adjust the "Position." Moreover, turn on keyframes for "Scale" and "Position" at various timeframes. Conclusively, you can also choose to lock the aspect ratio if needed for any snapshot.

Add Transition and Playback the Video
To add a smooth transition between the two videos, head toward the "Transition" tab and bring the transition of your choice to the timeline. Place it right before the starting point of the following video and playback to check the final results.
Are you getting bored of adding lyrics to your videos in an ordinary way and looking for the most fun and captivating method? Wondershare Filmora has provided you with the solution to this problem. This tool offers the best in-built video editing features to help you achieve milestones like creating luma lyric transition in Filmora.


